> ## Documentation Index
> Fetch the complete documentation index at: https://help.kajabi.com/llms.txt
> Use this file to discover all available pages before exploring further.
# Tags overview
> Add tags to contacts to efficiently manage and organize your contact list.
Add **Tags** to your contacts to efficiently manage the contacts in your Contacts tab. Utilize Tags to organize and categorize your list.
## What are tags?
Tags are tools to help you manage your contacts on Kajabi.
With Tags on Kajabi, you can create segments, filter your contacts, create email sequences specific to contacts with a Tag, and more.
Tags are built to help you organize, categorize, and manage your list more efficiently throughout your site on Kajabi.
### How many tags can I create?
You can create up to 100 total Tags in a site.
## Manually add tags to contacts
### Add tags to individual contacts
1. Open the **Contacts** tab from the Dashboard.
2. Select the name of the contact you wish to view.
3. Click **Add Tag**.
4. Open the dropdown menu to create a tag or choose an existing one.
5. Click **Save** to keep and apply your changes:
**Note:** This process is the same for [Customers and Contacts](../../contacts/manage-your-contacts/what-is-the-difference-between-a-customer-contact-and-a-subscriber). Keep in mind that each site has a total limit of 100 tags per site.
## Add a tag during import
### Tag contacts during import
1. Open the **Contacts** tab from the Dashboard.
2. Navigate to the top right corner of the page.
3. Click **+ Add Contacts**.
4. Follow the importing process.
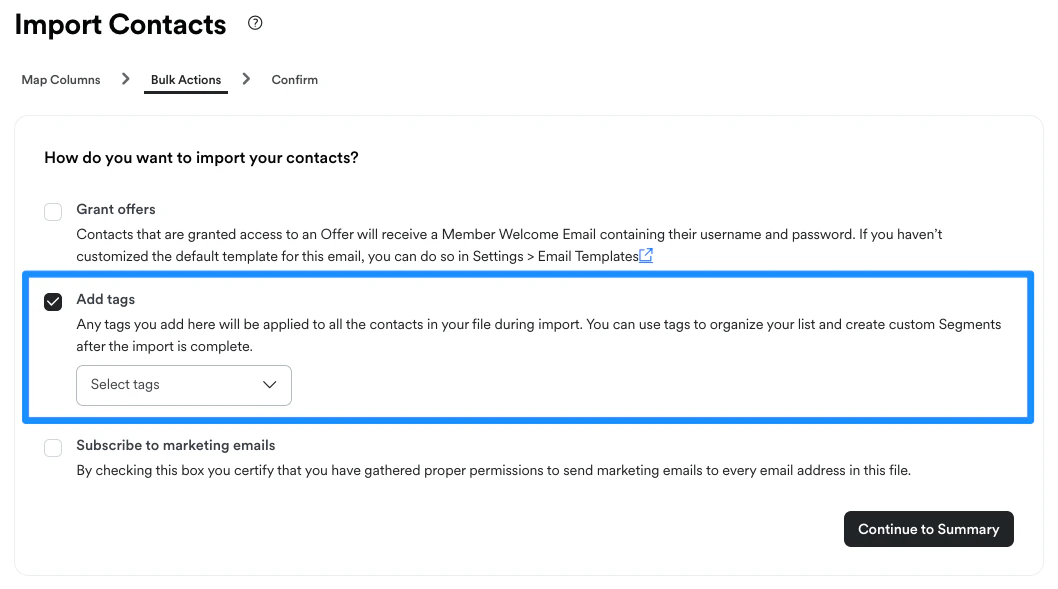
5. After mapping your columns, select **Add Tags** in the Bulk Actions step.
6. Select an existing tag or enter a tag:
 ## Add tags with automations
Automatically add tags after a set action occurs with Automations.
Follow the links below to learn more about adding tags with automations:
* [Add a tag after form submission](../../marketing/automations/add-tags-with-automations#h_1fb444d3-f13e-4479-b7a0-ae4a4d335d19)
* [Add a tag after an email sequence is completed](../../marketing/automations/add-tags-with-automations#adding-a-tag-after-an-email-sequence-is-completed)
* [Add a tag after an offer purchase](../../marketing/automations/add-tags-with-automations#adding-a-tag-after-an-offer-purchase)
## Bulk tag
### Add tags to a filtered selection of contacts in bulk
1. Open the **Contacts** tab from the Dashboard.
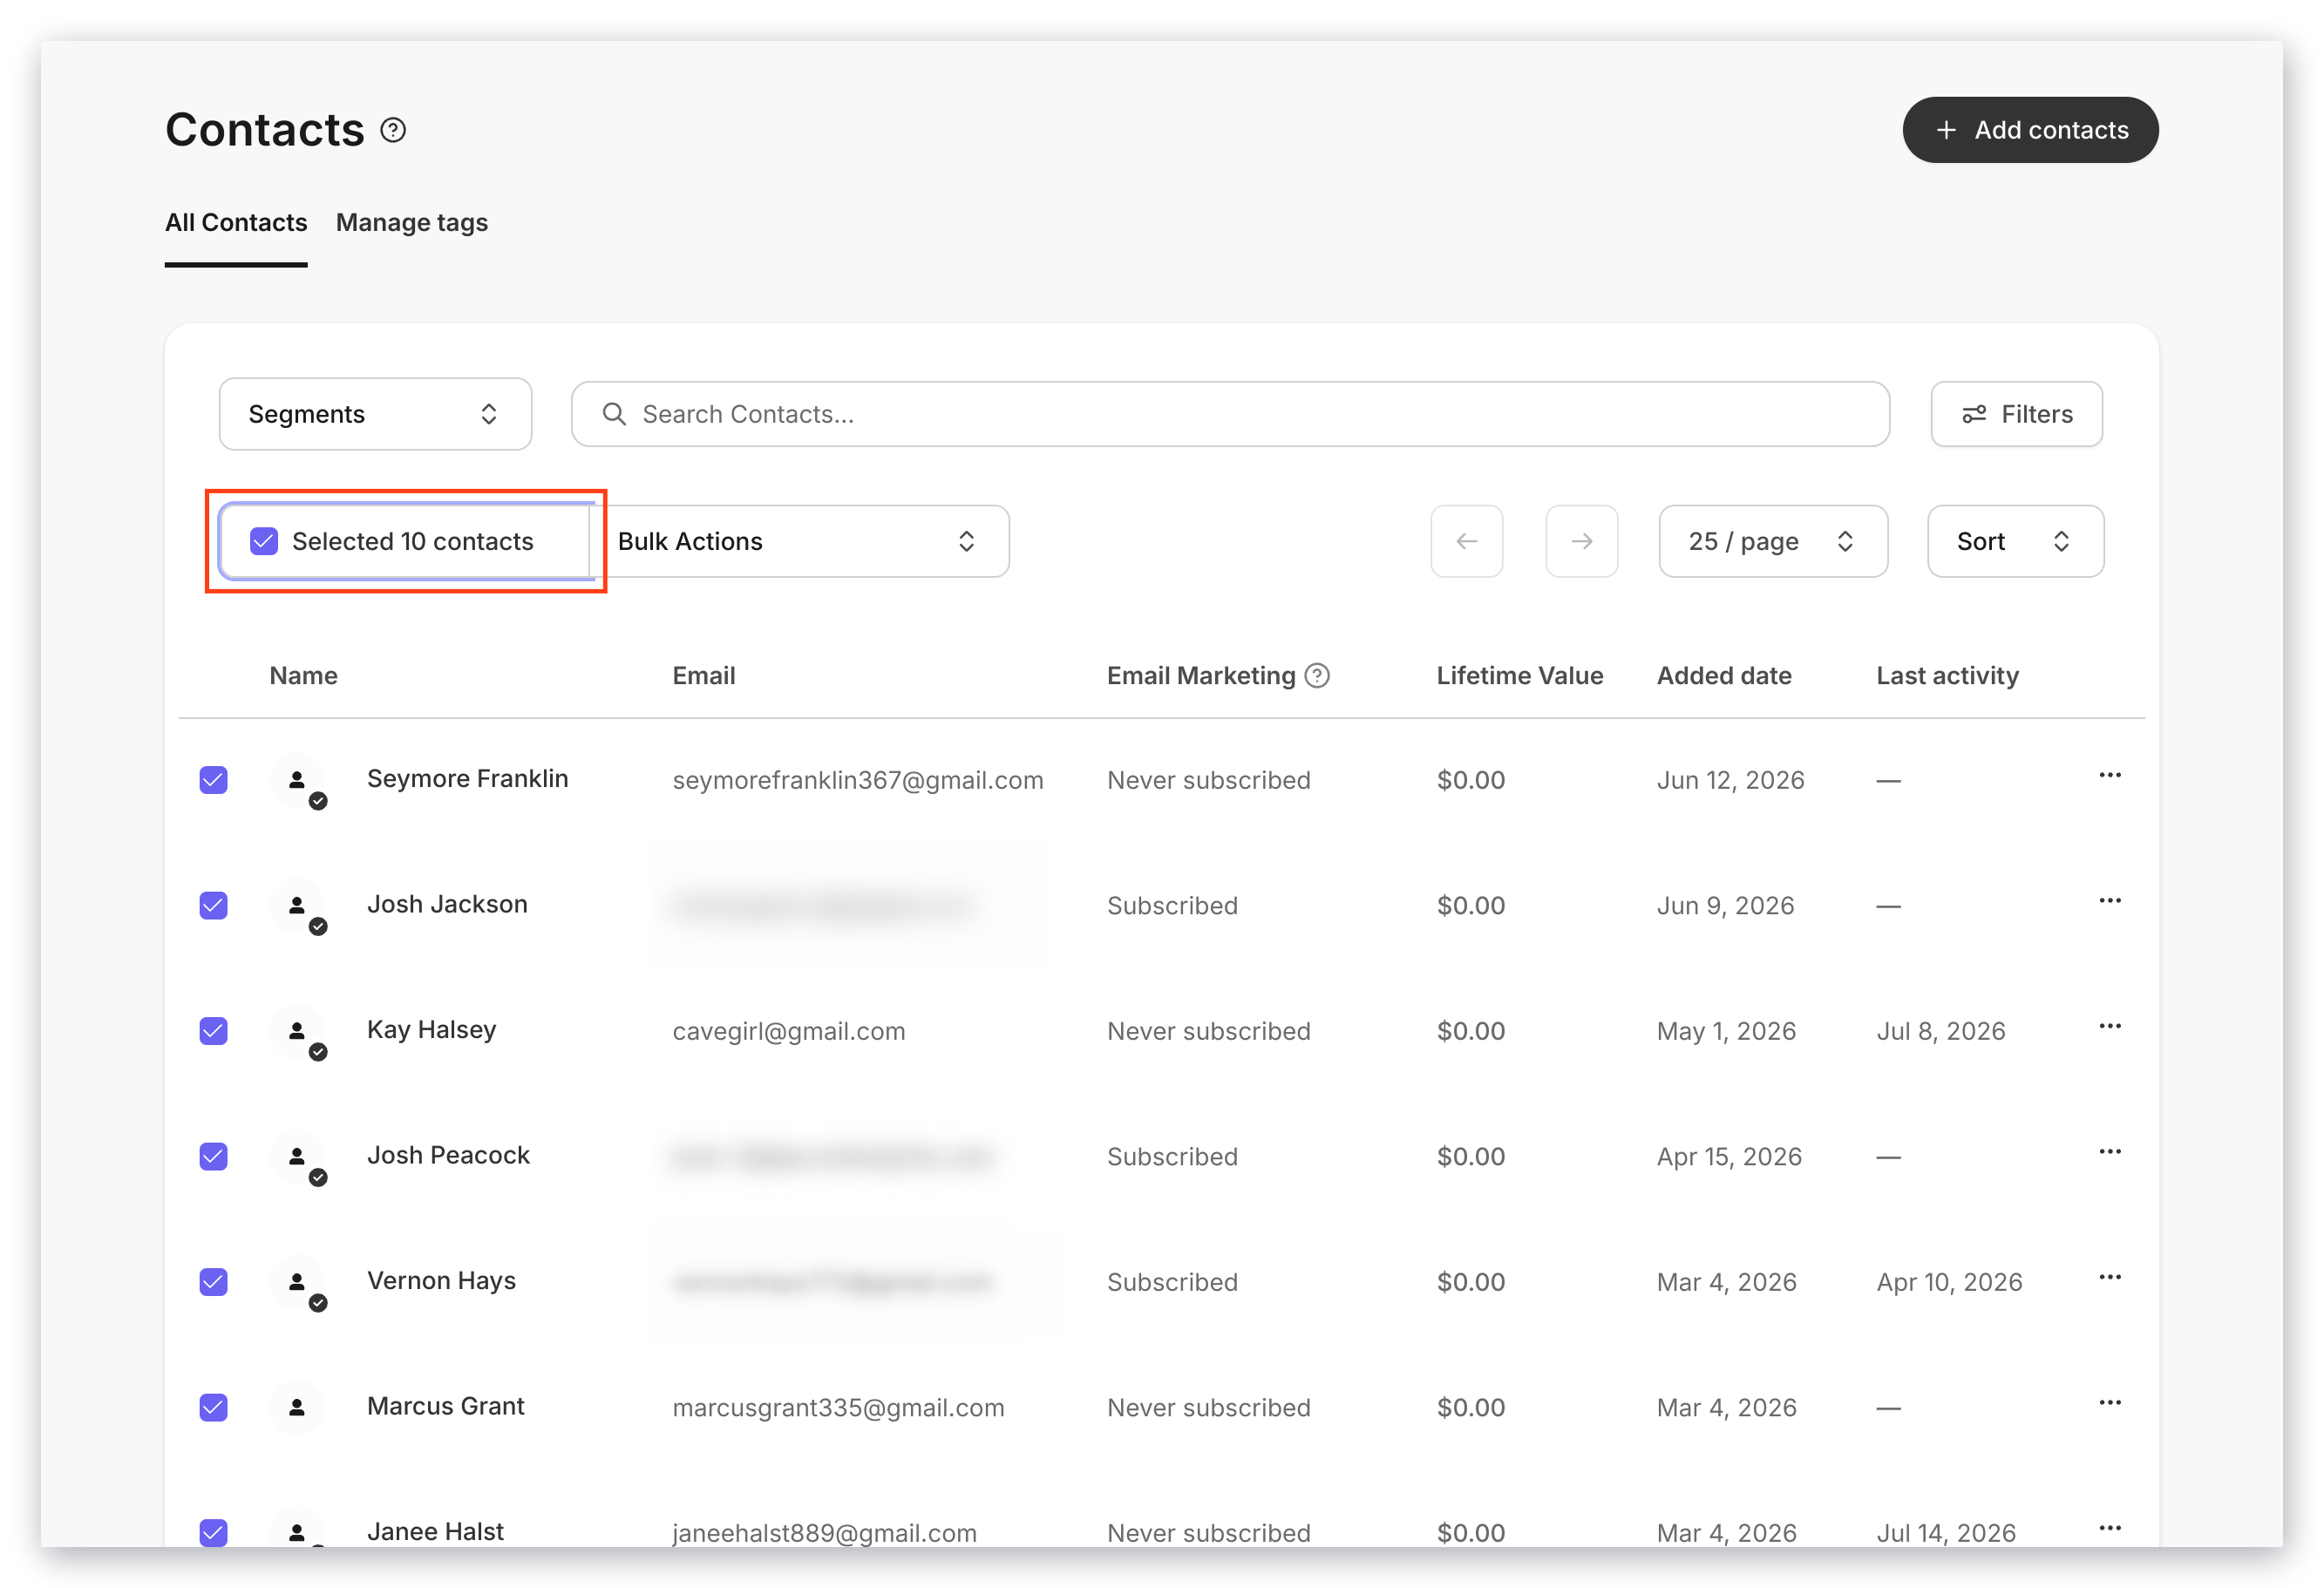
2. Click the checkbox to bulk select your contact list.
3. Use **Filters** to narrow your list.
4. After selecting all, click the **Bulk Actions** dropdown menu.
5. Navigate to **Tags** in the dropdown menu.
6. Click **Add Tag** to select an existing Tag or enter a Tag.
7. Click **Submit**. All the users in your filtered selection will be tagged:
## Add tags with automations
Automatically add tags after a set action occurs with Automations.
Follow the links below to learn more about adding tags with automations:
* [Add a tag after form submission](../../marketing/automations/add-tags-with-automations#h_1fb444d3-f13e-4479-b7a0-ae4a4d335d19)
* [Add a tag after an email sequence is completed](../../marketing/automations/add-tags-with-automations#adding-a-tag-after-an-email-sequence-is-completed)
* [Add a tag after an offer purchase](../../marketing/automations/add-tags-with-automations#adding-a-tag-after-an-offer-purchase)
## Bulk tag
### Add tags to a filtered selection of contacts in bulk
1. Open the **Contacts** tab from the Dashboard.
2. Click the checkbox to bulk select your contact list.
3. Use **Filters** to narrow your list.
4. After selecting all, click the **Bulk Actions** dropdown menu.
5. Navigate to **Tags** in the dropdown menu.
6. Click **Add Tag** to select an existing Tag or enter a Tag.
7. Click **Submit**. All the users in your filtered selection will be tagged:
 ## Remove a tag from a user
### Remove a tag from a contact
1. Open the **Contacts** tab from the Dashboard.
2. Select the name of the contact you wish to edit.
3. Click **Open full profile**.
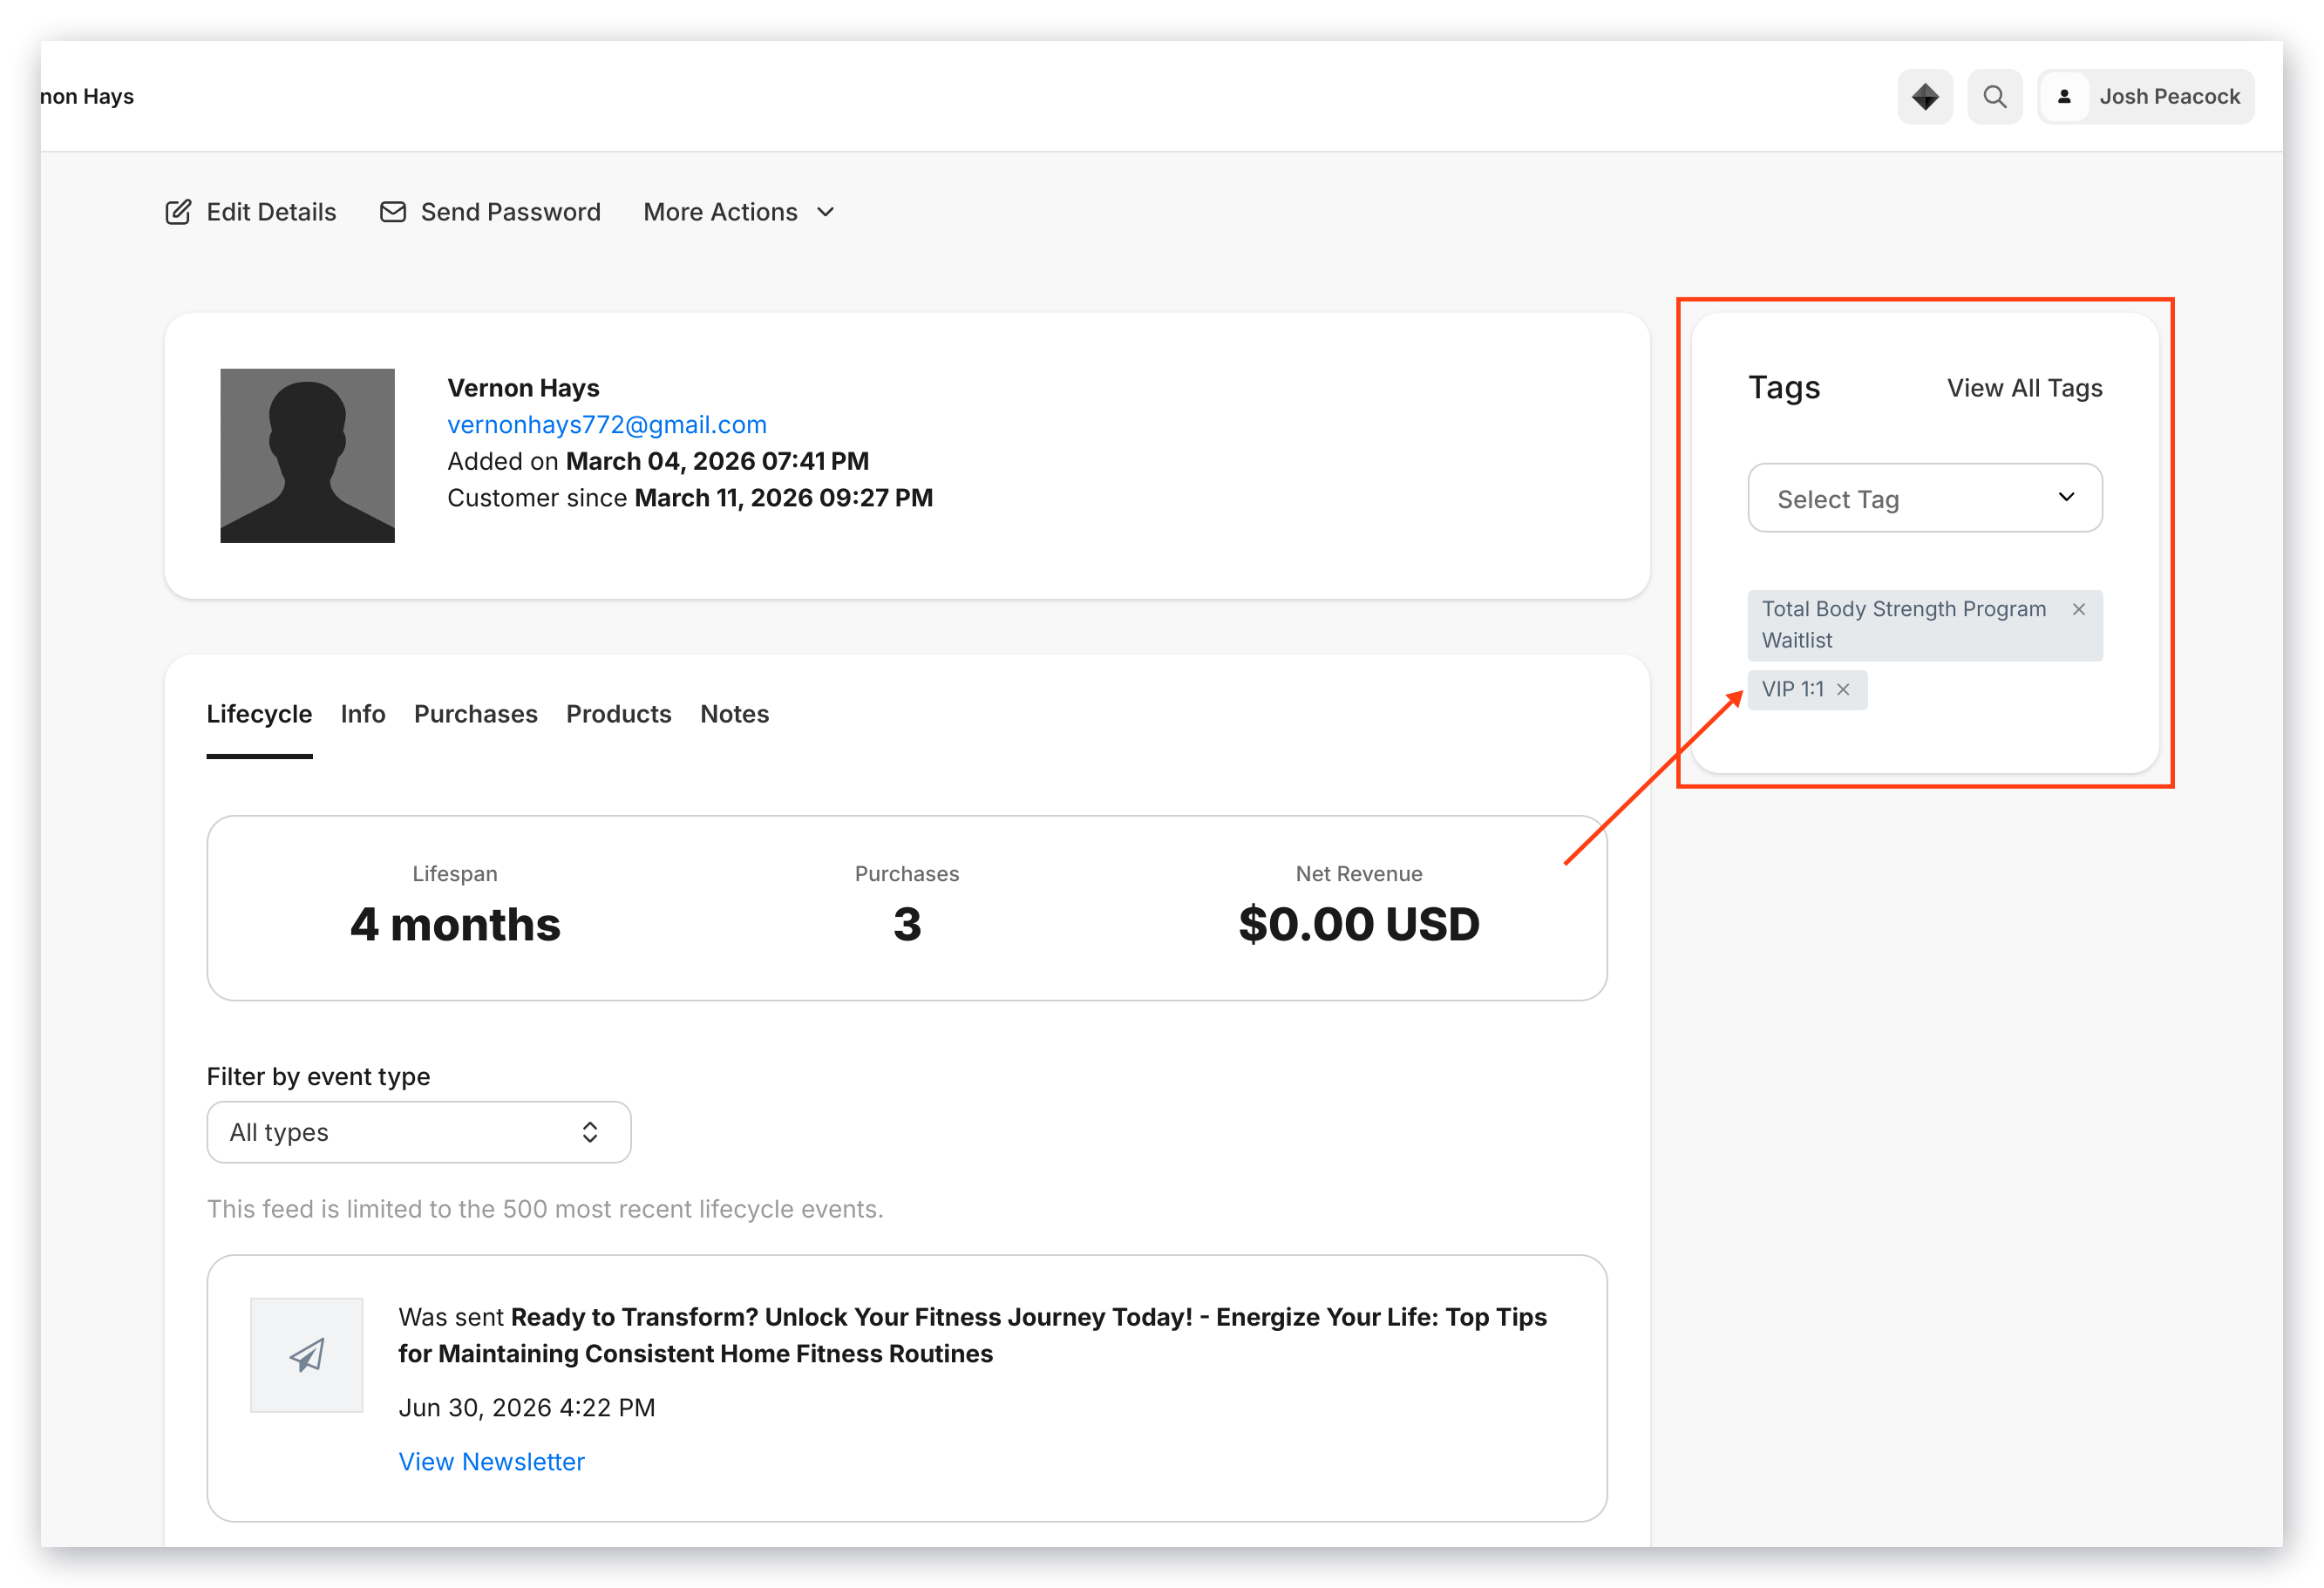
4. Click the **remove icon** to the right of the Tag name:
## Remove a tag from a user
### Remove a tag from a contact
1. Open the **Contacts** tab from the Dashboard.
2. Select the name of the contact you wish to edit.
3. Click **Open full profile**.
4. Click the **remove icon** to the right of the Tag name:
 ## Edit an existing tag
### Edit a tag
1. Open the **Contacts** tab from your Dashboard.
2. Click **Manage tags**.
3. Click the pencil icon to edit the Tag:
## Edit an existing tag
### Edit a tag
1. Open the **Contacts** tab from your Dashboard.
2. Click **Manage tags**.
3. Click the pencil icon to edit the Tag:
## Permanently delete a tag
### Delete a tag from a site
1. Open the **Contacts** tab from your Dashboard.
2. Click **Manage tags**.
3. Click the delete icon next to the Tag.
4. Confirm the deletion by retyping the Tag name exactly as it appears.
5. Click **Delete tag** to confirm:
**Note:** Each site has a total limit of 100 Tags.