> ## Documentation Index
> Fetch the complete documentation index at: https://help.kajabi.com/llms.txt
> Use this file to discover all available pages before exploring further.
# Automations overview
> Streamline processes and automate actions in Kajabi using conditional logic.
**Automations** on Kajabi use "when, then, but only if" logic to help you streamline processes and automate basic admin actions.
Depending on your Kajabi subscription plan, you may have access to Basic or Advanced Automations.
If you are on the Basic Plan, you have access to Basic Automations, whereas Growth and Pro Plans have access to Advanced Automations.
[Learn more about the difference between Basic Automations and Advanced Automations](/articles/marketing/automations/basic-vs-advanced-automations)
**Note:** Growth and Pro Plans have access to create any Automation within the **Marketing** tab. Basic Plans only have access to create Automations in various other areas of Kajabi.
## Where to add an Automation
You can add custom Automations in numerous places on Kajabi:
* **Funnels** - When someone submits a form to opt into your email list, then subscribe them to a welcome email sequence as the next step of your funnel
* **Email Campaigns** - When an email broadcast is opened, then add an "opened email" tag to the contact record of the person who opened it
* **Events** - When someone registers for an event, then send them an email with event info
* **Forms** - When someone submits a form to sign up for your free lead magnet product, then grant them the offer for that product
* **Offers** - When someone purchases an offer for your course, then add a "paid student" tag to the contact record for that person
* **Course Lessons** - When a lesson is completed, then send an email congratulating the person on their progress
* **Quizzes** - When a quiz is passed, then add a "passed quiz" tag to the contact record for that person
* **Certificates of Completion** - When a quiz is passed, then send a certificate of completion to that person
**Tip:** Check out the bottom of Editors in Kajabi to add Automations.
### Create an Automation
1. Click **+ Add Automation**.
2. Select a **When** action as an event trigger.
3. Choose a **Then** action as a response event.
4. Add a condition if desired (optional and only available with [Advanced Automations](/articles/marketing/automations/basic-vs-advanced-automations)).
5. Click **Save** to keep your changes.
## Conditionals in Automations
Conditionals in Automations allow you to add an "Only if" condition to your Automation.
This feature is only available with [Advanced Automations](/articles/marketing/automations/basic-vs-advanced-automations).
For example, you want to add a Tag to all contacts who submitted a Form, but only if they answered a question on that Form with a specific answer.
**Note:** The conditional filter matches the collected data and your specified value based on "contains" rather than an "exact match."
### Example scenario
You're creating a customer color survey to find out what the most common favorite color is among your customers.
1. Create a Form with a custom field asking "What is your favorite color?"
2. Add specific answers to choose from, or leave it open-ended.
3. Add the Automation either directly from the Form Editor, or from the Automations Dashboard under the **Marketing** tab.
4. If you just created a Form or added a Form field, click **Save** at the upper right of the Form Editor to save and apply your changes.
5. Click **Add Automation**.
6. The **When** action is already selected if you are creating the Automation from the Form editing page (i.e. "When form is submitted"). Choose your **Then** action. In this example, select the **Add a tag** action.
7. Add your condition. Here, you only want to tag users with the "Blue" tag *if* they chose blue as their favorite color (navigate to the end of the dropdown menu under Custom Field Filters).
8. Click **Apply**, and then **Save**.
**Note:** This same Automation can be created and configured in the Automations Dashboard under the **Marketing** tab.
## Add Automations on Kajabi
### Add an Automation to a Funnel
1. Navigate to the dashboard and go to the **Marketing** tab.
2. Click **Funnels** to view your funnels.
3. Create a new funnel or edit an existing funnel.
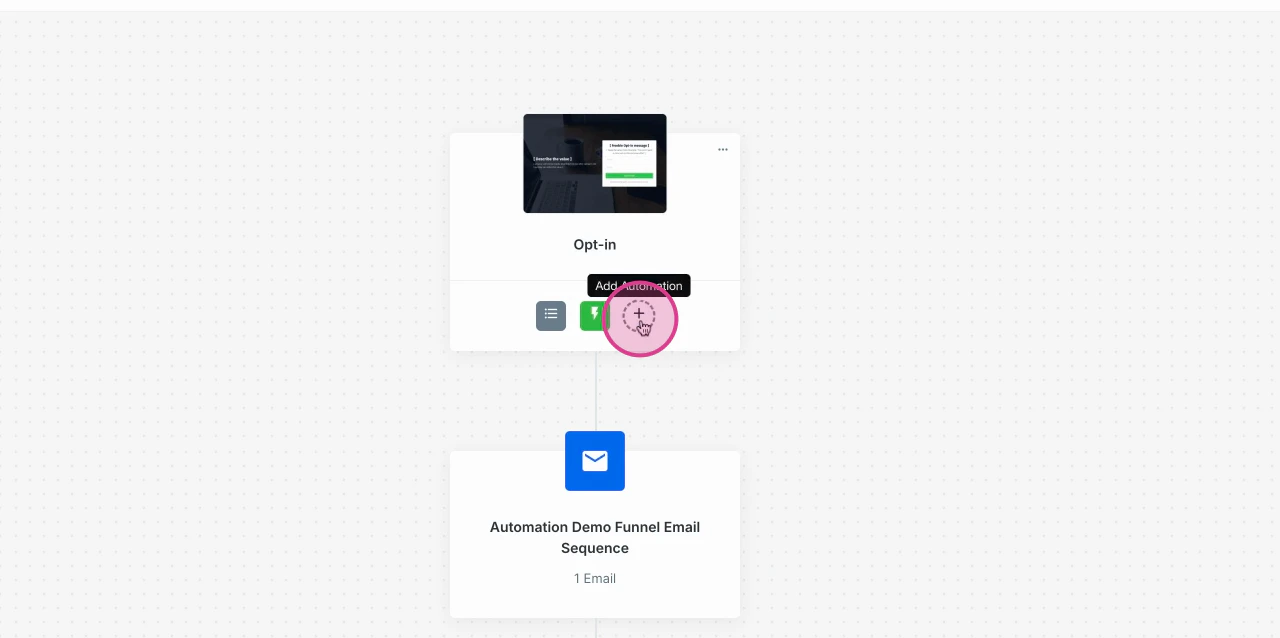
4. Click the **+** icon to add an Automation to the funnel.
 5. Create your Automation: define the trigger, actions, and any conditions as needed.
6. Click **Save** once you're done to apply the Automation to the funnel.
**Note:** You can add multiple Automations to a single funnel to run different actions for different triggers.
Make sure to click **Save** after editing so your Automation is activated.
[Learn more about Funnels on Kajabi](/articles/marketing/funnels/funnels-in-kajabi)
### Add an Automation to an Email Campaign
1. Open the **Marketing** tab from the Dashboard.
2. Click **Email Campaigns**.
3. Create a [new Email Campaign](/articles/marketing/email-campaigns/email-campaigns-overview) or edit an existing one.
[Learn more about Email Campaigns on Kajabi](/articles/marketing/email-campaigns/email-campaigns-overview)
#### Email Broadcast
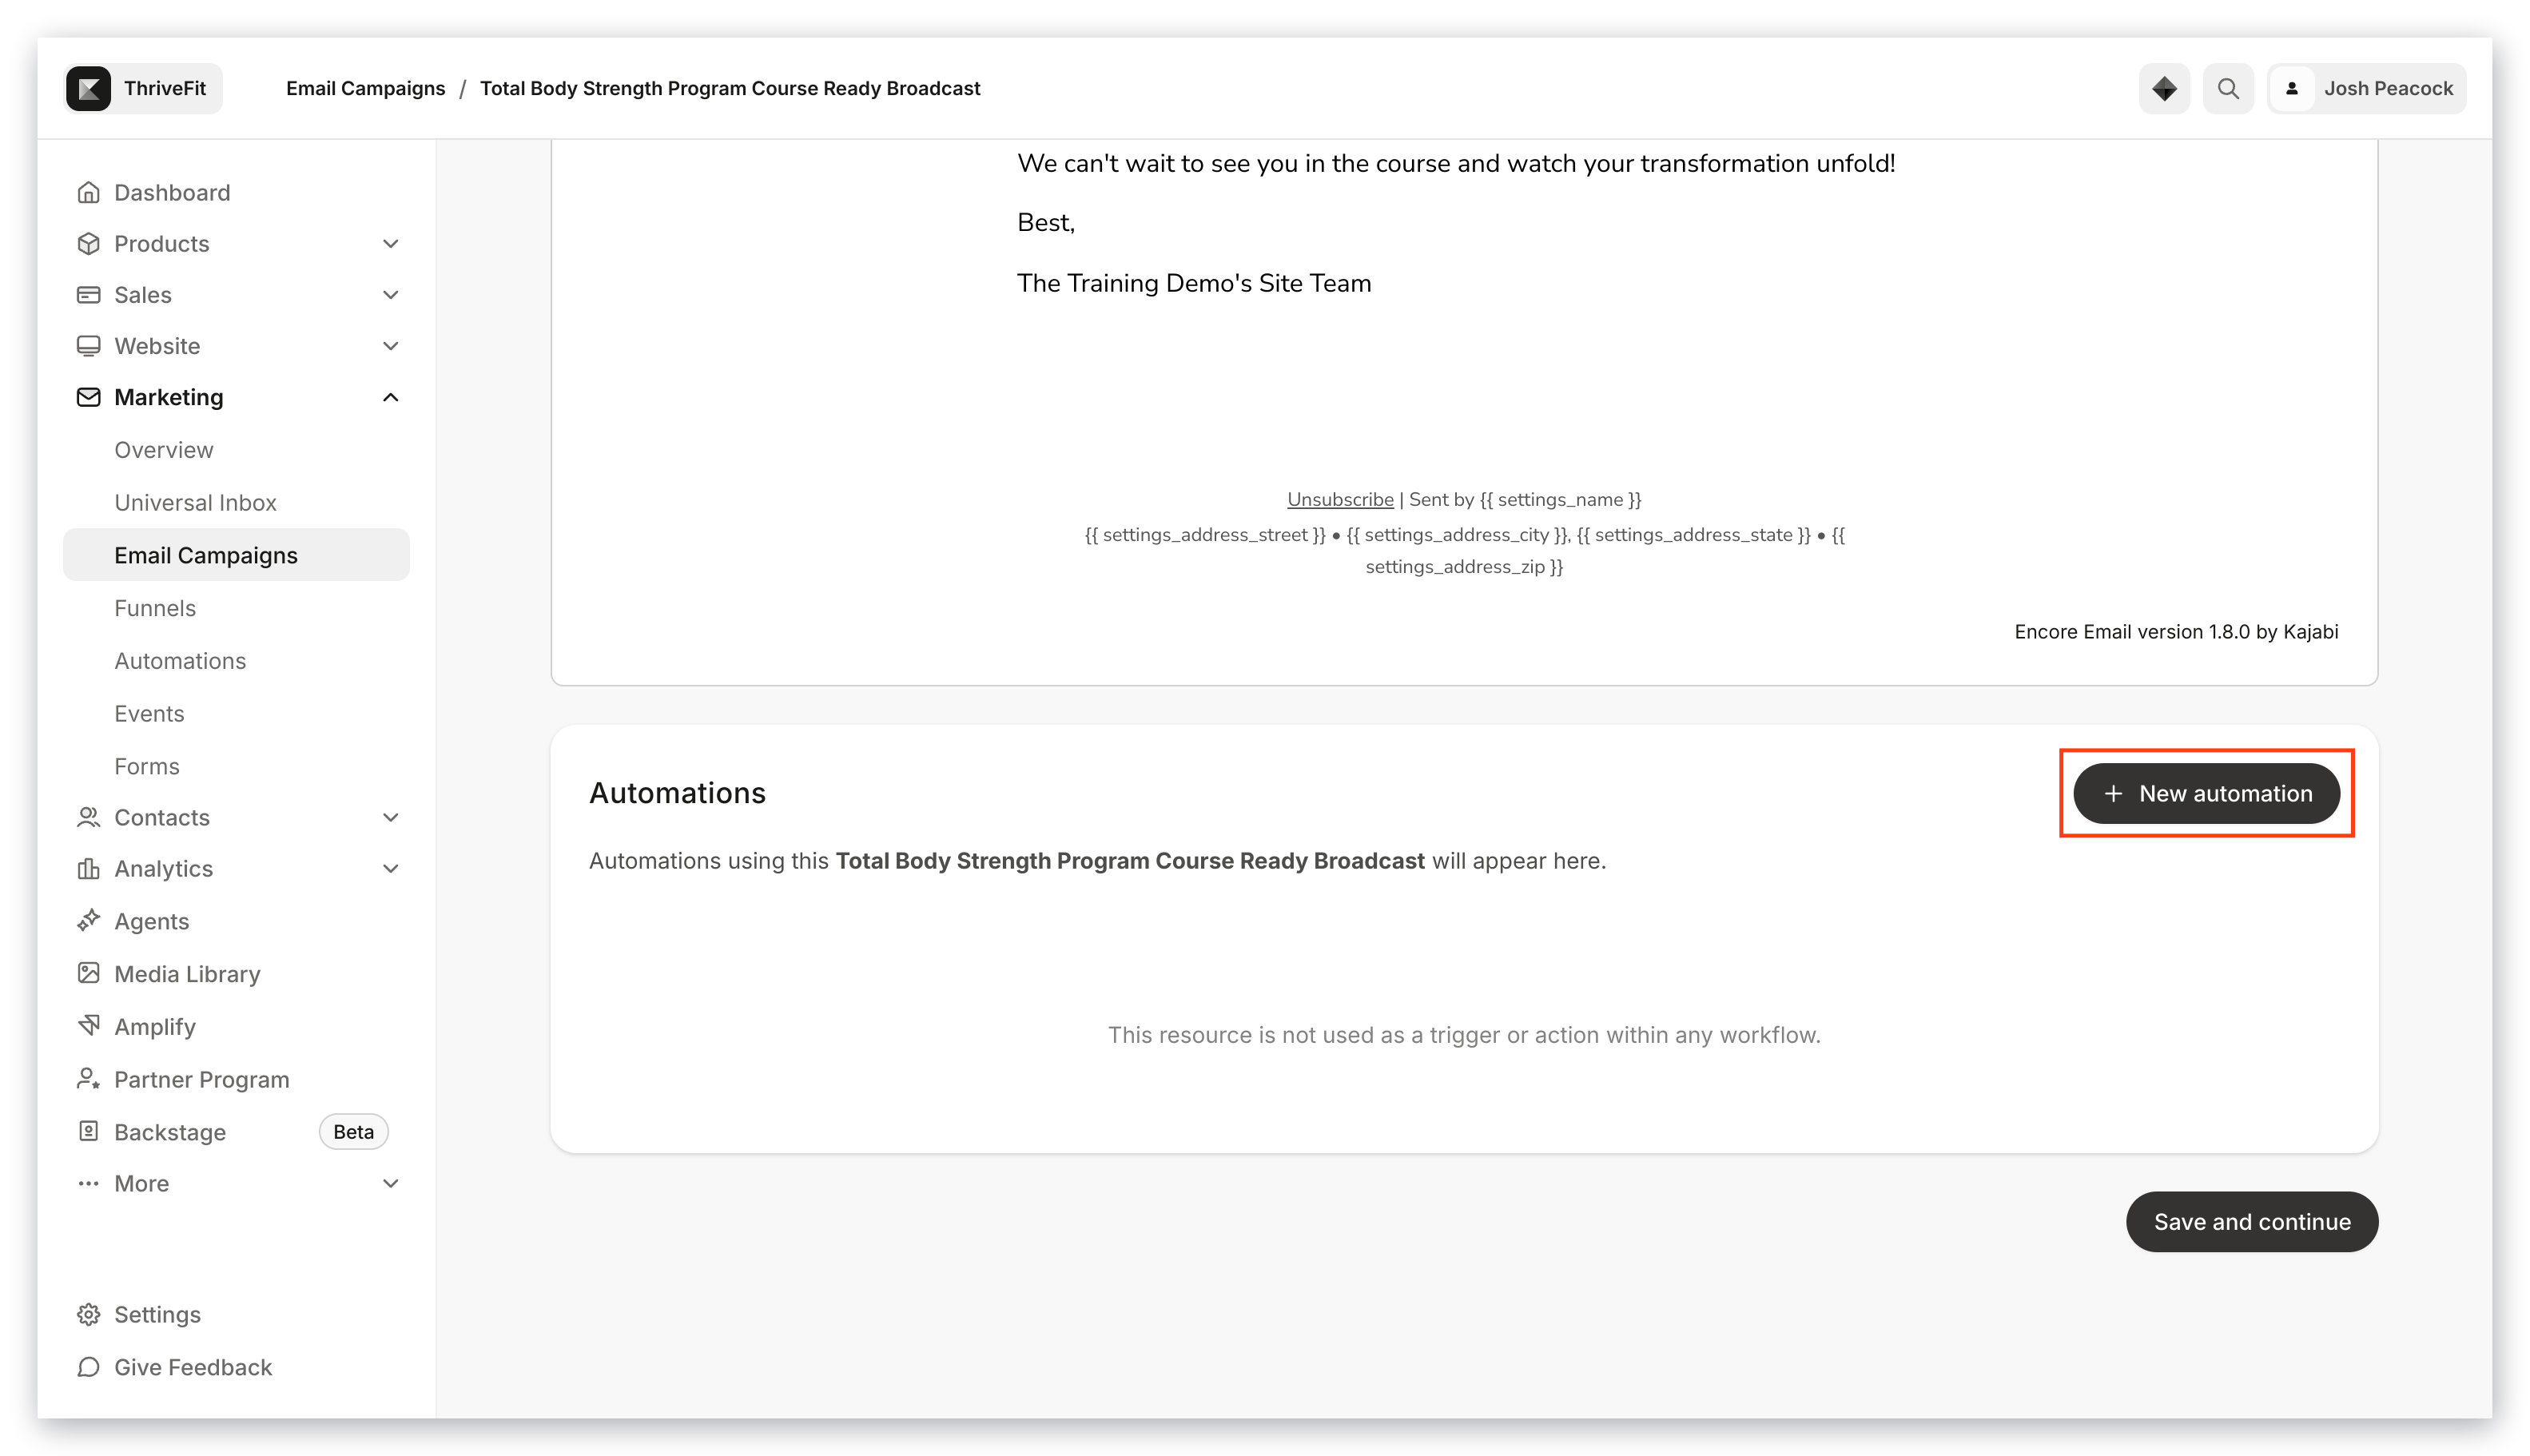
Click **+ Add Automation** in the Content Editor:
5. Create your Automation: define the trigger, actions, and any conditions as needed.
6. Click **Save** once you're done to apply the Automation to the funnel.
**Note:** You can add multiple Automations to a single funnel to run different actions for different triggers.
Make sure to click **Save** after editing so your Automation is activated.
[Learn more about Funnels on Kajabi](/articles/marketing/funnels/funnels-in-kajabi)
### Add an Automation to an Email Campaign
1. Open the **Marketing** tab from the Dashboard.
2. Click **Email Campaigns**.
3. Create a [new Email Campaign](/articles/marketing/email-campaigns/email-campaigns-overview) or edit an existing one.
[Learn more about Email Campaigns on Kajabi](/articles/marketing/email-campaigns/email-campaigns-overview)
#### Email Broadcast
Click **+ Add Automation** in the Content Editor:
 #### Email Sequence
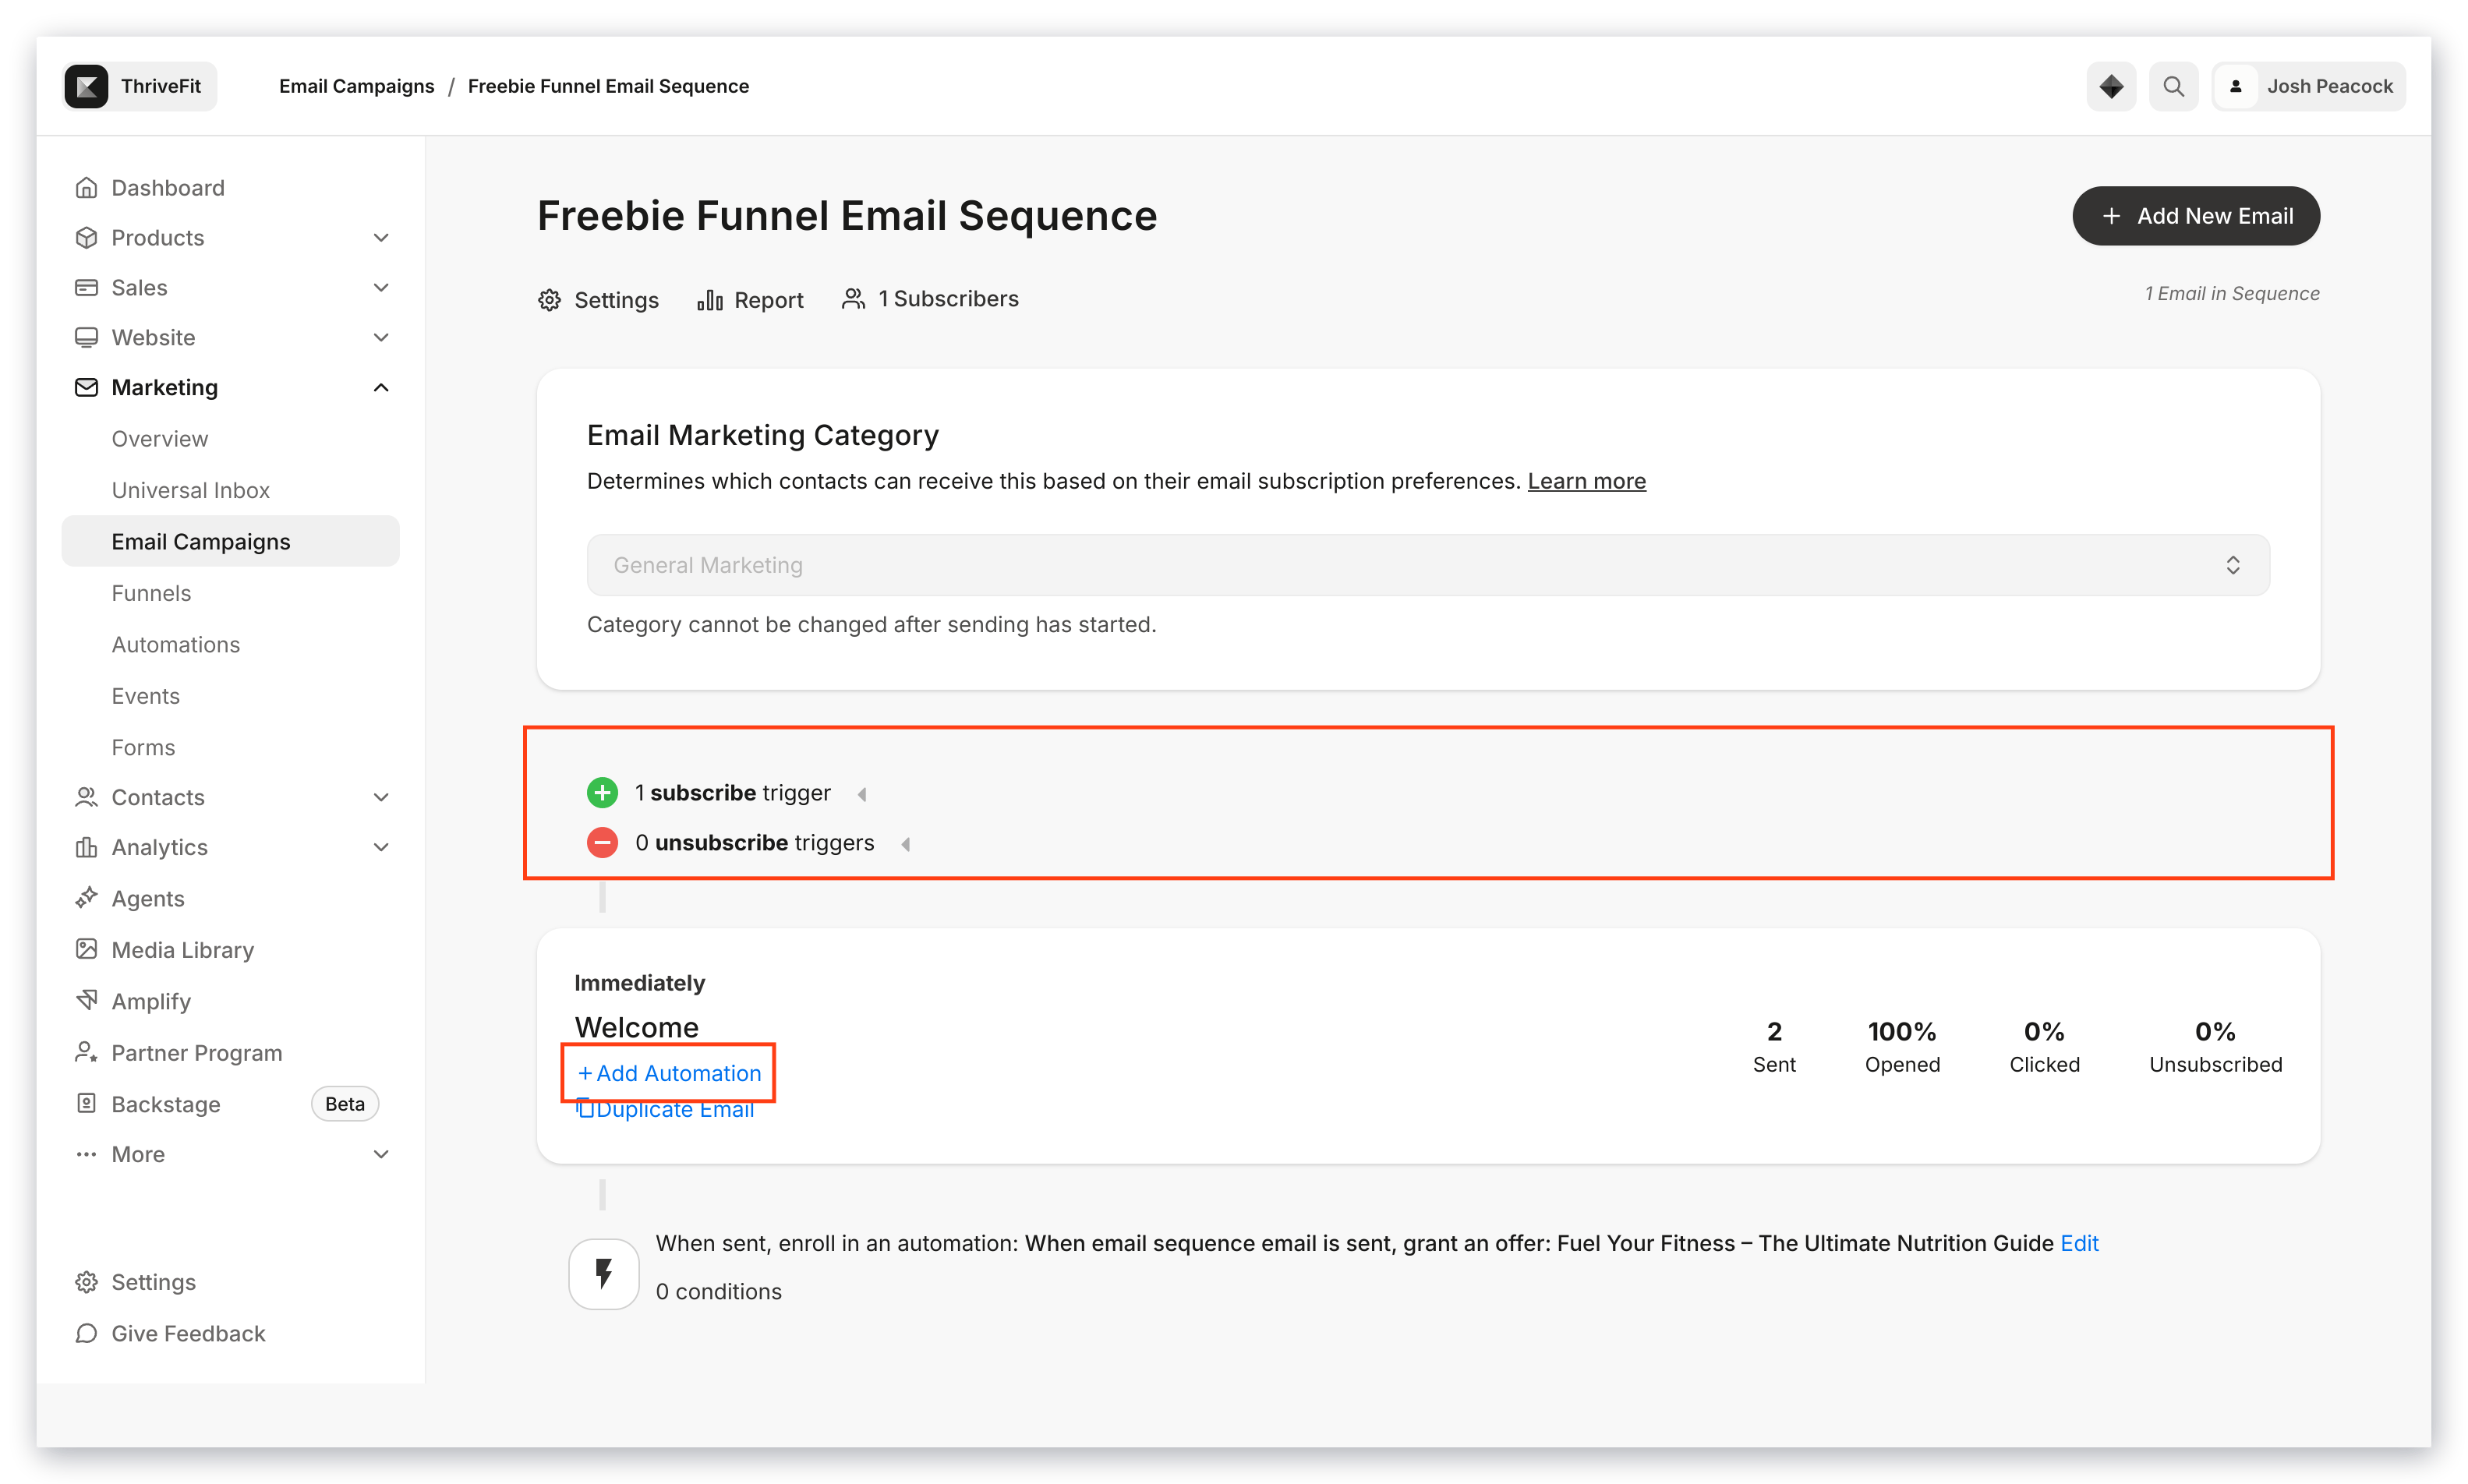
Click **+ Add Automation** for the email you wish to edit or create a Subscribe/Unsubscribe trigger:
#### Email Sequence
Click **+ Add Automation** for the email you wish to edit or create a Subscribe/Unsubscribe trigger:
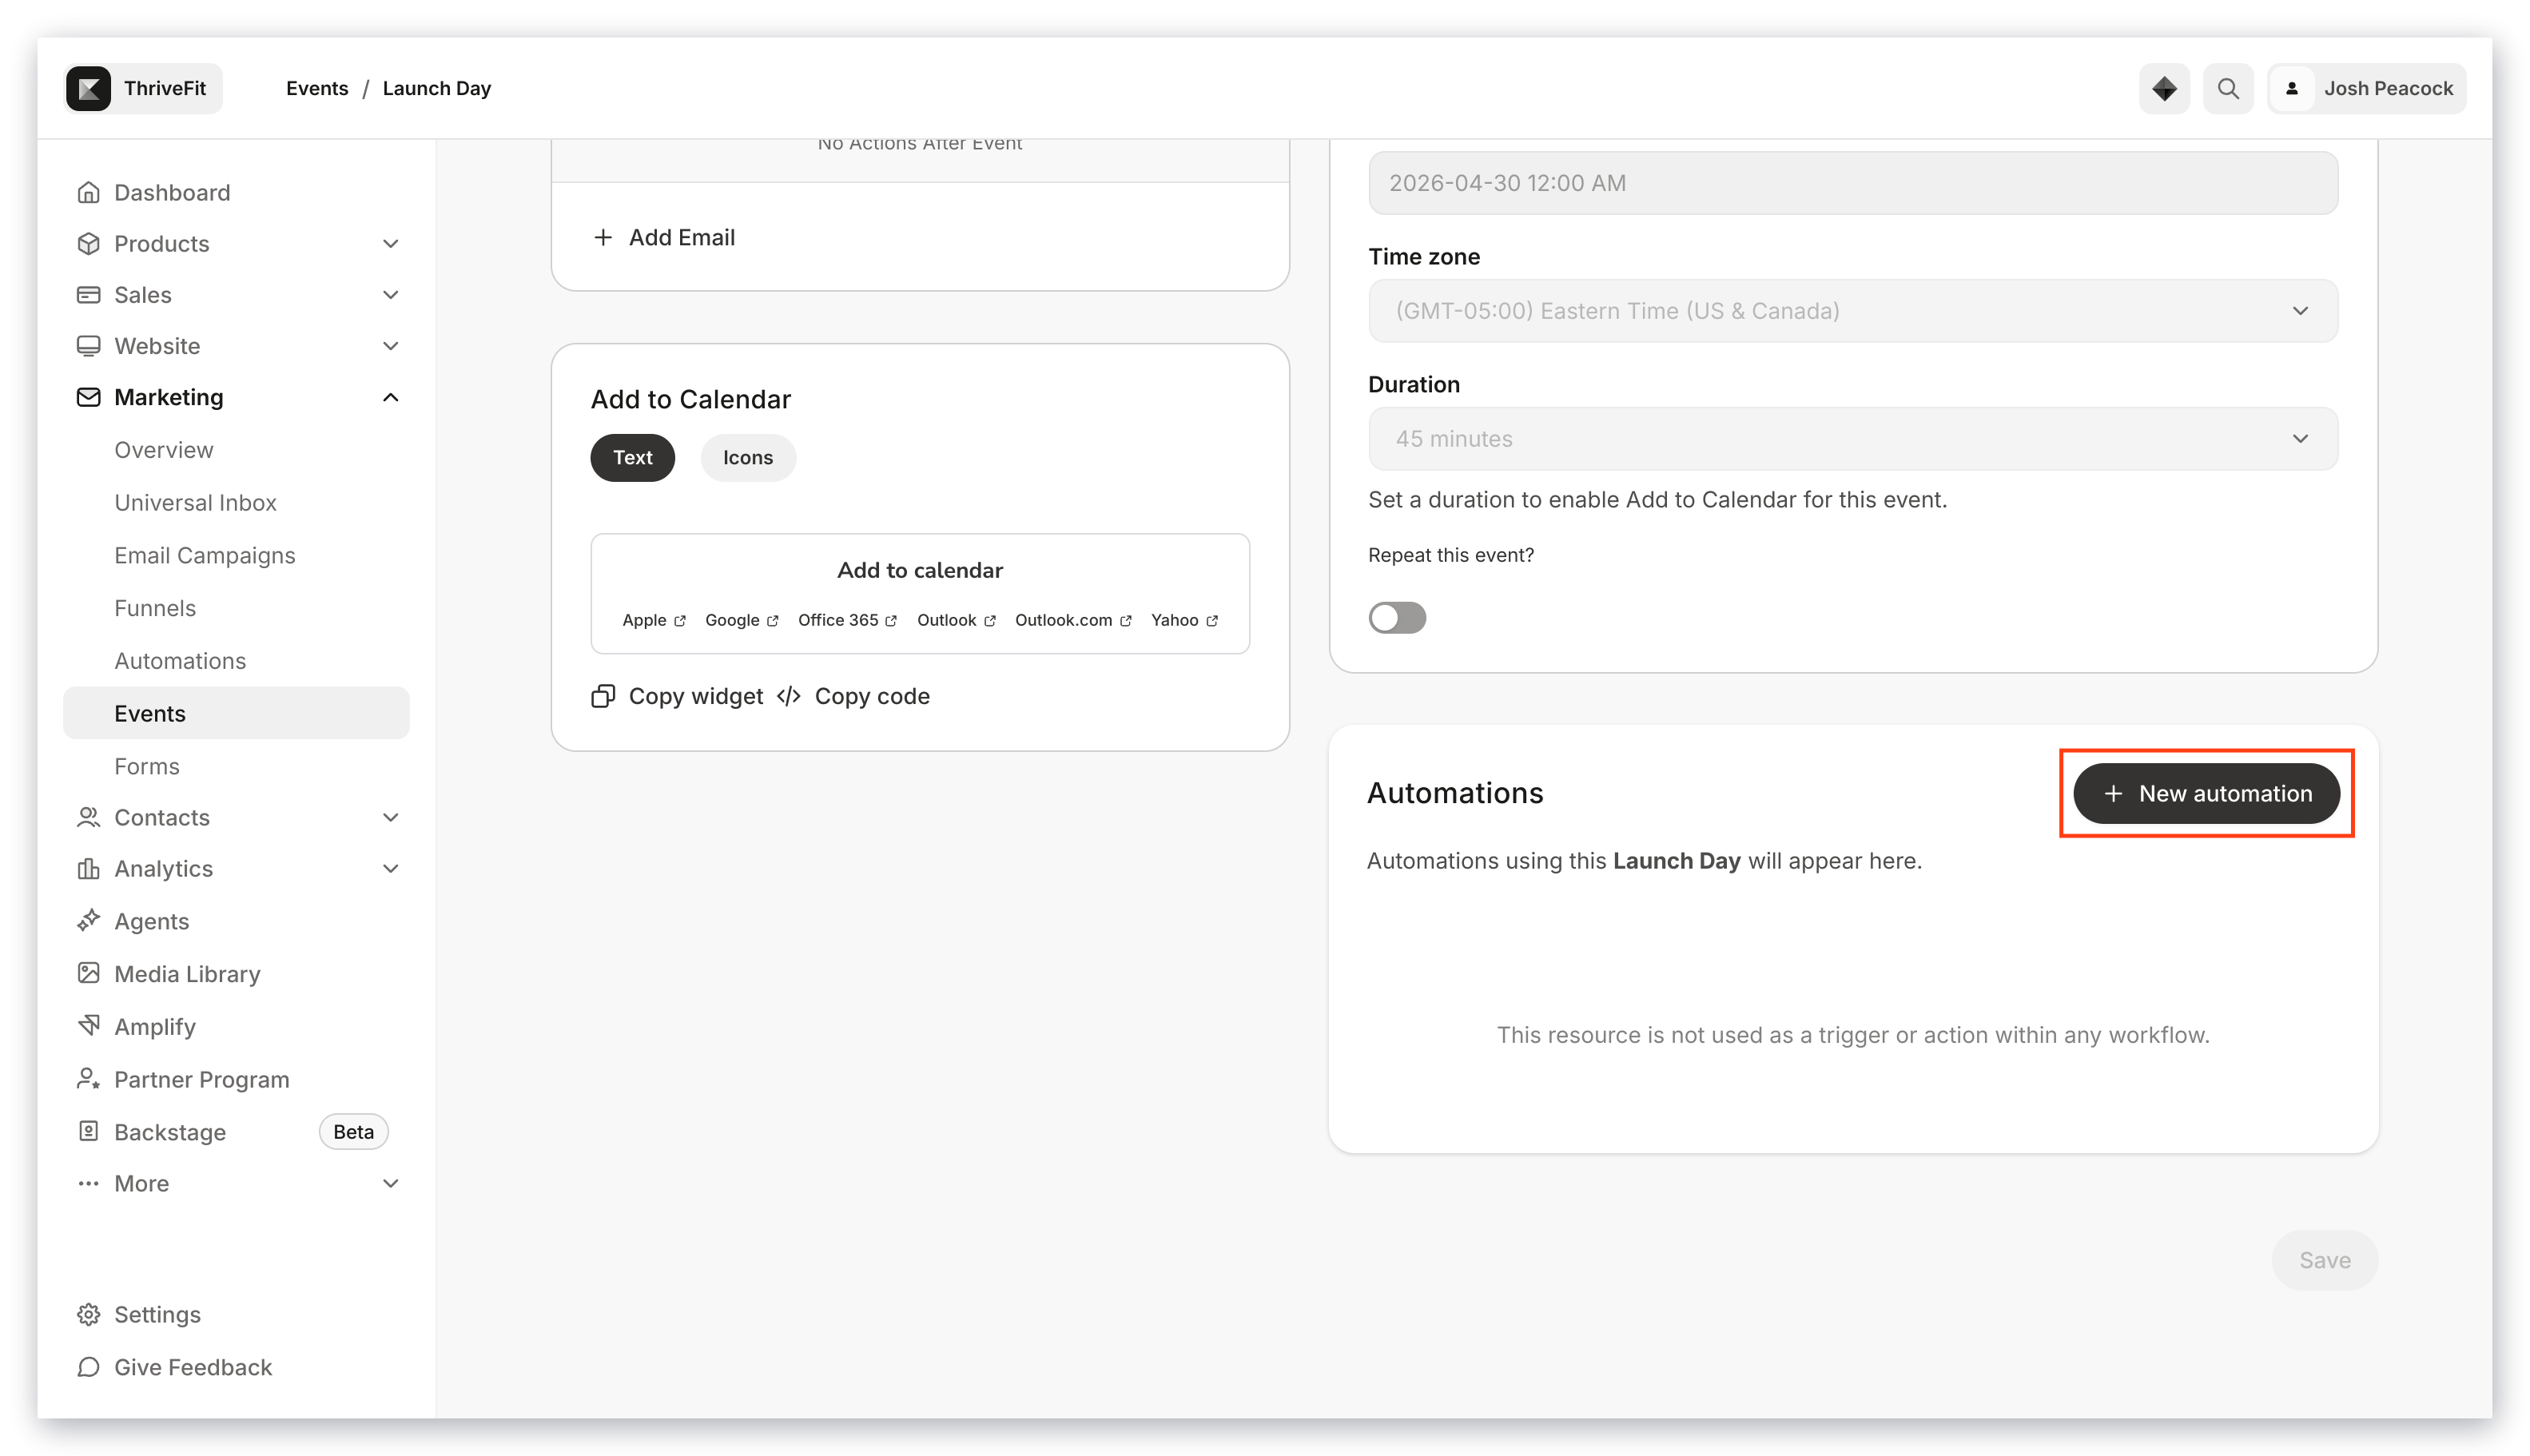
 ### Add an Automation to an Event
1. Open the **Marketing** tab from the Dashboard.
2. Select **Events**.
3. Create a new Event or edit an existing one.
4. Click **+ Add Automation**.
5. Create your Automation as desired.
### Add an Automation to an Event
1. Open the **Marketing** tab from the Dashboard.
2. Select **Events**.
3. Create a new Event or edit an existing one.
4. Click **+ Add Automation**.
5. Create your Automation as desired.
 [Learn more about Events](/articles/marketing/events/event-overview)
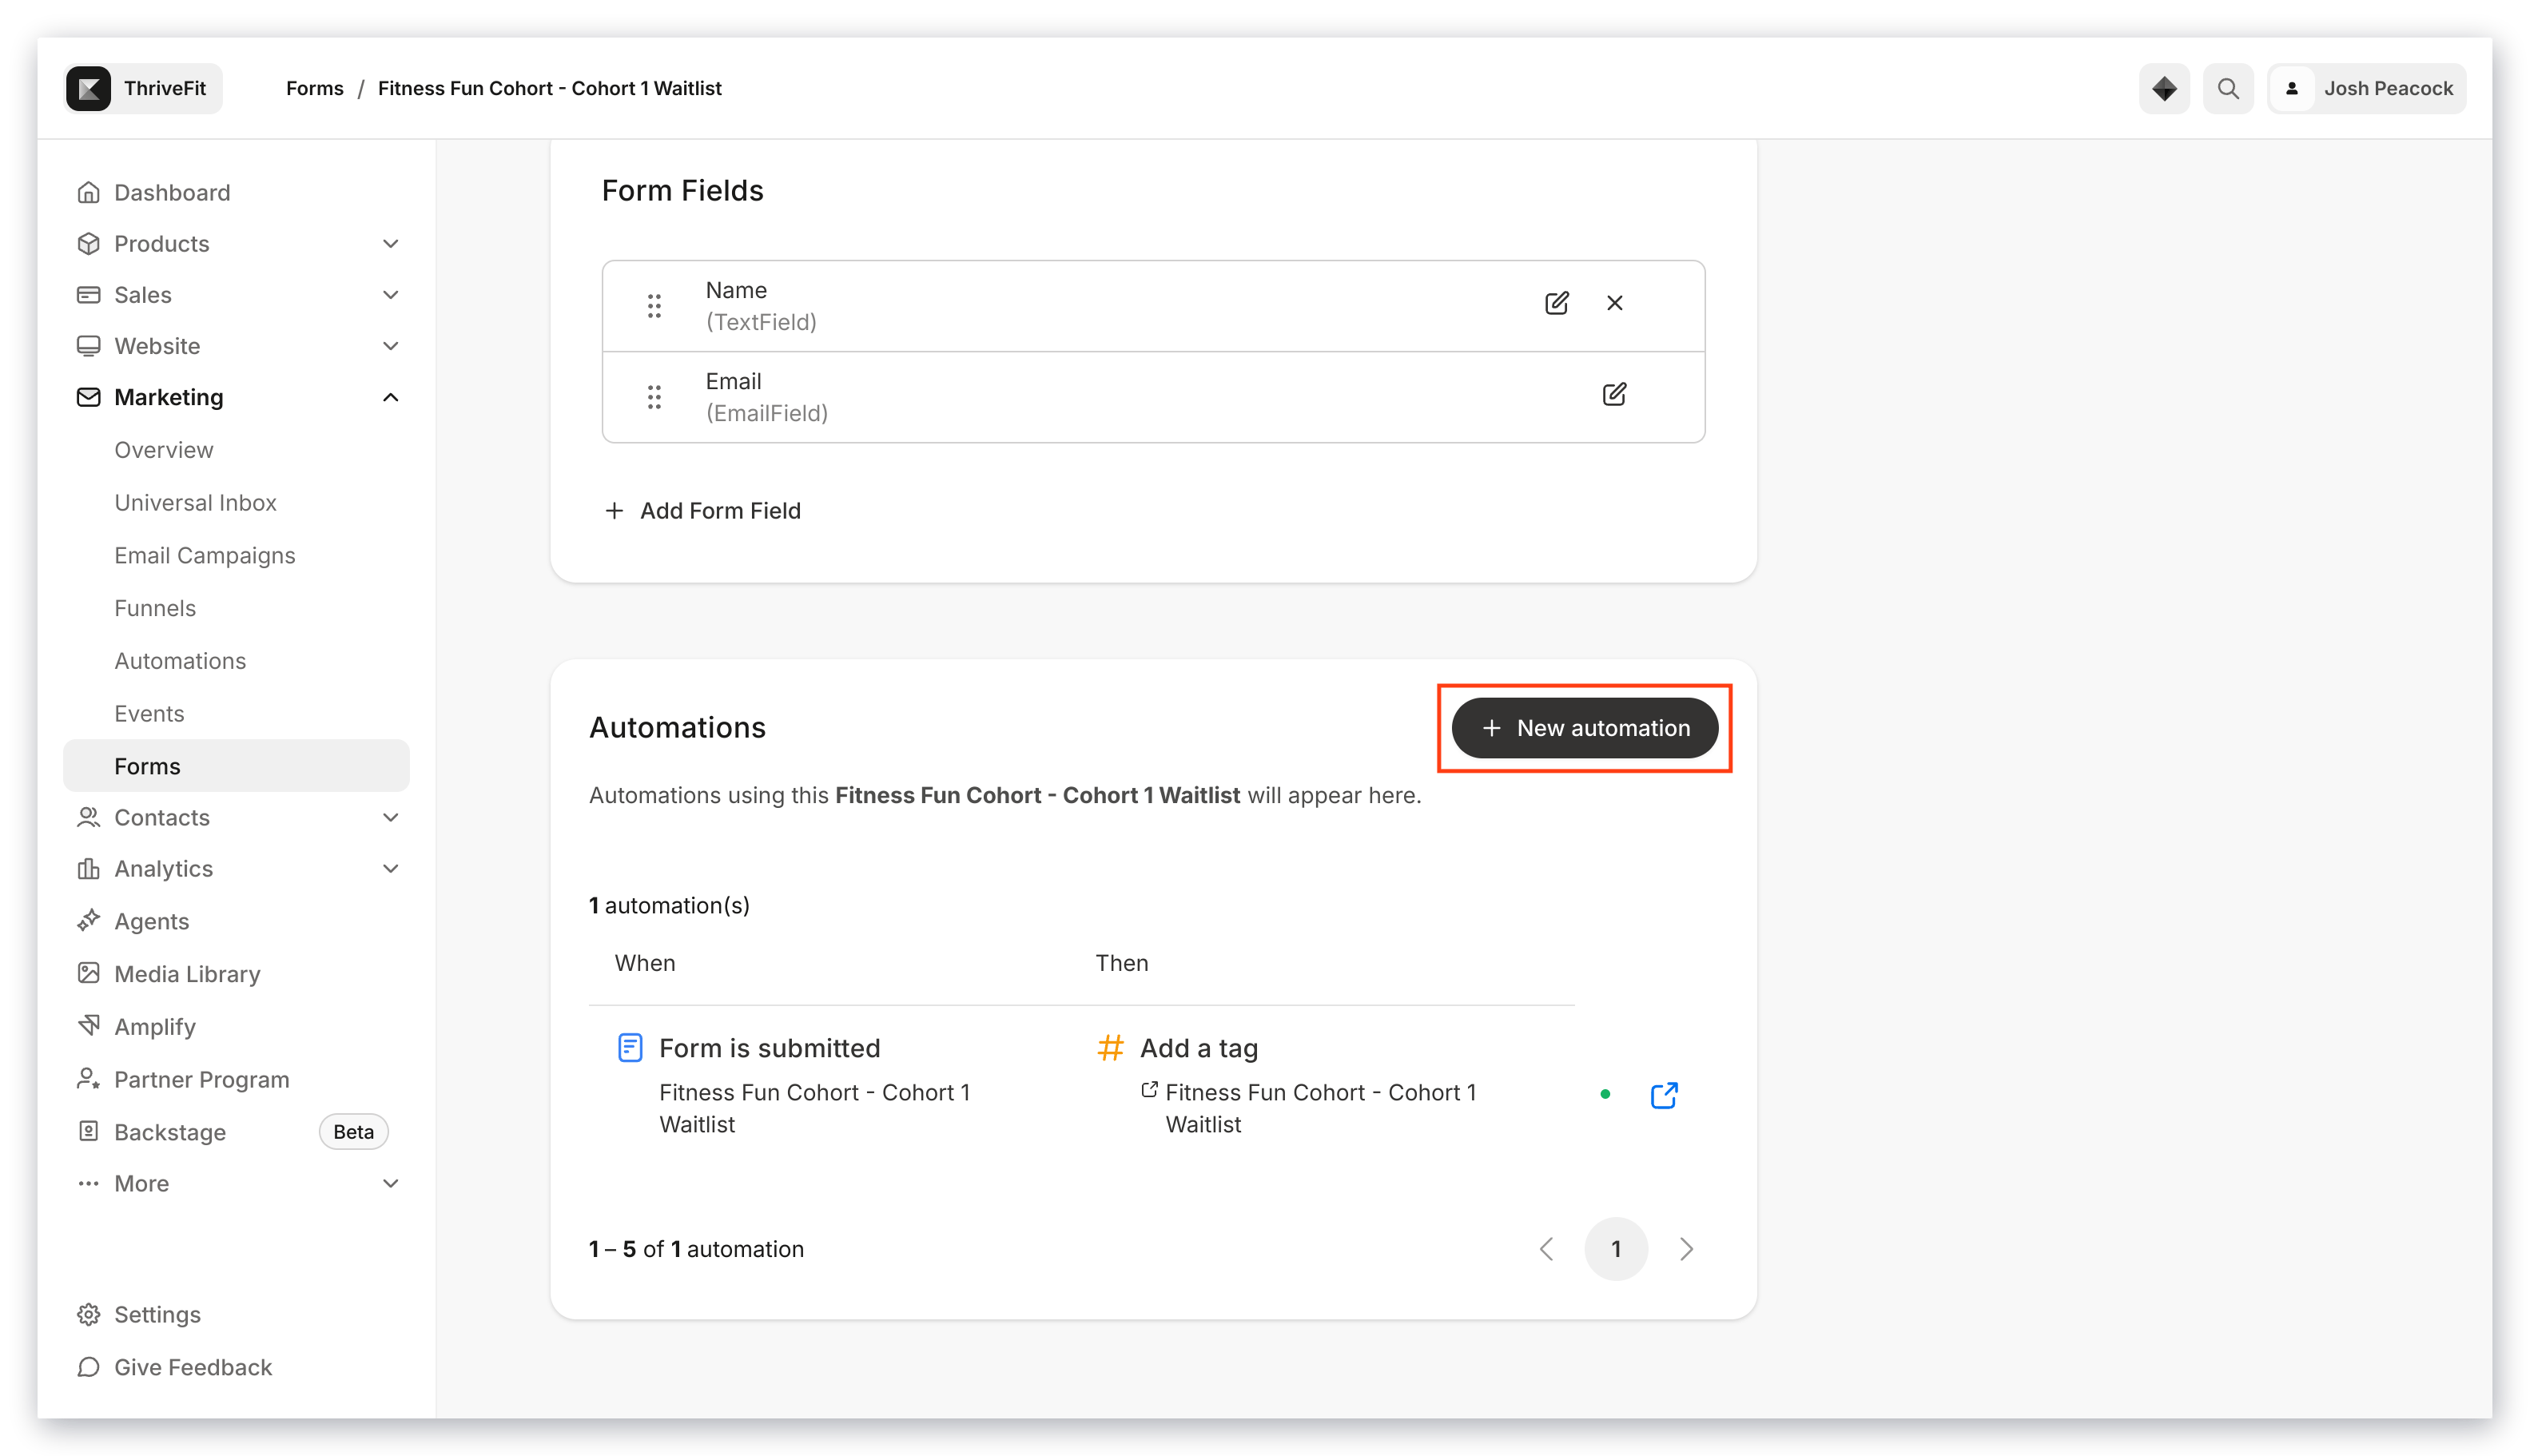
### Add an Automation to a Form
1. Open the **Marketing** tab from the Dashboard.
2. Select **Forms**.
3. Create a new **Form** or edit an existing one.
4. Click **+ Add Automation**.
5. Create your Automation as desired.
[Learn more about Events](/articles/marketing/events/event-overview)
### Add an Automation to a Form
1. Open the **Marketing** tab from the Dashboard.
2. Select **Forms**.
3. Create a new **Form** or edit an existing one.
4. Click **+ Add Automation**.
5. Create your Automation as desired.
 [Learn more about Forms](/articles/marketing/forms/create-and-build-your-form)
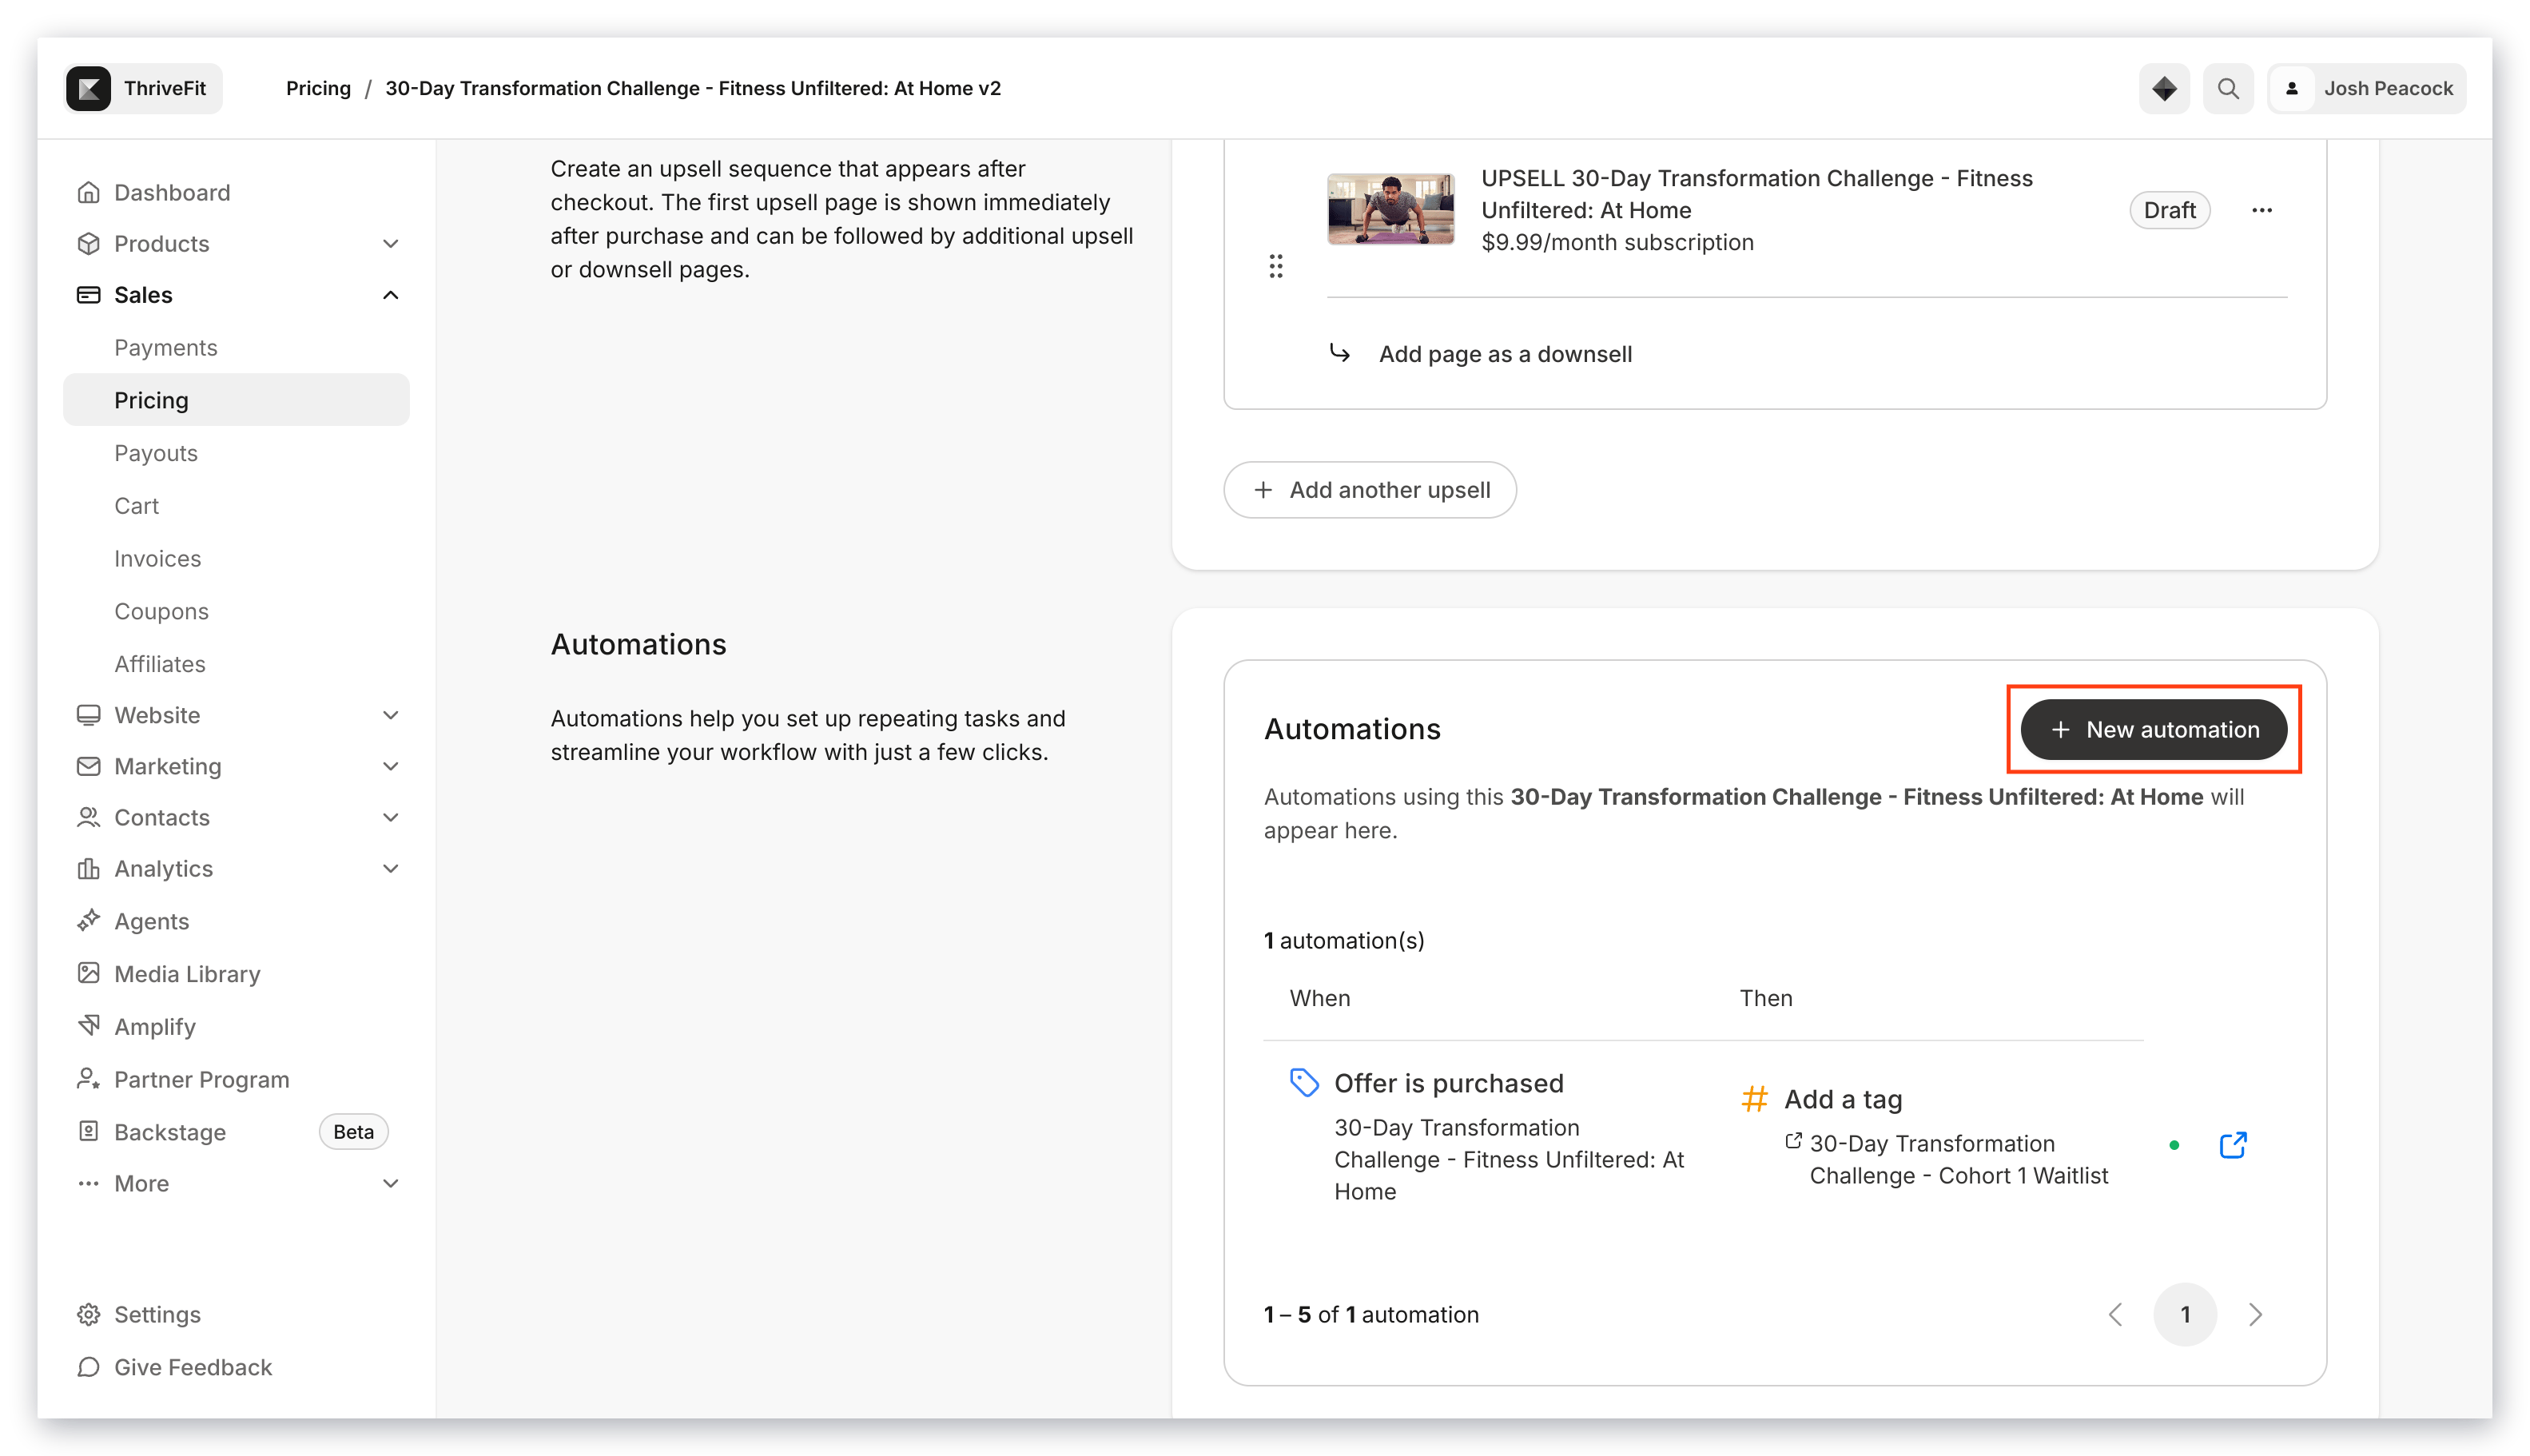
### Add an Automation to an Offer
1. Open the **Sales** tab from the Dashboard.
2. Select **Pricing**.
3. Create a new **Offer** or edit an existing one.
4. Click the **Purchase flow** tab.
5. Click **+ Add Automation**.
6. Create your Automation as desired.
[Learn more about Forms](/articles/marketing/forms/create-and-build-your-form)
### Add an Automation to an Offer
1. Open the **Sales** tab from the Dashboard.
2. Select **Pricing**.
3. Create a new **Offer** or edit an existing one.
4. Click the **Purchase flow** tab.
5. Click **+ Add Automation**.
6. Create your Automation as desired.
 [Learn more about Offers](/articles/sales/offers/offers-overview)
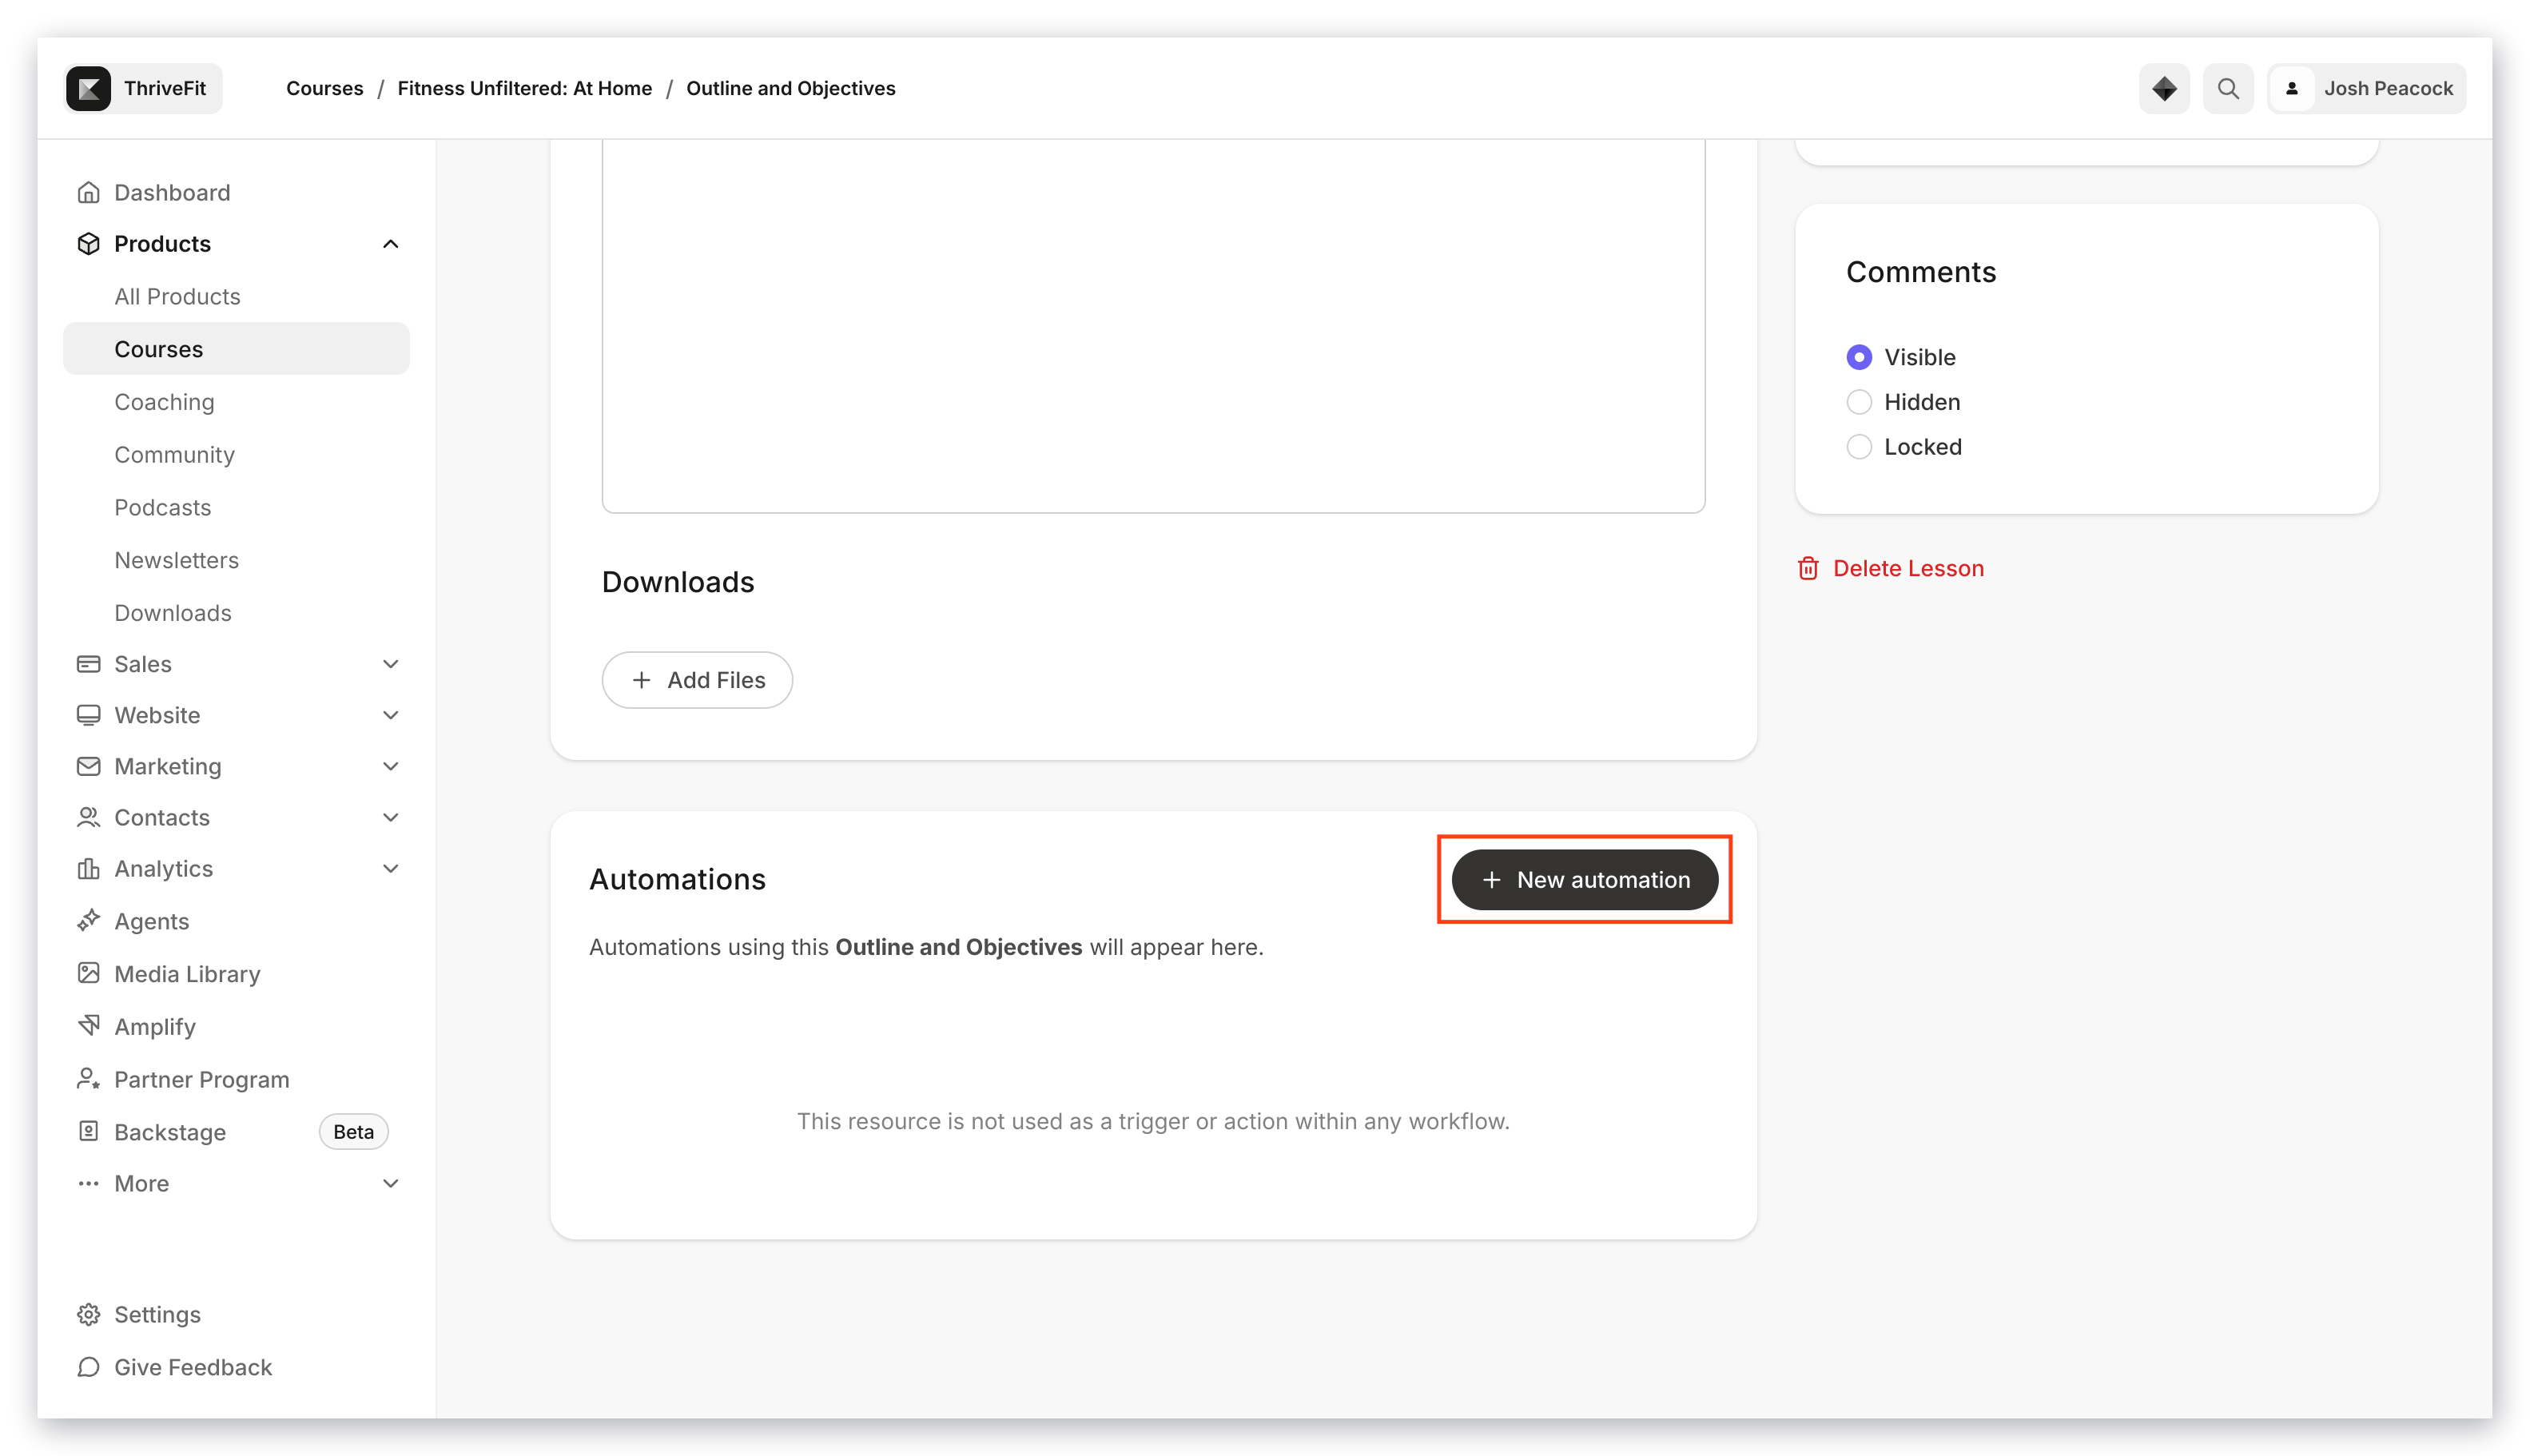
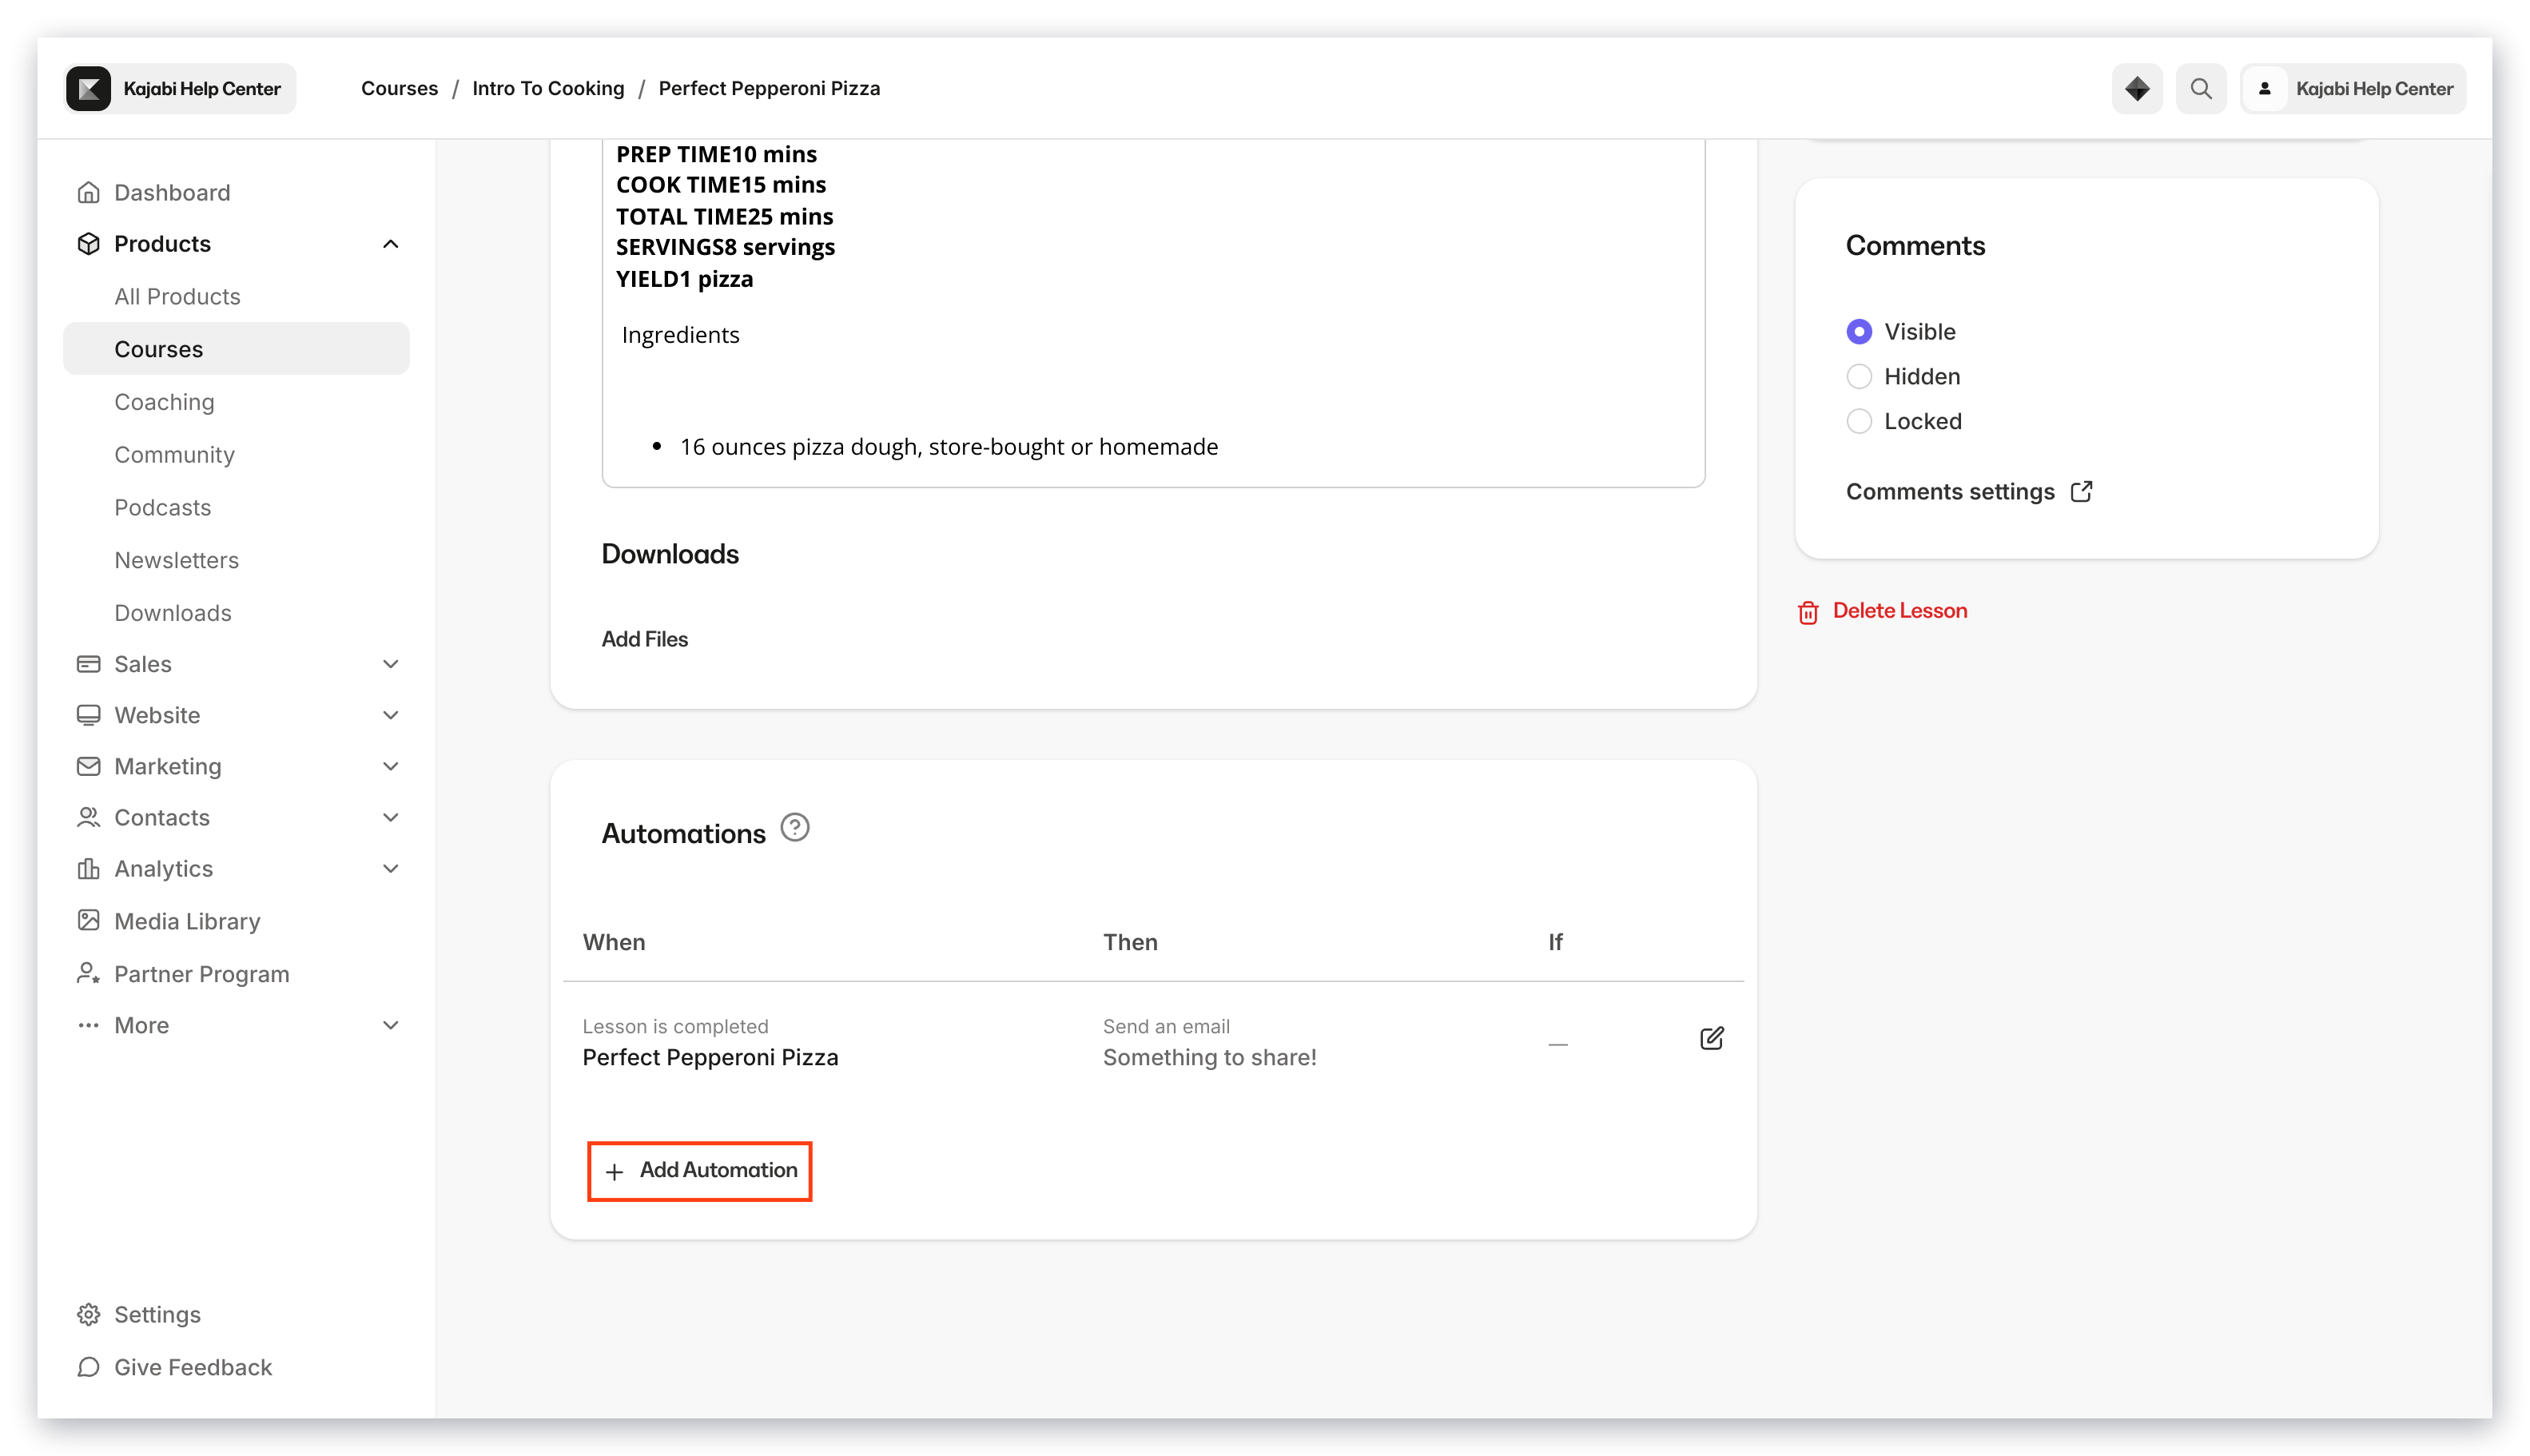
### Add an Automation to a Course Lesson
1. Open the **Products** tab from the Dashboard.
2. Select **Courses**.
3. Create a new Course or edit a **Lesson** in an existing Course.
4. Click **+ Add Automation**.
5. Create your Automation as desired.
[Learn more about Offers](/articles/sales/offers/offers-overview)
### Add an Automation to a Course Lesson
1. Open the **Products** tab from the Dashboard.
2. Select **Courses**.
3. Create a new Course or edit a **Lesson** in an existing Course.
4. Click **+ Add Automation**.
5. Create your Automation as desired.
 [Learn more about Course Lessons](/articles/products/products-overview/kajabi-products-overview)
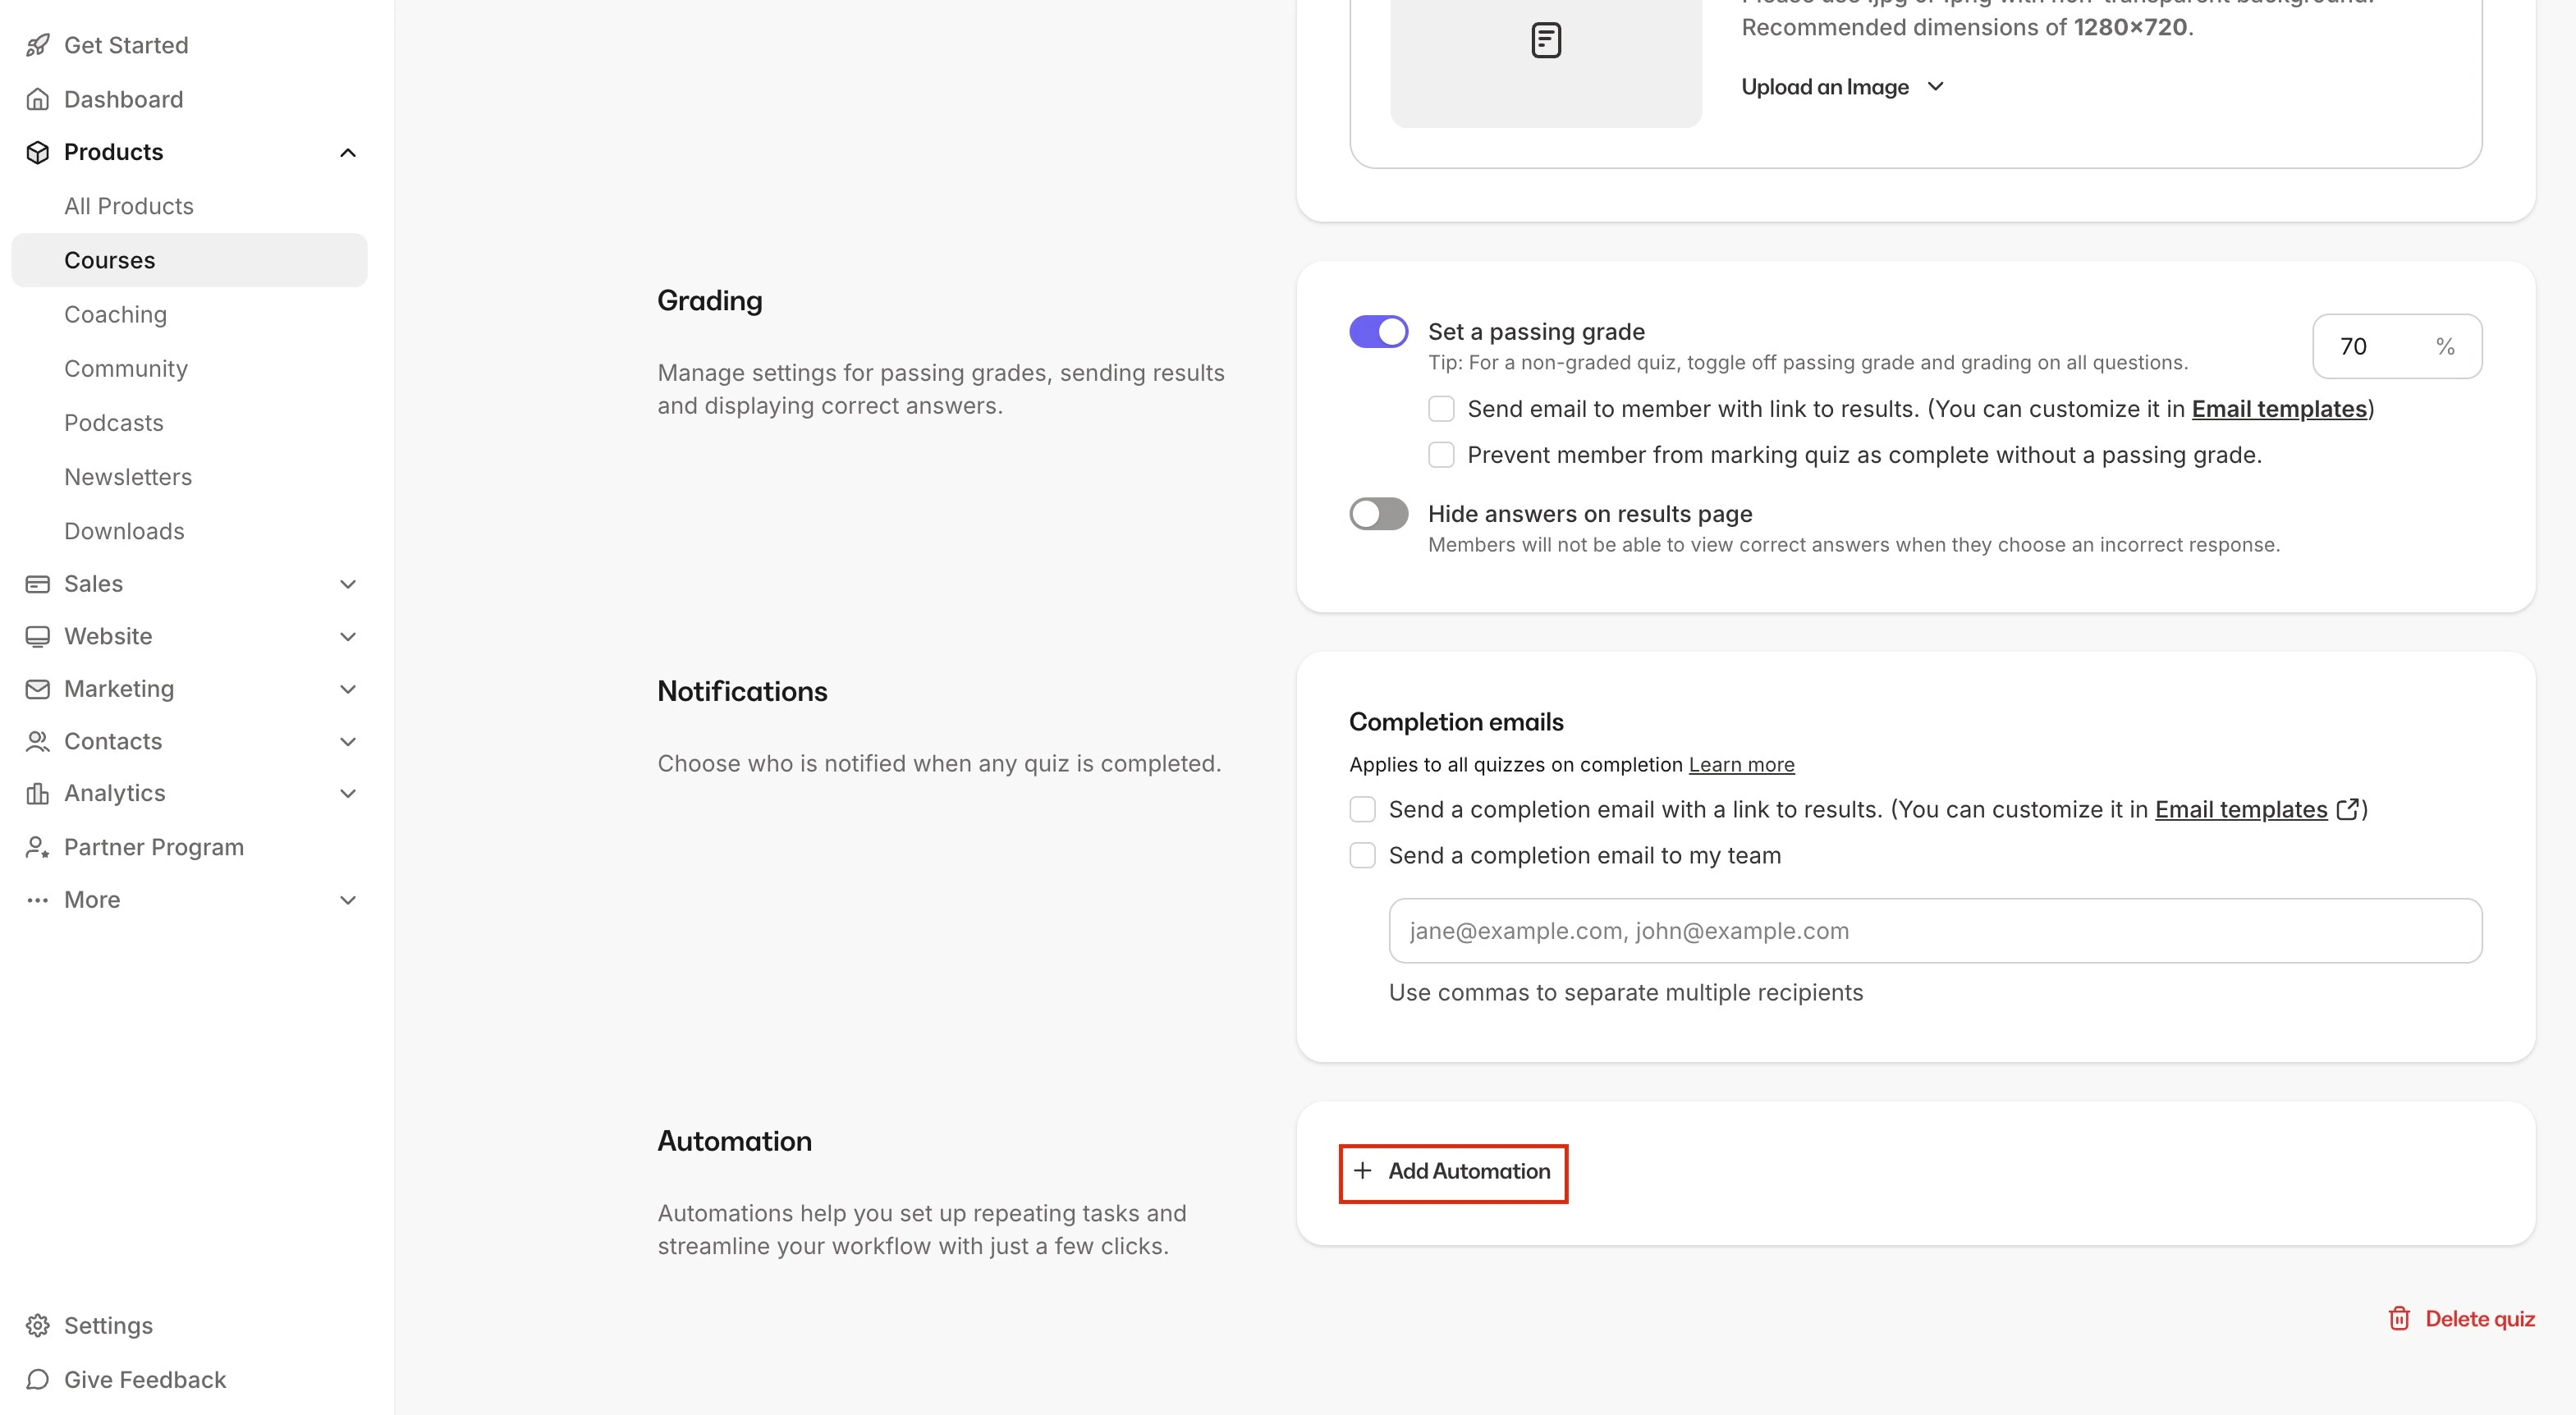
### Add an Automation to a Quiz
1. Open the **Products** tab from the Dashboard.
2. Select **Courses**.
3. Create a new Course or edit a **Quiz** in an existing Course.
4. Inside the Quiz Editor, select **Settings**.
5. Click **+ Add Automation**.
6. Create your Automation as desired.
[Learn more about Course Lessons](/articles/products/products-overview/kajabi-products-overview)
### Add an Automation to a Quiz
1. Open the **Products** tab from the Dashboard.
2. Select **Courses**.
3. Create a new Course or edit a **Quiz** in an existing Course.
4. Inside the Quiz Editor, select **Settings**.
5. Click **+ Add Automation**.
6. Create your Automation as desired.
 [Learn more about Quizzes](/articles/products/courses/course-quizzes)
### Add an Automation to a Certificate of Completion
1. Open the **Products** tab from the Dashboard.
2. Select **Courses**.
3. Create a new Course or edit a **Certificate** in an existing Course.
4. From the Course Outline, select **Certificates**.
5. If you haven't yet, create and save your Certificate of Completion (you won't see the Automations settings until after you've saved the Certificate).
6. Click **Add An Automation**.
7. Create your Automation as desired.
[Learn more about Quizzes](/articles/products/courses/course-quizzes)
### Add an Automation to a Certificate of Completion
1. Open the **Products** tab from the Dashboard.
2. Select **Courses**.
3. Create a new Course or edit a **Certificate** in an existing Course.
4. From the Course Outline, select **Certificates**.
5. If you haven't yet, create and save your Certificate of Completion (you won't see the Automations settings until after you've saved the Certificate).
6. Click **Add An Automation**.
7. Create your Automation as desired.
 [Learn about Certificates of Completion](/articles/products/courses/course-completion-certificates)
## Filter Automations
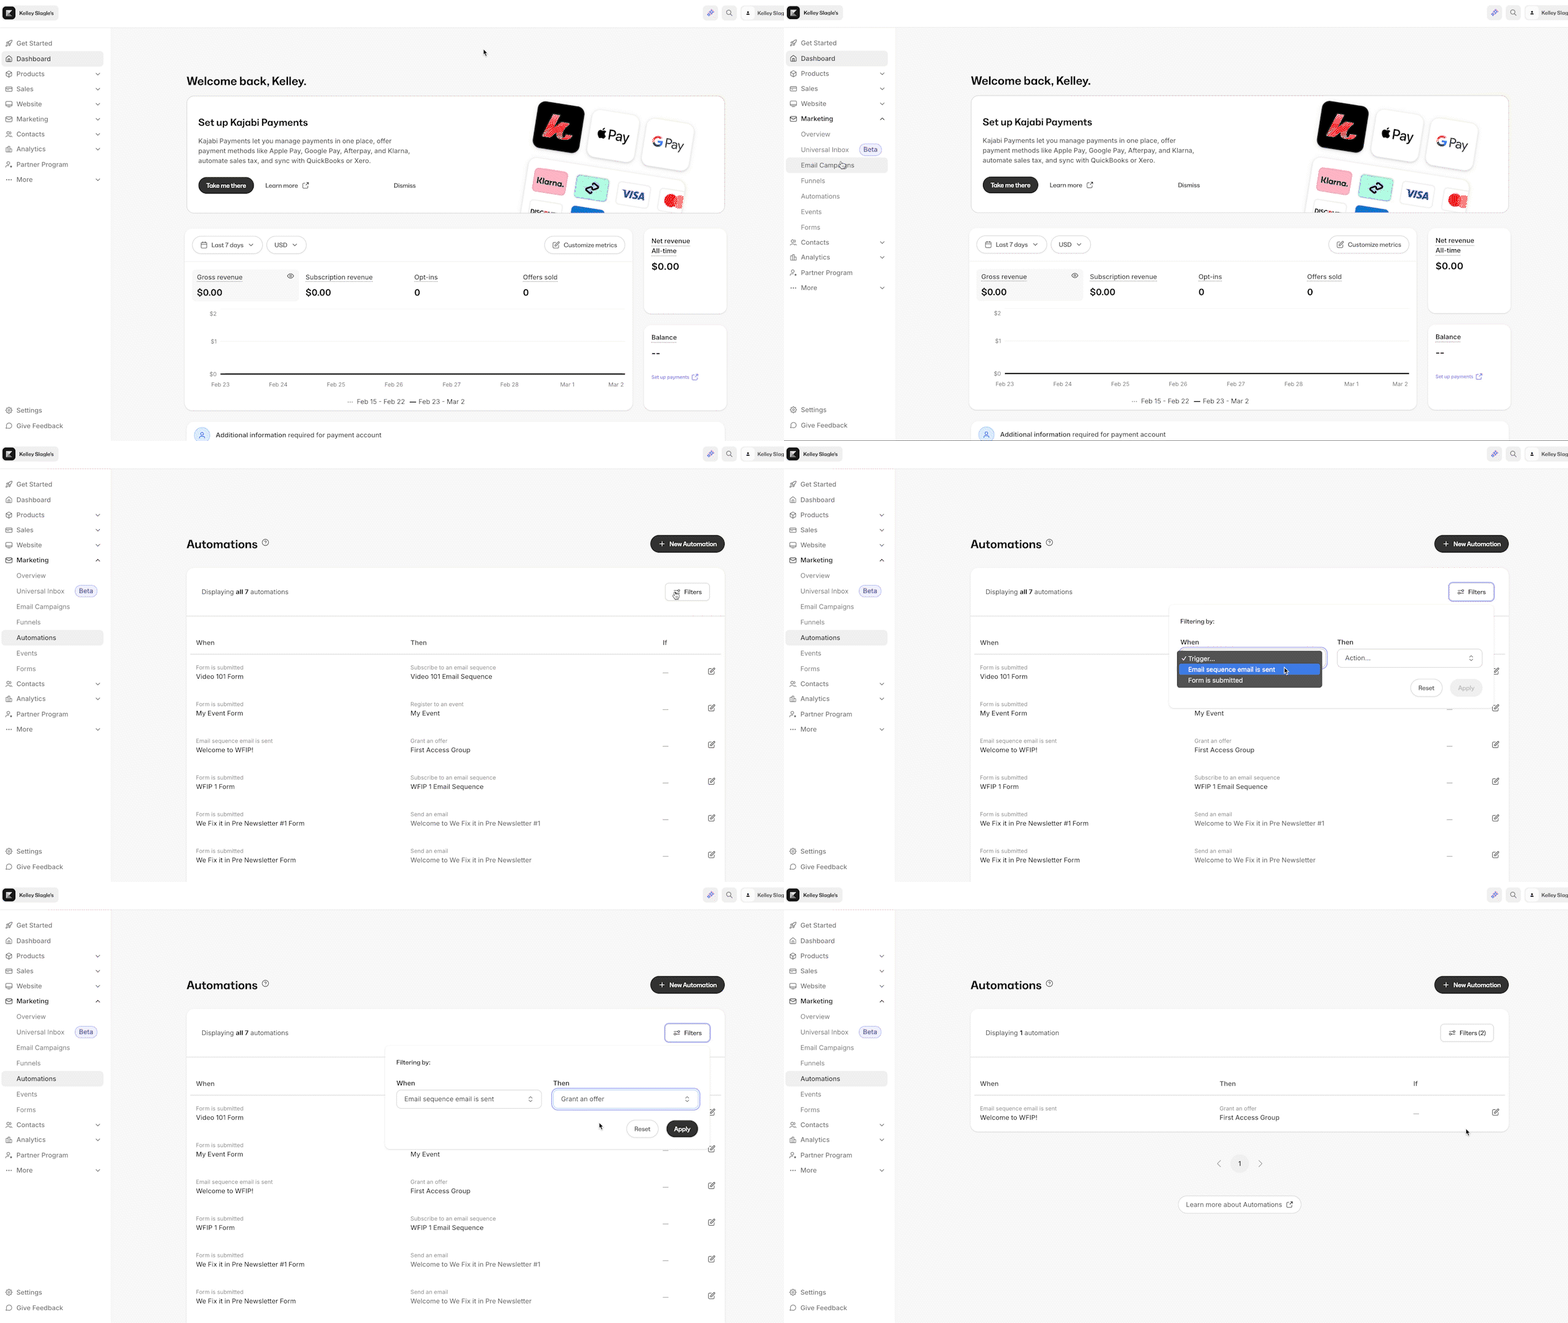
Search through your library of Automations in your **Automations** tab by using filters:
1. Open the **Marketing** tab from your Dashboard.
2. Click **Automations**.
3. Open **Filters**.
4. Select the **When Trigger** from the dropdown.
5. Select the **Then Action** from the dropdown.
6. Click **Apply** to view your filtered results.
[Learn about Certificates of Completion](/articles/products/courses/course-completion-certificates)
## Filter Automations
Search through your library of Automations in your **Automations** tab by using filters:
1. Open the **Marketing** tab from your Dashboard.
2. Click **Automations**.
3. Open **Filters**.
4. Select the **When Trigger** from the dropdown.
5. Select the **Then Action** from the dropdown.
6. Click **Apply** to view your filtered results.