> ## Documentation Index
> Fetch the complete documentation index at: https://help.kajabi.com/llms.txt
> Use this file to discover all available pages before exploring further.
# Send an email to a single contact
> Send an Email Broadcast to a single contact using a custom segment filter.
Send an **Email Broadcast** to a single contact by creating a custom segment filter with their email address.
## Email Broadcasts
To send an email to a single contact, you will need to use Kajabi's Email Broadcasts.
Email Broadcasts are a type of marketing email on Kajabi commonly used as Email Blasts, Newsletters, or individually crafted emails sent to a specified audience.
Build and design your Email Broadcasts with the [Email Visual Editor](../../marketing/email-campaigns/email-visual-editor-overview) or the Classic Editor to reach your audience and grow your brand.
[Learn to create an Email Broadcast](../../marketing/email-campaigns/create-an-email-broadcast#h_75d4c608-8b44-47f2-988a-7893cb9a17a5).
**Tip:**
To send an email to a contact, that contact must be subscribed to your marketing emails. If they are not subscribed you will not be able to send that contact an email. Learn more about [subscription status.](../../contacts/manage-your-contacts/what-does-the-subscription-status-mean)
## Send an Email Broadcast to a single contact
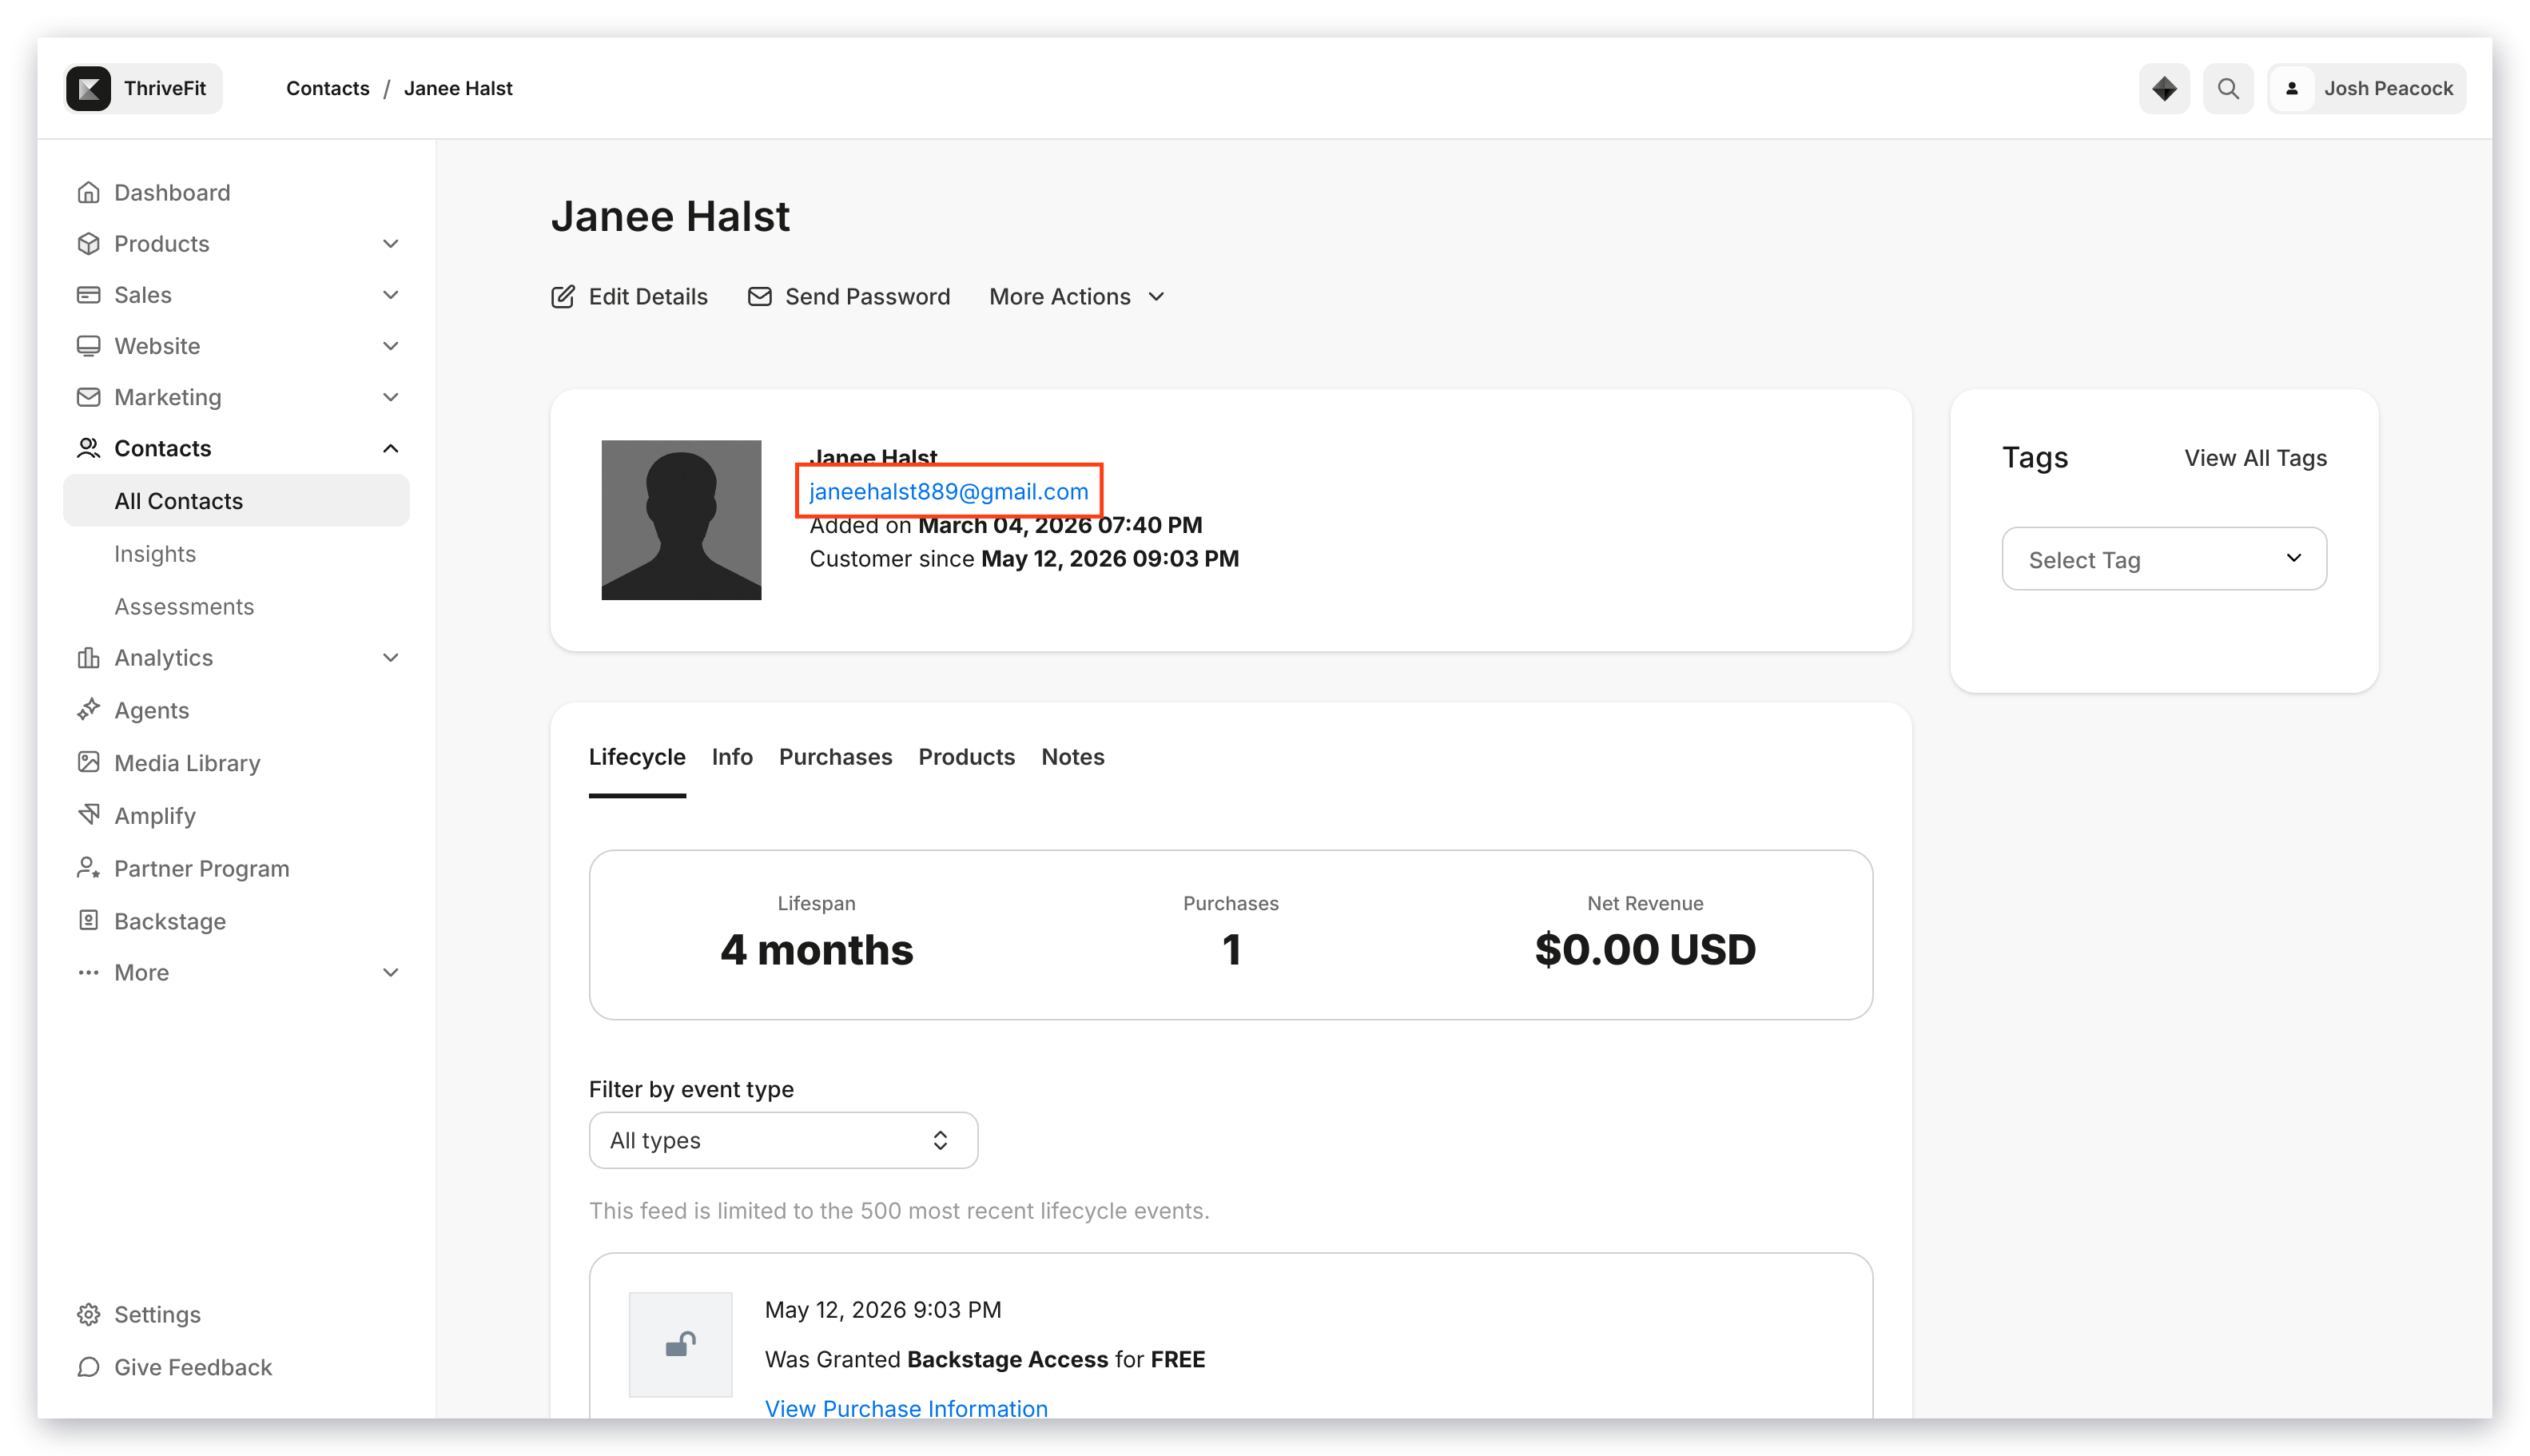
1. Open the **Profile** of the contact you wish to email in your Contacts tab.
2. Copy their email address from the email field:
3. Open the **Email Broadcast** that you wish to send to that contact (if it has already been created) or create an Email Broadcast.
4. Click **Select Recipients**:
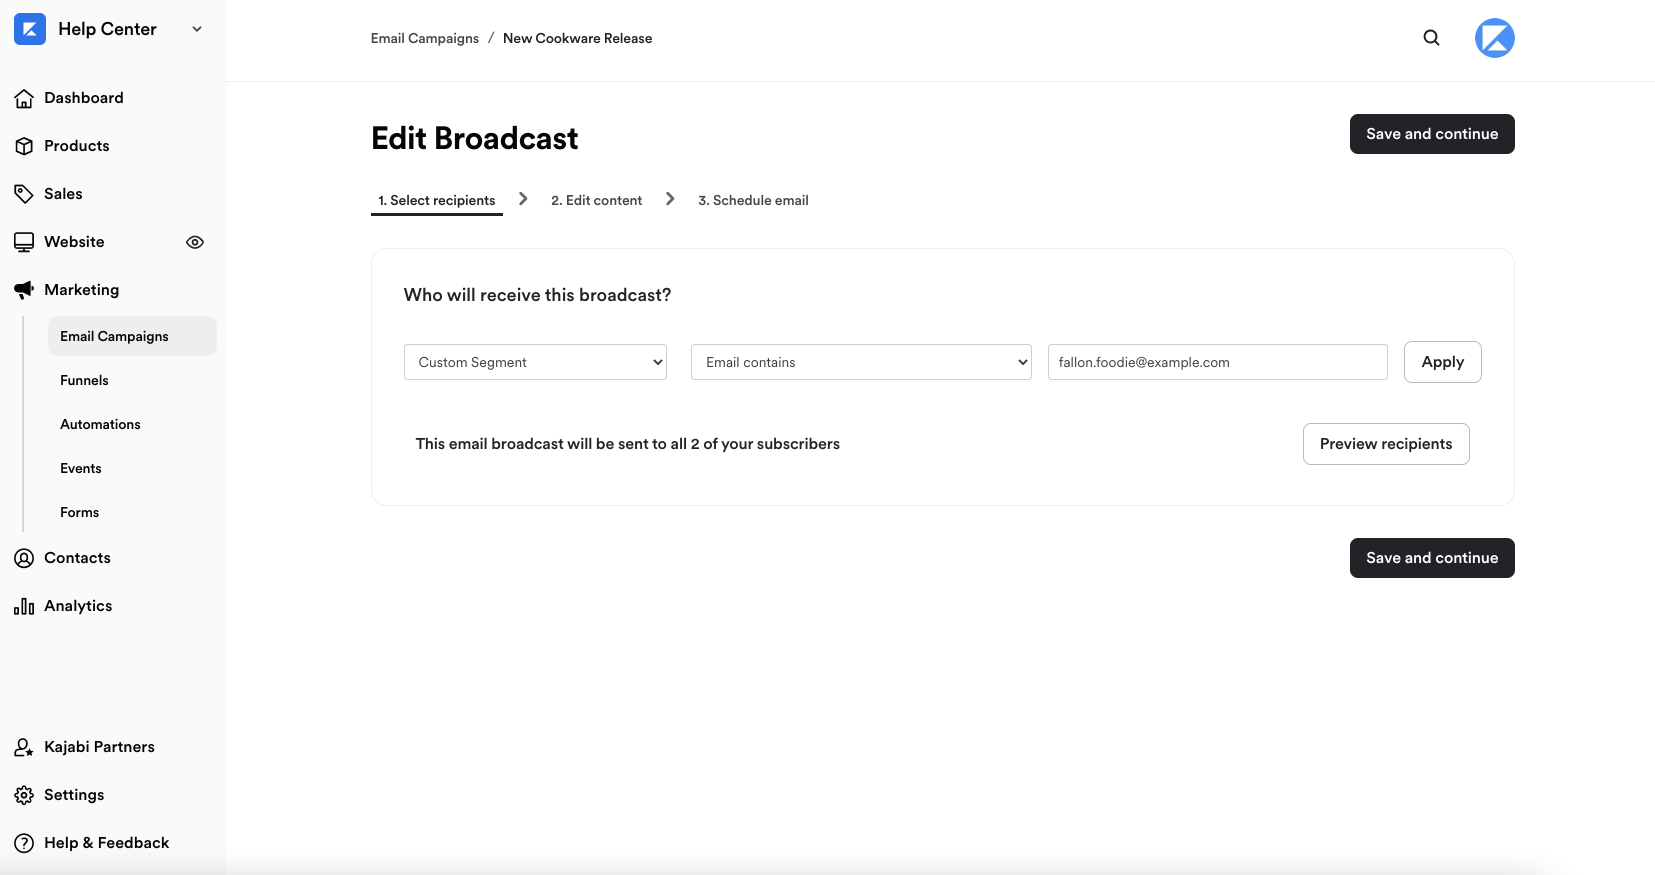
5. On the **Select Recipients** screen, under "Who will receive this broadcast?" open the **dropdown menu**.
6. Click **Custom Segment**.
7. Open the **Select Filter** dropdown menu.
8. Select **Email Contains** under "Default Field Filters".
9. Paste your chosen contact's email address in the empty field box. Your custom filter should look similar to the image below:
10. After adding your selected contact, click **Apply**:
 3. Open the **Email Broadcast** that you wish to send to that contact (if it has already been created) or create an Email Broadcast.
4. Click **Select Recipients**:
3. Open the **Email Broadcast** that you wish to send to that contact (if it has already been created) or create an Email Broadcast.
4. Click **Select Recipients**:
 10. After adding your selected contact, click **Apply**: