> ## Documentation Index
> Fetch the complete documentation index at: https://help.kajabi.com/llms.txt
> Use this file to discover all available pages before exploring further.
# Additional steps to change Google Cloud IAP Policy
> Complete these steps if you receive the IAM policy update failed error code.
If you receive the **IAM policy update failed** error code while configuring Google Cloud, follow the steps below to resolve it by updating roles and organizational policies.
## Add another role
1. Make sure that you are logged in with your **Organization Administrator** account
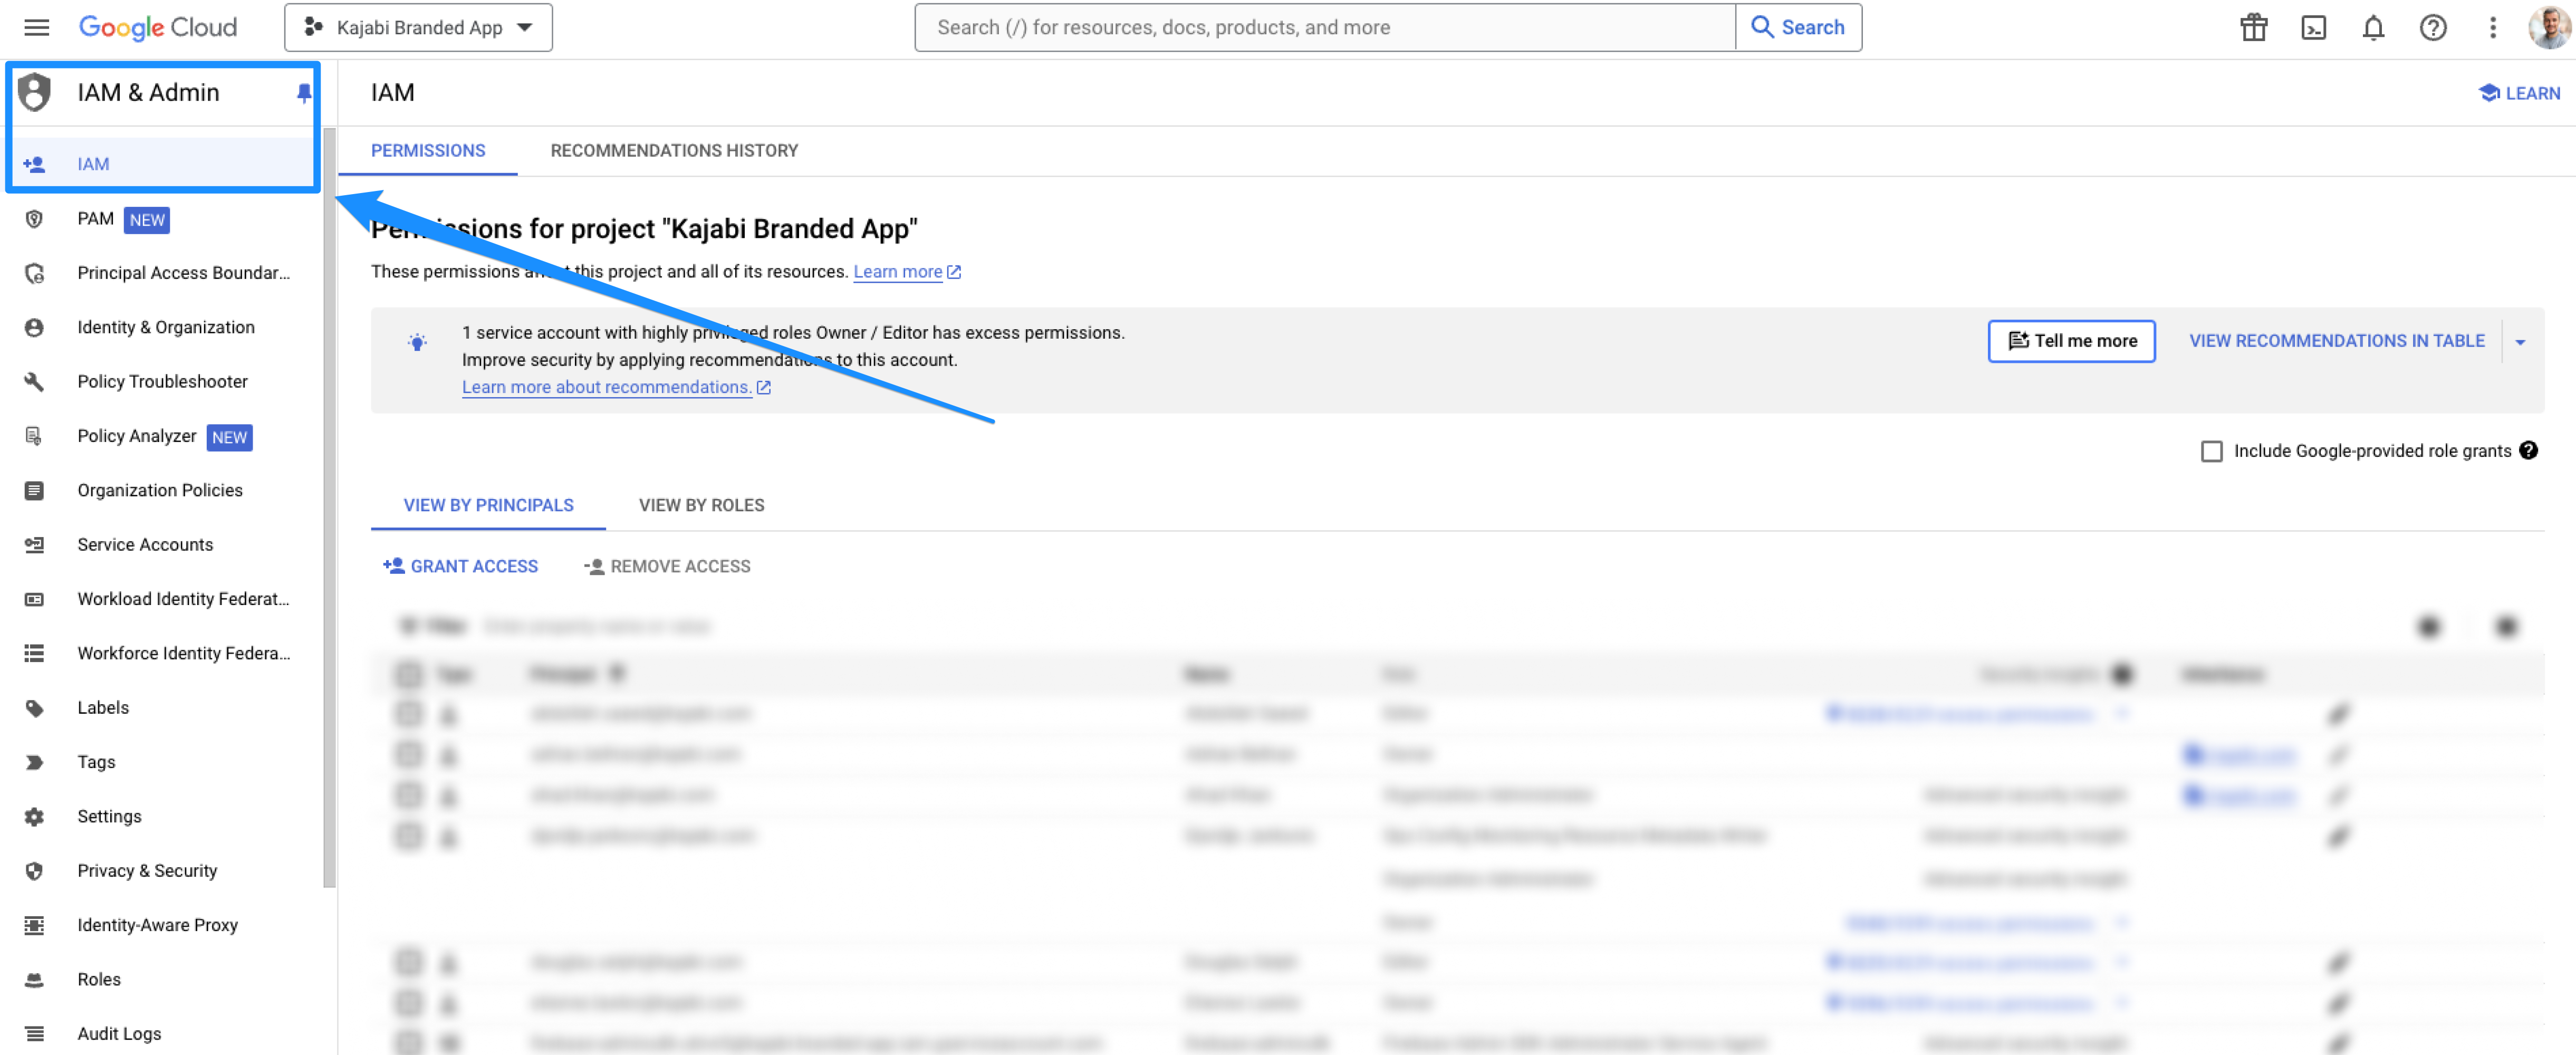
2. Open the **IAM** tab in the left menu:
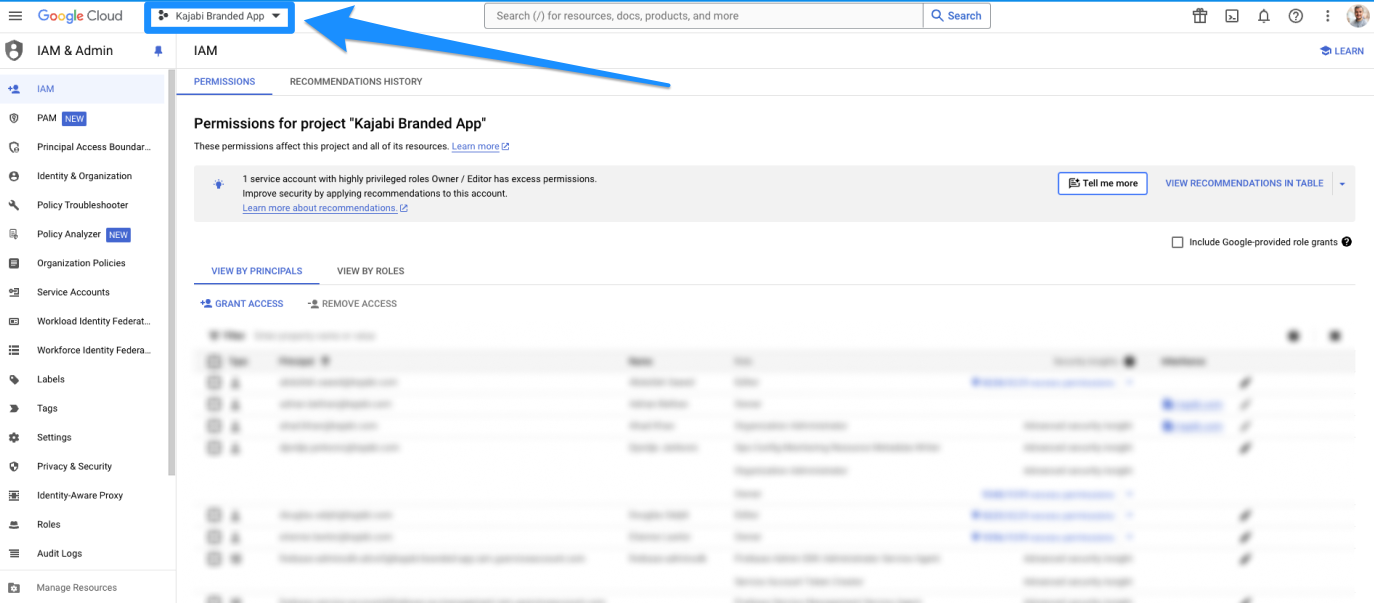
 3. Open the dropdown menu in the top-left corner:
 4. Select the organization (the organization will have a building icon next to it):
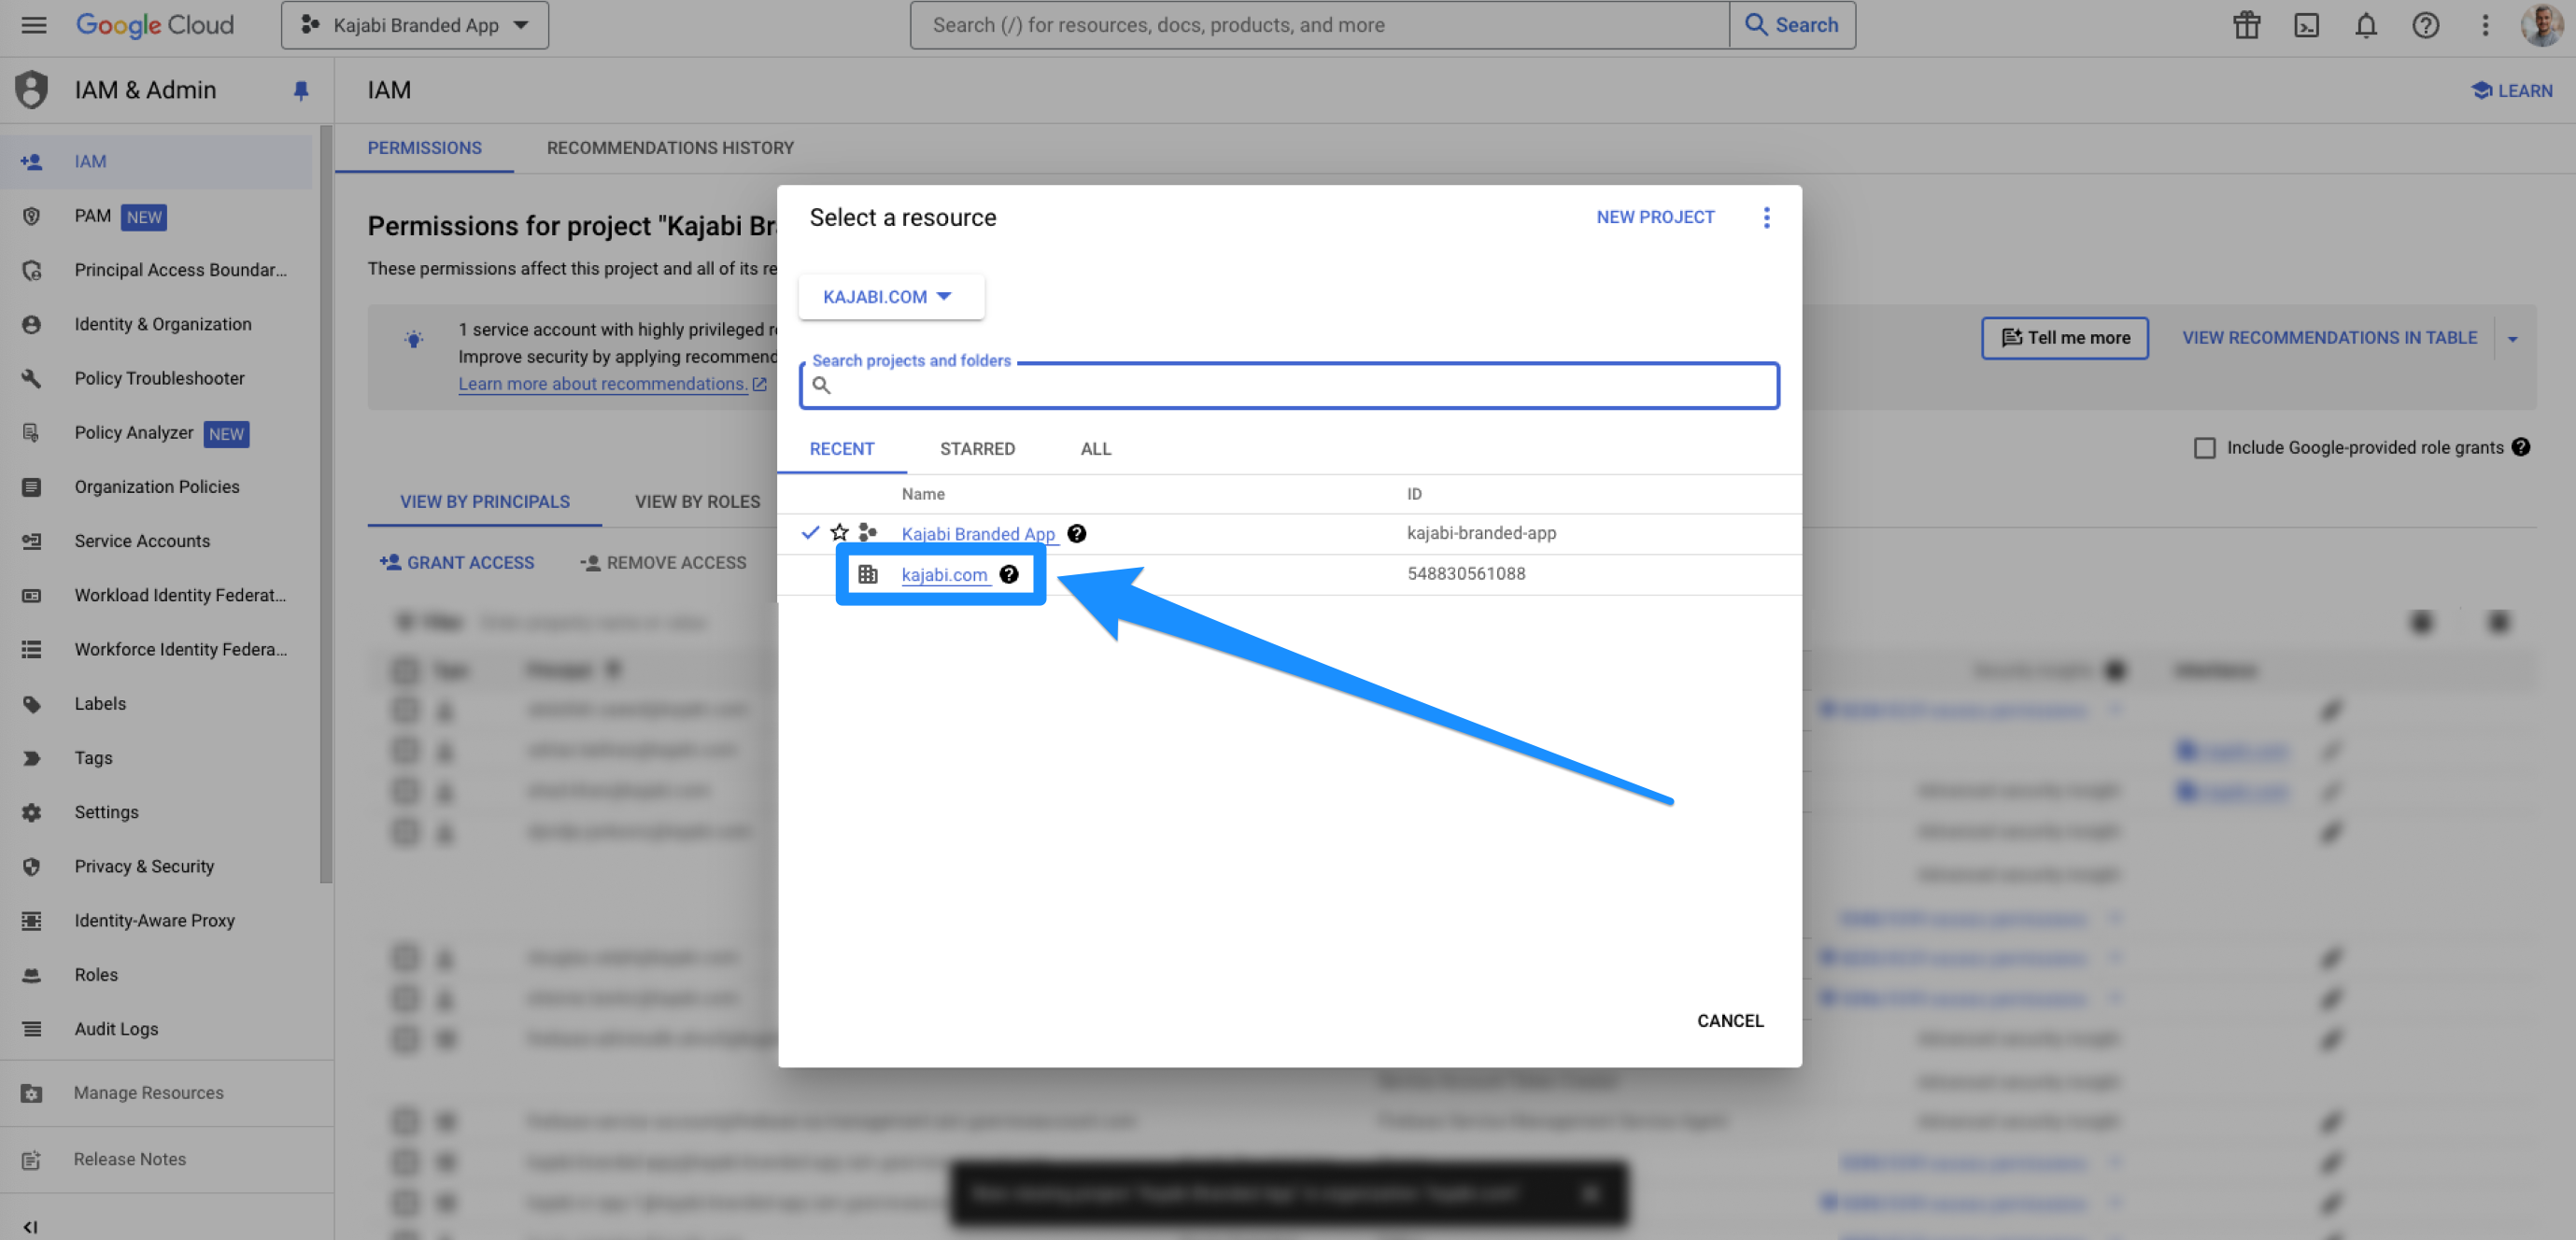 * If the organization does not show up to be selected, then you must add it first:
* Click **Cancel**
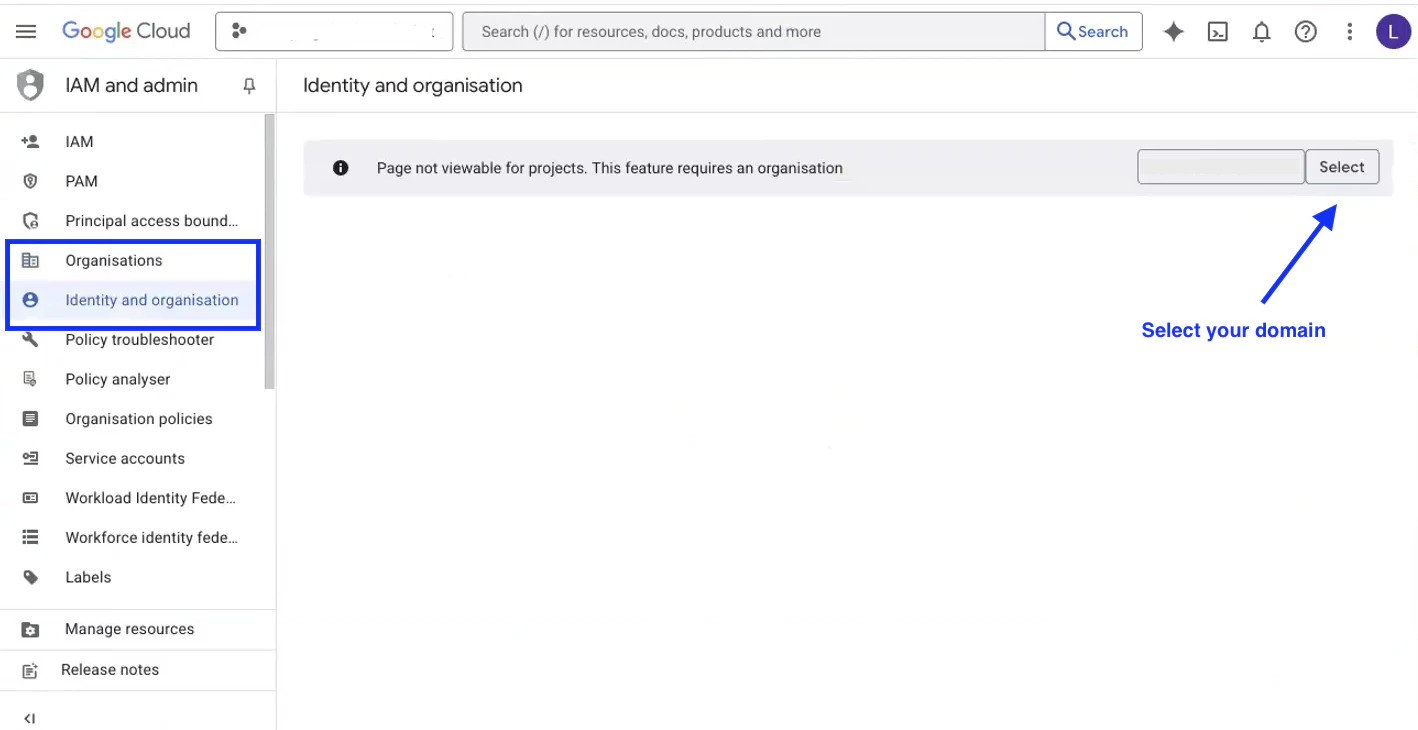
* Open the **Organizations** tab OR the **Identity & Organization** tab *(Google can display this step in either)* from the left sidebar
* Click **Select** next to the organization domain to add it to the project:
* If the organization does not show up to be selected, then you must add it first:
* Click **Cancel**
* Open the **Organizations** tab OR the **Identity & Organization** tab *(Google can display this step in either)* from the left sidebar
* Click **Select** next to the organization domain to add it to the project:
 * Be sure the organization is now selected in the dropdown and that you are in the **IAM** tab located in the left menu
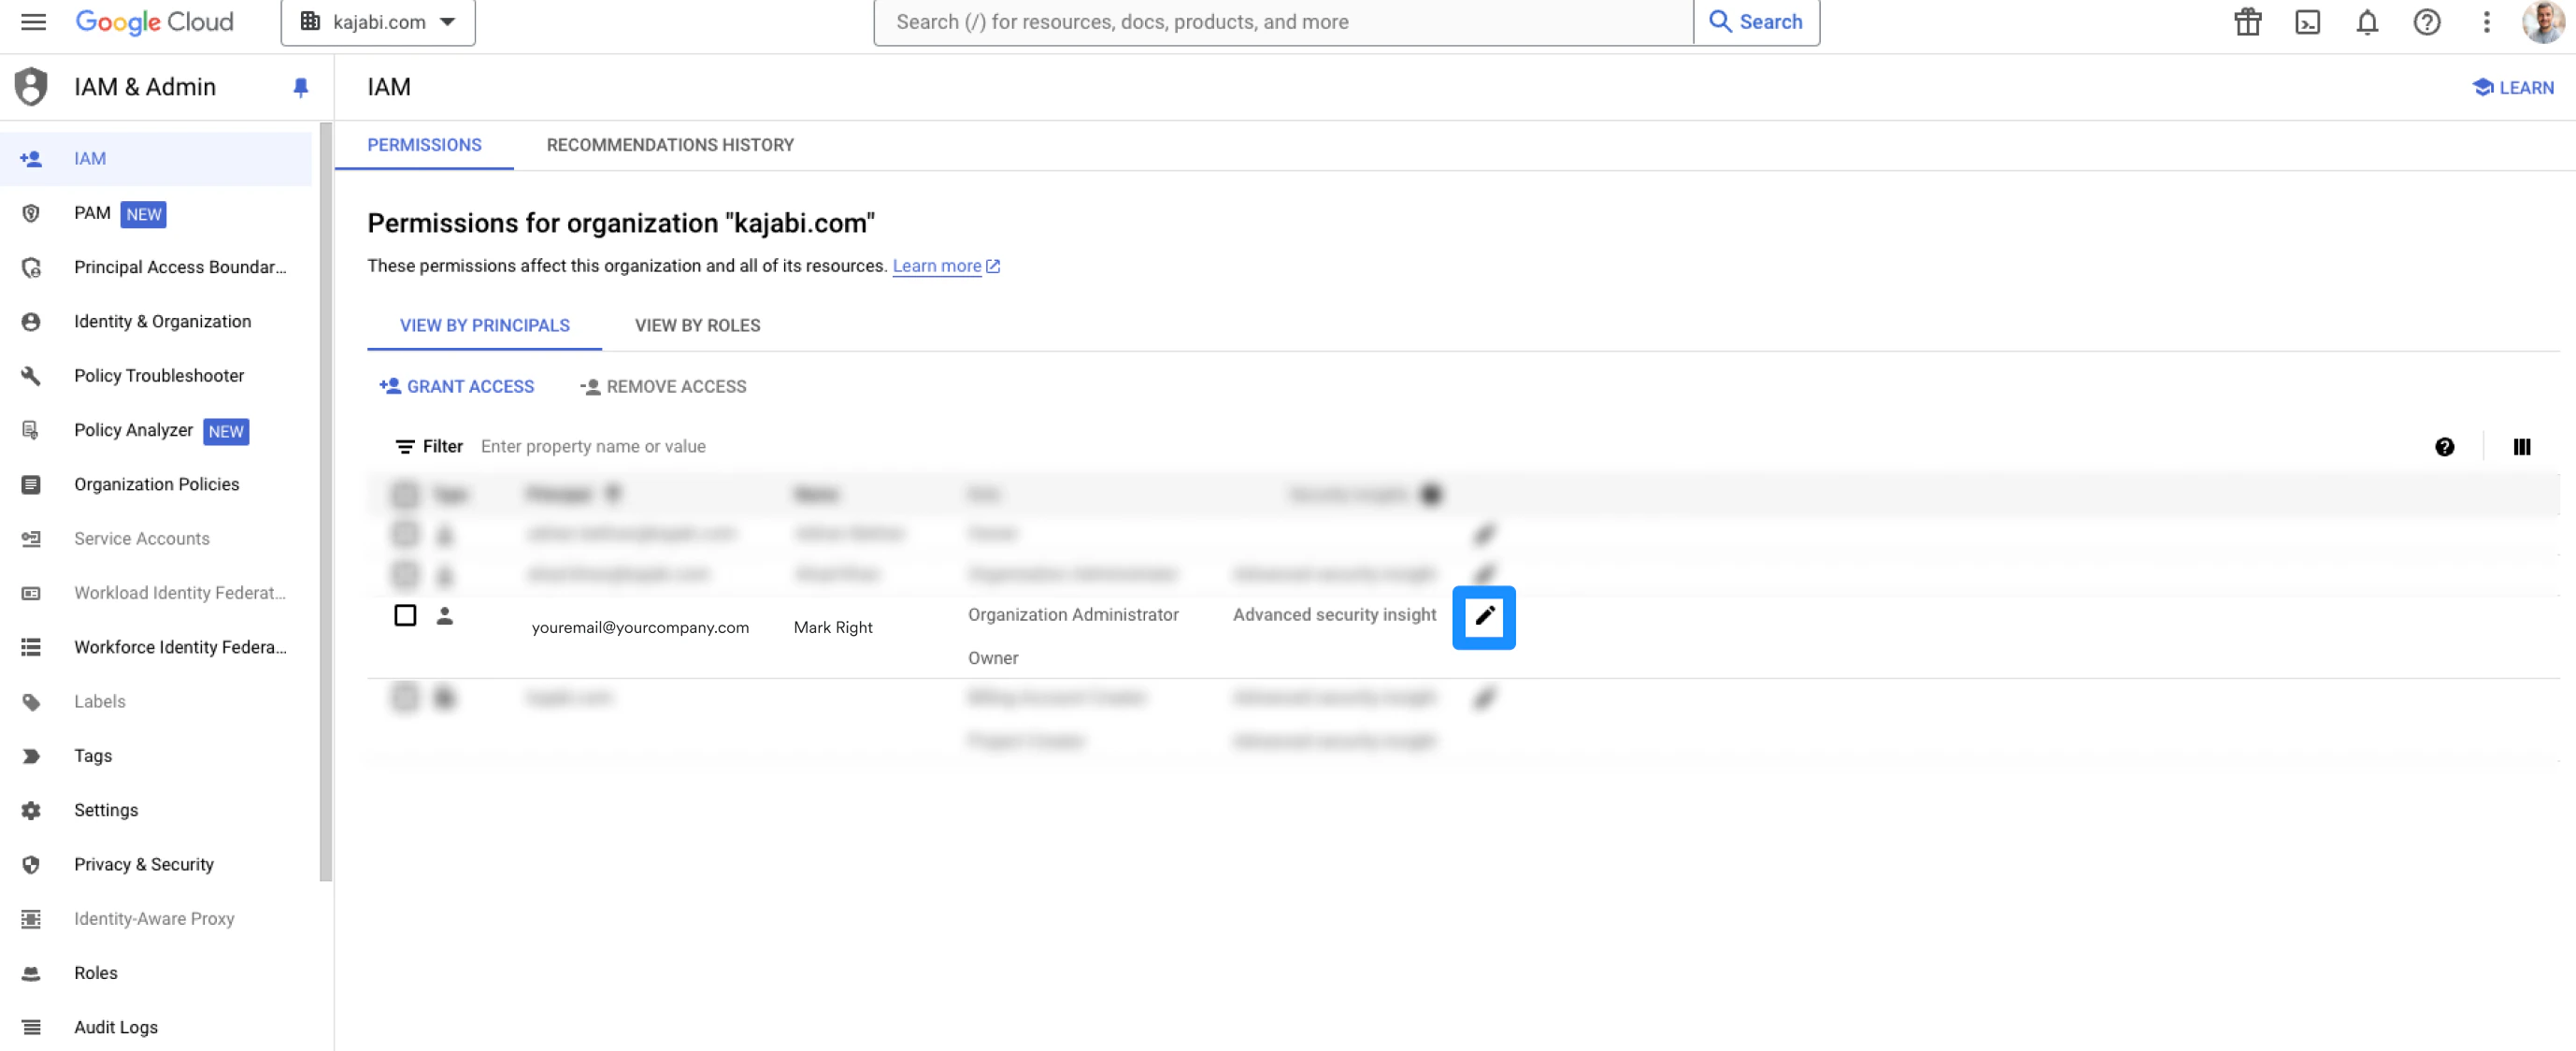
5. Then, click the pencil icon next to the email account:
* Be sure the organization is now selected in the dropdown and that you are in the **IAM** tab located in the left menu
5. Then, click the pencil icon next to the email account:
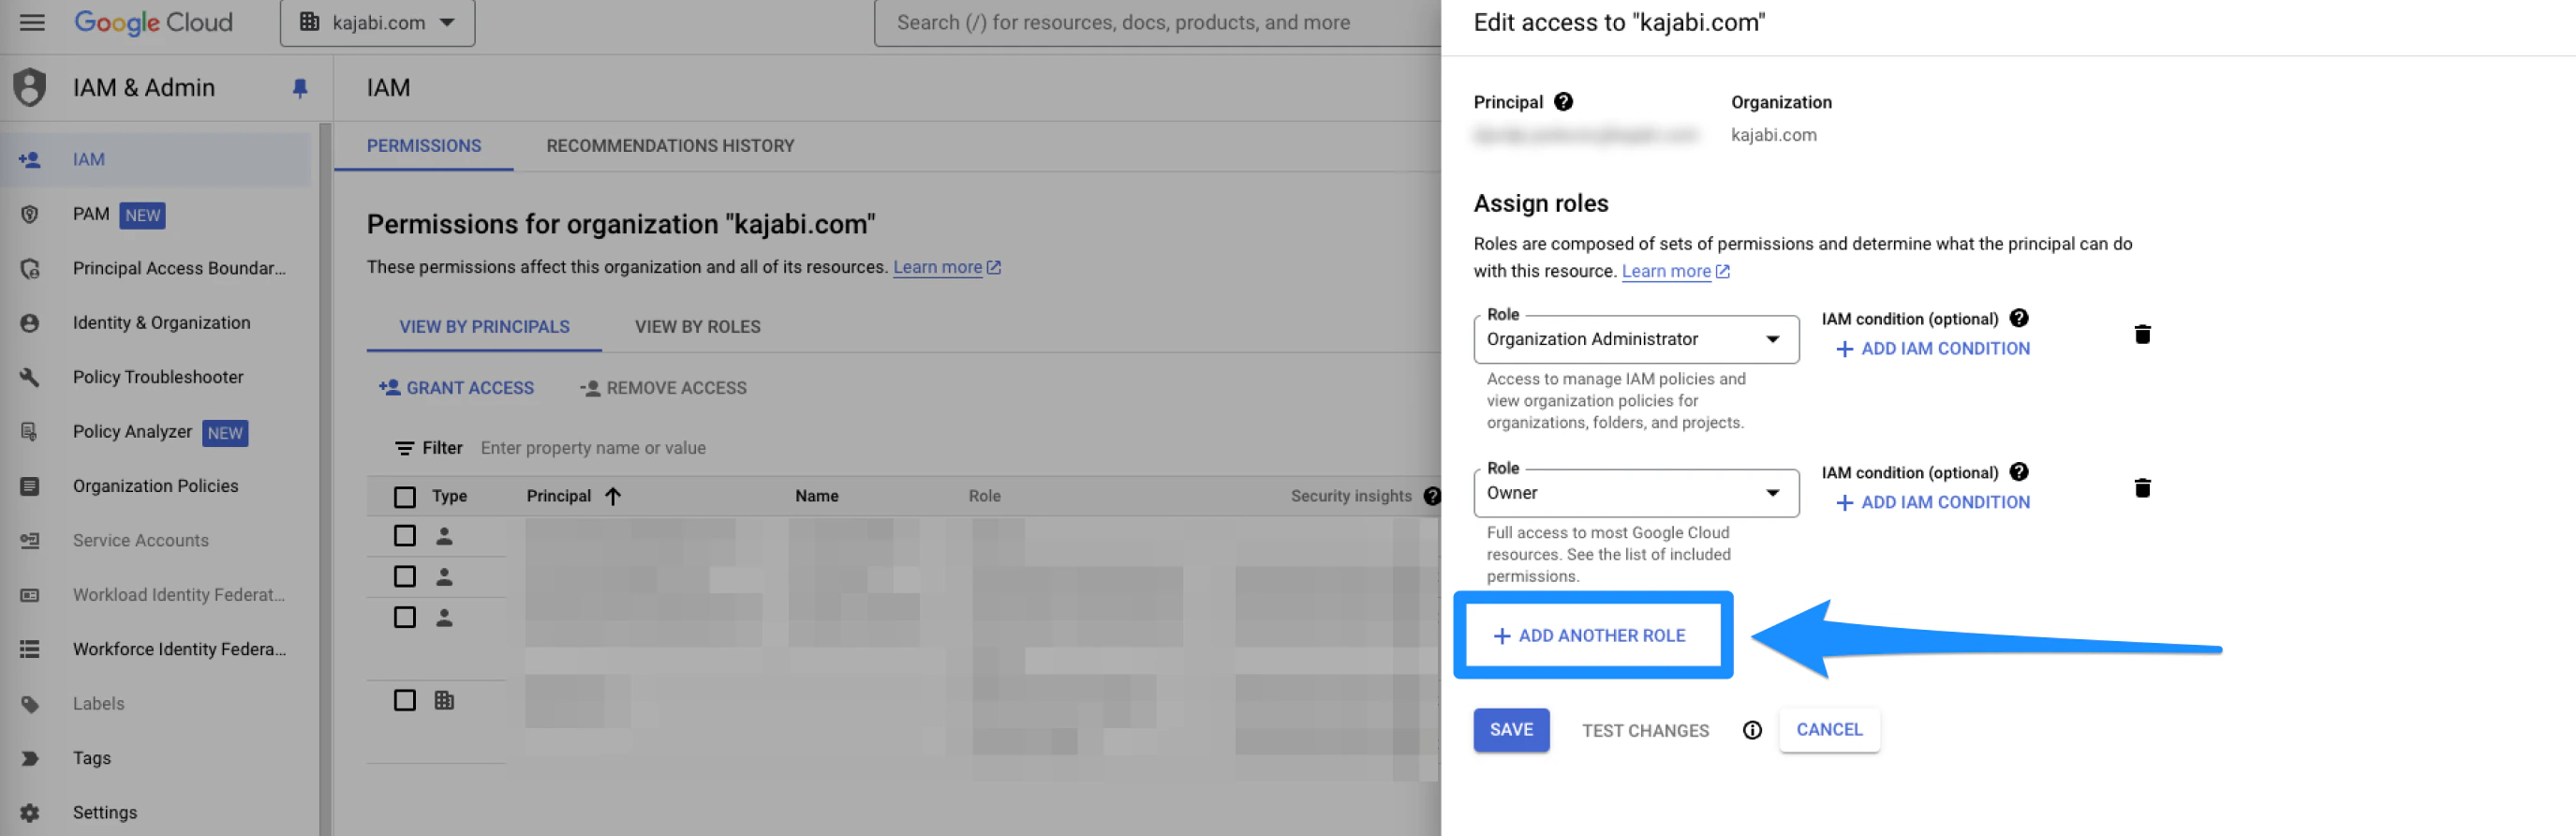
 6. Click **add another role**:
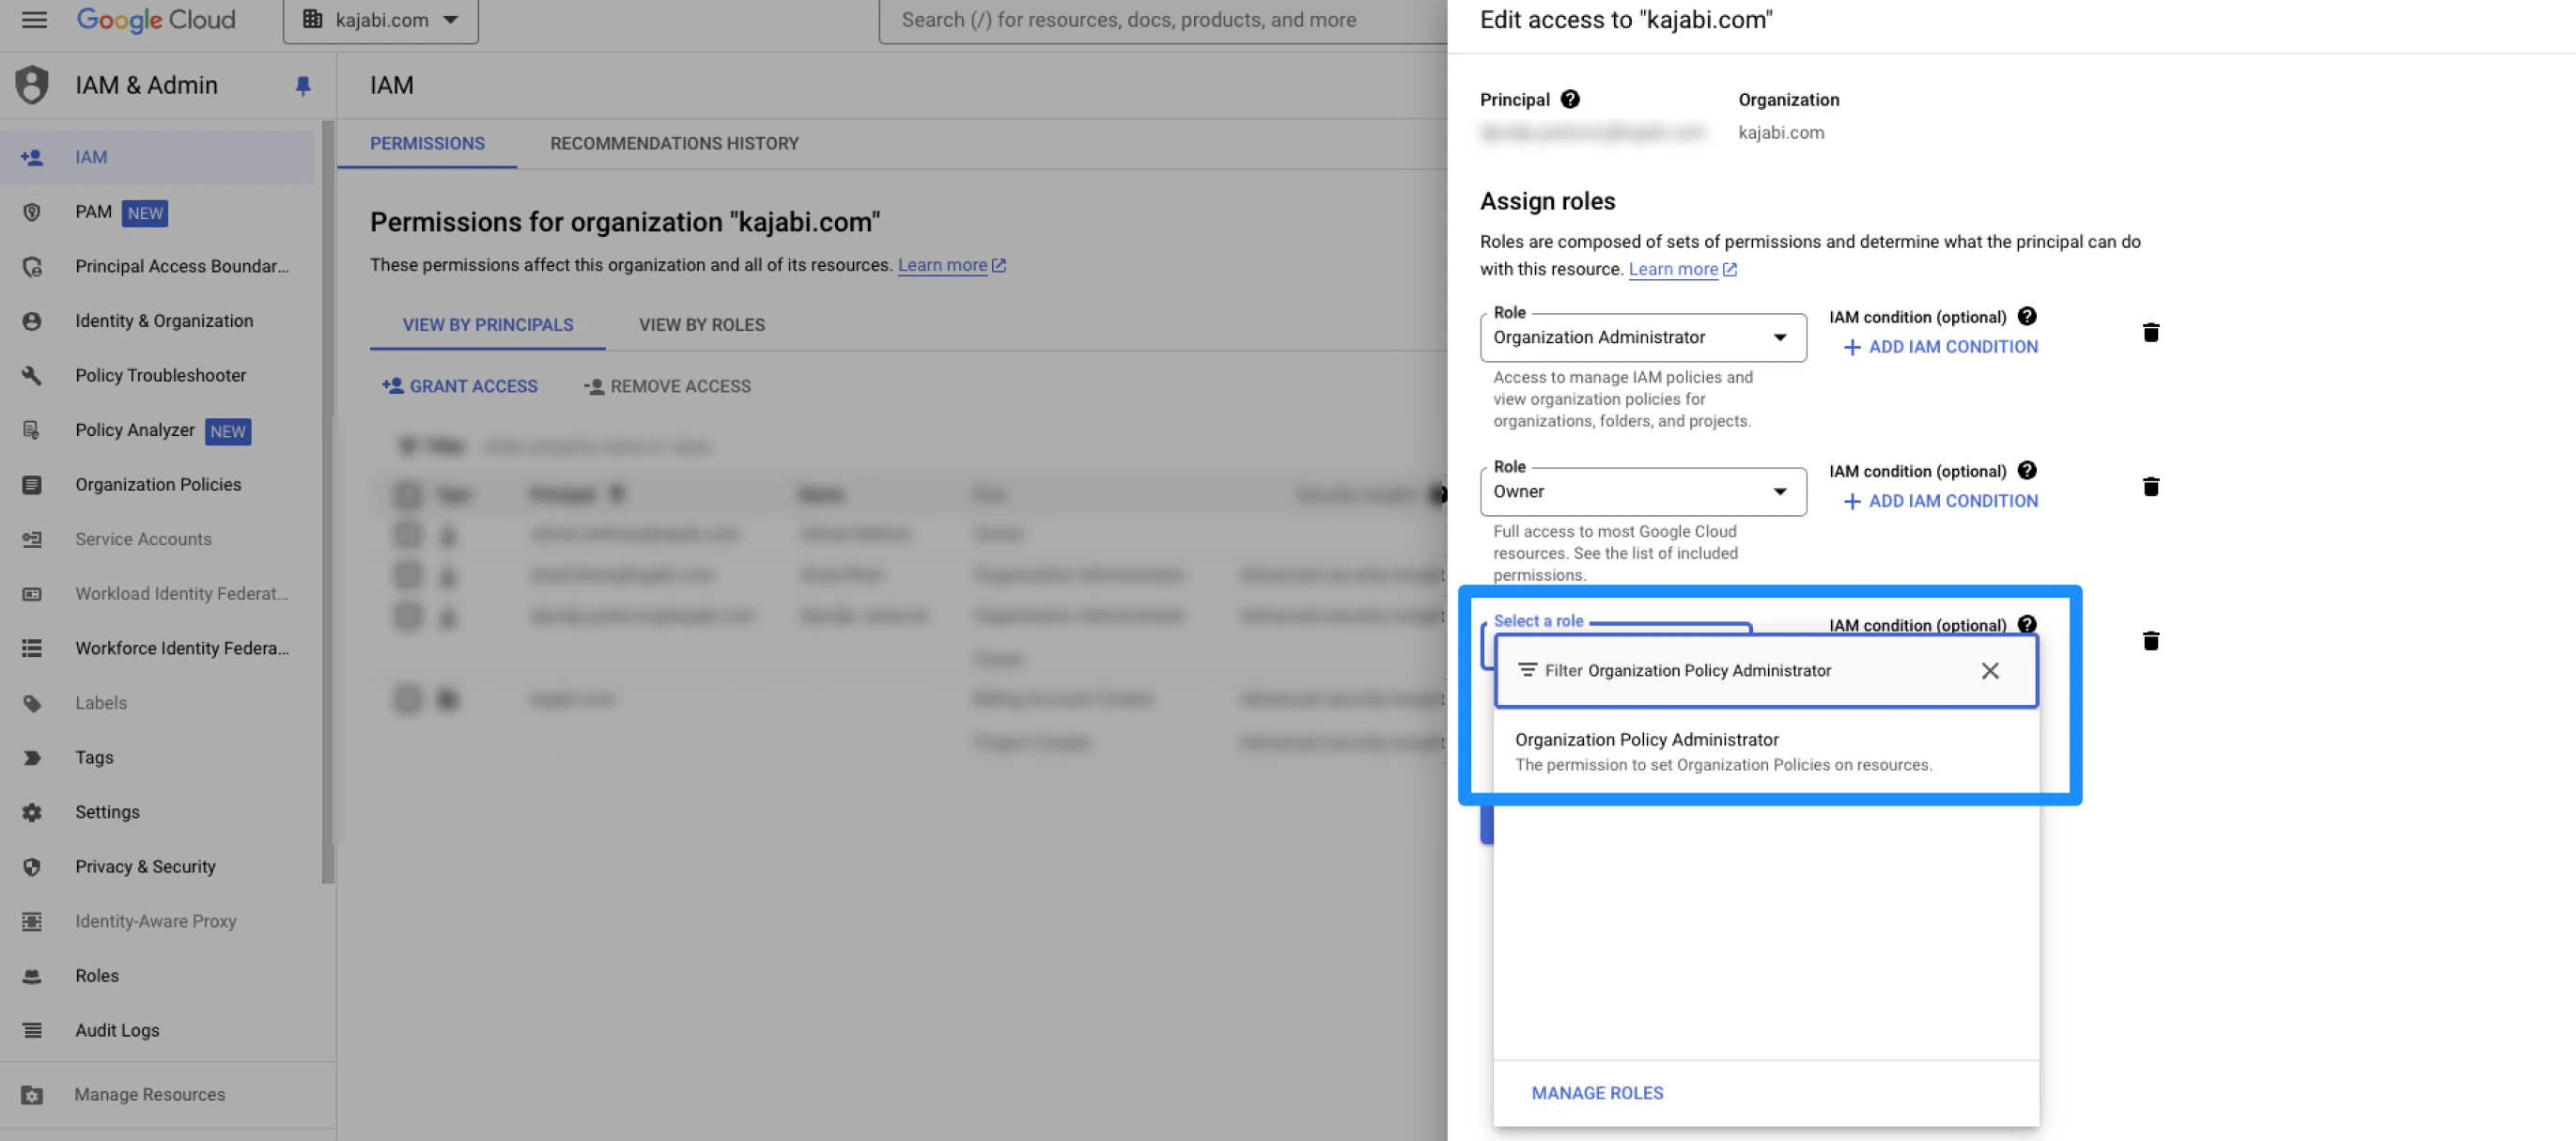
 * Search for the **organization policy administrator** role (you can search for it by typing it in. If you cannot find it, you are likely not logged in with the Organization's Administrator account):
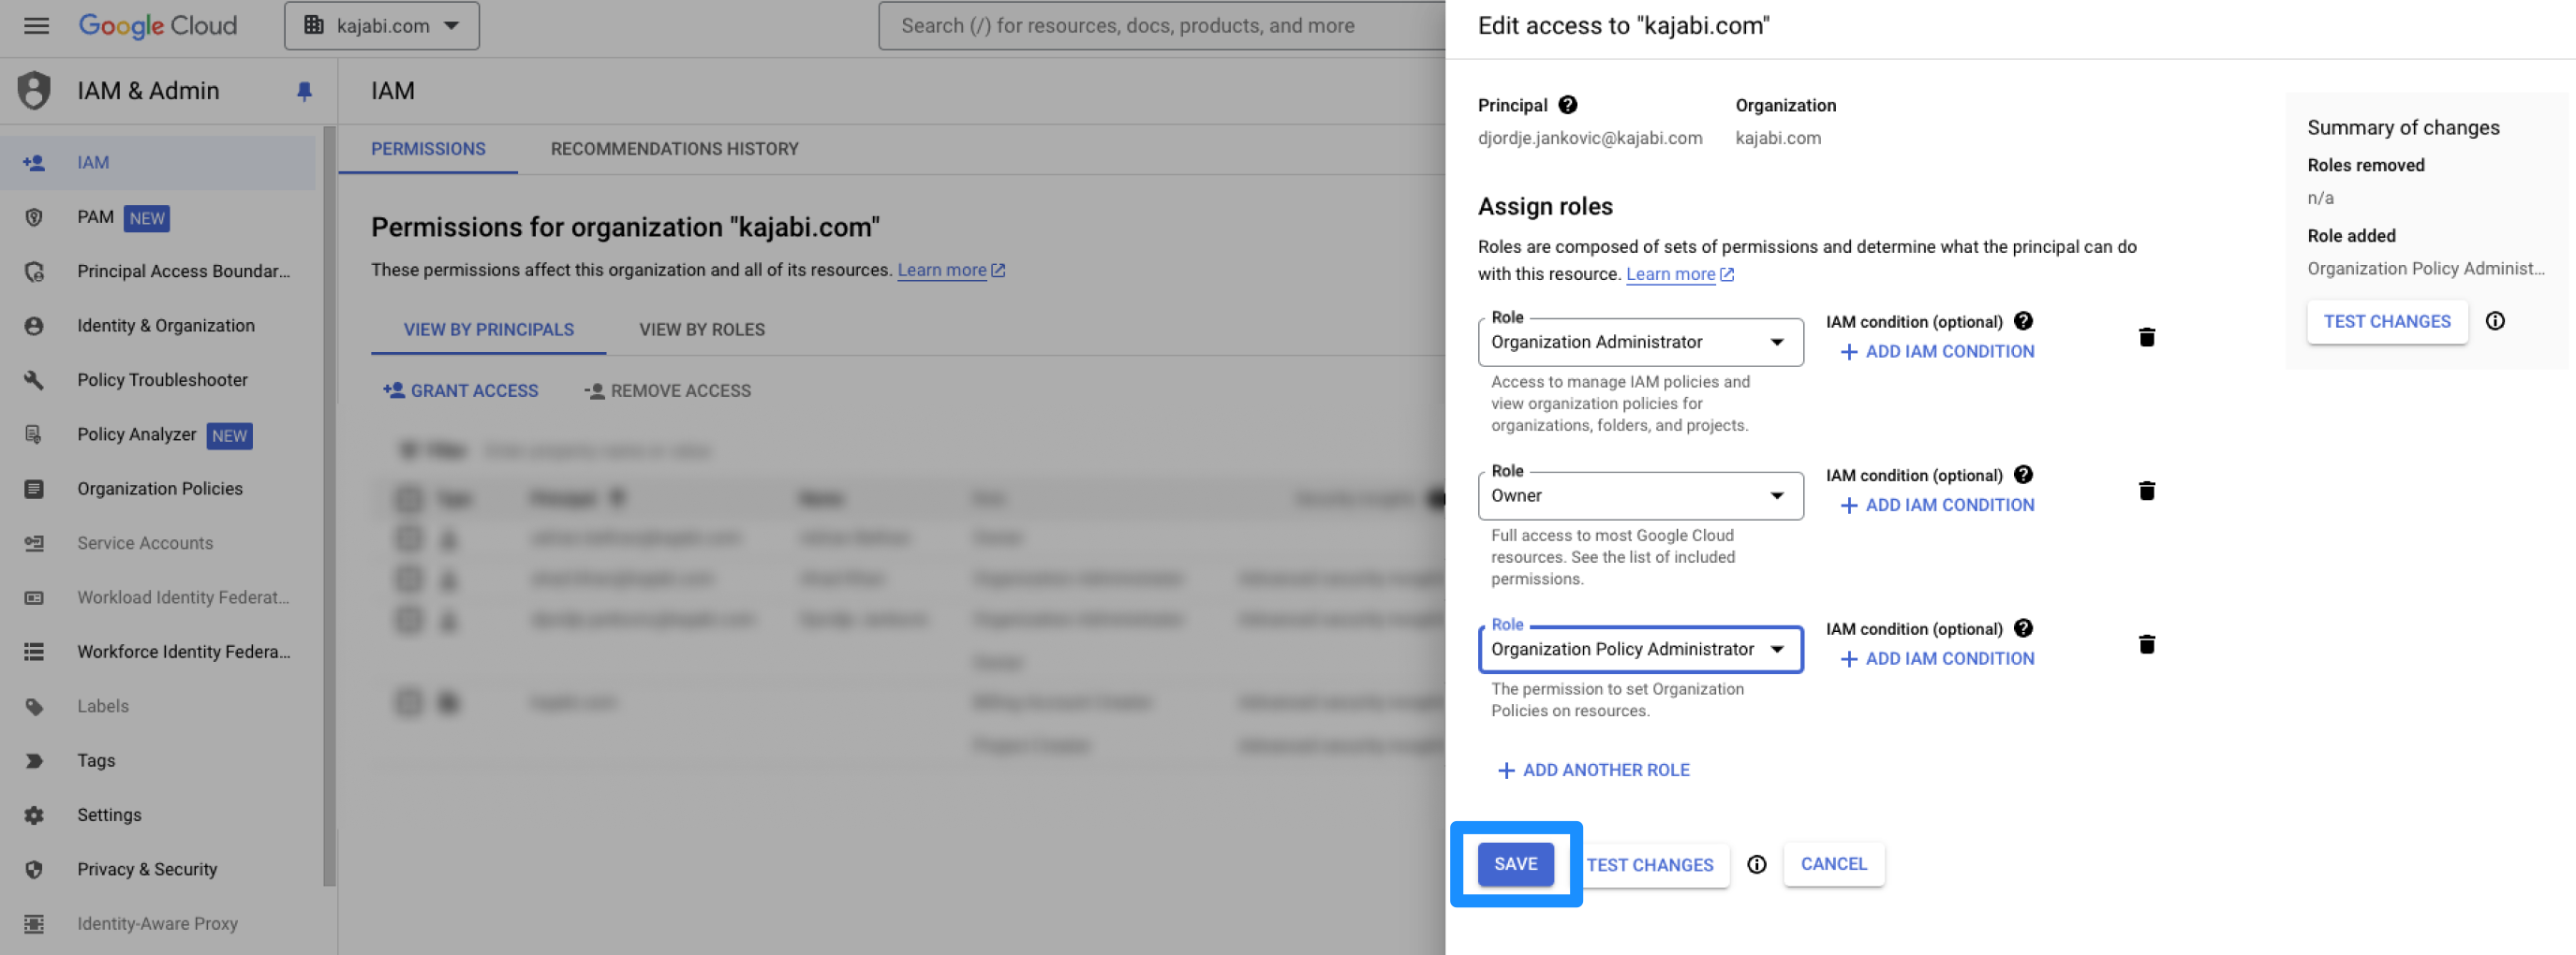
 7. Click **Save** to keep and apply the changes:
 ## Update the organizational policy
1. Open the **Organization Policies** tab from the left sidebar:
## Update the organizational policy
1. Open the **Organization Policies** tab from the left sidebar:
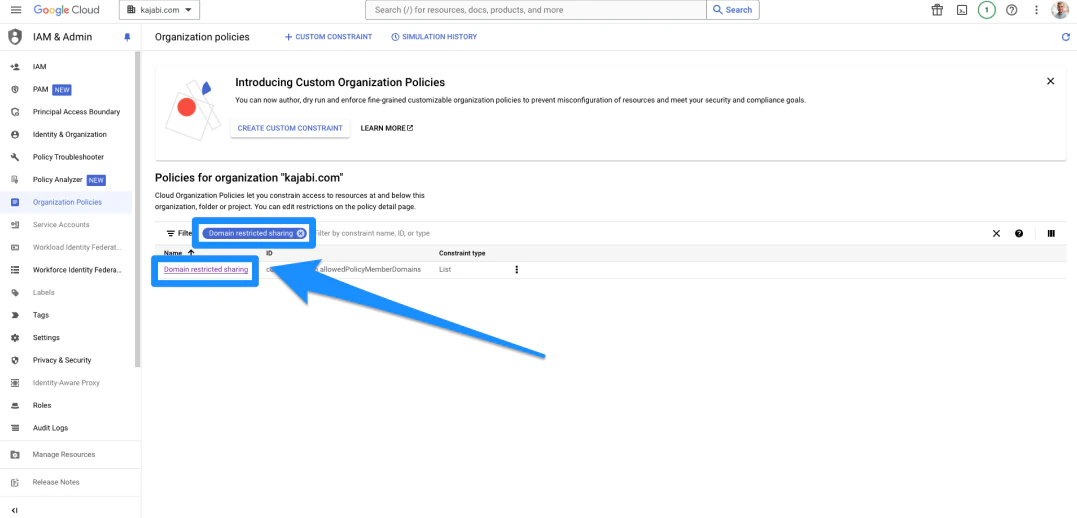
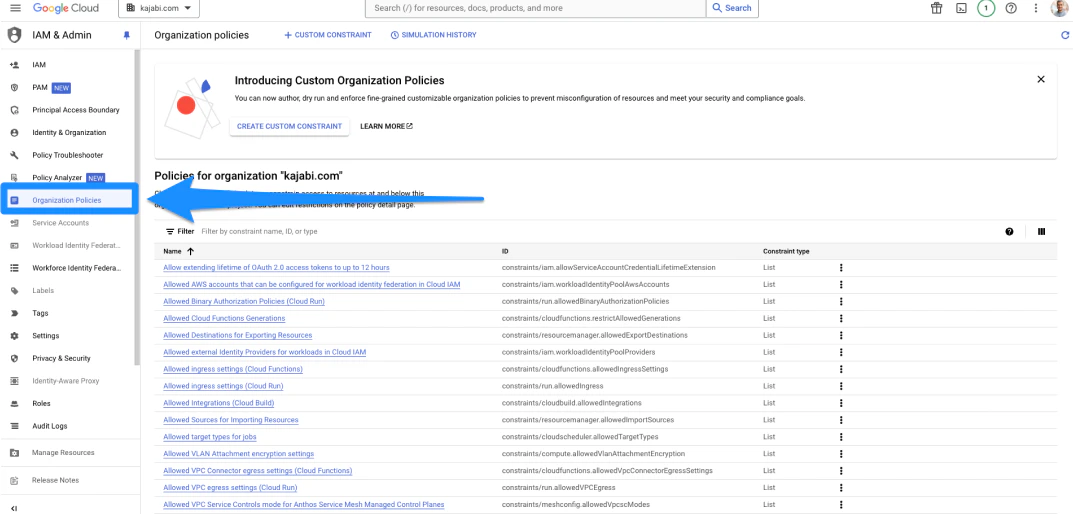 2. In the **Organization Policies** page, search for **Domain Restricted Sharing** from the list of constraints, then click **Domain Restricted Sharing**:
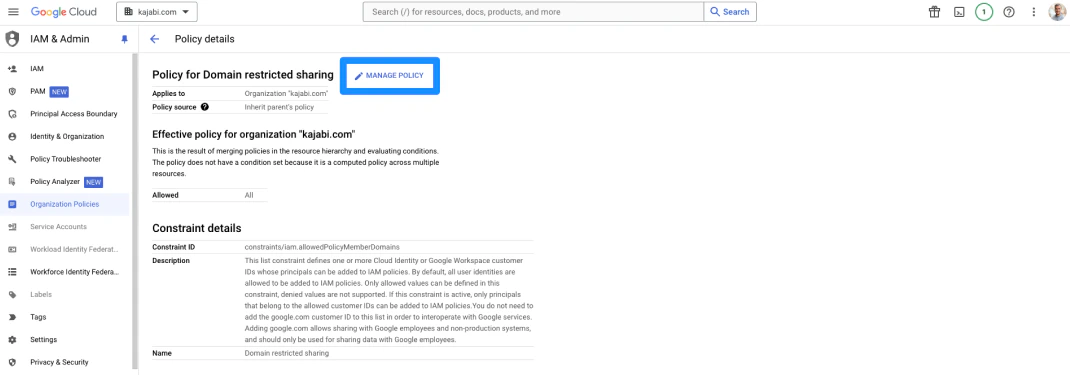
 3. Click **Manage Policy**:
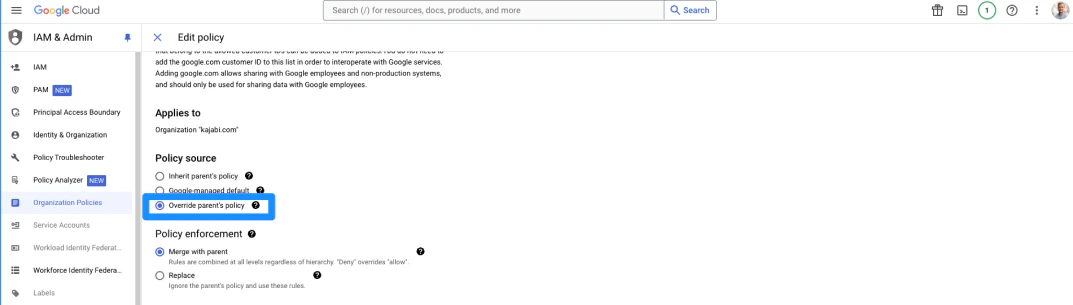
 4. Then, select the **Override Parent's Policy** option:
 * Click the **Replace** option, then click on the rule below and change the dropdown to **Allow All**
* Then, click **Done**:
* Click the **Replace** option, then click on the rule below and change the dropdown to **Allow All**
* Then, click **Done**:
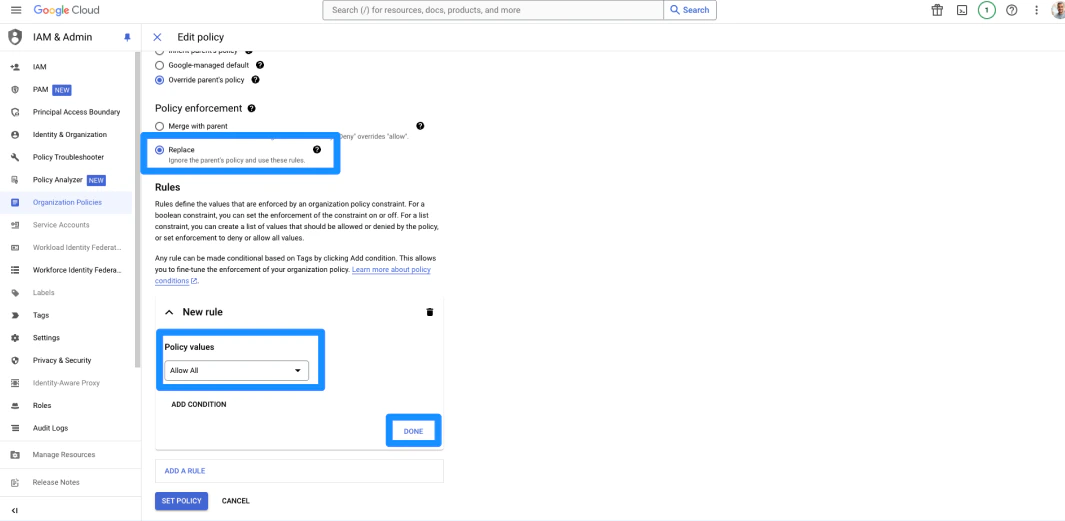 5. Click **Set Policy** to save all changes:
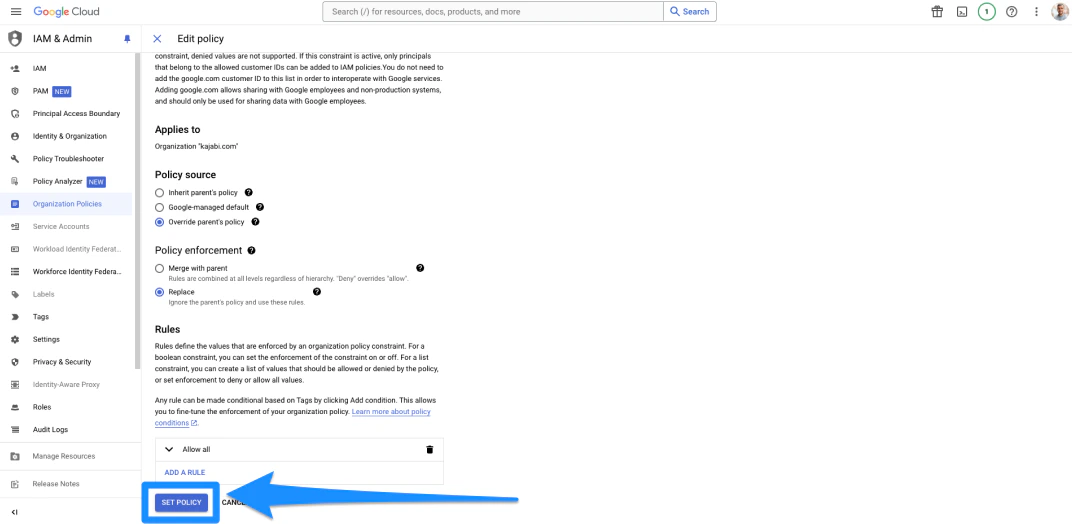 6. Now, return to the **Organizational Policies** tab to open the **Organization Policies** page.
* Search **Disable service account creation** from the list of constraints
* Click **Disable service account creation**:
* You will want to follow these next steps for both links
## Disable service account settings
1. Search **Disable service account key creation** from the list of constraints
6. Now, return to the **Organizational Policies** tab to open the **Organization Policies** page.
* Search **Disable service account creation** from the list of constraints
* Click **Disable service account creation**:
* You will want to follow these next steps for both links
## Disable service account settings
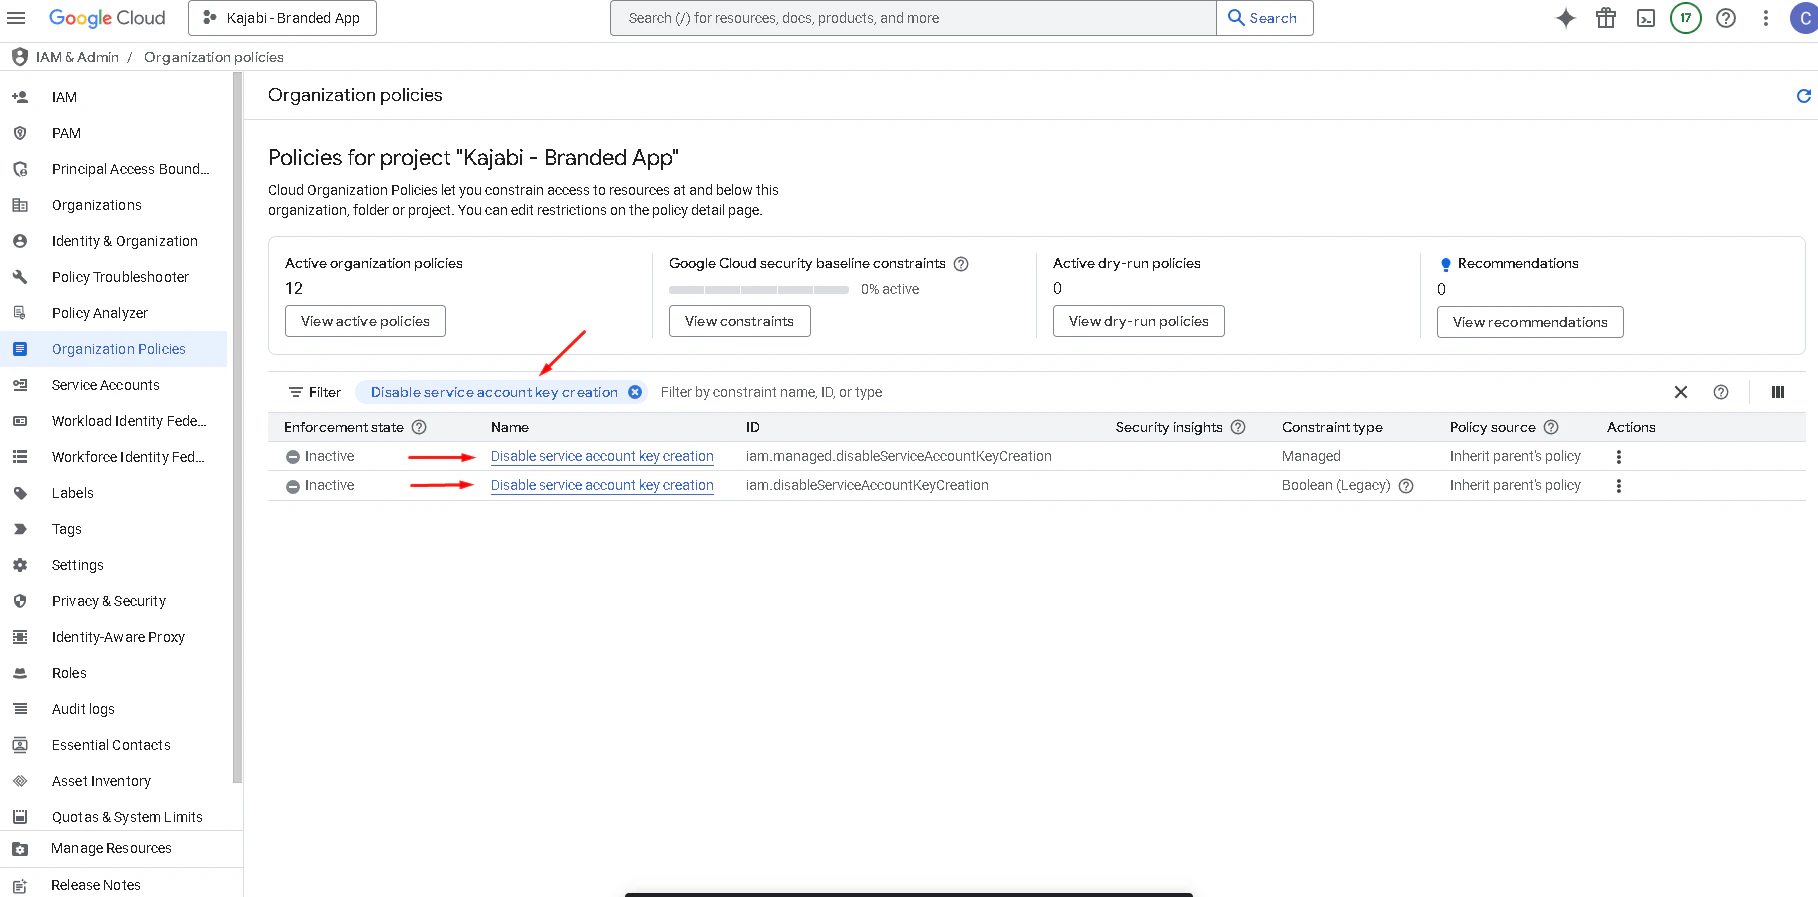
1. Search **Disable service account key creation** from the list of constraints
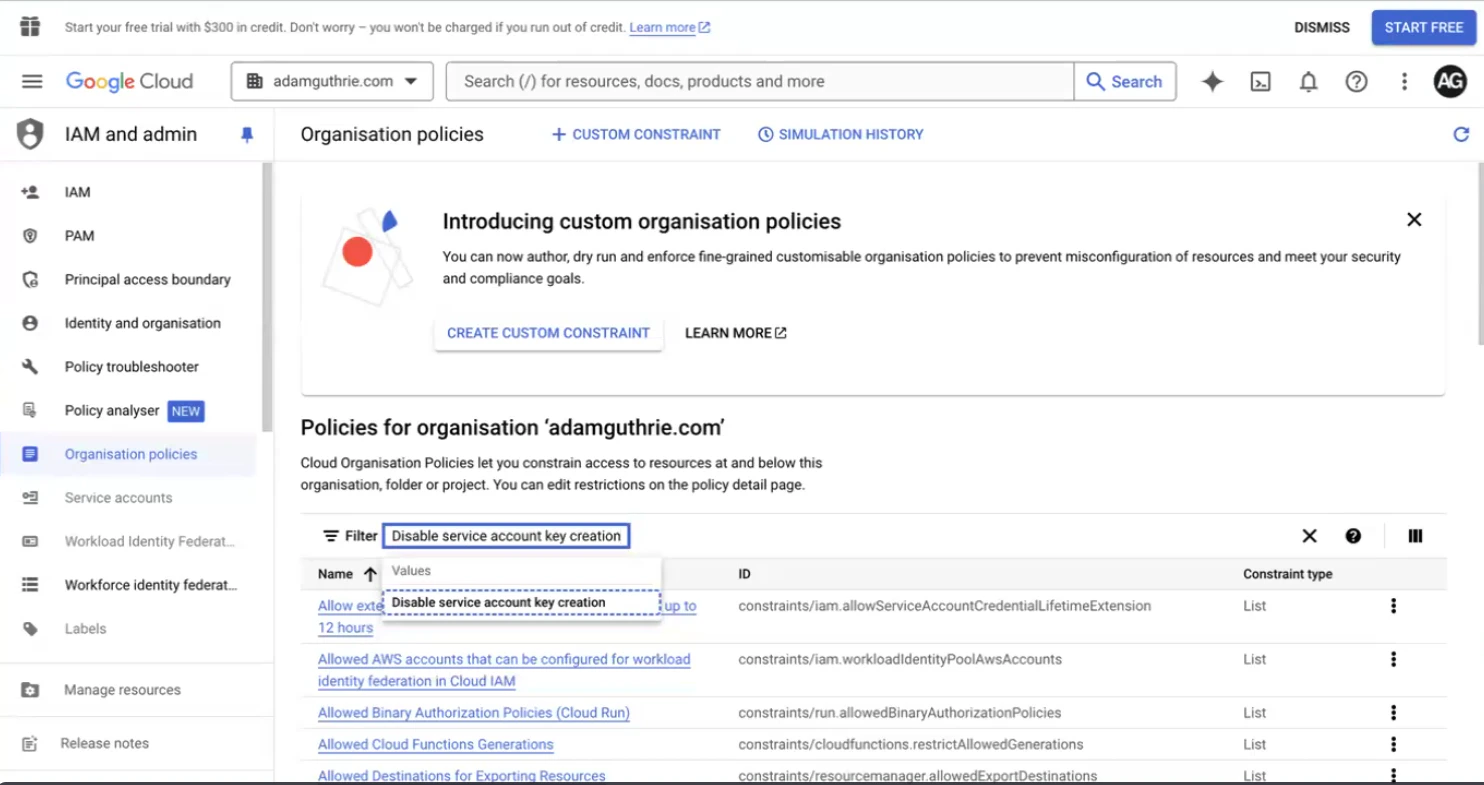
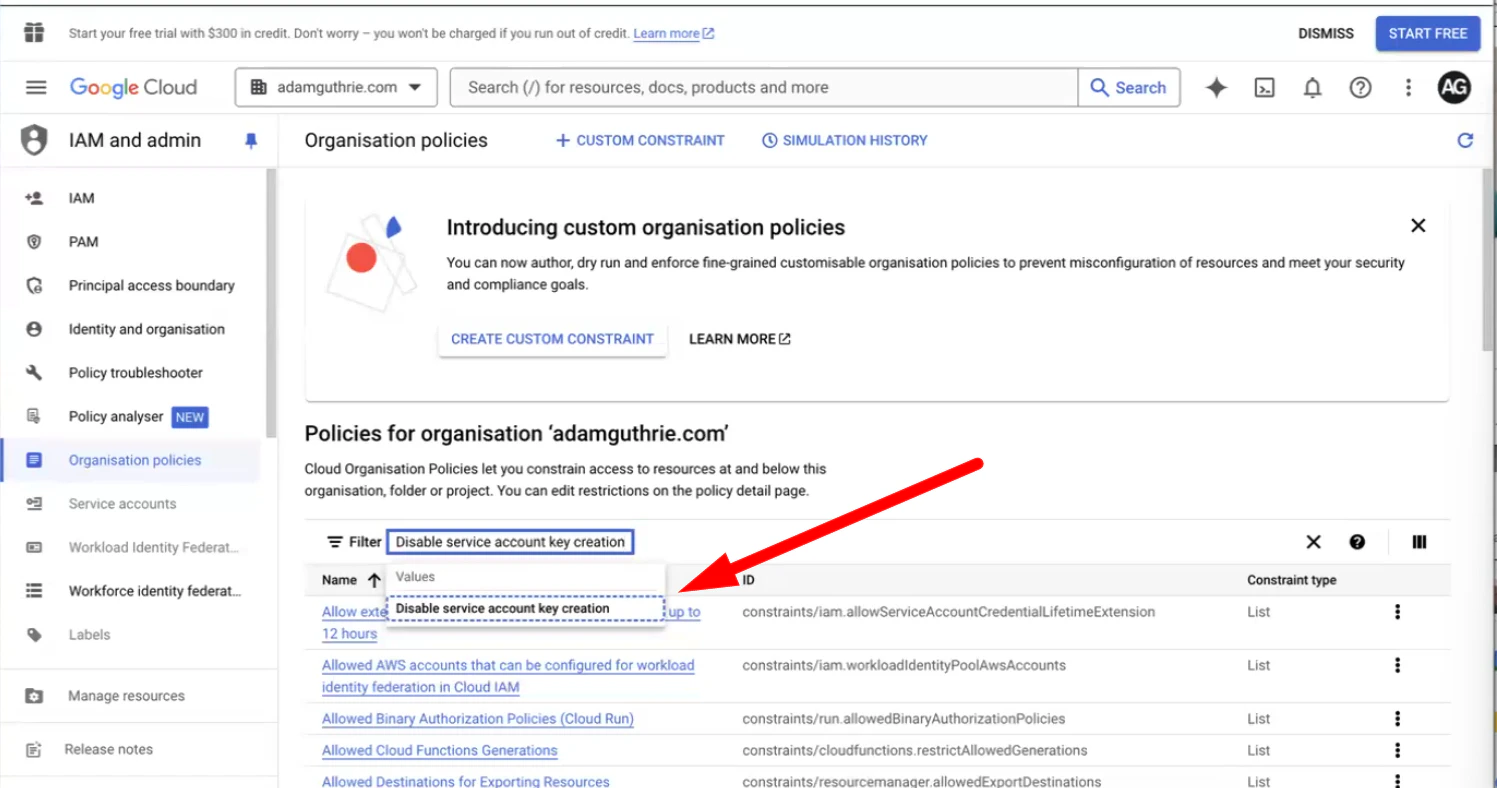 2. Click **Disable service account key creation**:
* You will want to follow these next steps for both links
2. Click **Disable service account key creation**:
* You will want to follow these next steps for both links
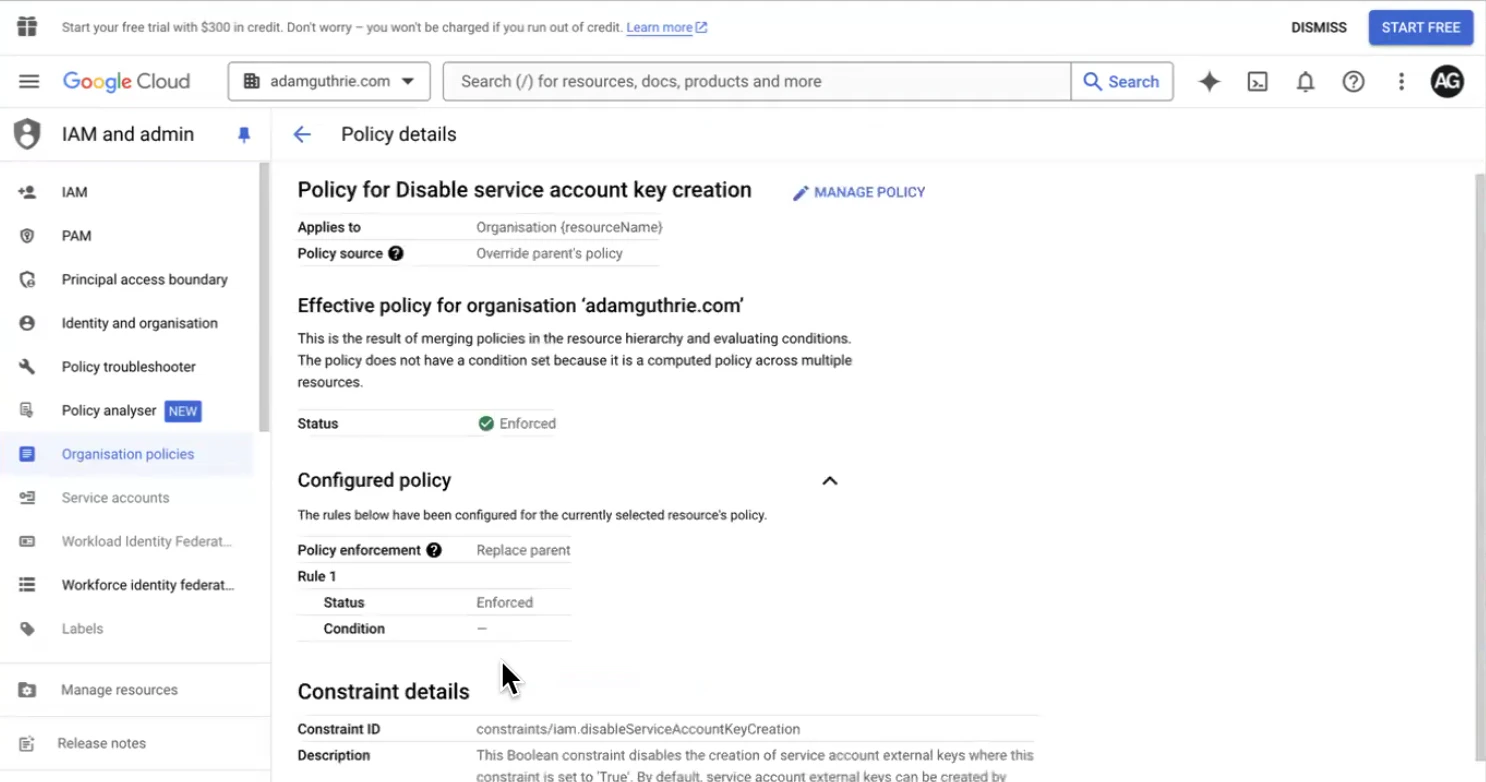
 3. Click **Manage Policy**
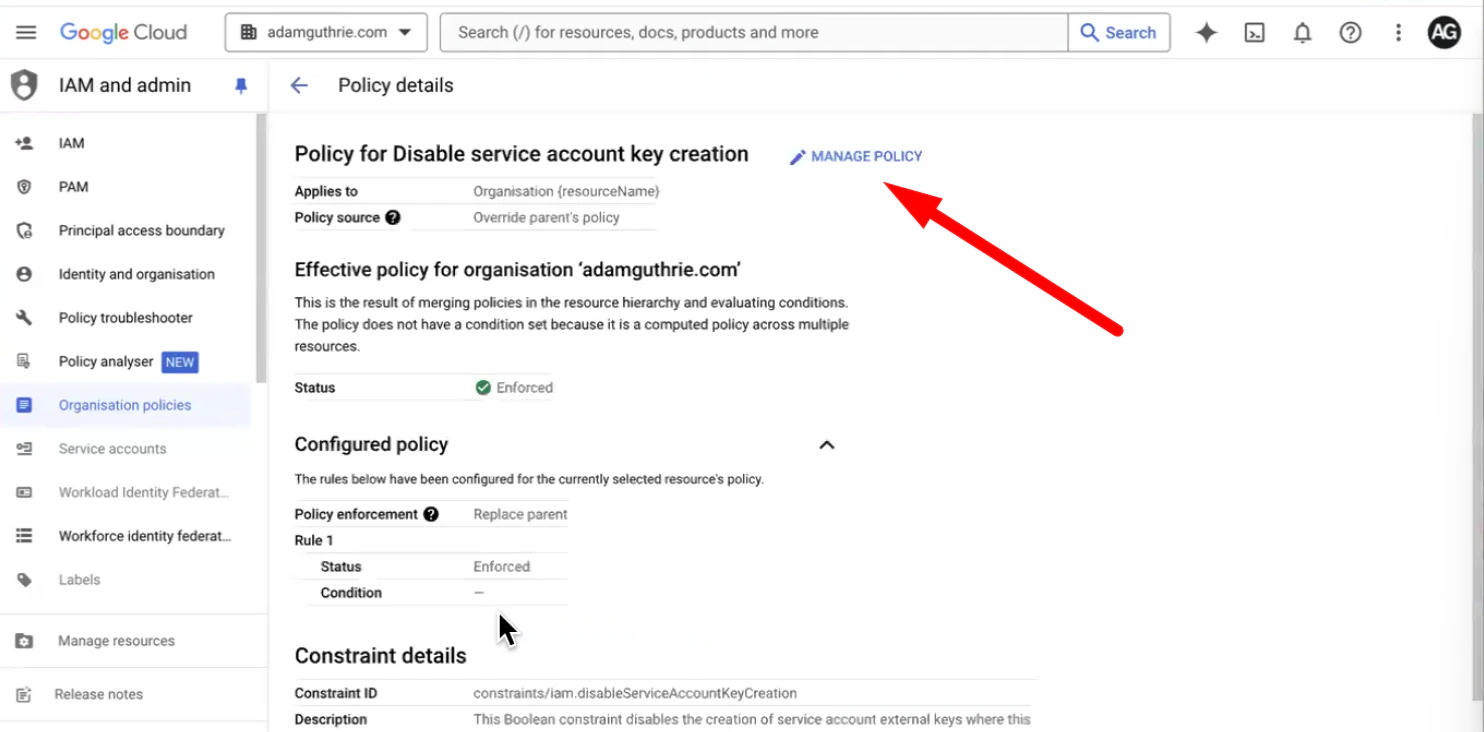 * Change the **Policy Source** to **Override Parent's Policy**, then click on the **Enforced** rule
* Change the **Enforced** rule to **Off**
4. Then, click **Done**:
* Change the **Policy Source** to **Override Parent's Policy**, then click on the **Enforced** rule
* Change the **Enforced** rule to **Off**
4. Then, click **Done**:
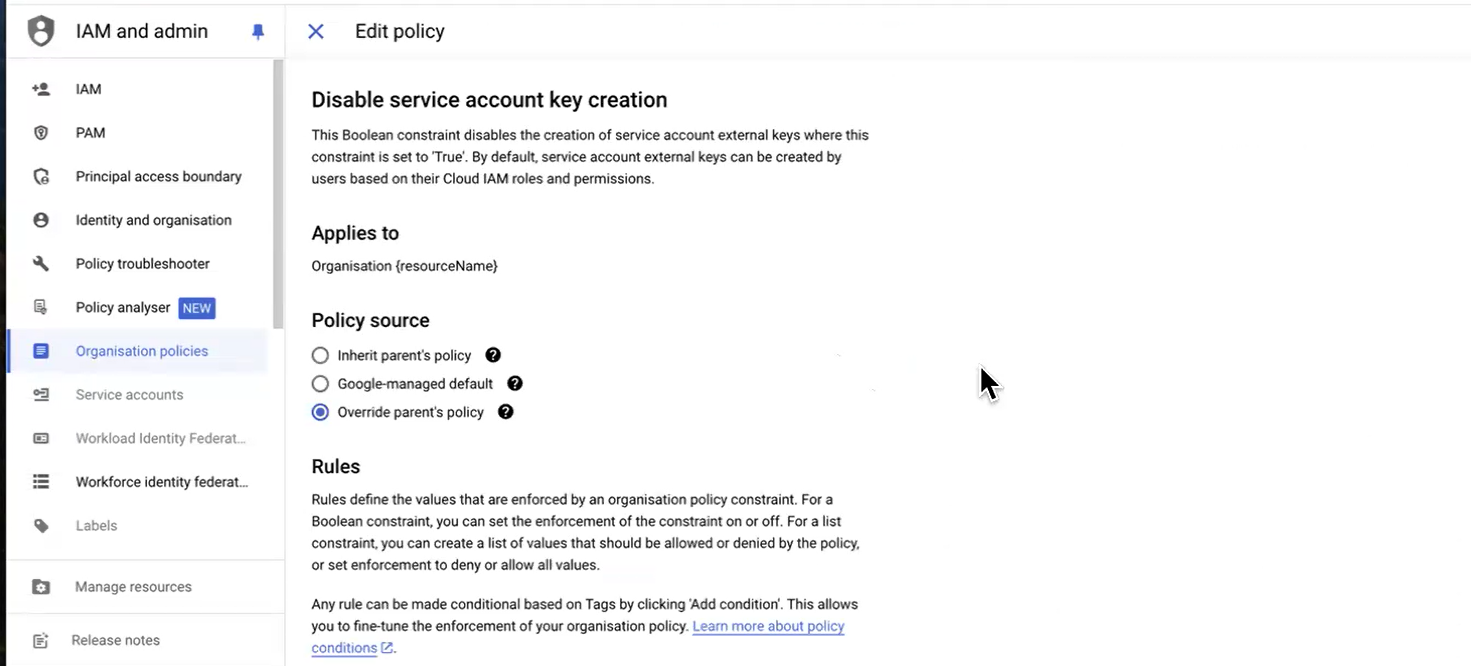
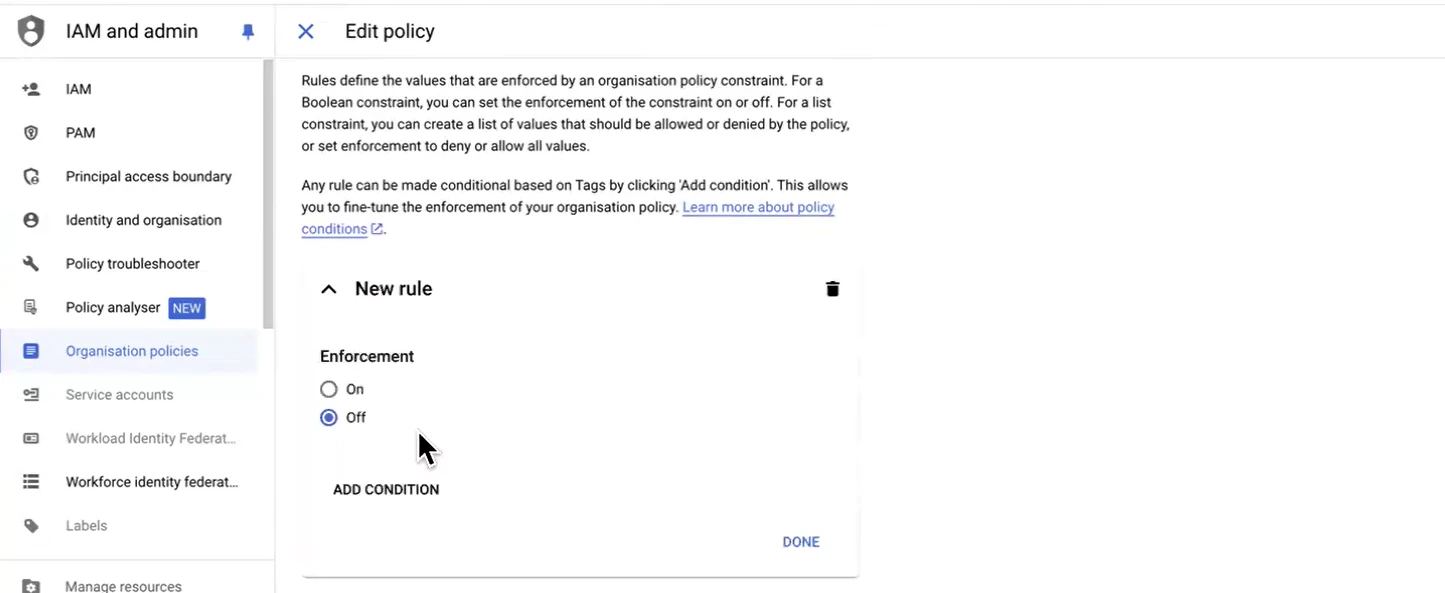 5. Click **Set Policy** to save the changes:
 * Make sure to repeat these steps for the second **Disable service account key creation** link
## Return to the project
After saving the new role, return to the project:
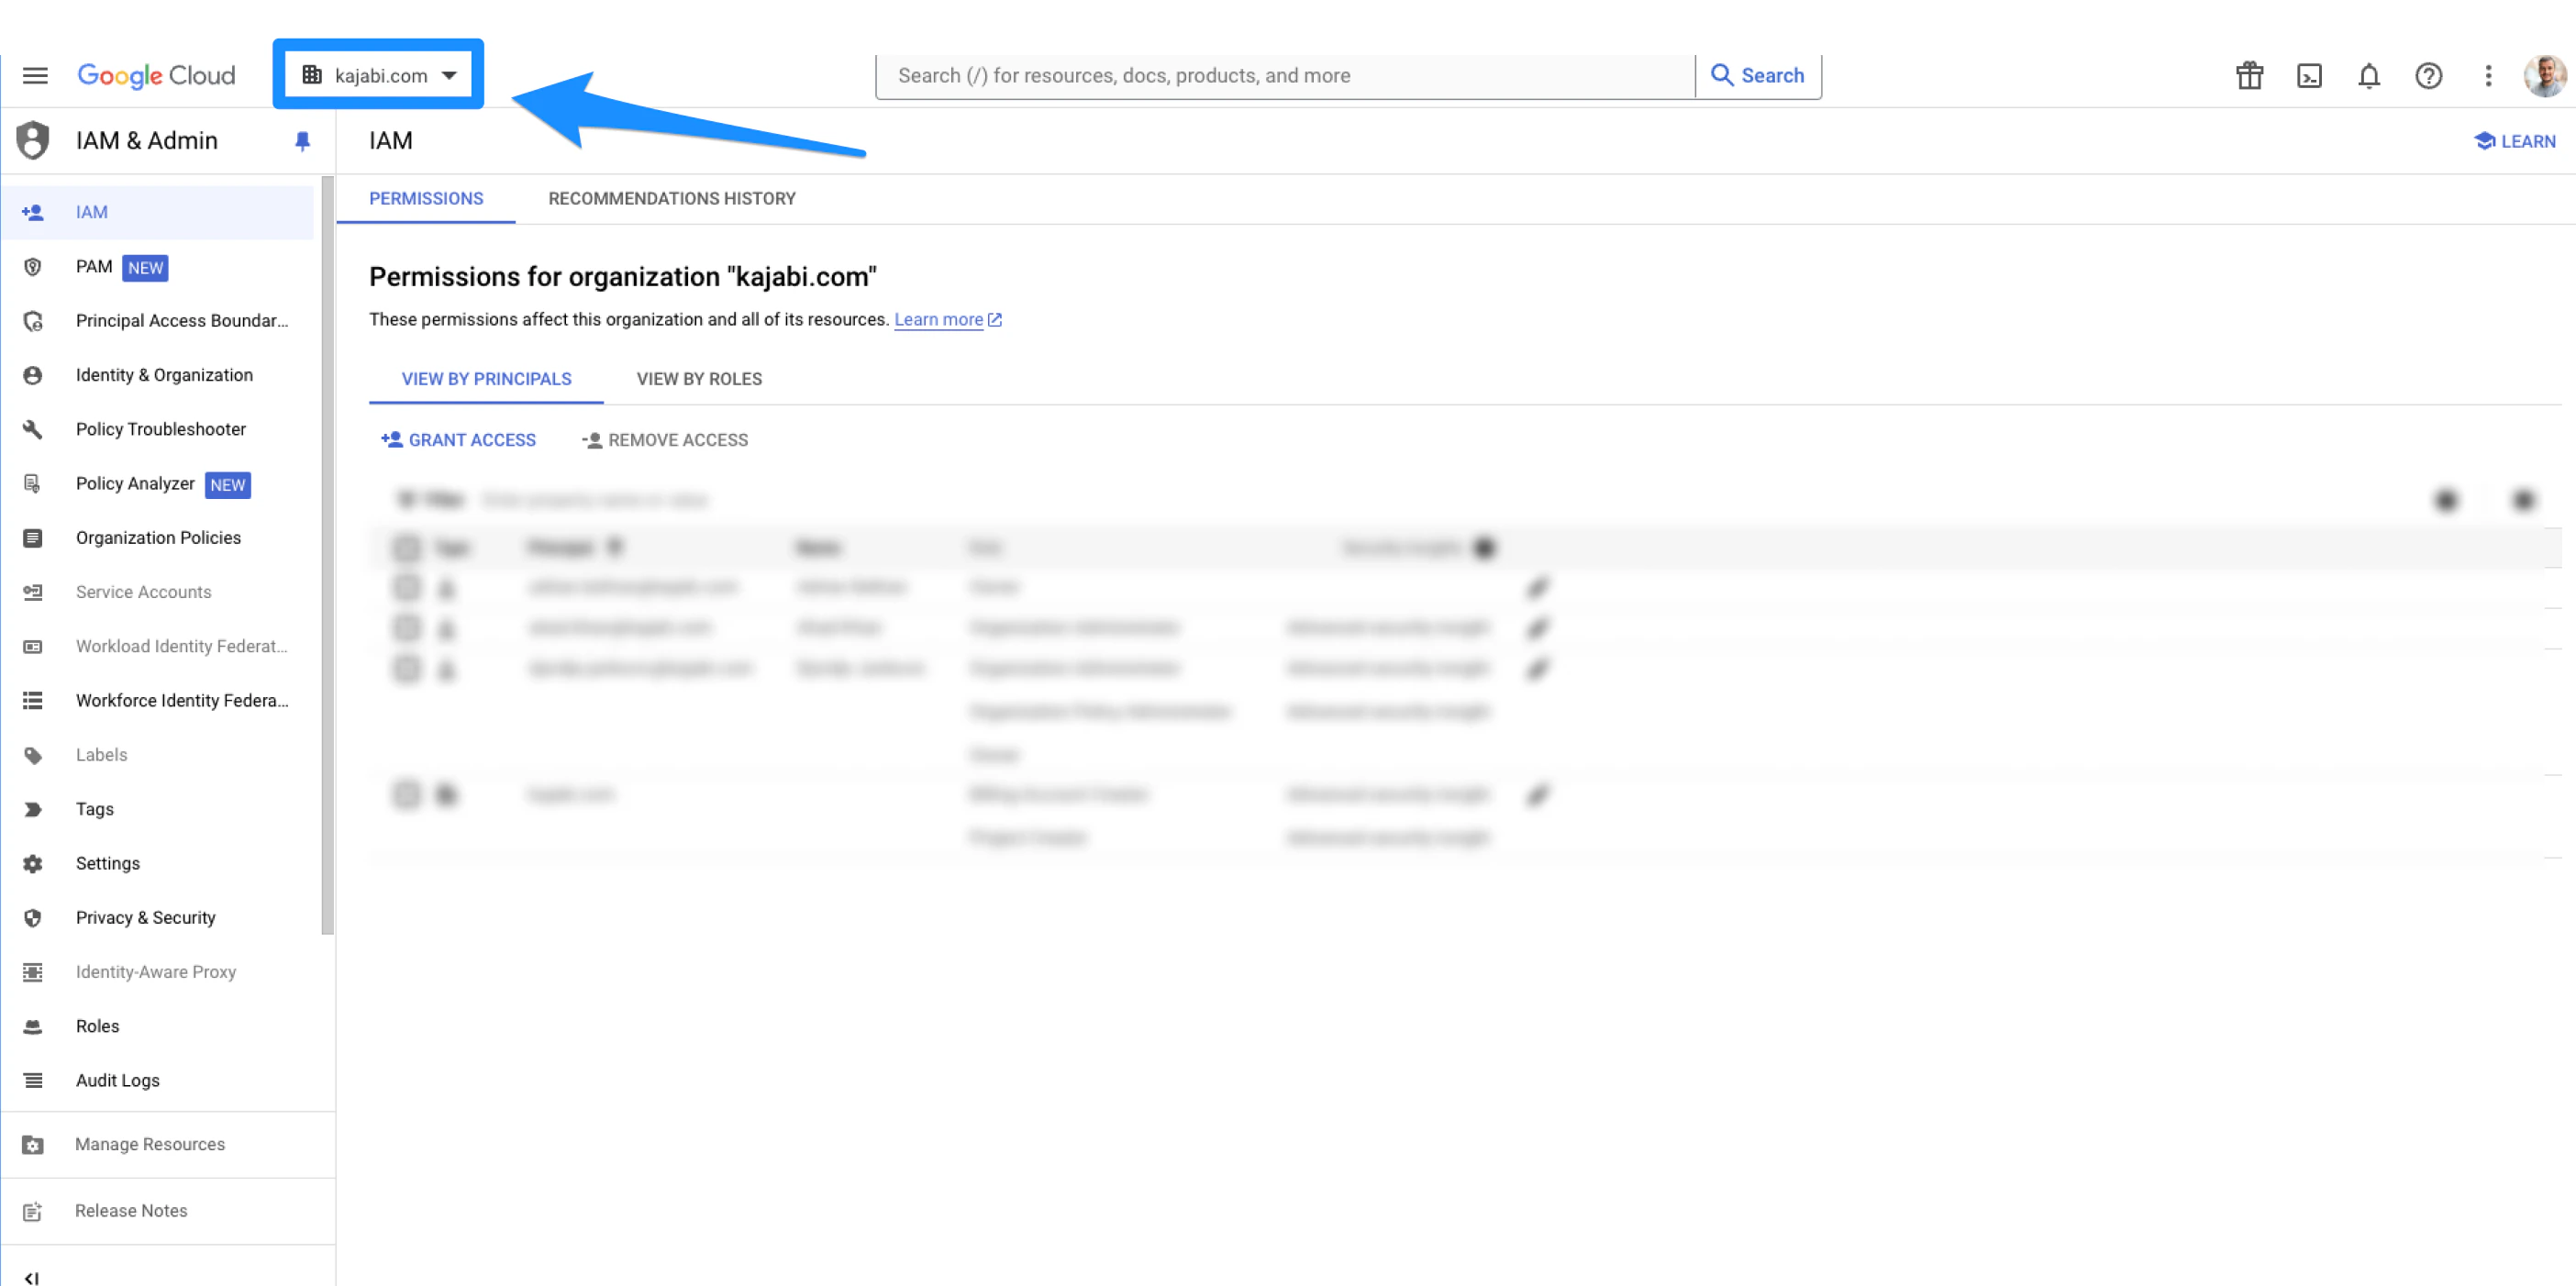
1. Open the dropdown menu in the top-left corner:
* Make sure to repeat these steps for the second **Disable service account key creation** link
## Return to the project
After saving the new role, return to the project:
1. Open the dropdown menu in the top-left corner:
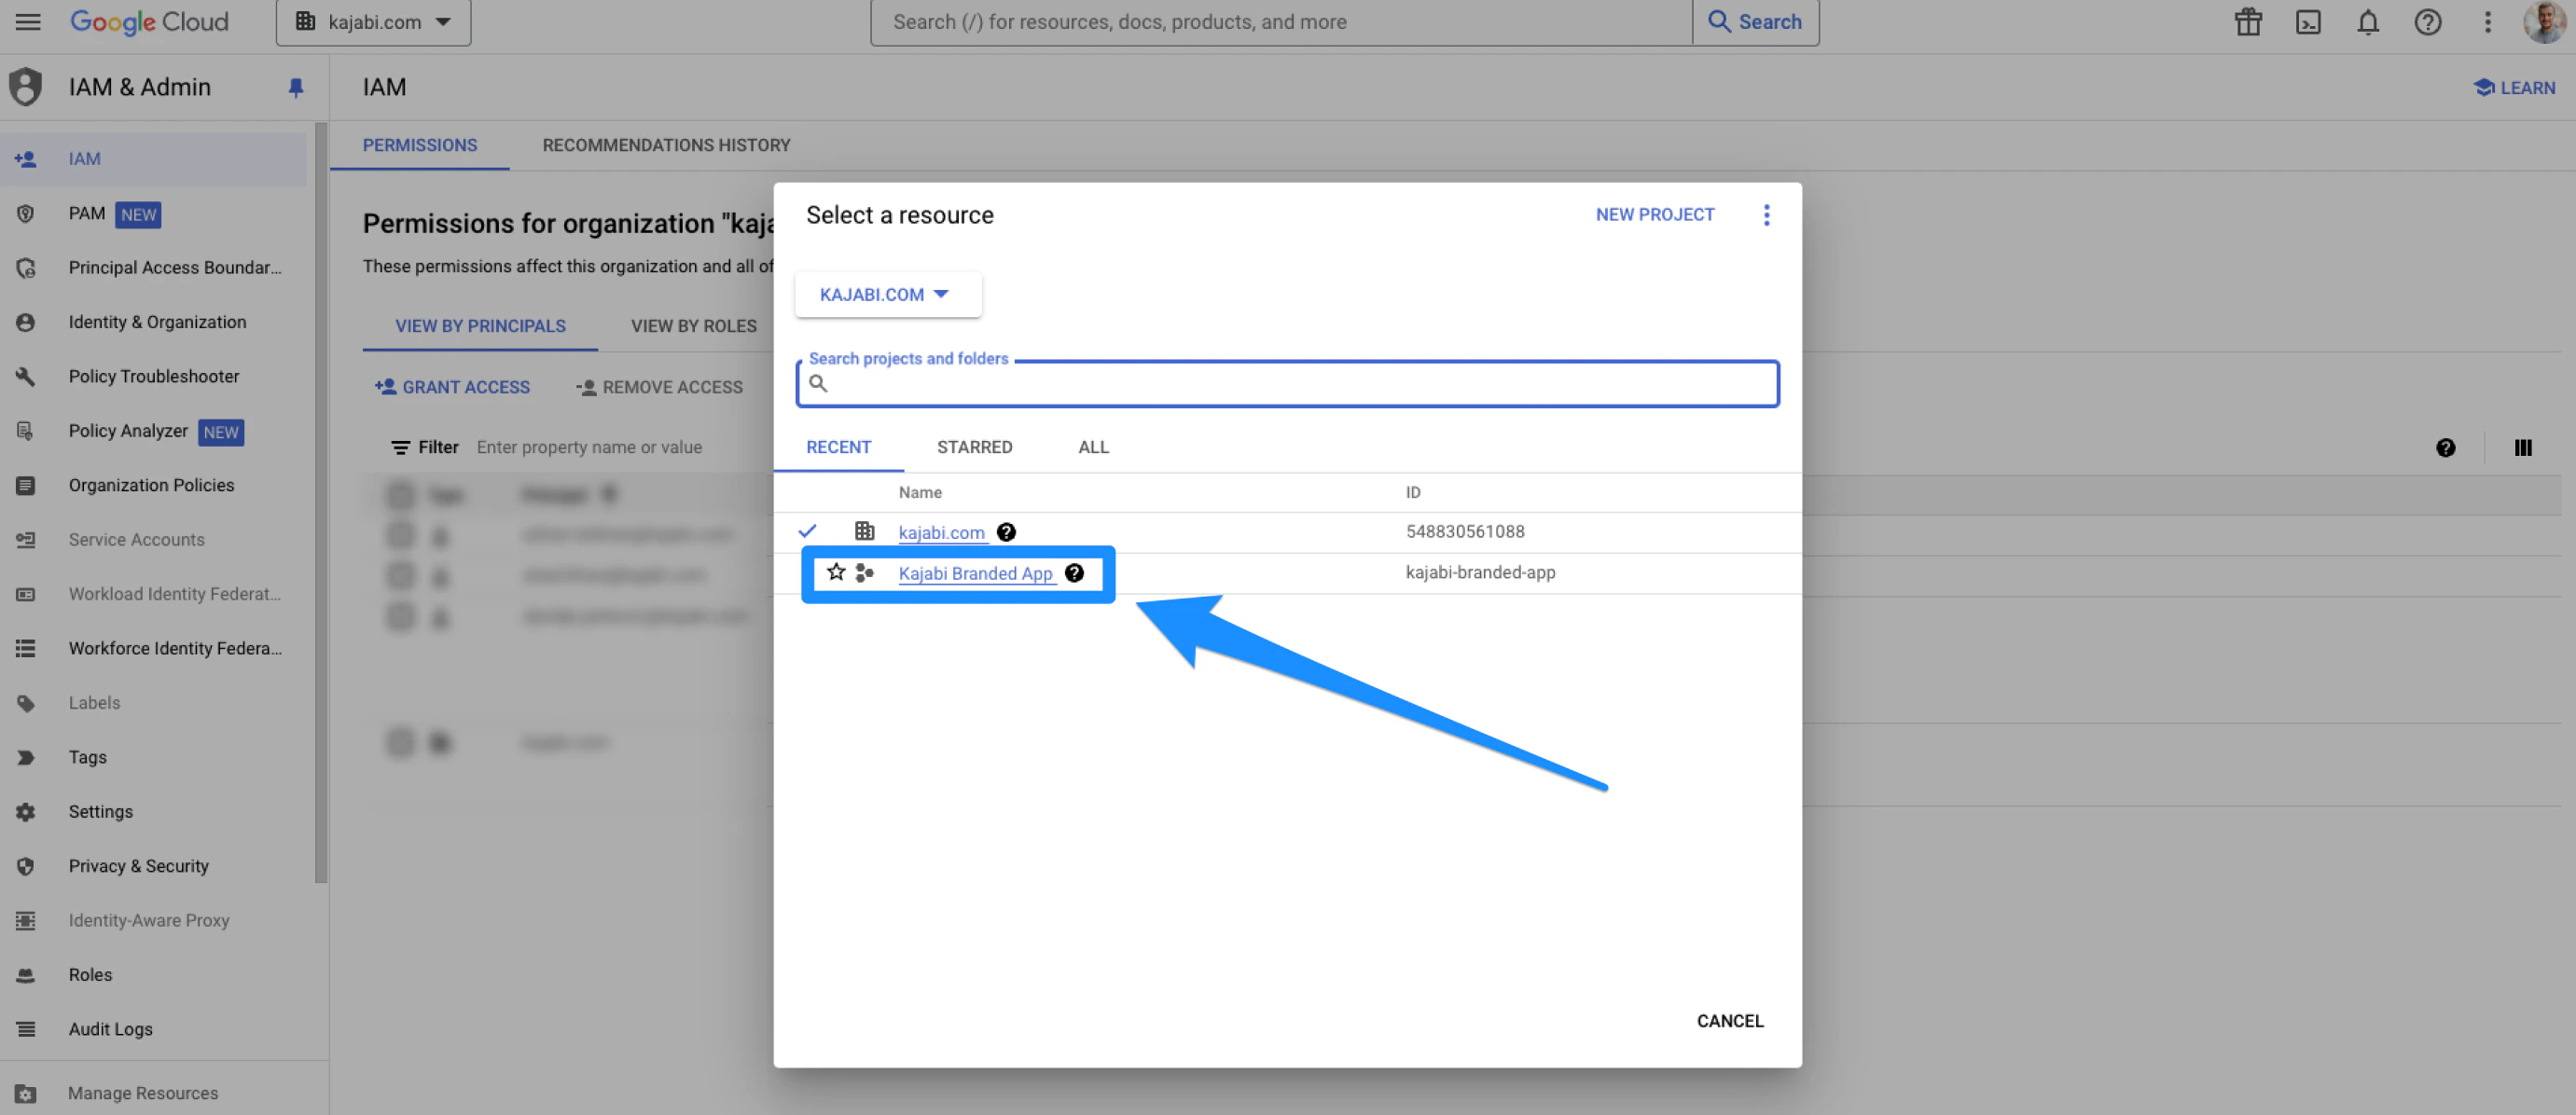
 2. Switch back to the project you created (the app name):
 ## Return to the previous article
Go back to [Add Kajabi as an Admin to your Google Play Console and Project Owner on Google Cloud Console](/articles/mobile-apps/branded-app/how-to-add-kajabi-as-an-admin-to-your-google-play-console-and-project-owner-on-google-cloud-console) and complete Steps 3 and 4.
## Return to the previous article
Go back to [Add Kajabi as an Admin to your Google Play Console and Project Owner on Google Cloud Console](/articles/mobile-apps/branded-app/how-to-add-kajabi-as-an-admin-to-your-google-play-console-and-project-owner-on-google-cloud-console) and complete Steps 3 and 4.