> ## Documentation Index
> Fetch the complete documentation index at: https://help.kajabi.com/llms.txt
> Use this file to discover all available pages before exploring further.
# Create a Google API key for a Branded Mobile App
> Generate an API key to connect a Branded App to Google Play Console.
An **API key** is required to connect a Branded App to Google Play Console. The steps below cover creating a Google Cloud project, generating API credentials, and enabling the necessary APIs.
## What is an API key?
API stands for Application Programming Interface. APIs provide the means for different software applications to communicate with each other.
An API key is a unique string of letters and numbers used to identify a software app when it tries to communicate with another app. When a Branded App reaches out to the Google Play Console to exchange data, Google uses the API key to confirm identity. Without an API key, Google won't be able to recognize the app.
## Create the Google API key
**Tip:**
You must be logged into a single Gmail / Google account to successfully complete all of the following steps. We recommend completing the steps in an incognito browser window to ensure you aren't logged into more than one Google account.
### Create a Google Cloud project
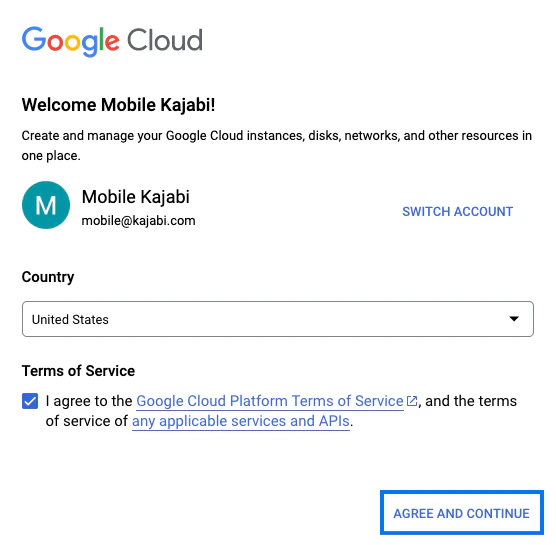
1. Log into the [Google Cloud Console](https://console.cloud.google.com/) (you must be logged in as the account owner) and agree to the terms and conditions:
 2. In the top left corner, click on the dropdown menu to **Select a Project**:
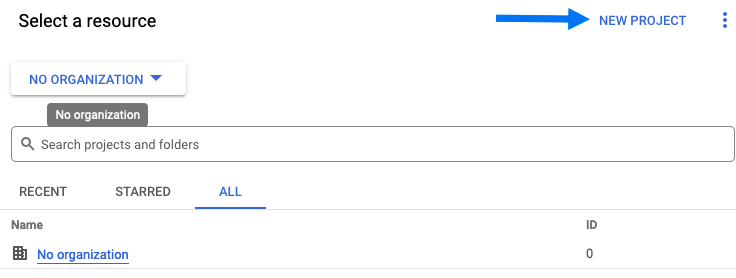
 3. When the next dialog box appears, select **New Project** in the top right corner:
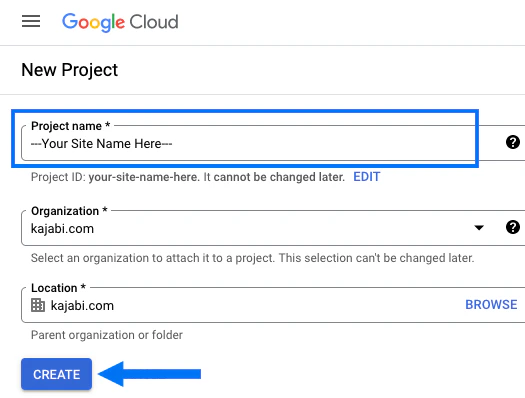
 4. Enter the Project name and click **Create**:
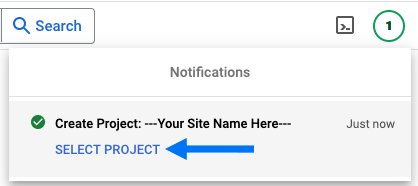
 5. It will take a moment to complete. Once it does, click the **Select Project** link in the notification window at the top right:
 ### Locate API credentials
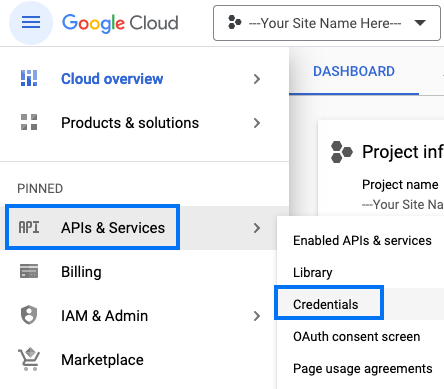
1. Click on **APIs & Services** in the left menu.
2. Then, select **Credentials**:
### Locate API credentials
1. Click on **APIs & Services** in the left menu.
2. Then, select **Credentials**:
 3. When the next page loads, if it's not already selected, click on **Credentials** again:
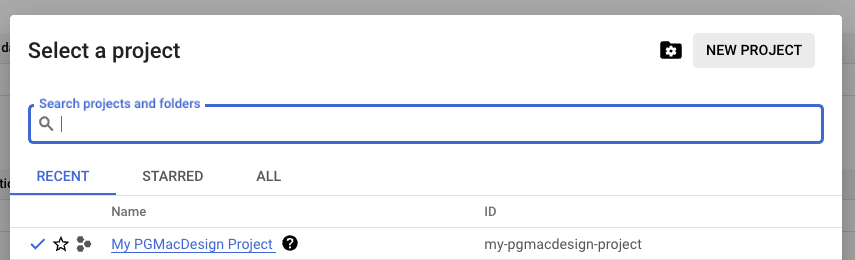
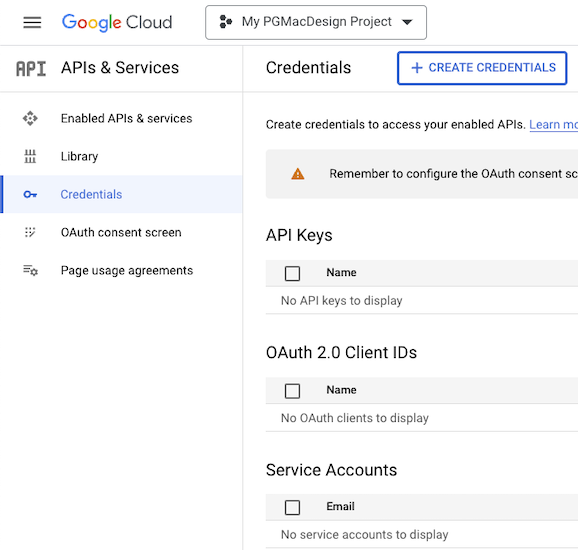 4. Locate the project dropdown menu at the top left next to **Google Cloud** and make sure the project is selected.
(In the screenshot below, the project name displays as *My PGMacDesign Project.* Your project name will be different.)
4. Locate the project dropdown menu at the top left next to **Google Cloud** and make sure the project is selected.
(In the screenshot below, the project name displays as *My PGMacDesign Project.* Your project name will be different.)
 ### Create API credentials
1. With the project selected, make sure you're on the **Credentials** tab on the left.
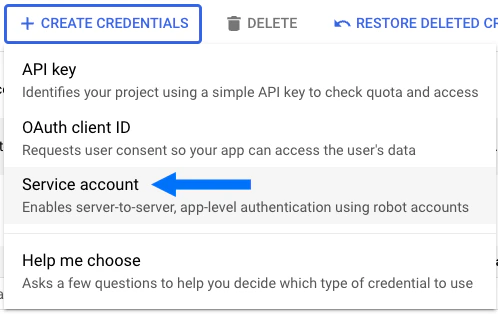
2. Click **+ Create Credentials**.
3. Select **Service account**:
### Create API credentials
1. With the project selected, make sure you're on the **Credentials** tab on the left.
2. Click **+ Create Credentials**.
3. Select **Service account**:
 4. Navigate to "Step 1: Service account details".
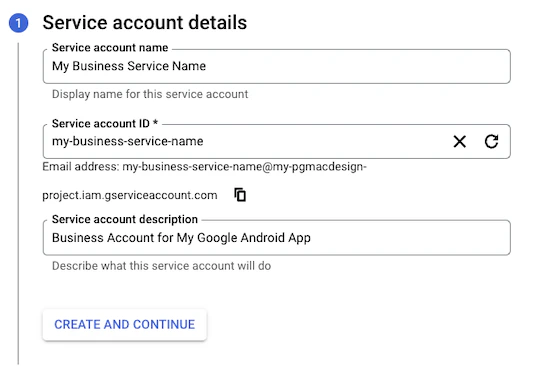
5. Enter a **Service account name** of your choice (for example, your business name).
6. The **Service account ID** will be created automatically.
7. Enter a short **Service account description** (for example, "Service account for my Android app").
8. Click **Create and Continue**:
4. Navigate to "Step 1: Service account details".
5. Enter a **Service account name** of your choice (for example, your business name).
6. The **Service account ID** will be created automatically.
7. Enter a short **Service account description** (for example, "Service account for my Android app").
8. Click **Create and Continue**:
 9. Navigate to "Step 2: Grant this service account access to project".
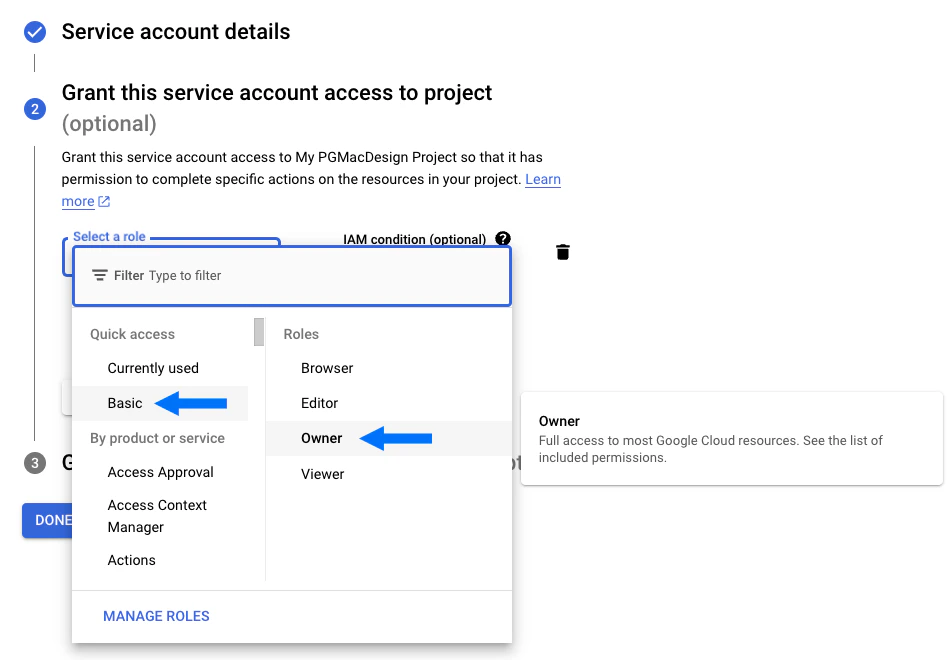
10. Click **Select a role.**
11. Select **Basic** as the access type and **Owner** as the role type.
12. Click **Continue**:
9. Navigate to "Step 2: Grant this service account access to project".
10. Click **Select a role.**
11. Select **Basic** as the access type and **Owner** as the role type.
12. Click **Continue**:
 13. Skip "Step 3: Grant users access to this service account".
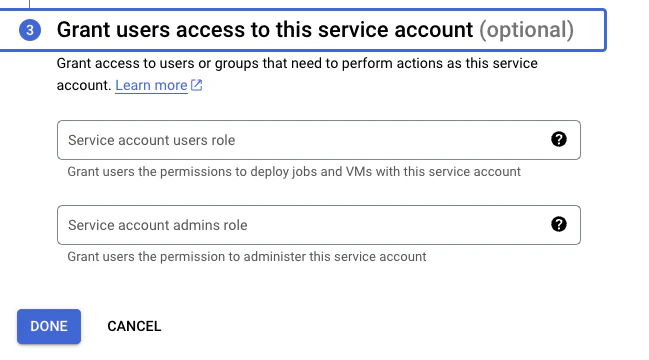
Leave this section blank.
14. Click **Done** to continue:
13. Skip "Step 3: Grant users access to this service account".
Leave this section blank.
14. Click **Done** to continue:
 ### Create an API key
You should now see a Service Account listed on the Credentials page under **Service Accounts**:
### Create an API key
You should now see a Service Account listed on the Credentials page under **Service Accounts**:
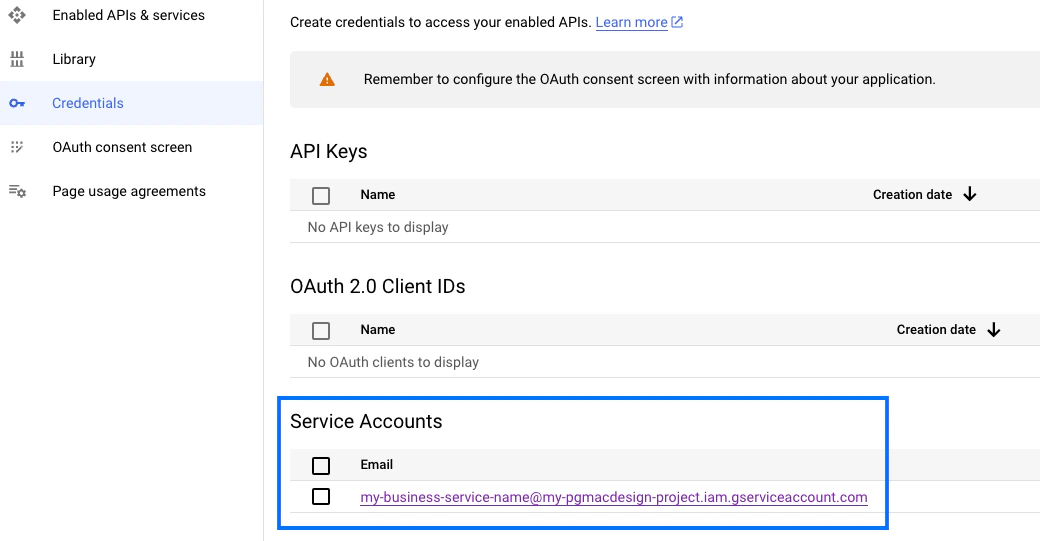 1. First, copy the **Service Account Email Address** and set it aside for now as you'll be using it in a later step.
2. Then click on the **Service Account Email Address** to open the account.
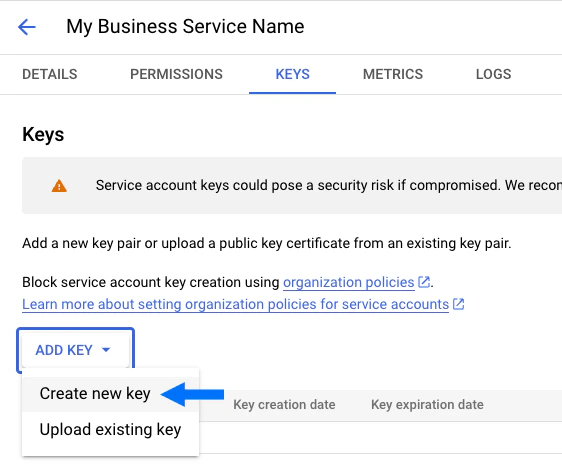
3. Select the **Keys** tab.
4. Click **Add Key**.
5. Select **Create new key:**
1. First, copy the **Service Account Email Address** and set it aside for now as you'll be using it in a later step.
2. Then click on the **Service Account Email Address** to open the account.
3. Select the **Keys** tab.
4. Click **Add Key**.
5. Select **Create new key:**
 6. When prompted to select the key type for download, select **JSON**.
You must select the JSON option for this step.
7. Click **Create**:
6. When prompted to select the key type for download, select **JSON**.
You must select the JSON option for this step.
7. Click **Create**:
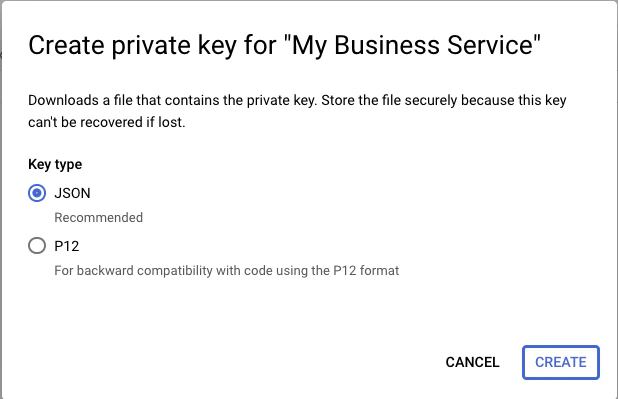 The JSON file will download to your computer locally (you'll typically find it in your Downloads folder). This is the file you'll need to upload to Kajabi during the intake process.
### Enable the API
Next, you'll need to enable the API within the Google Cloud Console.
**To enable the API:**
1. Click this link: [https://console.cloud.google.com/apis/library/androidpublisher.googleapis.com](https://console.cloud.google.com/apis/library/androidpublisher.googleapis.com)
2. Then, click the blue **ENABLE** button:
The JSON file will download to your computer locally (you'll typically find it in your Downloads folder). This is the file you'll need to upload to Kajabi during the intake process.
### Enable the API
Next, you'll need to enable the API within the Google Cloud Console.
**To enable the API:**
1. Click this link: [https://console.cloud.google.com/apis/library/androidpublisher.googleapis.com](https://console.cloud.google.com/apis/library/androidpublisher.googleapis.com)
2. Then, click the blue **ENABLE** button:
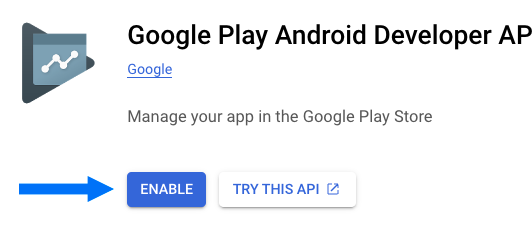 A progress spinner will appear for a minute or so, then you'll be redirected to a page. At this point the API has been properly enabled.
One additional API that needs to be enabled is Firebase.
3. Go here: [Firebase Management API - Google Cloud Console](https://console.cloud.google.com/apis/library/firebase.googleapis.com)
4. Then, click **Enable**:
A progress spinner will appear for a minute or so, then you'll be redirected to a page. At this point the API has been properly enabled.
One additional API that needs to be enabled is Firebase.
3. Go here: [Firebase Management API - Google Cloud Console](https://console.cloud.google.com/apis/library/firebase.googleapis.com)
4. Then, click **Enable**:
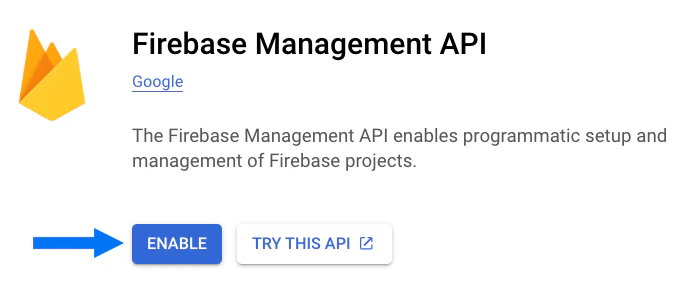 The page should automatically redirect you. To confirm it was successfully enabled, click on the [same link](https://console.cloud.google.com/apis/library/firebase.googleapis.com) and the screen should now look like this:
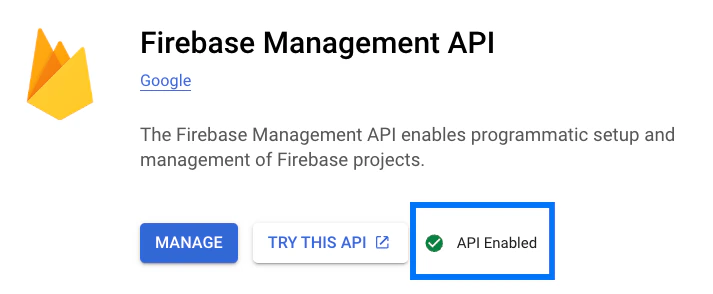 Confirm that you see **API Enabled** on the right side.
### Add an authorized user
1. Navigate to the [Google Play Console](https://play.google.com/console) and make sure you're not clicked into a specific app.
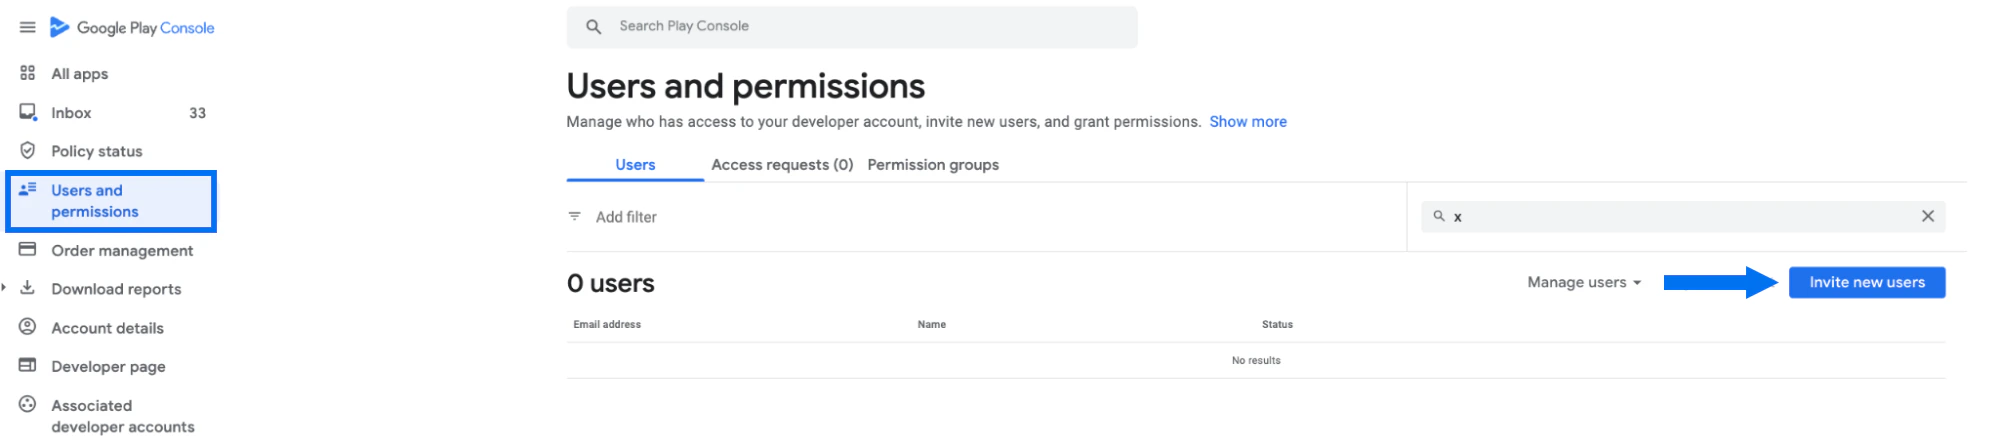
2. Click on **Users and permissions** in the menu at the left of the screen.
3. Then, click the blue **Invite new users** button:
Confirm that you see **API Enabled** on the right side.
### Add an authorized user
1. Navigate to the [Google Play Console](https://play.google.com/console) and make sure you're not clicked into a specific app.
2. Click on **Users and permissions** in the menu at the left of the screen.
3. Then, click the blue **Invite new users** button:
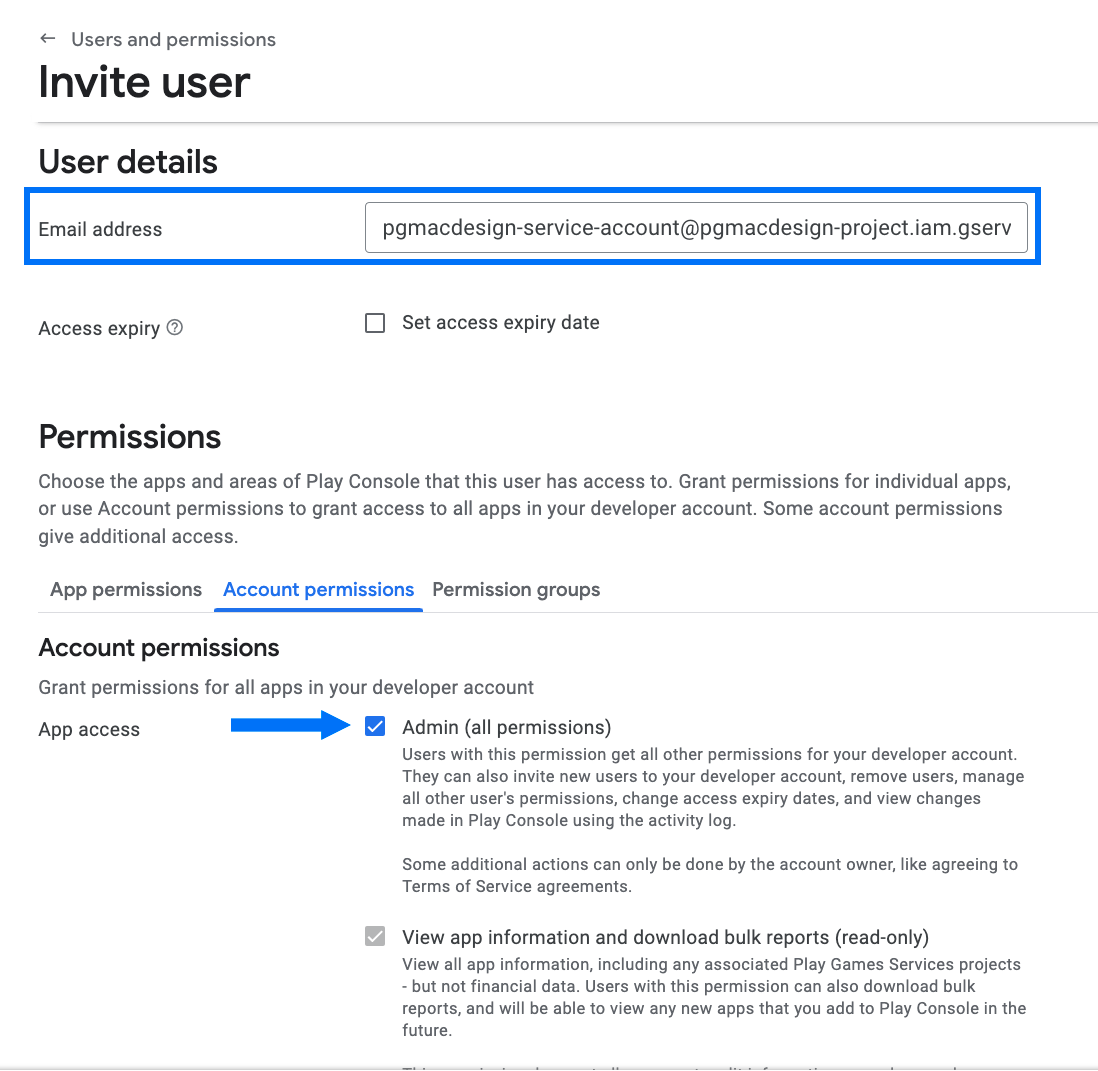
 4. Paste in the **Service Account Email Address** you just copied in the previous step.
5. Then select the **Admin** checkbox under **Account permissions**.
6. Click **Invite User**:
4. Paste in the **Service Account Email Address** you just copied in the previous step.
5. Then select the **Admin** checkbox under **Account permissions**.
6. Click **Invite User**: