> ## Documentation Index
> Fetch the complete documentation index at: https://help.kajabi.com/llms.txt
> Use this file to discover all available pages before exploring further.
# Create an Apple Developer account and join the Apple Developer Program
> Set up an Apple Developer account, enroll in the Apple Developer Program, and add Kajabi as an admin to publish a Branded App on iOS.
To publish a Branded App on iOS, you need an **Apple Developer account** and membership in the Apple Developer Program. The steps below cover account creation, program enrollment, and adding Kajabi as an admin.
## Create an Apple Developer account
First, create an Apple Developer account.
**To create the account:**
1. Navigate to: [https://developer.apple.com](https://developer.apple.com)
2. Select **Account** from the top navigation menu:
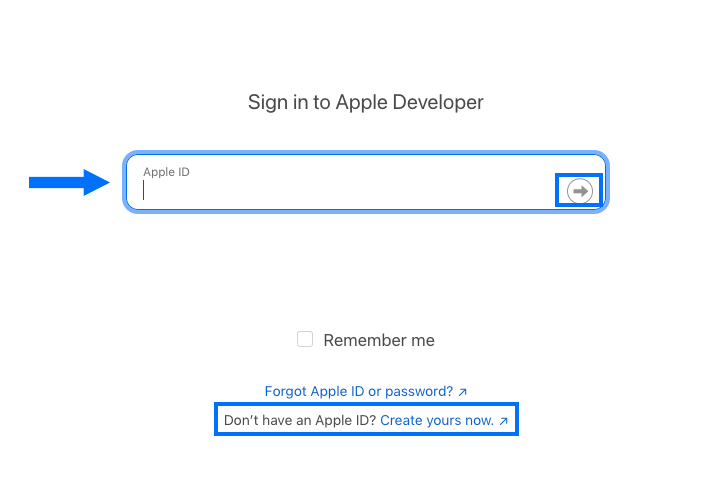
 3. Enter your **Apple ID** and click the arrow to submit:
(Or, if you don't yet have an Apple ID, click **Create yours now** and complete the form to create an ID. After creating your ID you'll automatically be directed to the Apple Developer Agreement.)
3. Enter your **Apple ID** and click the arrow to submit:
(Or, if you don't yet have an Apple ID, click **Create yours now** and complete the form to create an ID. After creating your ID you'll automatically be directed to the Apple Developer Agreement.)
 4. Submit your two-factor authentication code if/when prompted.
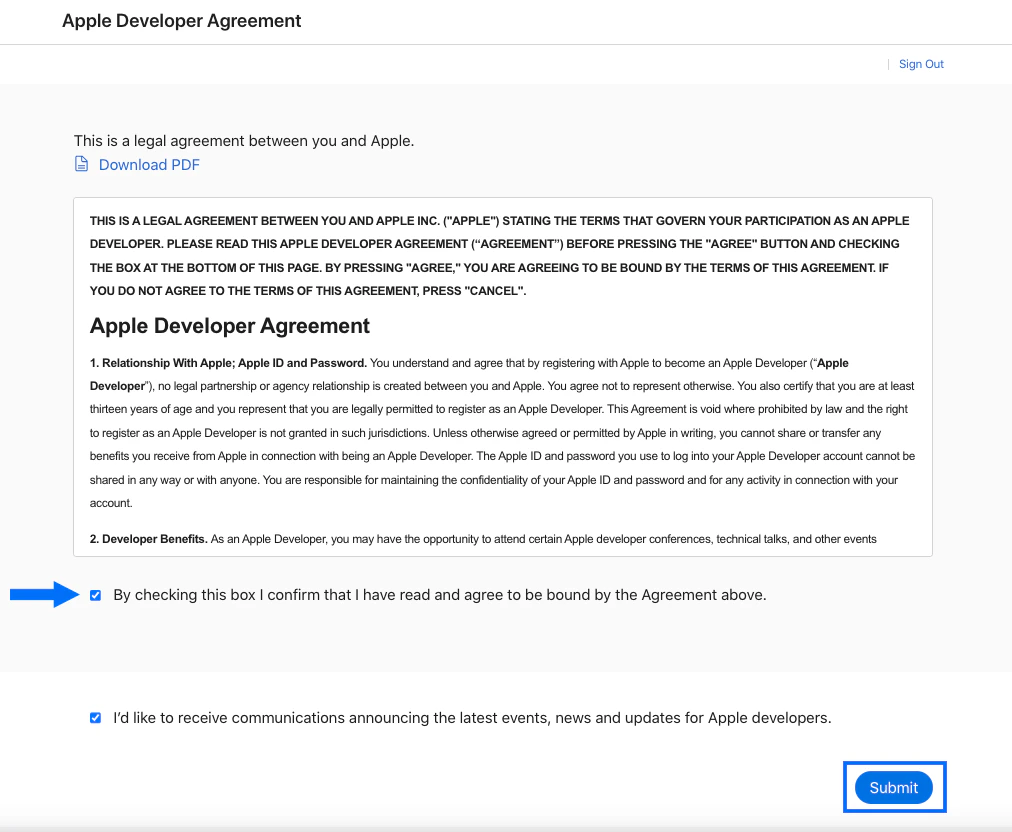
5. Review the Apple Developer Agreement.
6. Check the **checkbox** confirming that you agree to the terms and conditions.
7. Click **Submit**:
4. Submit your two-factor authentication code if/when prompted.
5. Review the Apple Developer Agreement.
6. Check the **checkbox** confirming that you agree to the terms and conditions.
7. Click **Submit**:
 The account has now been created. On the next screen you'll see an option to join the Apple Developer Program.
## Join the Apple Developer Program
Next, sign up for the Apple Developer Program to access the resources you'll need to create the iOS app. The Program has a membership fee of \$99/year, so have your credit card details handy.
**To sign up**:
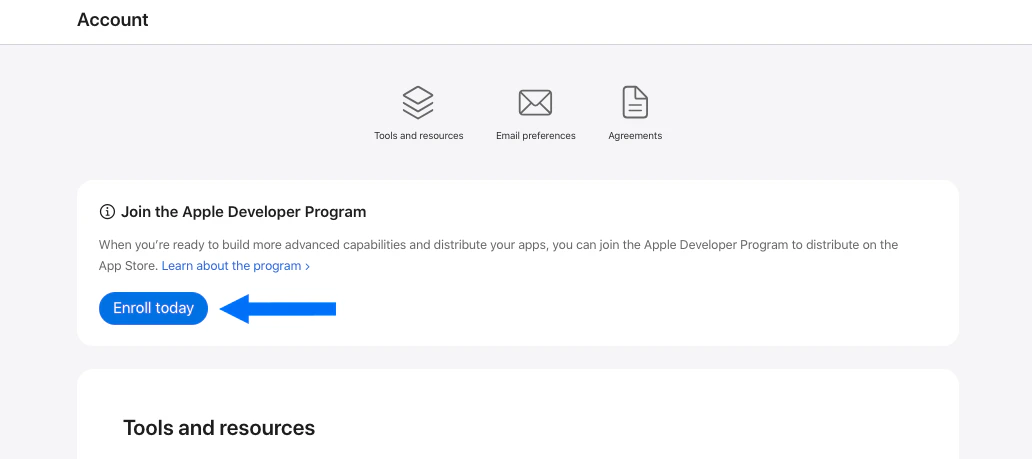
1. Locate **Join the Apple Developer Program** on your [Apple Developer Account](https://developer.apple.com/account) page and click the **Enroll today** button (if you just created the Developer Account, you should already be on this page):
The account has now been created. On the next screen you'll see an option to join the Apple Developer Program.
## Join the Apple Developer Program
Next, sign up for the Apple Developer Program to access the resources you'll need to create the iOS app. The Program has a membership fee of \$99/year, so have your credit card details handy.
**To sign up**:
1. Locate **Join the Apple Developer Program** on your [Apple Developer Account](https://developer.apple.com/account) page and click the **Enroll today** button (if you just created the Developer Account, you should already be on this page):
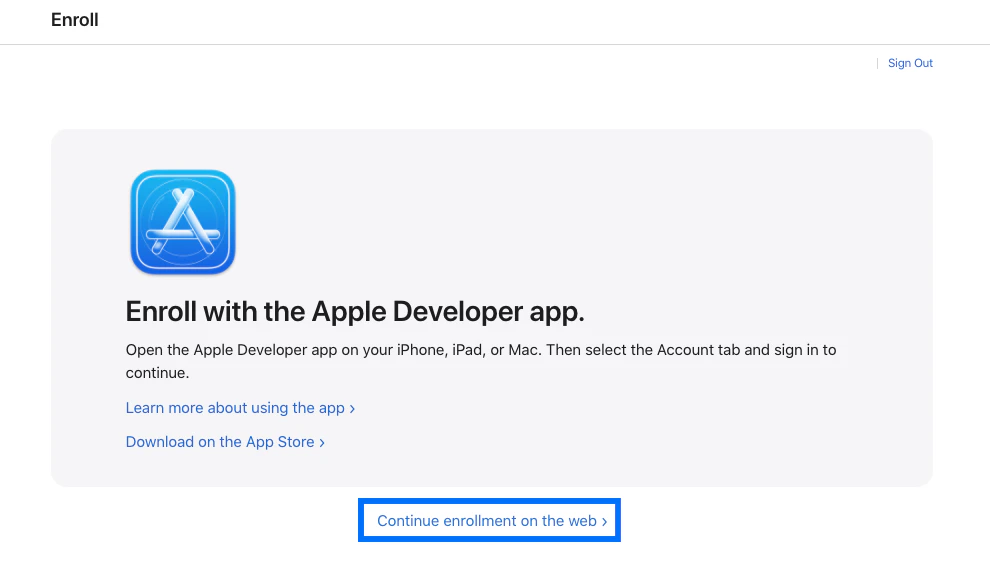
 2. Click **Continue enrollment on the web** (Or, if you prefer, you can download the Apple Developer app and enroll via the app instead. In this guide, we'll walk you through enrolling via the web.):
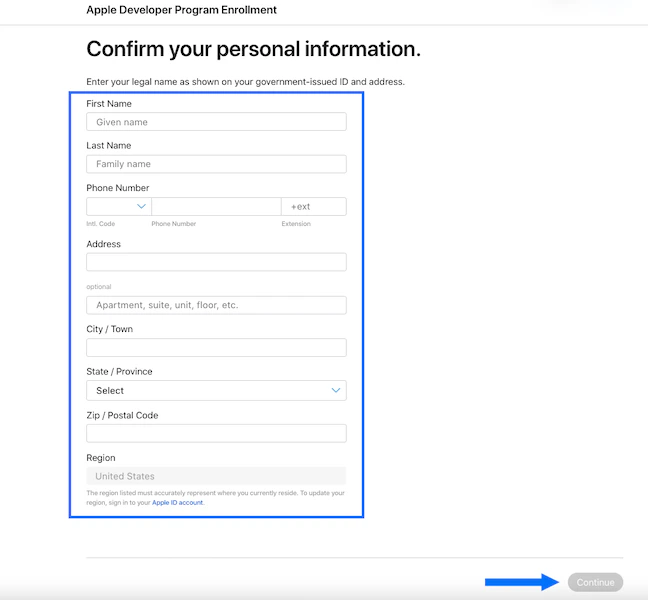
 3. Complete the personal information form by inputting your first and last name, phone number, and address as instructed.
4. Click **Continue**:
3. Complete the personal information form by inputting your first and last name, phone number, and address as instructed.
4. Click **Continue**:
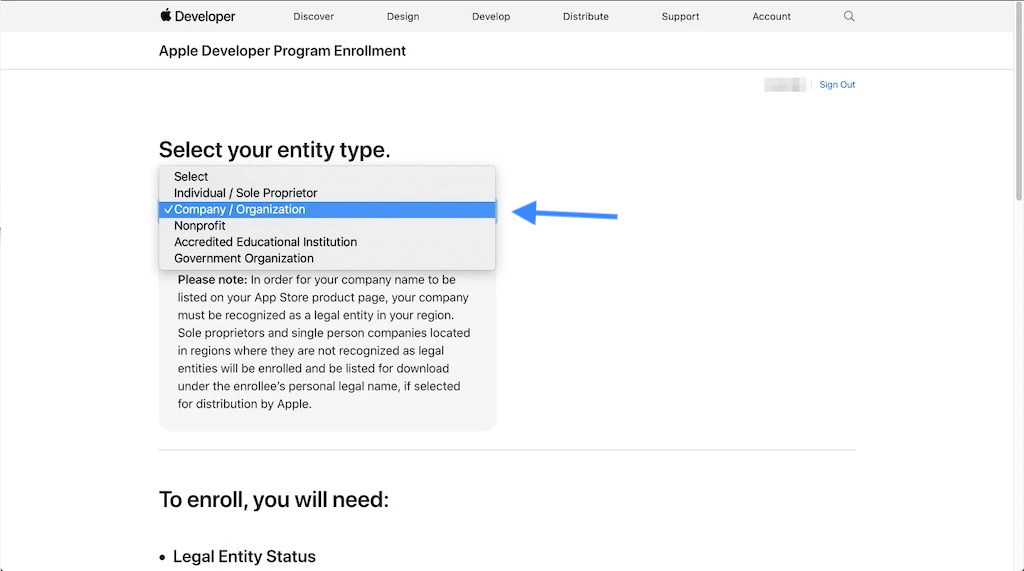
 5. Click into the dropdown menu and select your **entity type**. For Kajabi to assist with the app build, we require you to create an account for an organization (You'll need to have or apply for a [DUNS number](/articles/mobile-apps/branded-app/how-to-set-up-your-d-u-n-s-number-for-your-branded-app).)
 Within the next 24 hours you should also receive a second email asking you to complete an identity verification check. Please complete the ID verification as soon as possible.
**Note:**
You may be asked to submit a different type of documentation, especially if you registered as an entity type other than "Individual / Sole Proprietor". Please follow the instructions sent to you by Apple and submit the documents they require in your case.
**To complete the ID verification:**
1. Take a picture of your government issued photo ID (or whichever document(s) Apple requested in your case) and save it to your device.
2. Open the ID confirmation email you received.
3. Click **Upload ID**:
Within the next 24 hours you should also receive a second email asking you to complete an identity verification check. Please complete the ID verification as soon as possible.
**Note:**
You may be asked to submit a different type of documentation, especially if you registered as an entity type other than "Individual / Sole Proprietor". Please follow the instructions sent to you by Apple and submit the documents they require in your case.
**To complete the ID verification:**
1. Take a picture of your government issued photo ID (or whichever document(s) Apple requested in your case) and save it to your device.
2. Open the ID confirmation email you received.
3. Click **Upload ID**:
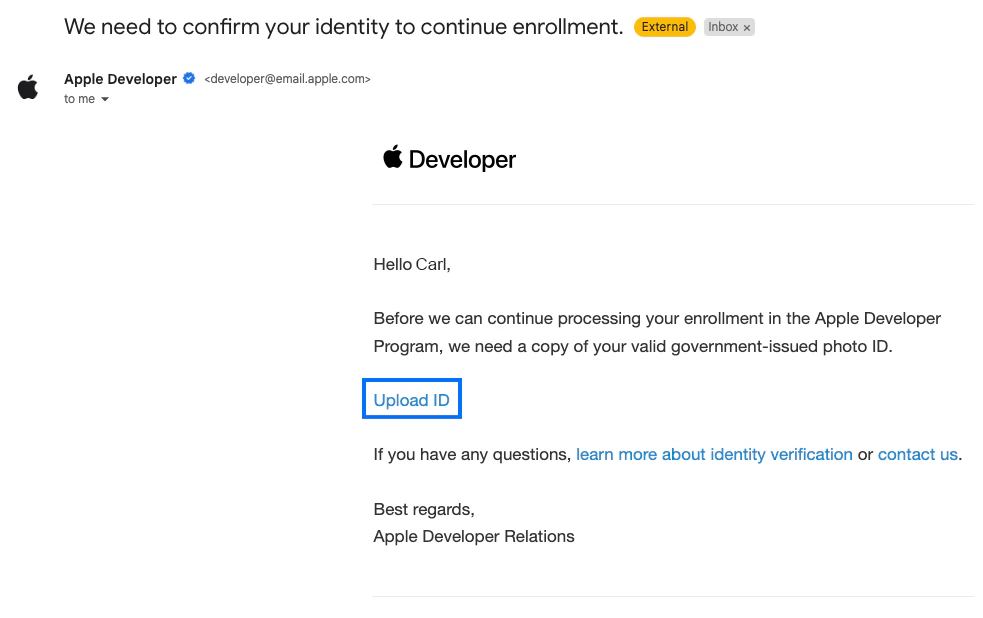 4. The Apple Developer sign-in page will open. Sign into your account.
You'll be directed to a document upload form.
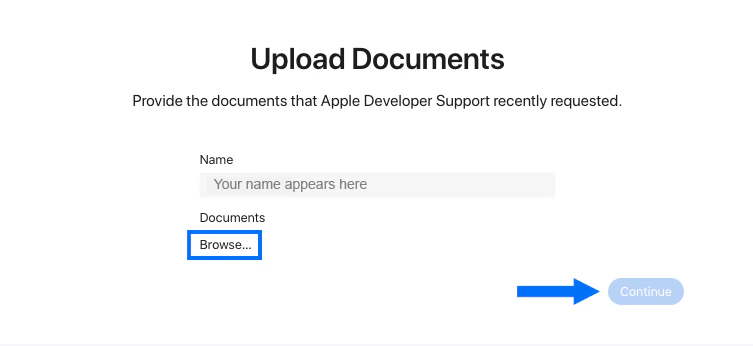
5. Click **Browse** and upload your document(s).
6. Click **Continue**:
4. The Apple Developer sign-in page will open. Sign into your account.
You'll be directed to a document upload form.
5. Click **Browse** and upload your document(s).
6. Click **Continue**:
 7. Click **Submit** on the popup modal to confirm the ID submission:
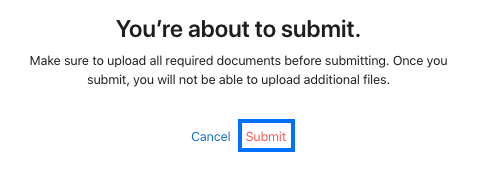 You'll see a confirmation message that your documents are being processed.
You'll receive an email notification when your membership has been activated.
If you don't receive your activation notice and access to App Store Connect within five business days, please [contact Apple Support](https://developer.apple.com/contact/submit/).
## Add Kajabi as an account admin
Once the Branded App is built, you'll receive an email notification from Kajabi letting you know it's time to submit the app for review and publication.
First, grant the Kajabi team admin access to the App Store Connect account so we can help ensure that the app submission goes as smoothly as possible.
**To give the Kajabi team access to the account:**
1. Click this link to open the **Users and Access** page in App Store Connect: [https://appstoreconnect.apple.com/access/users](https://appstoreconnect.apple.com/access/users)
(If you're not logged into the account, you'll be prompted to log in).
2. Then, click the blue **+** sign to add a user:
You'll see a confirmation message that your documents are being processed.
You'll receive an email notification when your membership has been activated.
If you don't receive your activation notice and access to App Store Connect within five business days, please [contact Apple Support](https://developer.apple.com/contact/submit/).
## Add Kajabi as an account admin
Once the Branded App is built, you'll receive an email notification from Kajabi letting you know it's time to submit the app for review and publication.
First, grant the Kajabi team admin access to the App Store Connect account so we can help ensure that the app submission goes as smoothly as possible.
**To give the Kajabi team access to the account:**
1. Click this link to open the **Users and Access** page in App Store Connect: [https://appstoreconnect.apple.com/access/users](https://appstoreconnect.apple.com/access/users)
(If you're not logged into the account, you'll be prompted to log in).
2. Then, click the blue **+** sign to add a user:
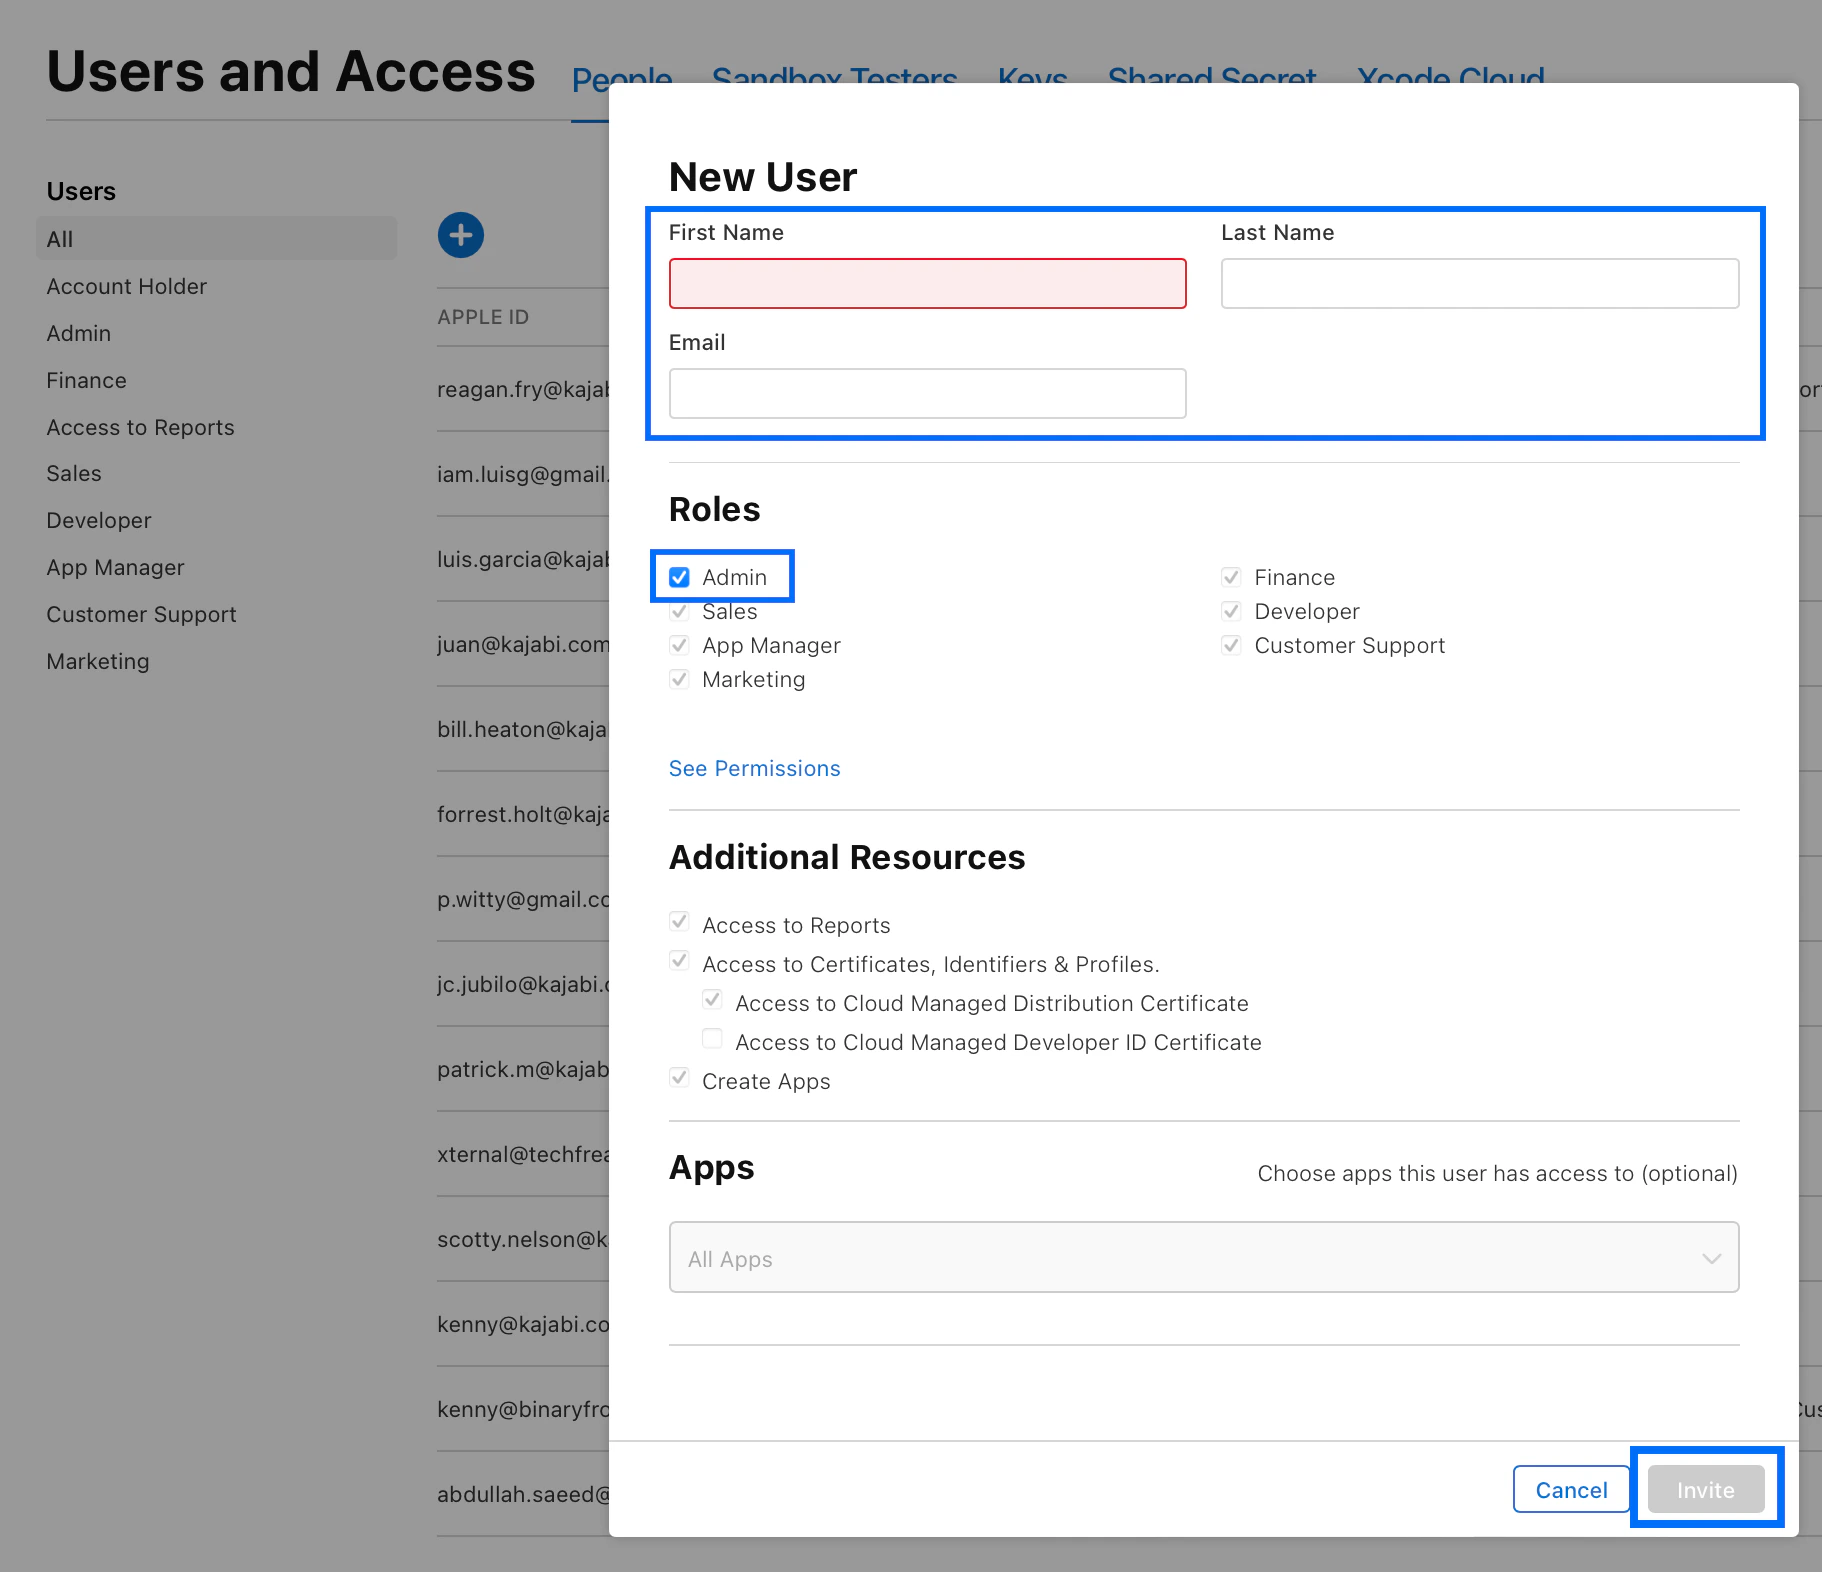
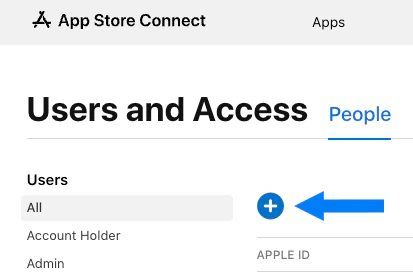 A popup modal will appear with a New User input form.
3. In the **First Name** field, input: **Vinay**
4. In the **Last Name** field, input: **Mysoor**
5. In the **Email** field, input: **[bma@kajabi.com](mailto:bma@kajabi.com)**
6. Under **Roles**, select the checkbox next to **Admin**
7. Click the **Invite** button:
A popup modal will appear with a New User input form.
3. In the **First Name** field, input: **Vinay**
4. In the **Last Name** field, input: **Mysoor**
5. In the **Email** field, input: **[bma@kajabi.com](mailto:bma@kajabi.com)**
6. Under **Roles**, select the checkbox next to **Admin**
7. Click the **Invite** button:
 Repeat the process to add **[Agile.Server@oc-corpeng.com](mailto:Agile.Server@oc-corpeng.com)** as another admin user to the account.
You can now continue with the Branded App intake process.
Repeat the process to add **[Agile.Server@oc-corpeng.com](mailto:Agile.Server@oc-corpeng.com)** as another admin user to the account.
You can now continue with the Branded App intake process.