> ## Documentation Index
> Fetch the complete documentation index at: https://help.kajabi.com/llms.txt
> Use this file to discover all available pages before exploring further.
# Create a first paid Apple App Offer for approval
> Submit a first paid Apple App Offer from a Branded Mobile App for Apple's review.
The first time you create a **paid App Offer** for the iOS version of a Branded App, you need to complete an extra step inside App Store Connect. The steps below cover setting up banking info, creating the offer, and submitting it for Apple's approval.
## Set up banking and tax info
Before creating in-app purchase offers in a Branded App, you will need to provide Banking and Tax information with Apple and Google.
Learn to [set up banking and tax info with Apple](/articles/mobile-apps/branded-app/how-to-set-up-your-banking-and-tax-info-with-apple) and [how to set up a merchant account for Google in-app purchases](/articles/mobile-apps/branded-app/how-to-set-up-a-merchant-account-for-google-in-app-purchases).
## Create the first paid in-app offer
After setting up banking and tax information, you can begin to create the first paid in-app offer. [Learn to create a paid in-app offer](/articles/mobile-apps/branded-app/how-to-create-app-offers-for-your-branded-app).
## Add courses on the Branded App home screen
[Customize the Branded App home screen](/articles/mobile-apps/branded-app/how-to-create-custom-screens-for-your-branded-mobile-app) to display the courses available with the in-app offer.
Wait 10-15 minutes for Kajabi to automatically finish up the app build before moving on to the next step.
## Submit the first paid Apple App Offer for approval
The first time you create a paid [App Offer](/articles/mobile-apps/branded-app/how-to-create-app-offers-for-your-branded-app) for the iOS version of a Branded App, you'll need to complete an extra step inside App Store Connect. After that, you'll be able to conveniently create all additional App Offers from within Kajabi.
**To submit the first paid App Offer to Apple:**
1. Log into your [App Store Connect](https://appstoreconnect.apple.com/) account.
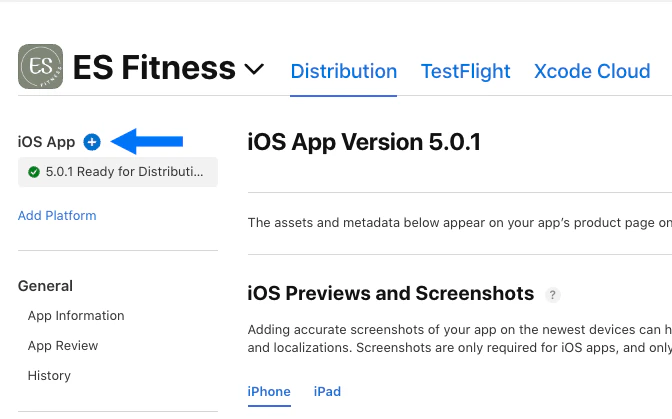
2. Click the blue **+** button at the top left to create a version of the app:
 A modal popup will appear where you can enter the New Version number.
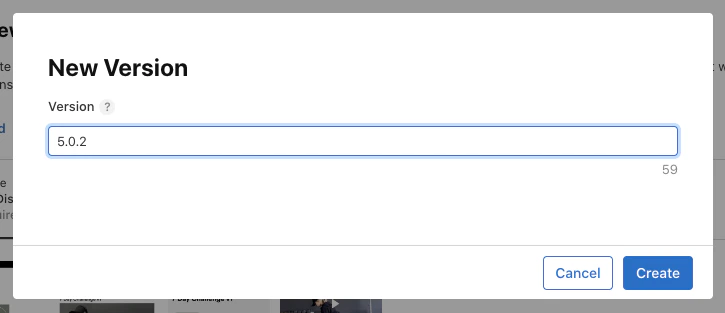
3. Enter the next number in the app version sequence. This can be any number, though we recommend numbering each version one increment higher than the last (example: 5.0.2).
4. Click **Create**:
A modal popup will appear where you can enter the New Version number.
3. Enter the next number in the app version sequence. This can be any number, though we recommend numbering each version one increment higher than the last (example: 5.0.2).
4. Click **Create**:
 A version of the app will be created.
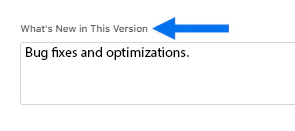
5. Next, scroll down to the **What's new in this version** field.
6. Enter a short description of what's new (example: bug fixes and optimizations):
A version of the app will be created.
5. Next, scroll down to the **What's new in this version** field.
6. Enter a short description of what's new (example: bug fixes and optimizations):
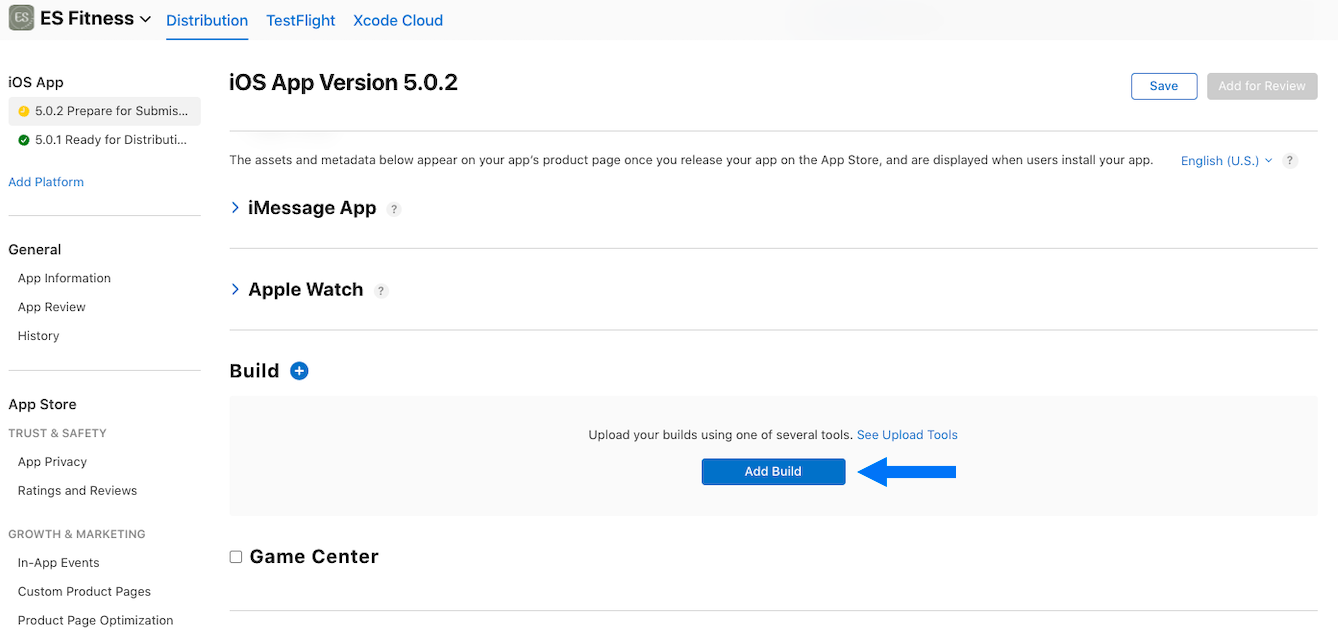
 7. Scroll down the page to the **Build** section and click **Add Build**:
 8. Select the latest build version from the popup modal (the latest build version will have the highest version number).
9. Click **Done**.
10. Scroll up and click **Save** at the top right of the page.
11. Click **Add for Review**.
12. Then, click **Submit to App Review** to submit the app for review.
## FAQs
### Why is the in-app purchase pending approval?
If you see the App Offer status listed as "Pending Submission" in Kajabi Branded App settings, this means that Apple has yet to approve the in-app purchase submission.
Apple reviews all first-time in-app purchase submissions to ensure that they comply with Apple's terms and conditions. This process usually takes a few days, and may take longer in some cases. Please check back in a few days for a status update.
8. Select the latest build version from the popup modal (the latest build version will have the highest version number).
9. Click **Done**.
10. Scroll up and click **Save** at the top right of the page.
11. Click **Add for Review**.
12. Then, click **Submit to App Review** to submit the app for review.
## FAQs
### Why is the in-app purchase pending approval?
If you see the App Offer status listed as "Pending Submission" in Kajabi Branded App settings, this means that Apple has yet to approve the in-app purchase submission.
Apple reviews all first-time in-app purchase submissions to ensure that they comply with Apple's terms and conditions. This process usually takes a few days, and may take longer in some cases. Please check back in a few days for a status update.