> ## Documentation Index
> Fetch the complete documentation index at: https://help.kajabi.com/llms.txt
> Use this file to discover all available pages before exploring further.
# Verify a Google Developer account
> Complete the Google Developer account verification process for a Branded Mobile App.
Google requires you to verify a **Google Developer account** by providing information related to how it was originally registered. If you registered as an individual, you will be required to provide contact information, identity documents, and verify your email and phone number. If you registered as an organization, you will need to provide the same items listed as an individual as well as documents verifying the business validity.
## Watch for the email
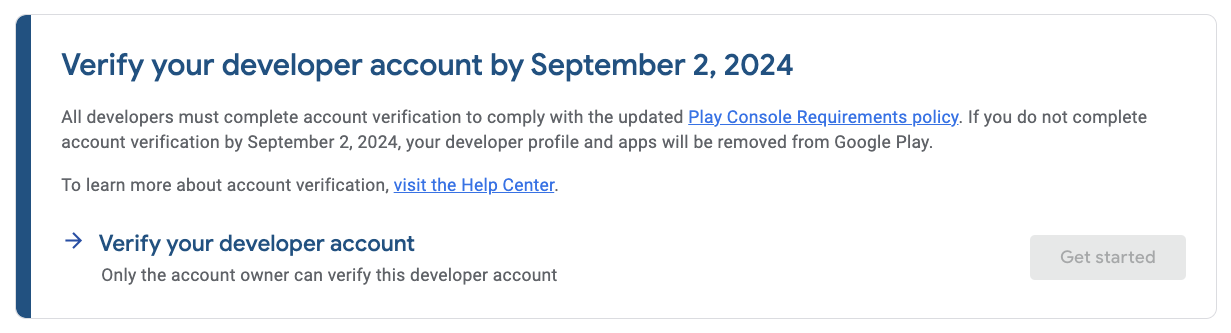
Google will email you with an email that indicates, "Verify your developer account by {date}". You can also [log into the developer account](https://play.google.com/console/) directly and you will see the following verification request:
 **Note:**
You may need to select an app before this will appear or it may appear on the account-level page.
## Start the process
1. [Log into the developer account](https://play.google.com/console/) where you can see the verification request
2. Click **Get Started**
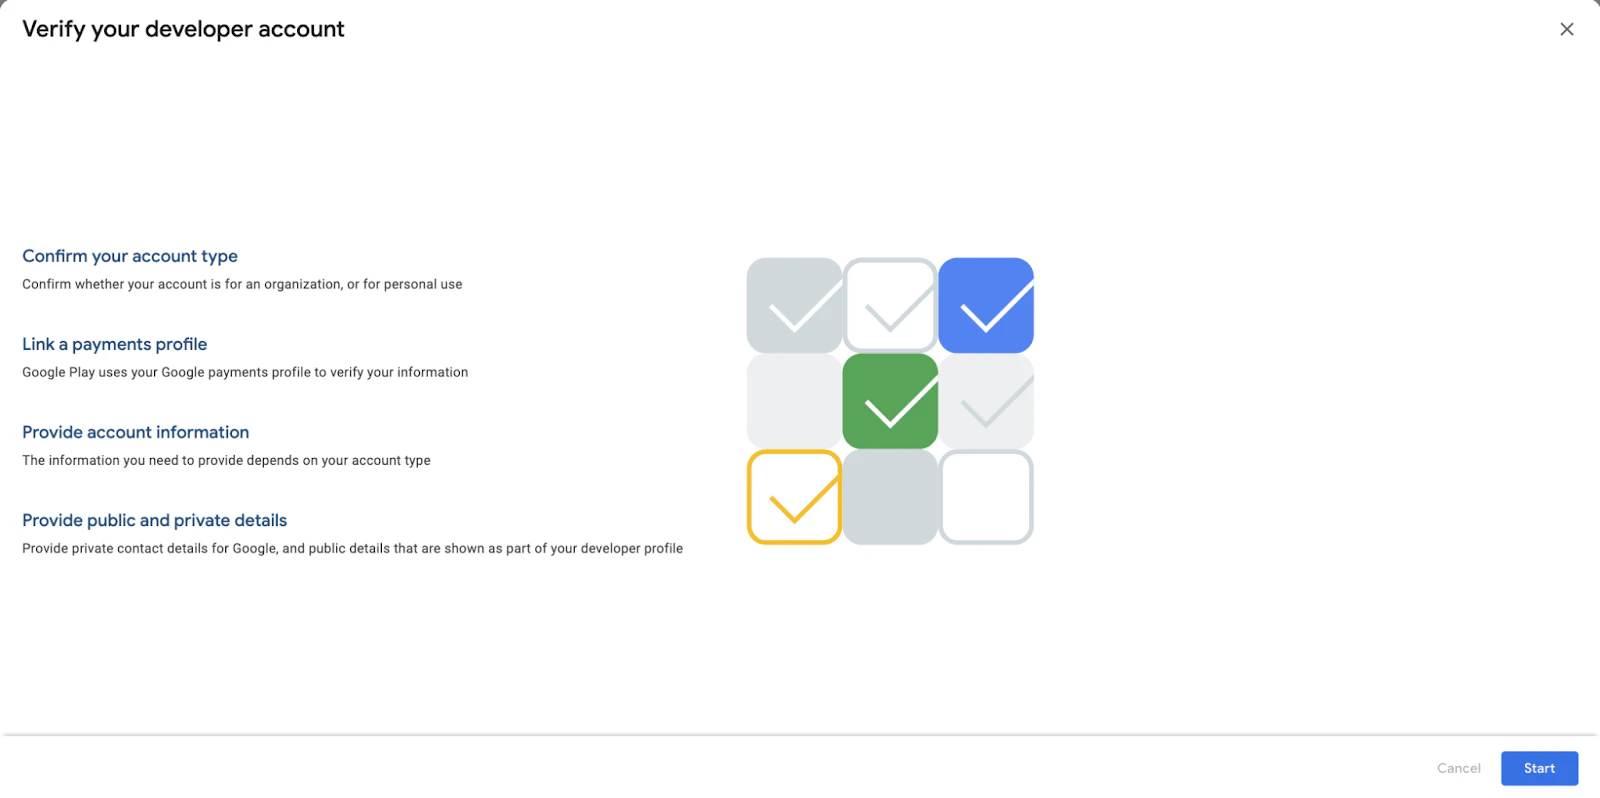
3. You will be taken to a screen that indicates the process involved:
**Note:**
You may need to select an app before this will appear or it may appear on the account-level page.
## Start the process
1. [Log into the developer account](https://play.google.com/console/) where you can see the verification request
2. Click **Get Started**
3. You will be taken to a screen that indicates the process involved:
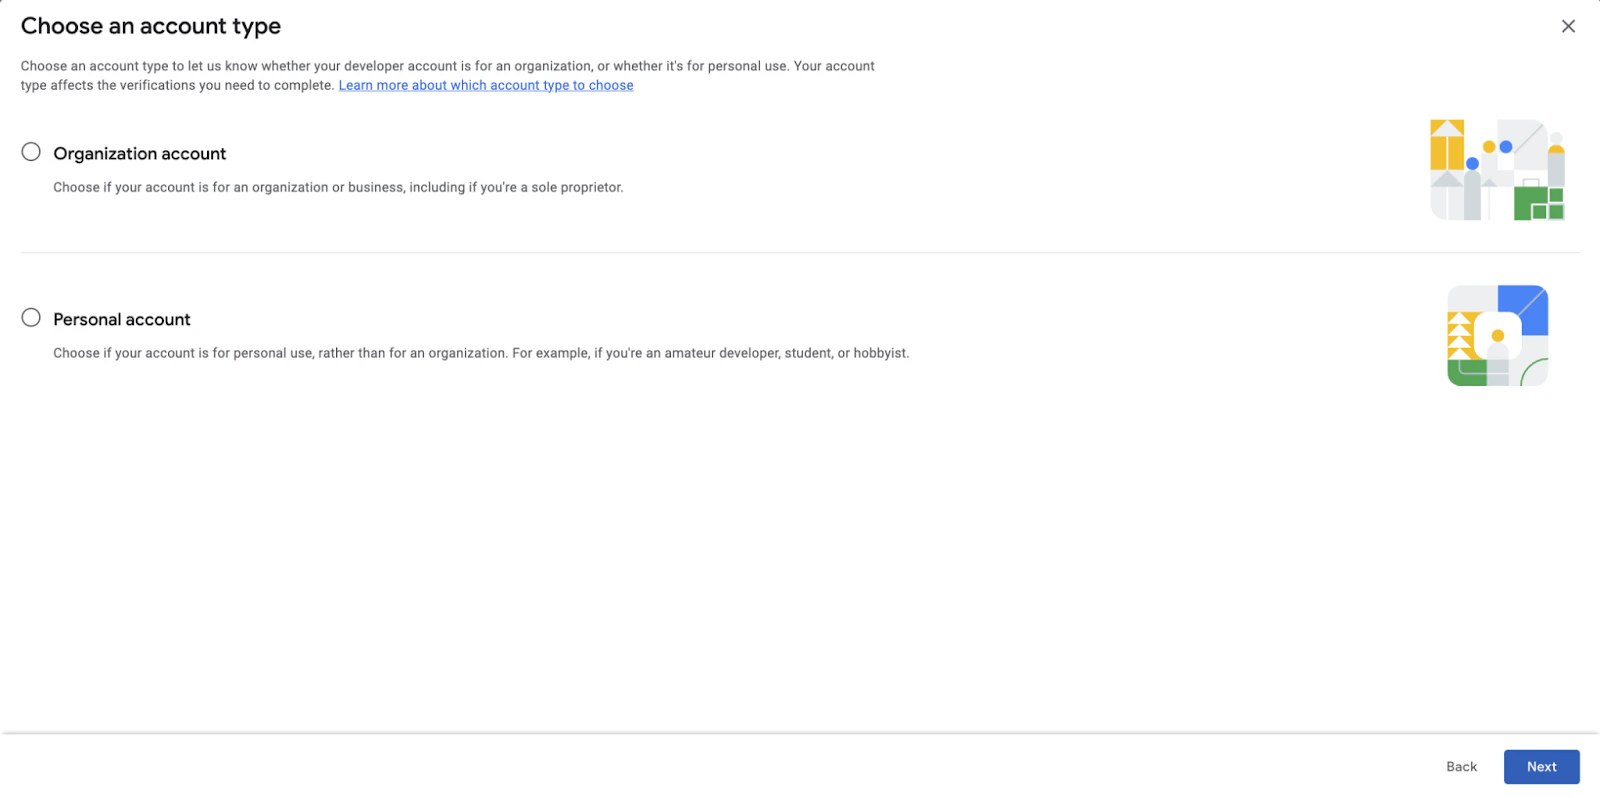
 4. Check whether you want to verify this as an organization account or as a personal account:
 **Note:**
If you select an organization account, you are required to provide the DUNS number during the verification process. [Learn to set up a D-U-N-S number](./how-to-set-up-your-d-u-n-s-number-for-your-branded-app).
**The remainder of this guide will be following the steps under the assumption you are verifying the developer account as an organization account as it is more complex and has more steps, but the majority of the steps are similar for the individual verification**.
## Create or link a Payments Profile
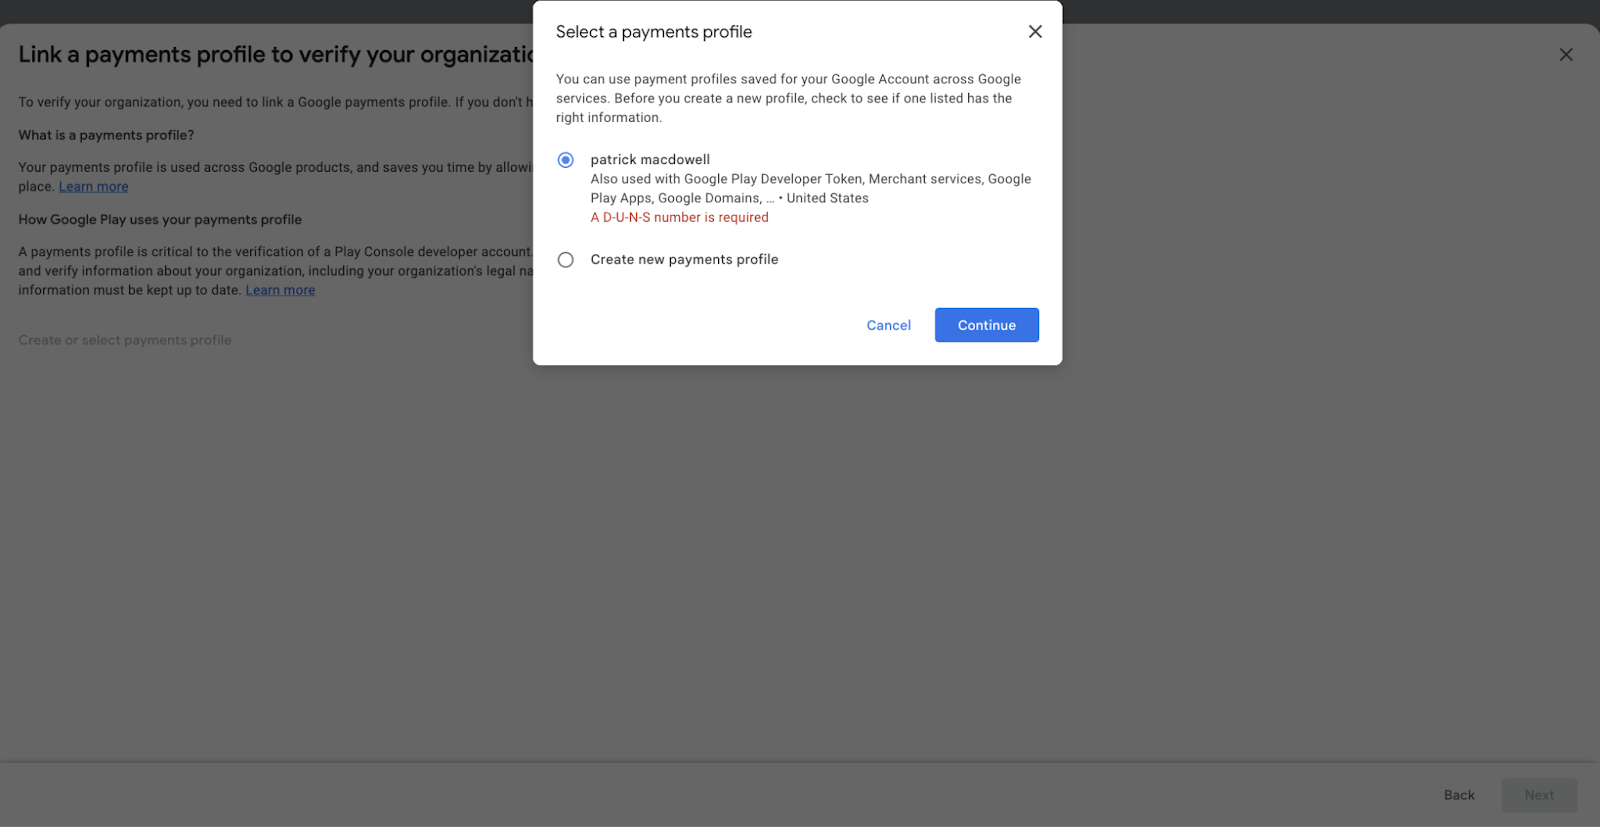
1. If you have not already done so, you will be requested to set up or link a **Payments Profile** before you can continue:
**Note:**
If you select an organization account, you are required to provide the DUNS number during the verification process. [Learn to set up a D-U-N-S number](./how-to-set-up-your-d-u-n-s-number-for-your-branded-app).
**The remainder of this guide will be following the steps under the assumption you are verifying the developer account as an organization account as it is more complex and has more steps, but the majority of the steps are similar for the individual verification**.
## Create or link a Payments Profile
1. If you have not already done so, you will be requested to set up or link a **Payments Profile** before you can continue:
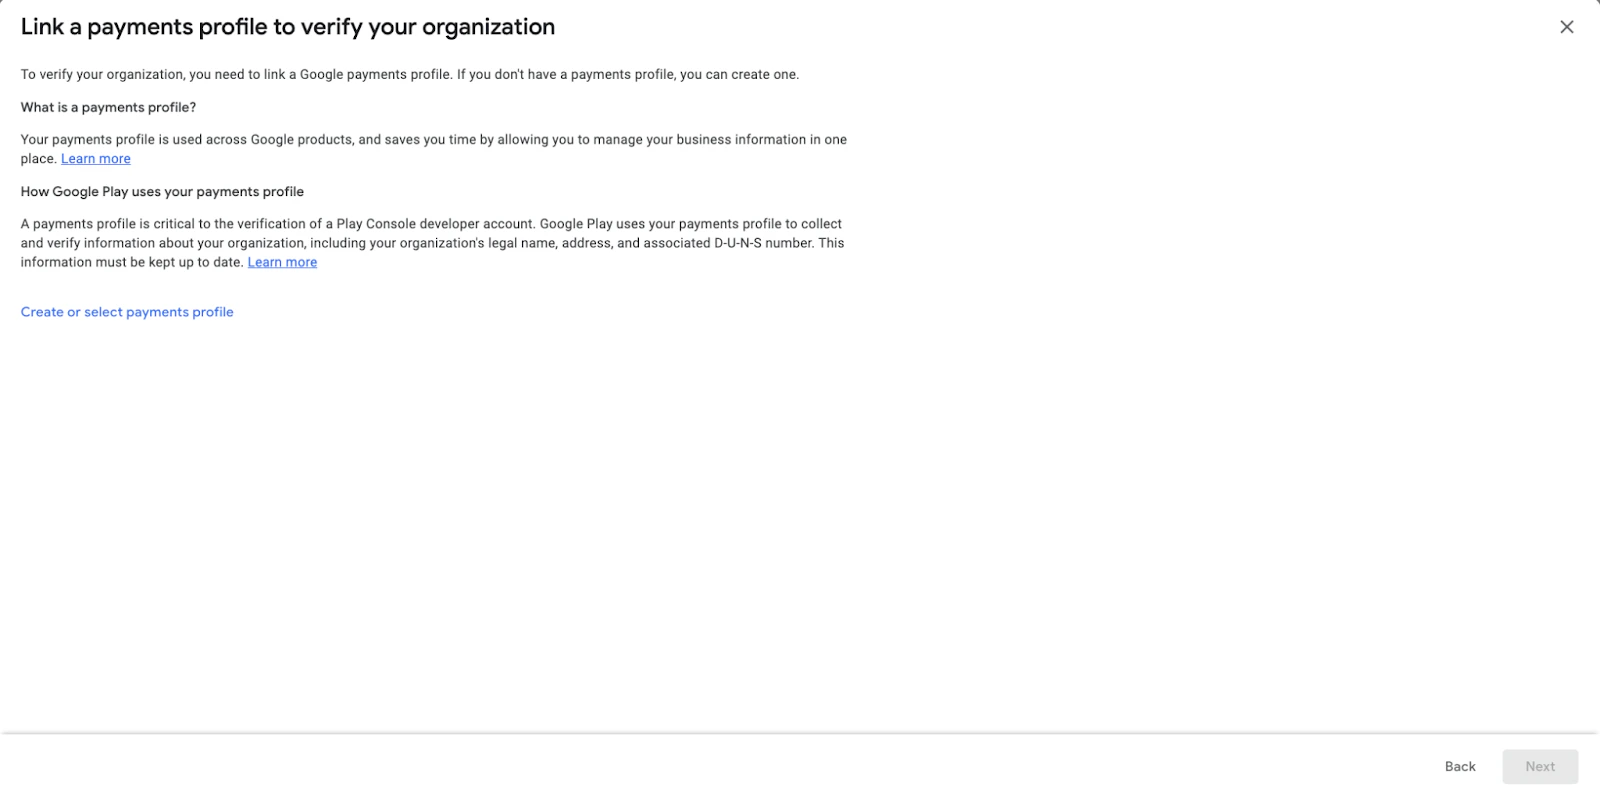 2. Select **Create or Select Payments Profile** on the page
If you already have one set up, like in the screenshot below, you can use it. If not, you will need to create one:
2. Select **Create or Select Payments Profile** on the page
If you already have one set up, like in the screenshot below, you can use it. If not, you will need to create one:
 ## Enter the DUNS number
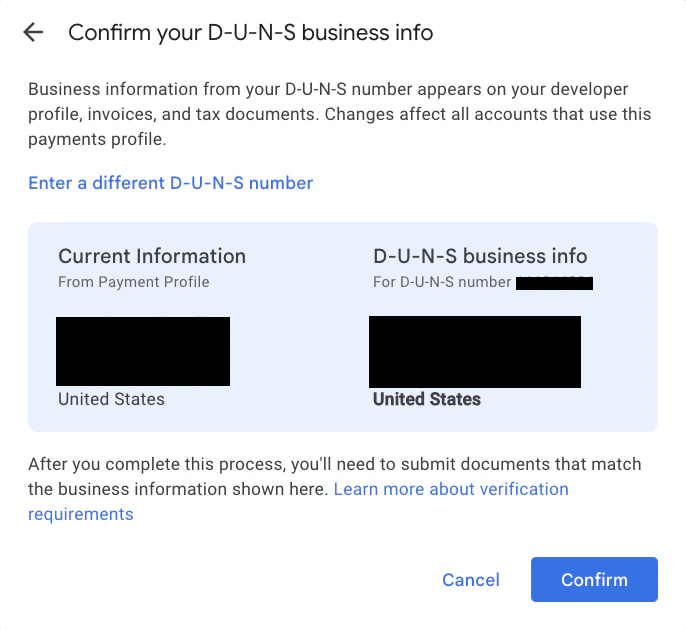
Next, you will be redirected to a page where you enter in the [DUNS number](./how-to-set-up-your-d-u-n-s-number-for-your-branded-app).
You should see the following:
## Enter the DUNS number
Next, you will be redirected to a page where you enter in the [DUNS number](./how-to-set-up-your-d-u-n-s-number-for-your-branded-app).
You should see the following:
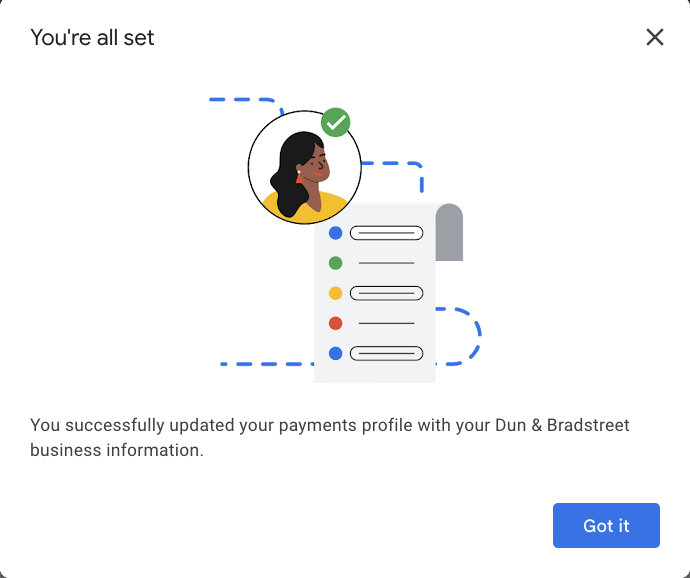
 1. Click **Confirm** and you will see this completion page:
 ## Enter organization or personal information
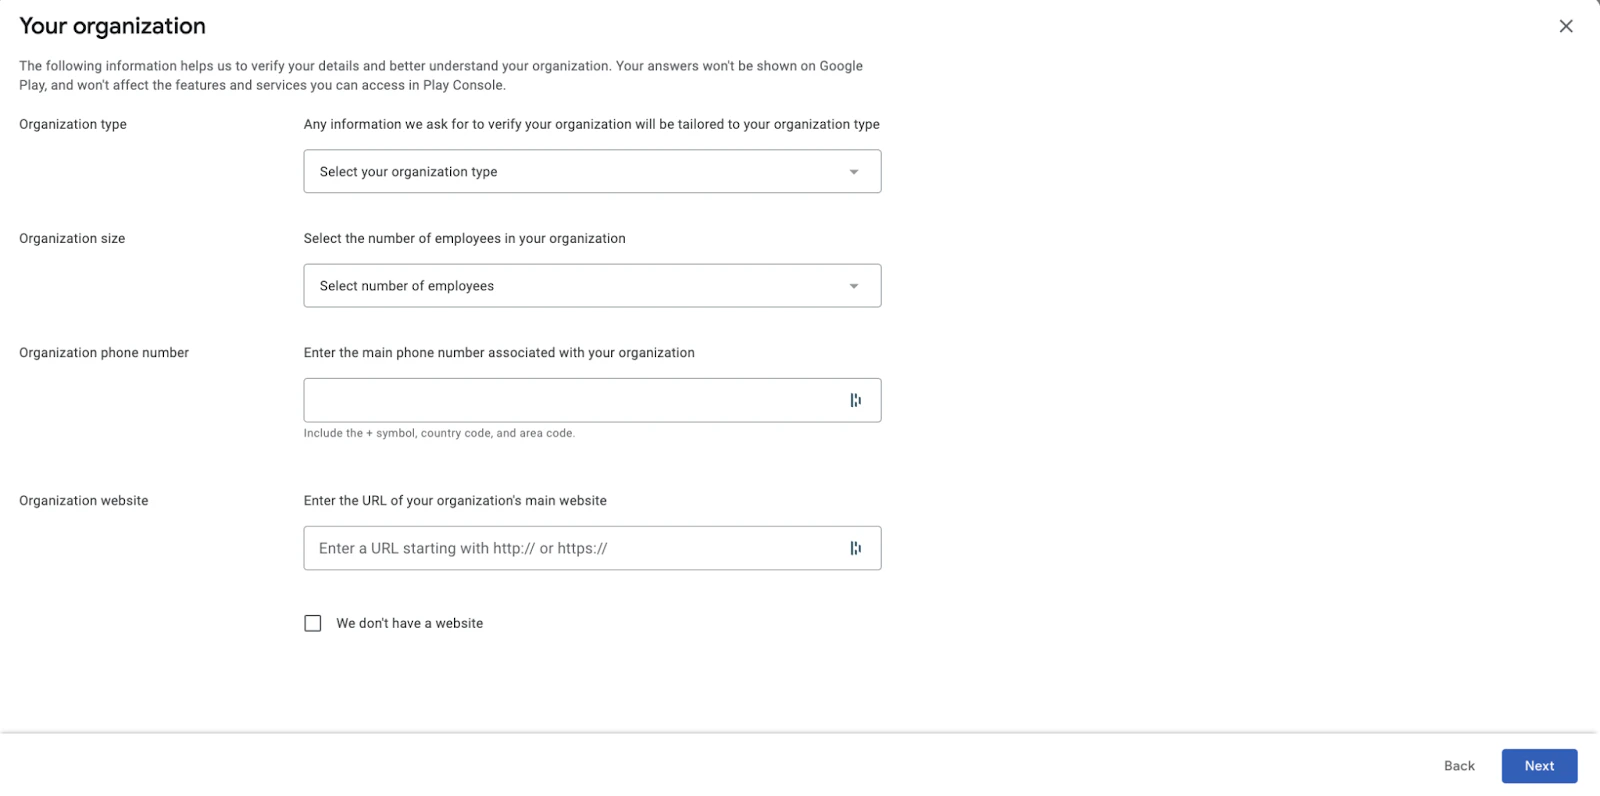
1. Enter in the information that pertains to the organization or personal account:
## Enter organization or personal information
1. Enter in the information that pertains to the organization or personal account:
 2. After this, you will be asked to enter information that requires you to verify what is entered:
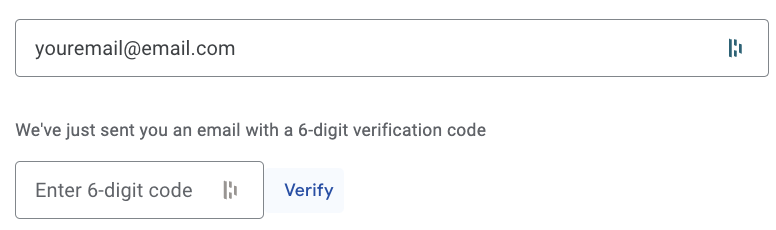
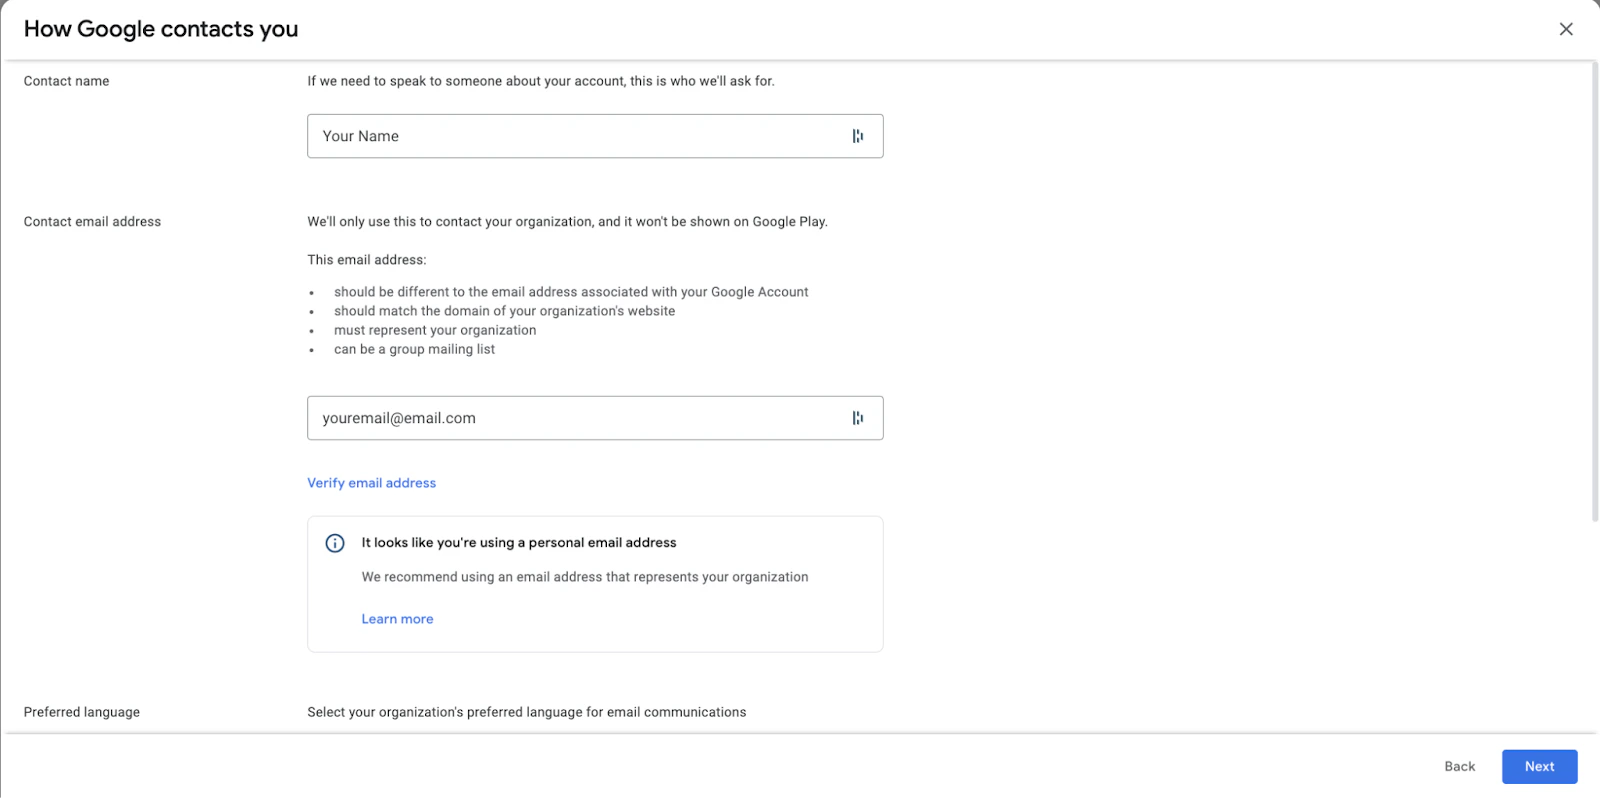 3. You will see a **Verify email address** text on the screen. When you enter in the email, you will be required to verify it by reading a code from the email and entering it:
 **Note:**
You will have to do the same for a phone number in this process as well.
## Update Payments Profile
It is very likely at this point that you will see the following error:
**Note:**
You will have to do the same for a phone number in this process as well.
## Update Payments Profile
It is very likely at this point that you will see the following error:
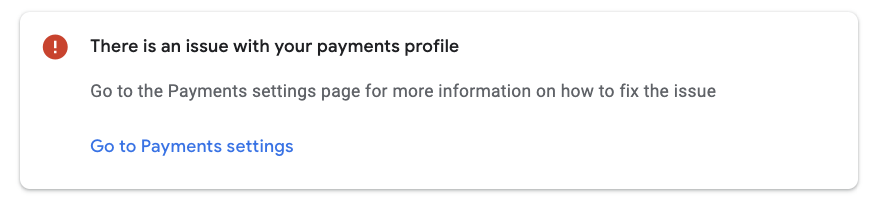 1. If you see it, complete this section. If not, move on to the next section
2. You will be asked to verify the identity within the payments profile:
1. If you see it, complete this section. If not, move on to the next section
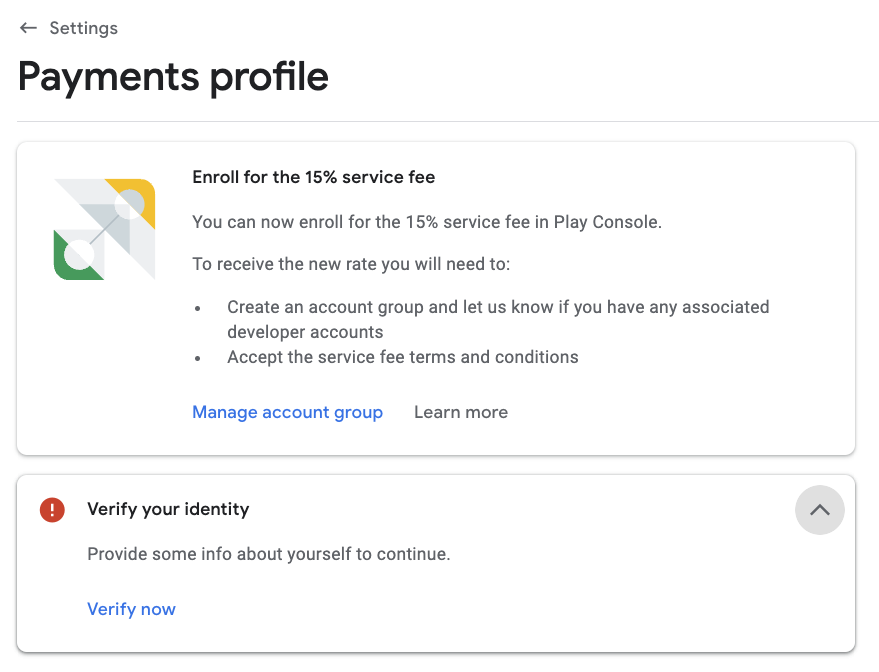
2. You will be asked to verify the identity within the payments profile:
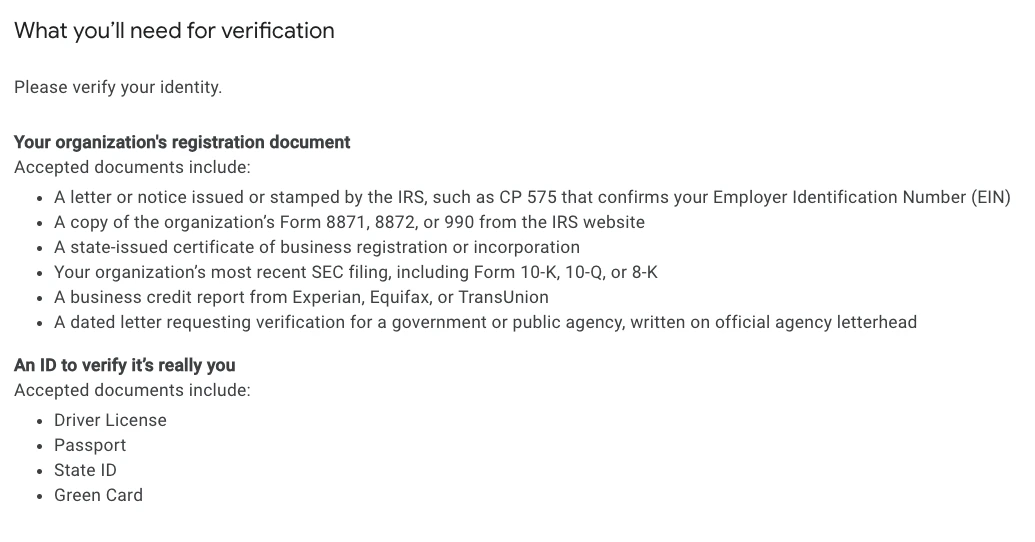
 3. You will then be asked to upload at least 2 documents that verify the identity
Please see this list of authorized documents Google permits you to use for verification:
3. You will then be asked to upload at least 2 documents that verify the identity
Please see this list of authorized documents Google permits you to use for verification:
 4. After you have verified the information requested, you will see this notification:
 When you see the above notification, you have completed all the steps required to verify the account.
Now, all you need to do is wait for Google to complete the verification process on their end.
When you see the above notification, you have completed all the steps required to verify the account.
Now, all you need to do is wait for Google to complete the verification process on their end.