> ## Documentation Index
> Fetch the complete documentation index at: https://help.kajabi.com/llms.txt
> Use this file to discover all available pages before exploring further.
# Connect Calendly to a Coaching Product
> Integrate Calendly with a Coaching Product on Kajabi for a seamless scheduling experience.
**Calendly** is a scheduling tool built to help you schedule your meetings professionally and efficiently. With Kajabi's native integration with Calendly, you can create a seamless scheduling experience for your members. Use Calendly to set time blocks, adjust your appointments, and manage your overall scheduling.
[Learn more about Calendly](https://calendly.com/).
**Note:**
The [Calendly plan with webhooks](https://calendly.com/pricing) is required to integrate your Calendly with your Coaching Product on Kajabi successfully.
## Create a Calendly Event
Get started with your Calendly integration by first creating your Calendly event.
If you haven't created a Calendly account, [create one now](https://calendly.com/signup). Keep in mind that a [Calendly account with webhooks](https://calendly.com/pricing) is required to integrate your Calendly with your Coaching Product on Kajabi successfully.
**Note:**
In order to connect Calendly with Kajabi, your Calendly account must have **admin** status.
If your account does not currently have admin status, your role will need to be changed by a current admin:
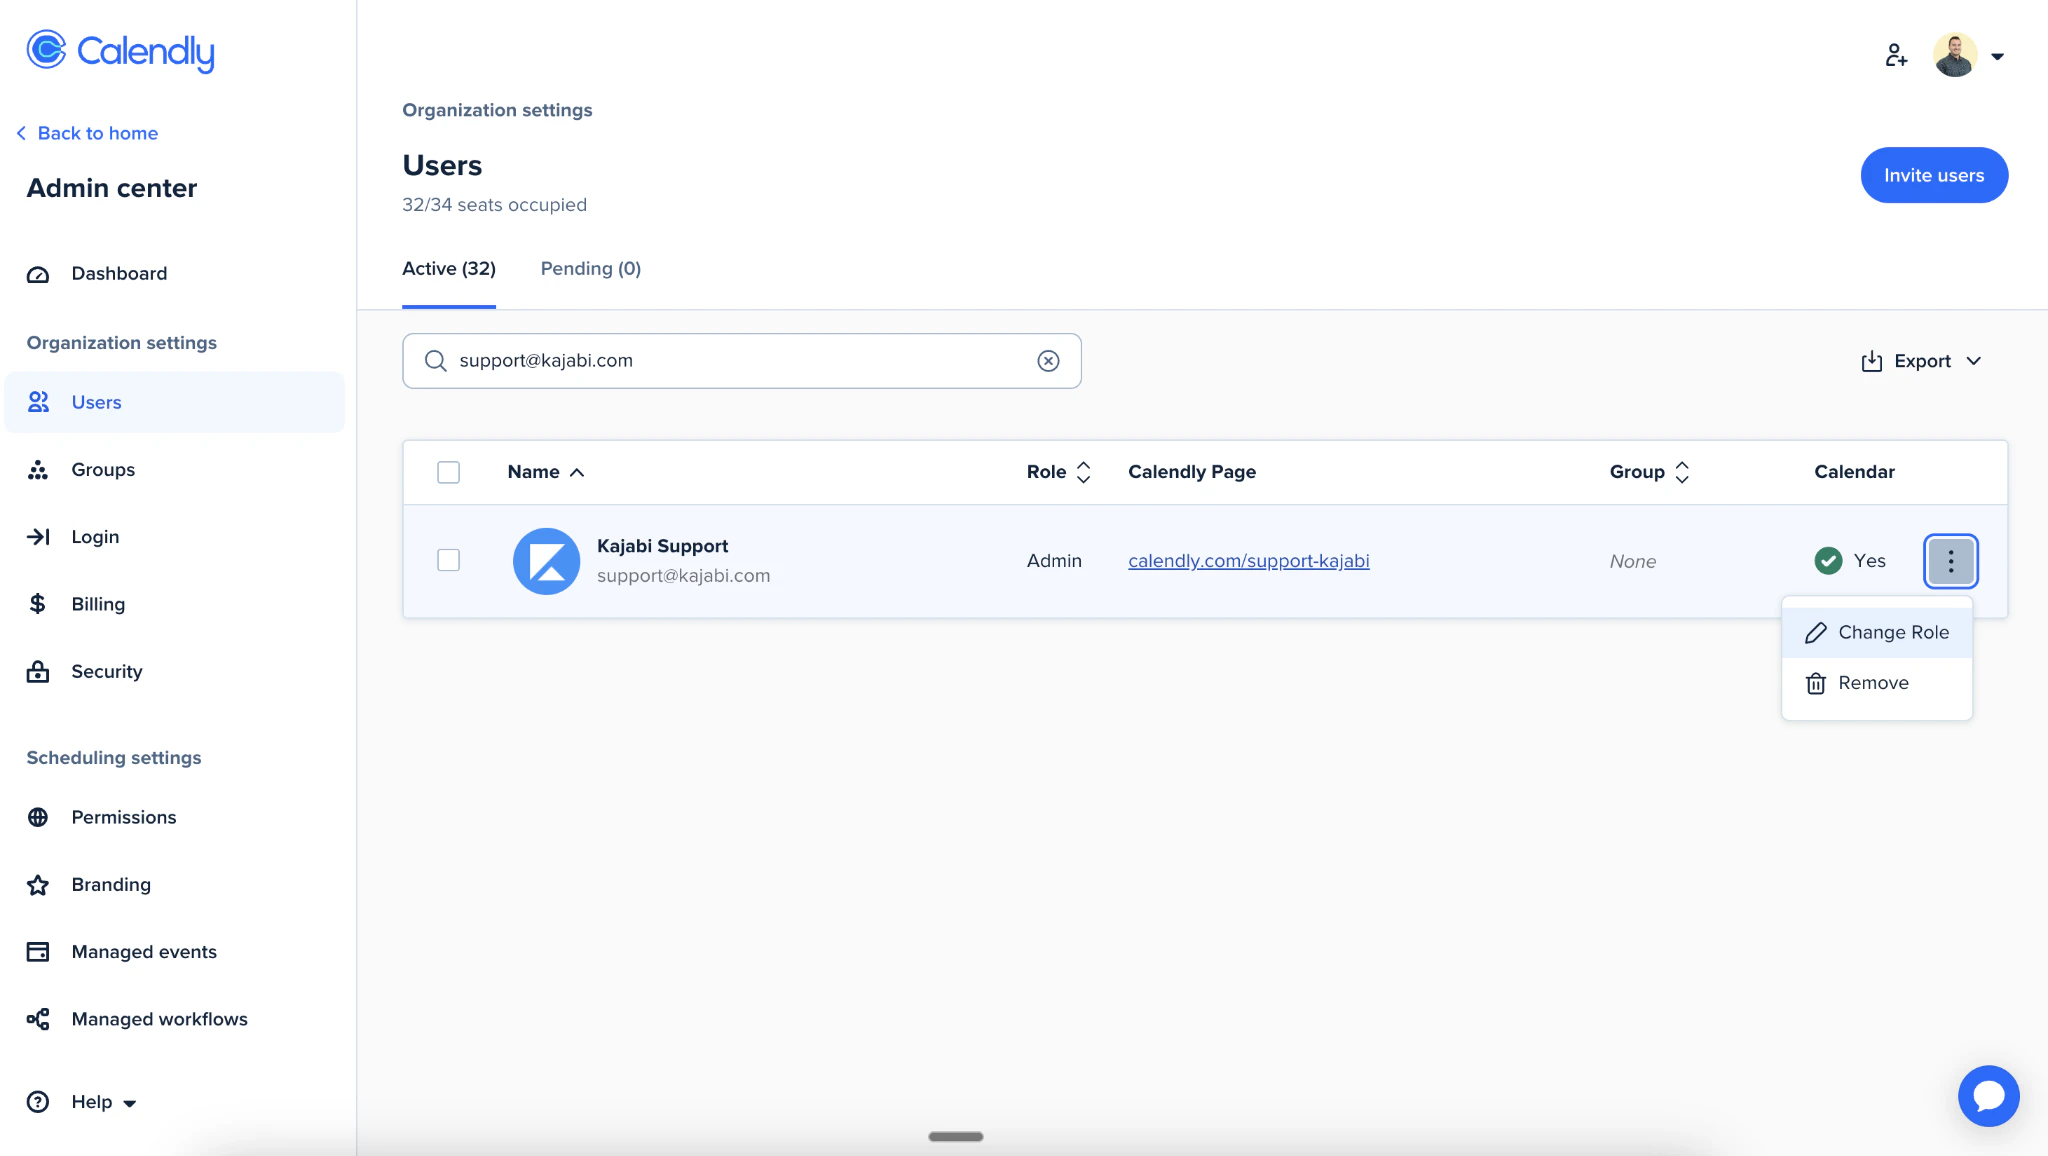 [Learn more about admin roles in Calendly](https://help.calendly.com/hc/en-us/articles/4410722852759-User-roles-and-permissions).
### Create the event
After creating your account, log in to Calendly and:
1. Select **+ Create** from your Calendly Dashboard
2. Click **Event Type**
3. Select **Create** for the One-on-One Event Type
**Note:**
Only one-on-one Calendly event types are supported at this time.
[Learn more about admin roles in Calendly](https://help.calendly.com/hc/en-us/articles/4410722852759-User-roles-and-permissions).
### Create the event
After creating your account, log in to Calendly and:
1. Select **+ Create** from your Calendly Dashboard
2. Click **Event Type**
3. Select **Create** for the One-on-One Event Type
**Note:**
Only one-on-one Calendly event types are supported at this time.
4. Provide the following information for your Calendly Event:
* Event name
* Location
* Description/Instructions
* Event link
* Event color
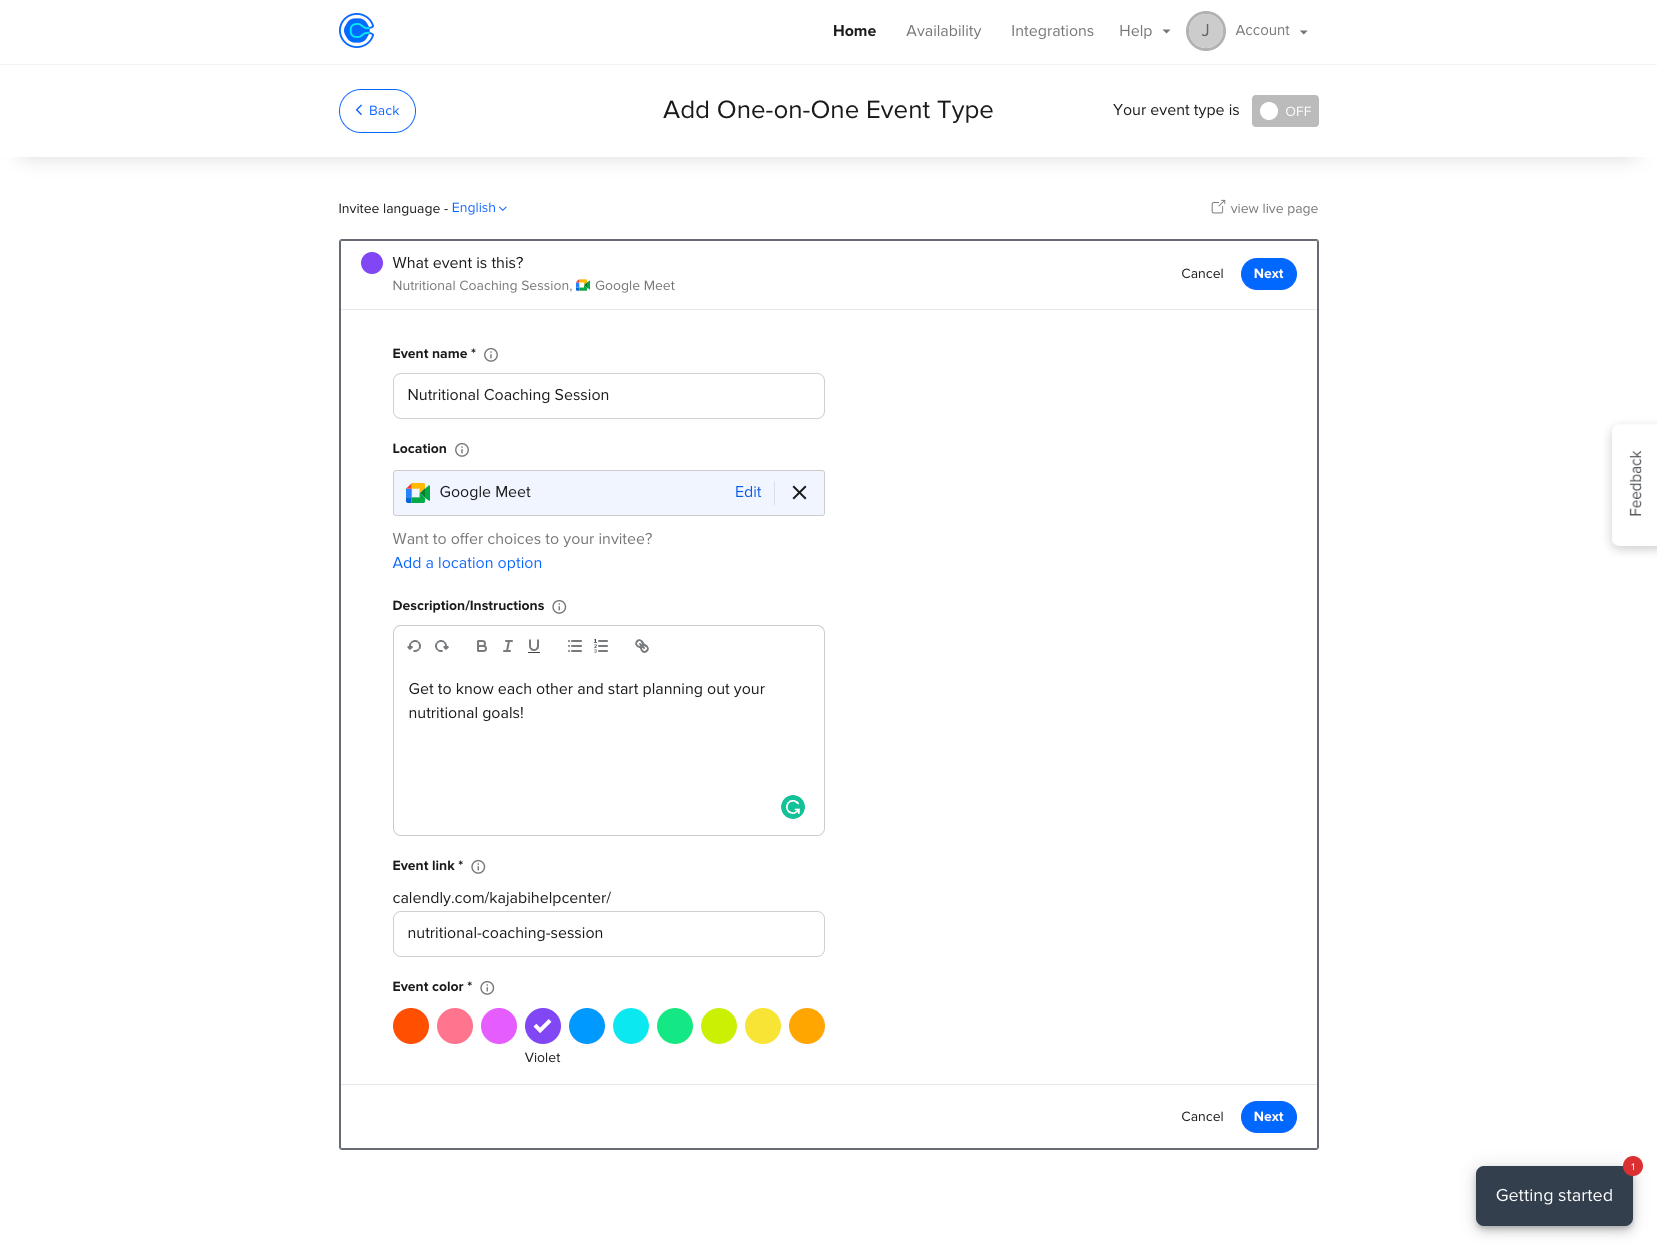 5. Click **Next** when you are finished
6. Complete your booking details:
* Date Range
* Duration
* Availability
7. Click **Additional rules for your availability**
8. Scroll to the bottom of the page and select **Make this a secret event**
**Important:**
Kajabi will only detect secret events in Calendly. If your event was not secret, people could potentially book your event directly from your Calendly page without first purchasing it through Kajabi.
9. When you are finished creating your event, click **Next**
5. Click **Next** when you are finished
6. Complete your booking details:
* Date Range
* Duration
* Availability
7. Click **Additional rules for your availability**
8. Scroll to the bottom of the page and select **Make this a secret event**
**Important:**
Kajabi will only detect secret events in Calendly. If your event was not secret, people could potentially book your event directly from your Calendly page without first purchasing it through Kajabi.
9. When you are finished creating your event, click **Next**
## Connect Calendly to a Kajabi Coaching Product
After your event is live in Calendly, connect Calendly to your Kajabi Coaching Product.
### Connect Calendly
1. Select **Products** from your Dashboard
2. Select **Coaching**
3. Click **+ New Coaching Program**
4. Click **Get started**
5. Select **Single session** or **Package** for your Coaching program
[Learn about the difference between single sessions and packages](../../products/coaching/differences-between-a-11-coaching-program-and-group-coaching).
6. Enter your Coaching Program details:
* Title
* Coach name
* Product description
7. Click **Continue**
8. Open the **Scheduling Preference** dropdown menu
9. Select **Calendly**
10. Click **Connect with Calendly**
11. Enter your Calendly login credentials and click **Continue** to be directed back to Kajabi
Kajabi will then need to reload the page to connect Calendly, which means you will need to re-enter your Program details.
### Re-enter Program details
1. Click **Get started**
2. Select **Single session** or **Package** for your Coaching program
[Learn about the difference between single sessions and packages](../../products/coaching/differences-between-a-11-coaching-program-and-group-coaching).
3. Enter your Coaching Program details:
* Title
* Coach name
* Product description
4. Click **Continue**
5. Select **Calendly**
6. Choose the **One-on-one Event Type** from the dropdown
7. Click **Finish**
**Important:**
To avoid potential complications with your integration, refrain from changing Calendly credentials (name and password), disconnecting, or detaching an existing Calendly integration. Instead, create an event in your connected Calendly account and add another person to it, or delete your Coaching Program in Kajabi and create a new one. If you wish to disconnect an existing Calendly integration, reach out to our support team for assistance.
## Schedule a session on behalf of a client
You can book a session on behalf of your client after successfully connecting Calendly to your Coaching Product.
1. Navigate to your **Products** tab from your Dashboard
2. Click **Coaching**
3. Click **Programs**
4. Select your Coaching Program
5. Select your client's Name
6. Click **Schedule session**
7. Select a Date and Time
8. Click **Confirm**
9. Edit the Session Details
10. Click **Schedule Event**