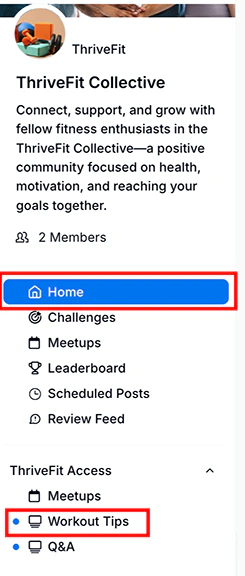
 4. In the left sidebar, click **Feed** (or Home) or click a **\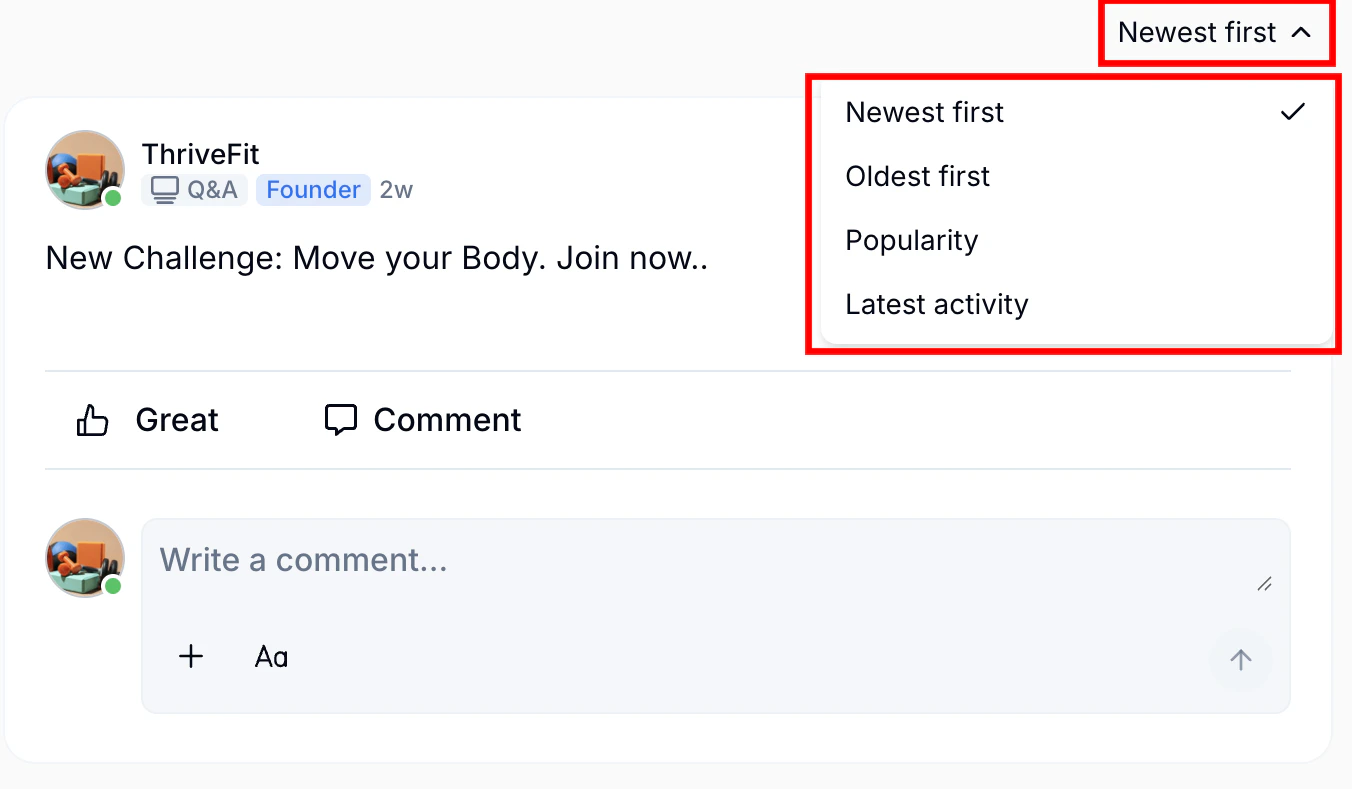
## Choose a Feed View Mode The Community Admin may configure up to three different **View Modes**, or layouts, for members to use to view posts in the Global Feed or in individual Channels. To toggle View Modes, at the top of the Community click either **Feed**, **Forum**, or **Gallery**.
 * **Feed** (Default) - A social card layout for scrolling through text and media posts
* **Forum** - A compact table layout for scanning topics, replies, and activity
* **Gallery** - A responsive image grid for showcasing photos, designs, and visual content
## Create a Post
* **Feed** (Default) - A social card layout for scrolling through text and media posts
* **Forum** - A compact table layout for scanning topics, replies, and activity
* **Gallery** - A responsive image grid for showcasing photos, designs, and visual content
## Create a Post
 1. From the **Feed** or **Channel** page, click **+ icon** next to the blank form field at the top right.
2. Add any written content as desired.
3. When crafting your post, click the **+** **icon** in the bottom left corner to attach media. You may add images, GIFs, videos files, audio files, and more.
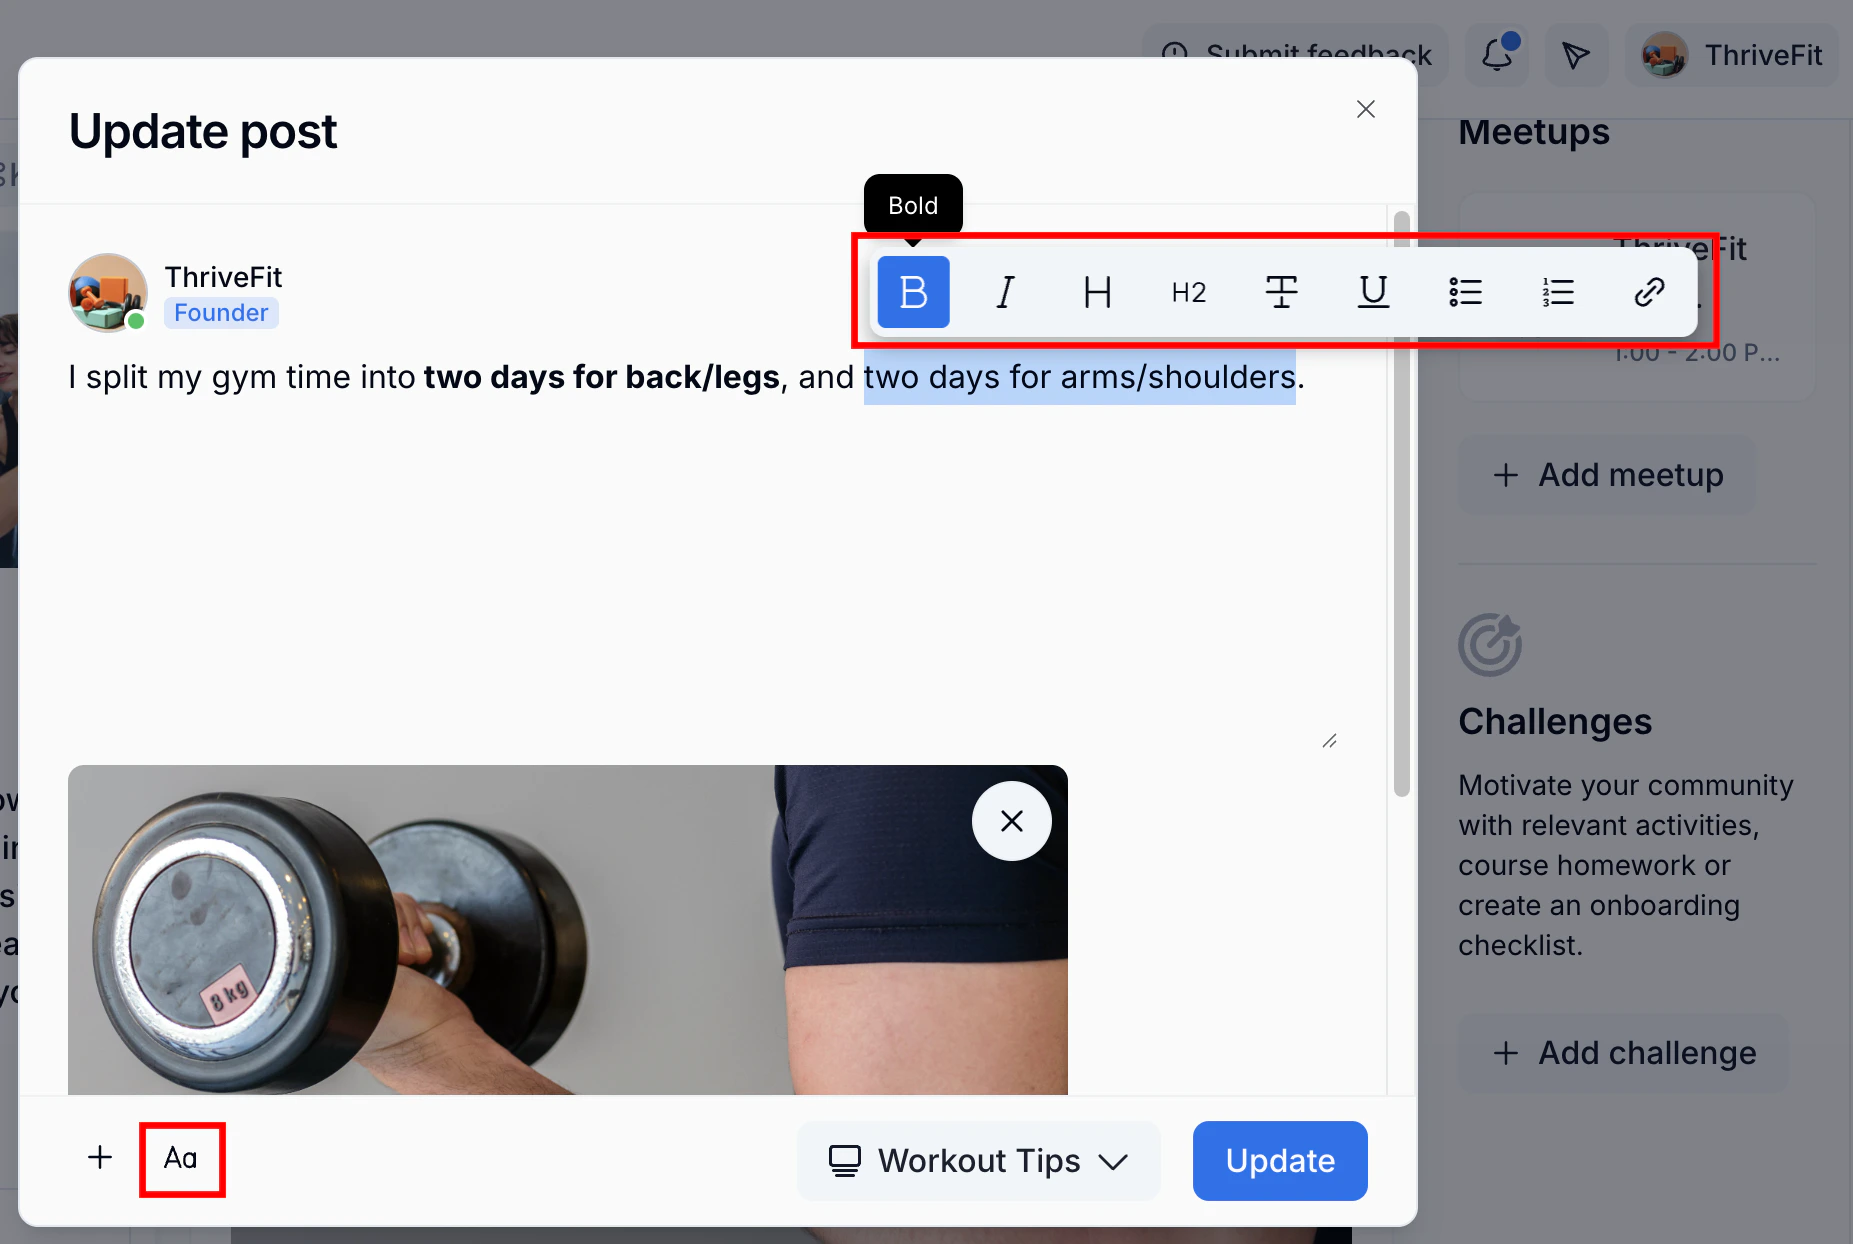
4. Click the **Aa button** or highlight a selection on a Post or Comment to enhance its visual appeal with **text formatting**. This includes bold, italics, underline, strikethrough, ordered lists (numbered lists), unordered lists (bullet points), headings 1 and 2 (only available in Posts, not Comments), and hyperlinks.
5. Click **Post**, then select a **Channel** (if posting from the Global Feed page).
6. Click **Post** again to publish it.
1. From the **Feed** or **Channel** page, click **+ icon** next to the blank form field at the top right.
2. Add any written content as desired.
3. When crafting your post, click the **+** **icon** in the bottom left corner to attach media. You may add images, GIFs, videos files, audio files, and more.
4. Click the **Aa button** or highlight a selection on a Post or Comment to enhance its visual appeal with **text formatting**. This includes bold, italics, underline, strikethrough, ordered lists (numbered lists), unordered lists (bullet points), headings 1 and 2 (only available in Posts, not Comments), and hyperlinks.
5. Click **Post**, then select a **Channel** (if posting from the Global Feed page).
6. Click **Post** again to publish it.
## Make, read, and reply to Comments **Comments** may be left by Admins or Members on any Post in a feed-type Channel they have access to. Members may reply to a Comment, copy the comment's direct URL, or report it for inappropriate content or spam. Members may delete their own comments, but not others. Admins can delete any Comment. When a Channel is in a **Forum** or **Gallery** view, Comments appear in a side thread panel. On a desktop, this is pinned to the right side of the app window, while on mobile, the panel slides up on the screen. ## Add Chat Messages To add a Message to a chat-type Channel, write Comments in the form at the bottom of the Channel window. You may attach or embed multimedia, use emojis, or add a poll. Click the **up arrow** to submit. ## Pin a Post As an Admin, you may spotlight an important Post by **pinning** it to the top of a feed-type Channel or the global Feed. This helps ensure members see your most important content first.
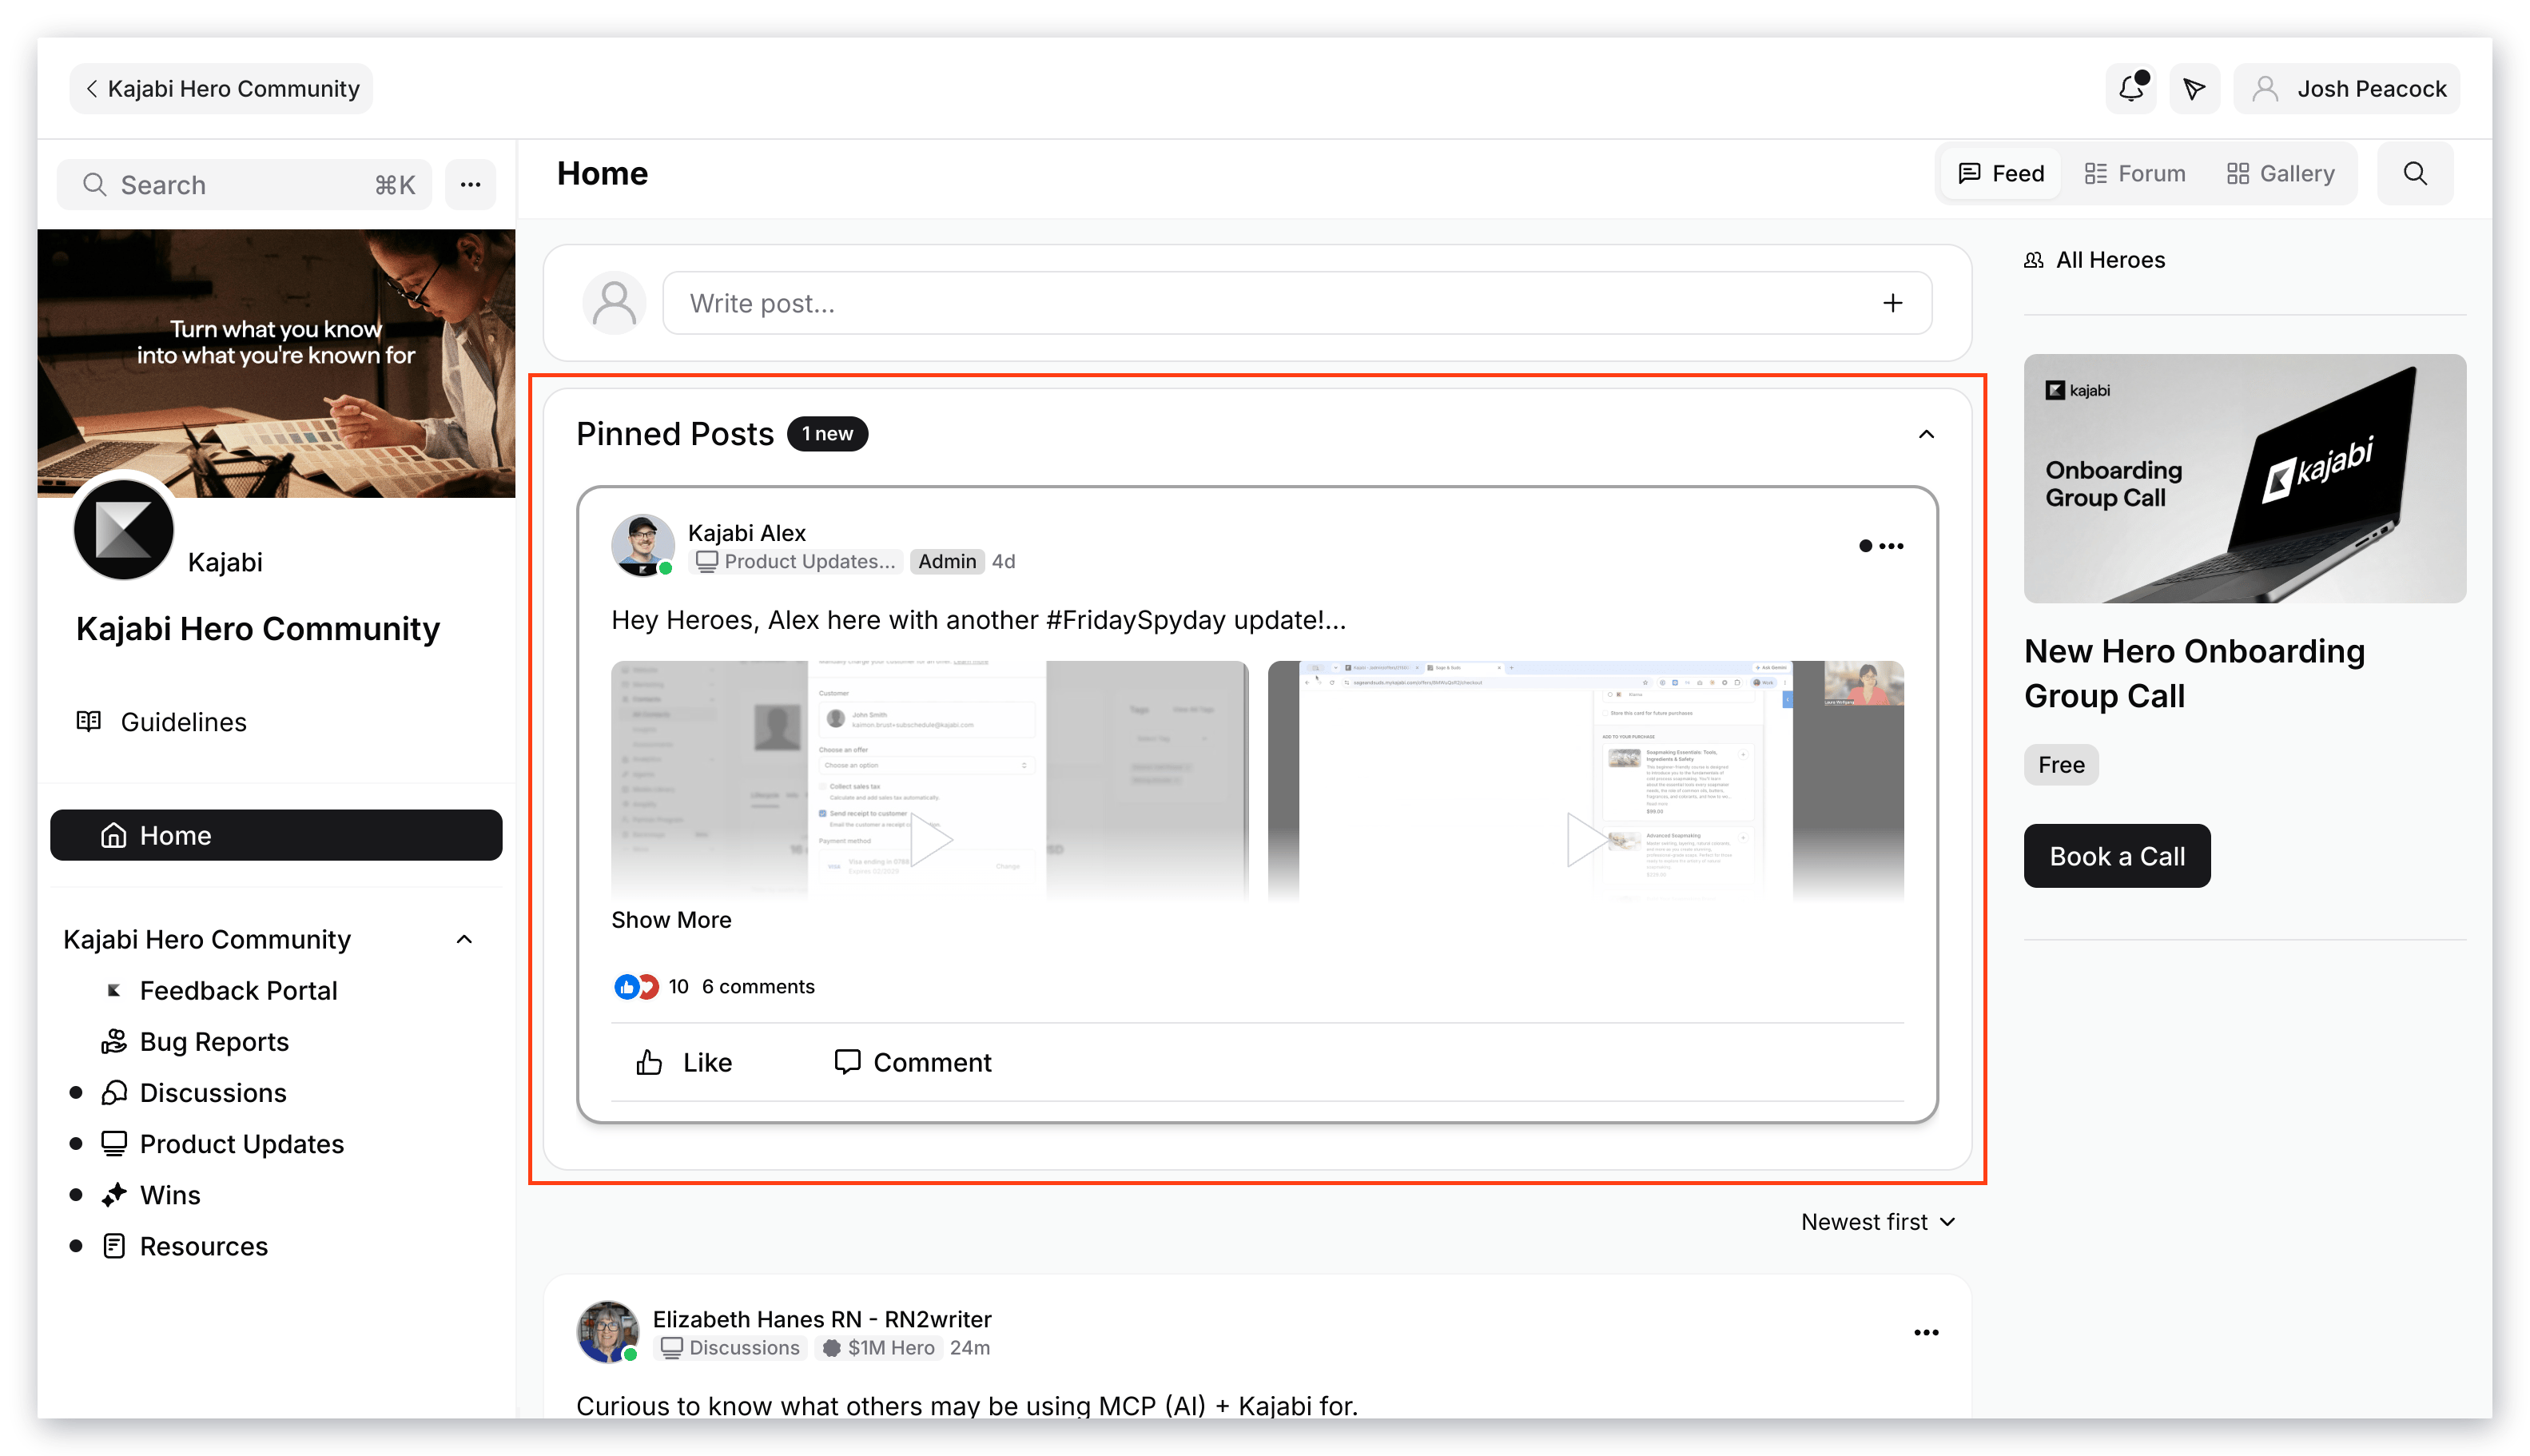 ### Pin a Post to the Global Feed or a feed-type Channel
1. Navigate to the global Feed or a **Channel**.
2. Locate the **Post** you wish to pin.
3. Click the **ellipsis menu (...).**
4. Select **Pin to \
### Pin a Post to the Global Feed or a feed-type Channel
1. Navigate to the global Feed or a **Channel**.
2. Locate the **Post** you wish to pin.
3. Click the **ellipsis menu (...).**
4. Select **Pin to \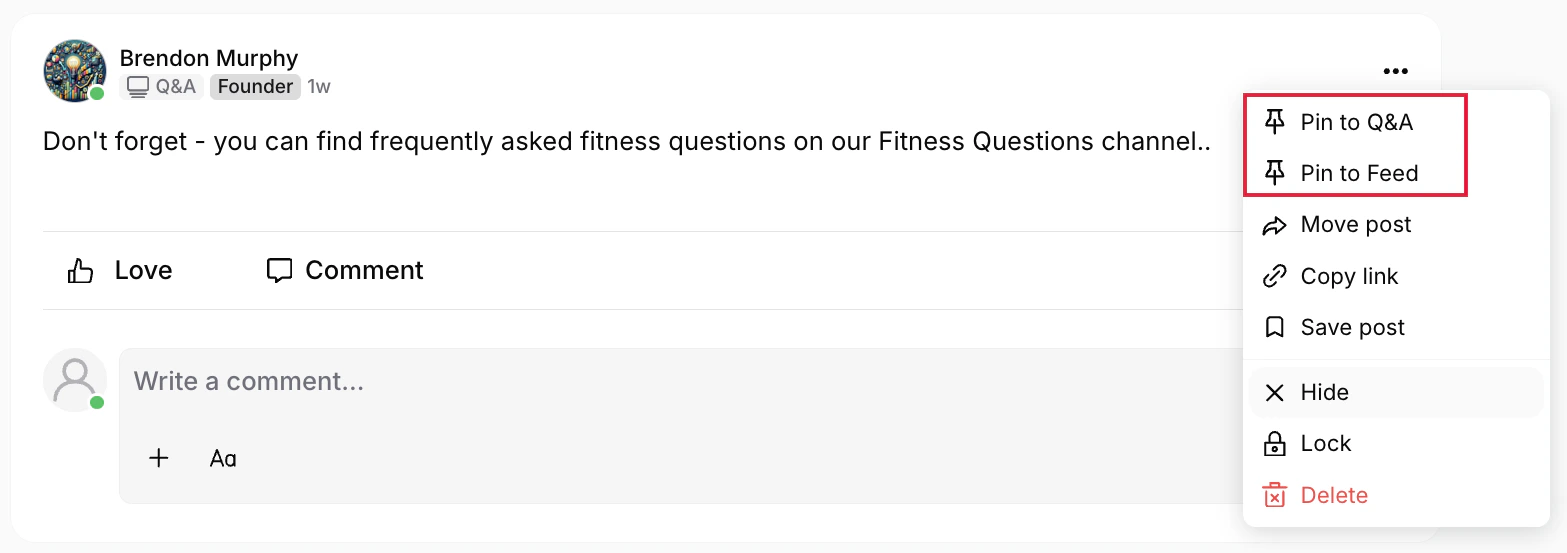
## Save a Post Admins and Members may save any Posts in a Feed they want to refer back to later. ### Save or unsave a Post 1. To save a post, click **Save post** under its **ellipsis menu (...)**. Tapping it bookmarks it for future reference. 2. To unsave a post, select **Unsave post** from the same menu to remove it.
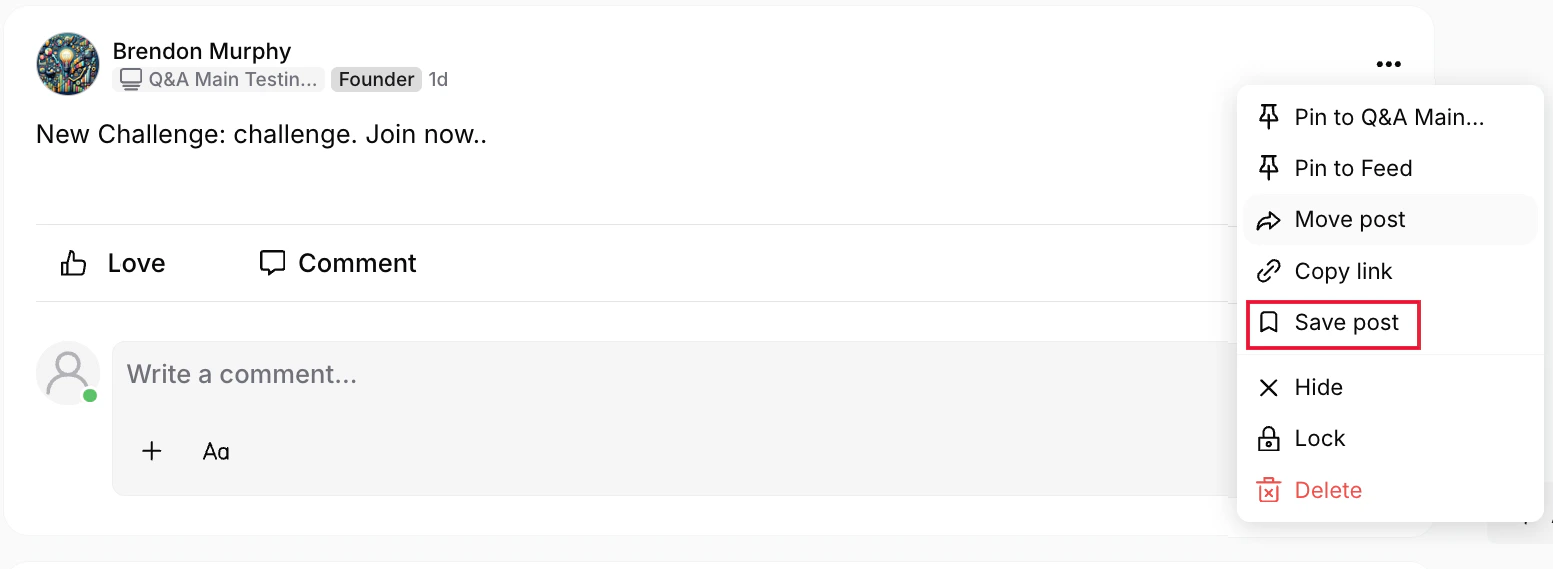 **Saved Posts** are displayed on the Member's profile page. On web, this appears as a section on the profile; on mobile, it displays as a new tab.
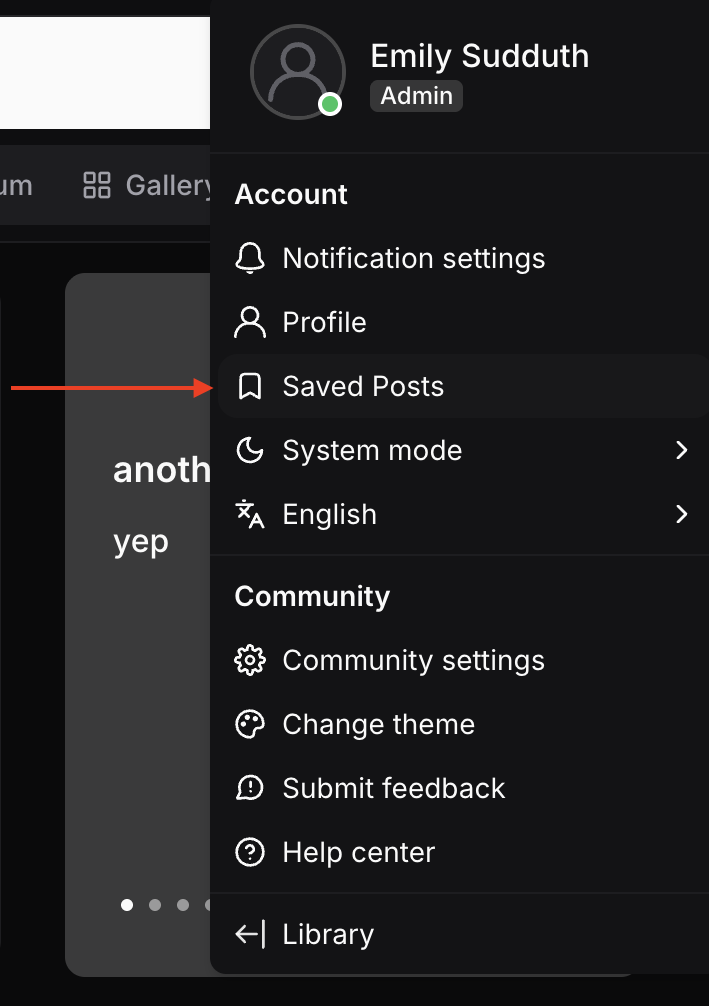
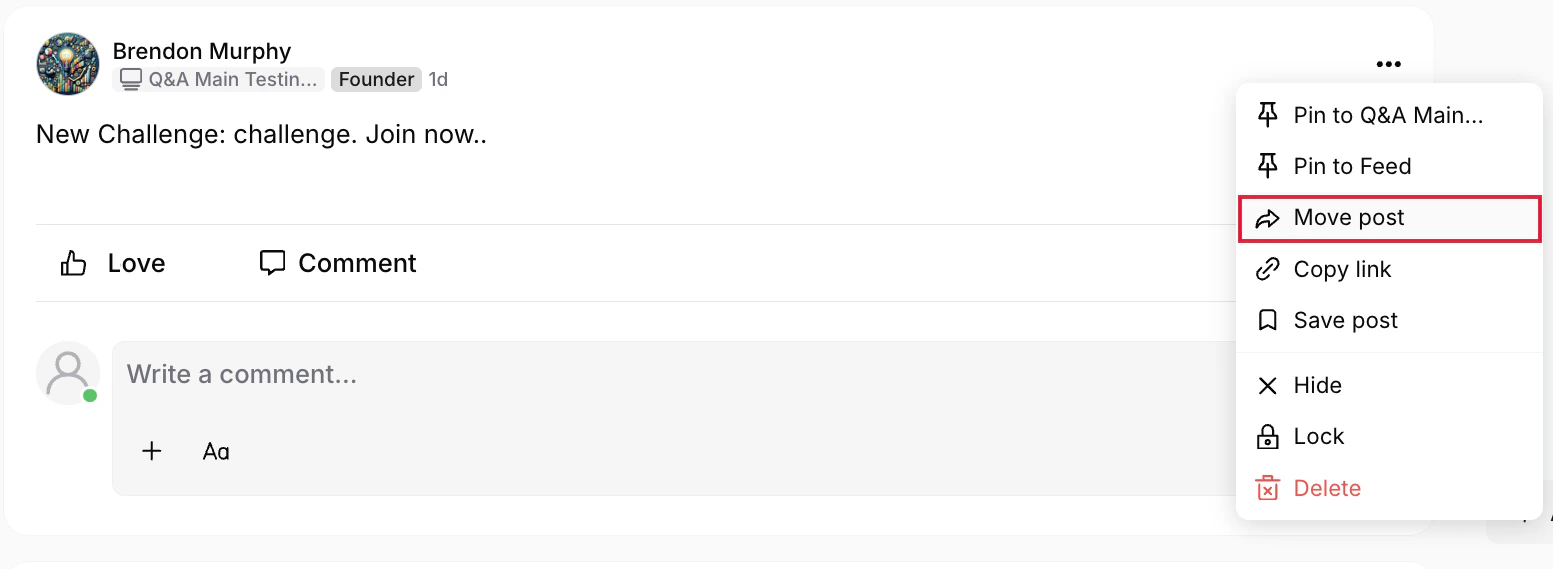
## Move Posts between Channels Both Admins and Members are able to move a Post between feed-type Channels. This option is available when editing a Post or by clicking **Move post** from the **ellipsis** **menu (...)**.
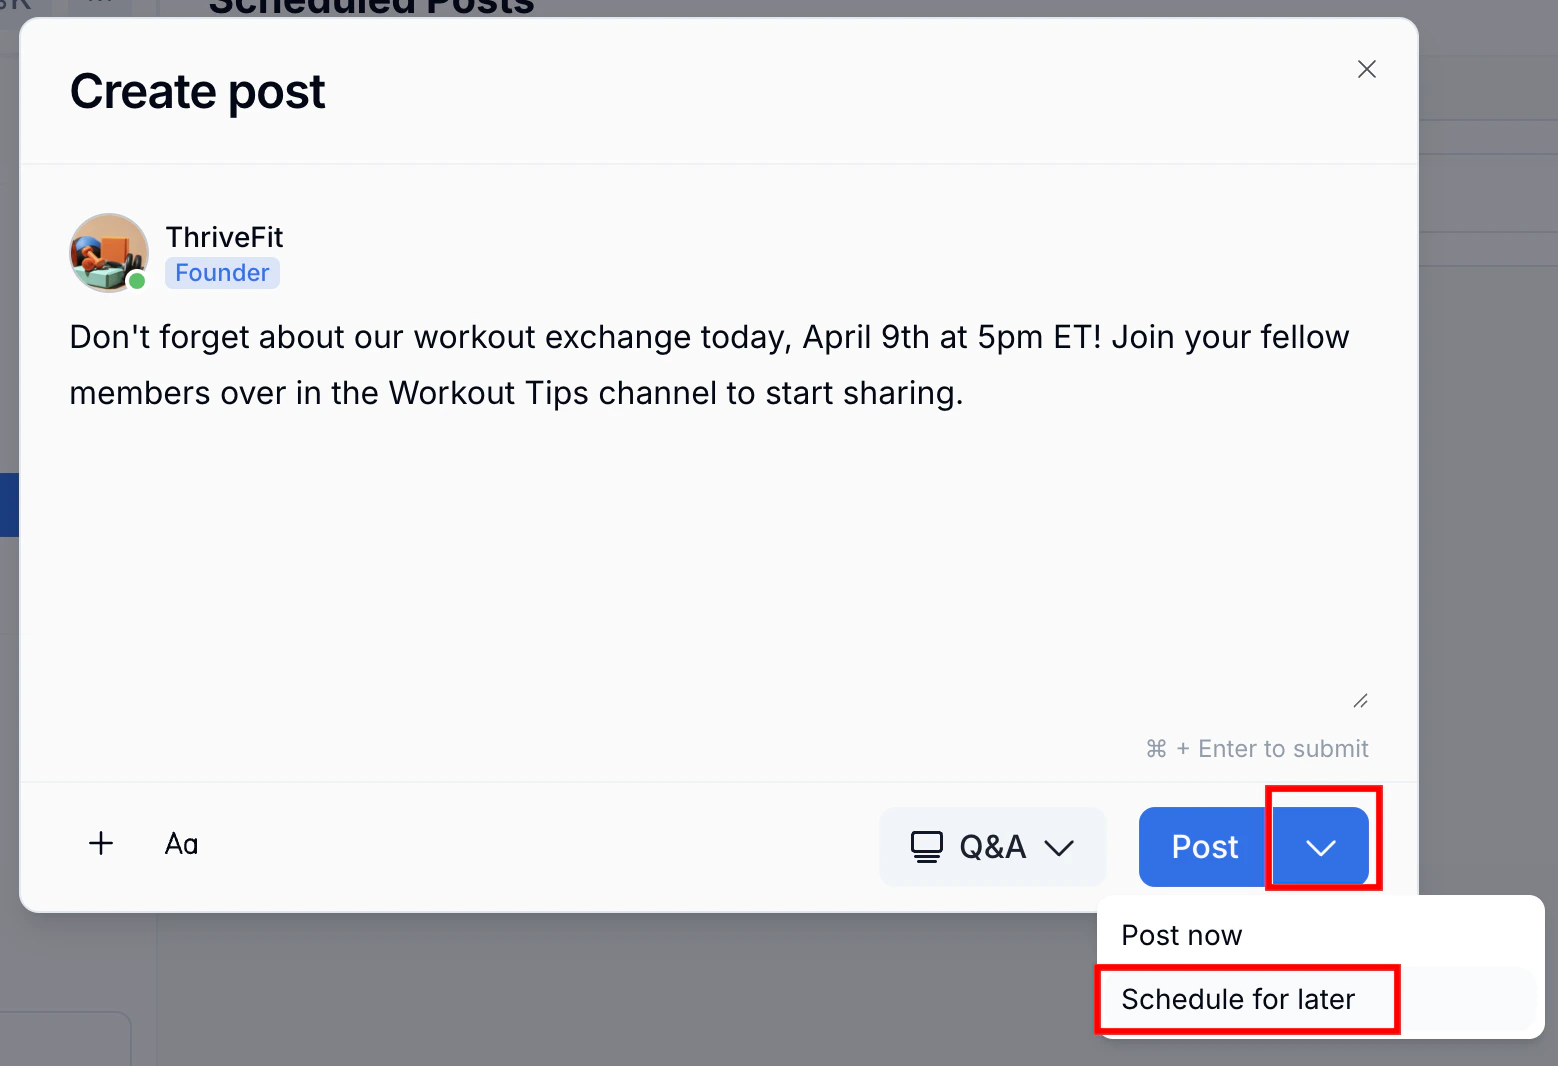
## Schedule a Post **Scheduling Posts** within feed-type Channels ahead of time ensures a consistent and engaging flow of content for your members. 1. Click the **+ icon** in the Post form at the top of one of these locations: the global Feed, an individual Channel, or the **Scheduled Posts** page linked in the Community left nav bar. 2. Add content and any media as desired. 3. Click the **dropdown arrow** next to the **Post** button and select **Schedule for later**:
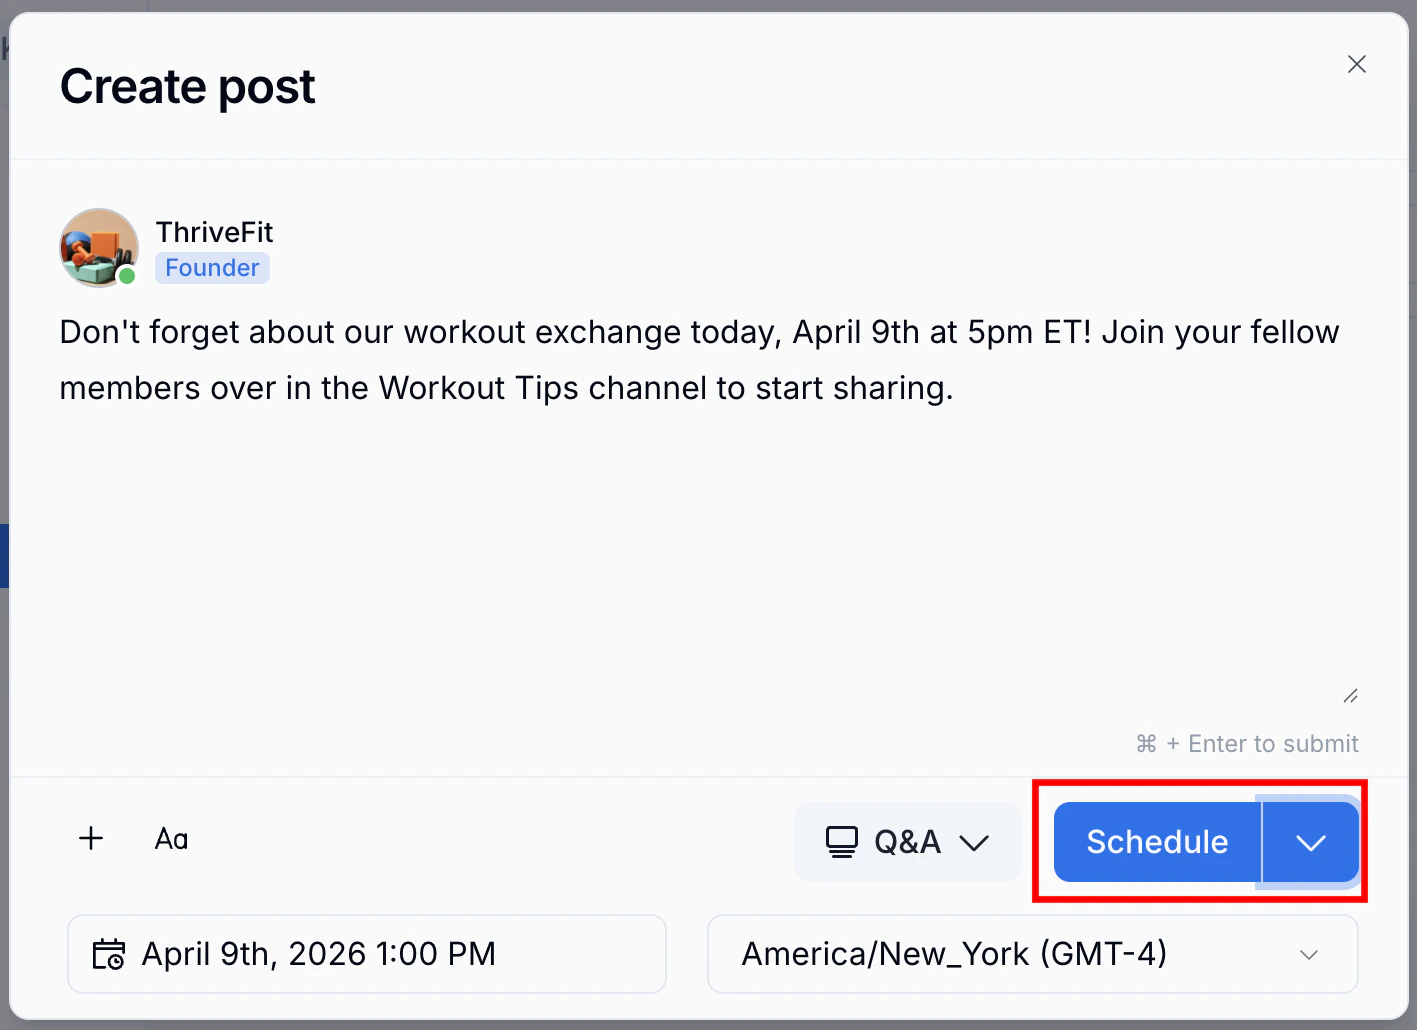
 4. Choose a **Date** / **Time** and **Timezone**.
5. Click **Schedule** to finalize and schedule your post:
4. Choose a **Date** / **Time** and **Timezone**.
5. Click **Schedule** to finalize and schedule your post:
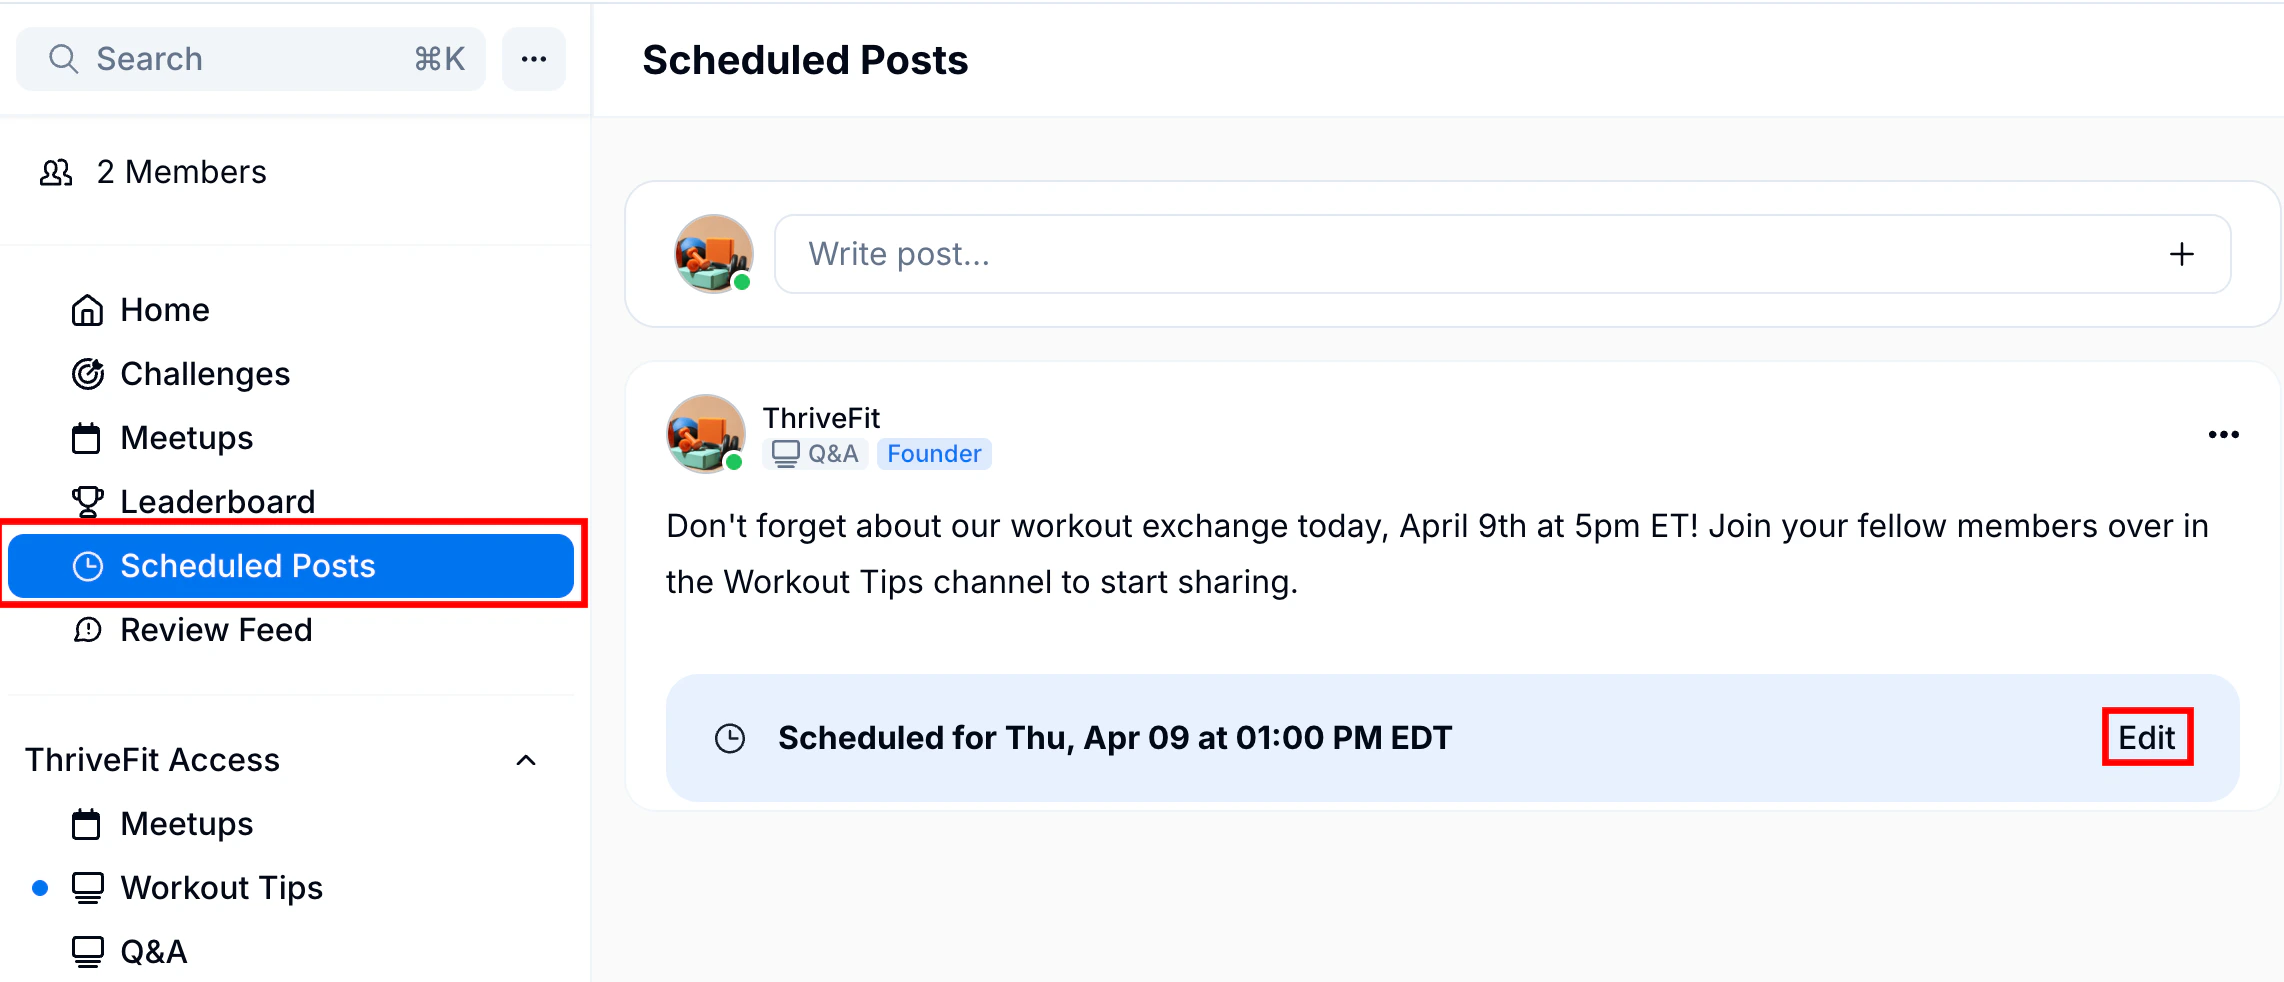
 6. Click **Scheduled Posts** in the left nav bar to see a list of and access all your scheduled Posts: