> ## Documentation Index
> Fetch the complete documentation index at: https://help.kajabi.com/llms.txt
> Use this file to discover all available pages before exploring further.
# Create a Community Channel
> Segment your customers into refined groups with feed or chat Channels.
A **Channel** in Kajabi Communities lets you segment your customers into focused groups. Channels support **Feed** or **Chat** formats, so you can drive discussions, share updates, and build engagement around specific topics. Only Admins can create Channels.
## Channel types
### Public, Private & Read-only Channels
A **Public Channel** automatically includes all members in the selected Access Group.
A **Private Channel** limits access to only the members you invite from the Access Group.
A **Read-only channel** may be public or private, and limits write access to Admins, Moderators and Assistants only.
### Feed vs. Chat
A **Feed** supports posts and topic threads. It displays in a feed-style layout where members can post photos, videos, share content, and show appreciation.
A **Chat** is a group conversation where you can exchange messages with members.
## Channel topic ideas
Channels live within an [Access Group](../../products/community/community-access-groups). Choose topics that align with your goals and add value for your members.
Topic-based examples:
* Mental Health
* Need Advice
* Body Positivity
* Books
Location-based examples:
* Los Angeles Chapter
* Tokyo Buddies
* Australia Chapter
Channels enable engaging discussions, [Meetups](../../products/community/host-live-rooms-and-events-in-your-community), and [Announcements](../../products/community/create-a-community-announcement).
## Create a Channel on the web
1. Open the **Products** tab from your Dashboard.
2. Select **Community**.
3. Click the **Go to Community** button.
4. Click the **more options icon (...)** in the top left next to the Community cover photo, then select **Community Settings**.
5. Navigate to **Channels** on the left, then select **+New channel**.
6. Add an image, **Title**, and **Description** for your Channel.
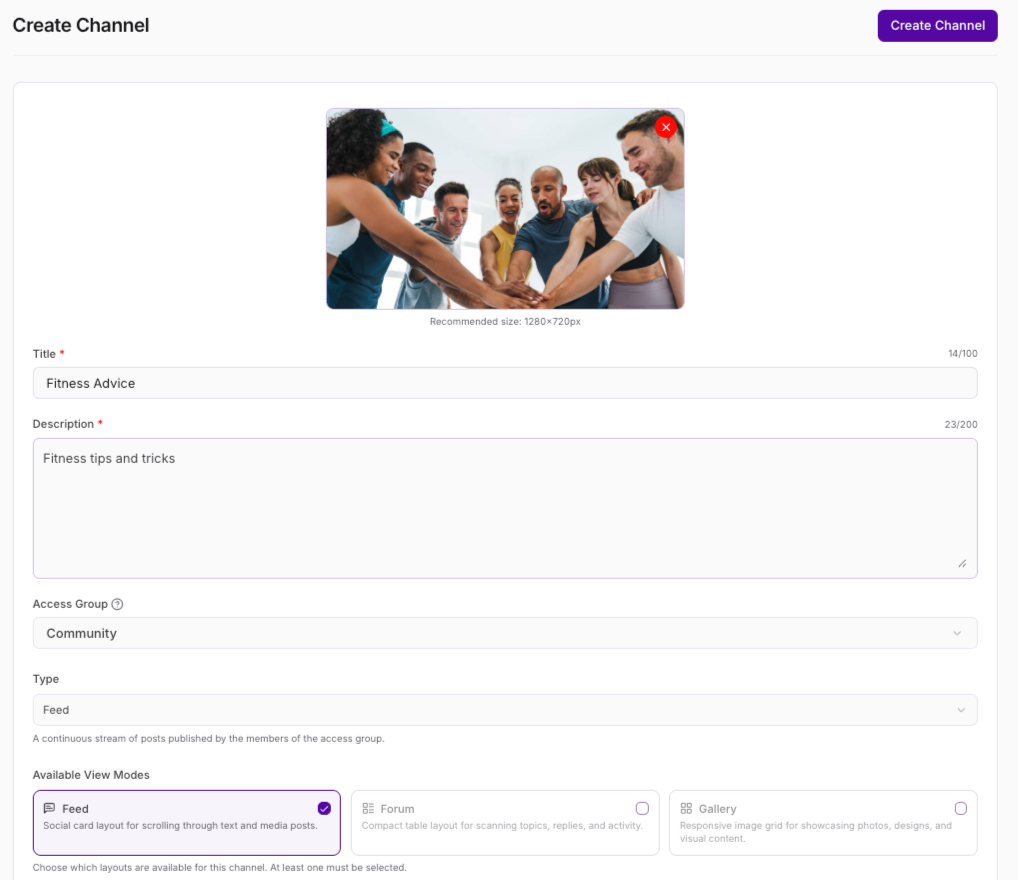 7. Choose which **Access Group** can interact with your Channel.
8. Select the type of Channel you want to create:
* A **Feed** layout supports posts and topic threads
* A **Chat** is a group chat where you can exchange messages with others
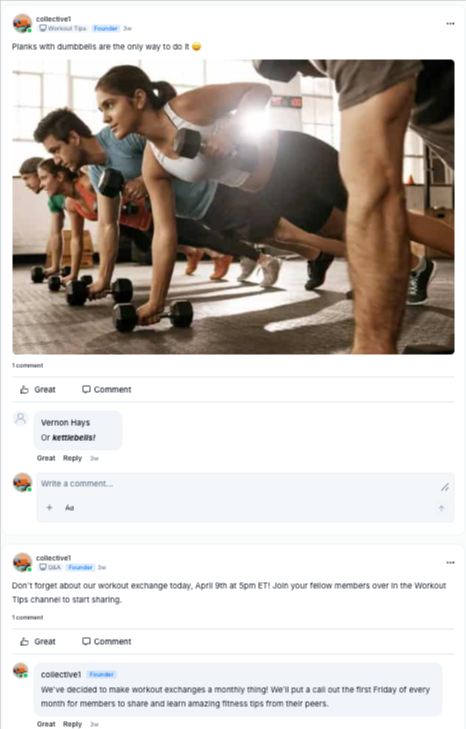
9. Select one or more **View Modes**, or layouts, that are available for the channel. Community members are able to choose between the modes you select: **Feed** (Default) - A social card layout for scrolling through text and media posts.
7. Choose which **Access Group** can interact with your Channel.
8. Select the type of Channel you want to create:
* A **Feed** layout supports posts and topic threads
* A **Chat** is a group chat where you can exchange messages with others
9. Select one or more **View Modes**, or layouts, that are available for the channel. Community members are able to choose between the modes you select: **Feed** (Default) - A social card layout for scrolling through text and media posts.
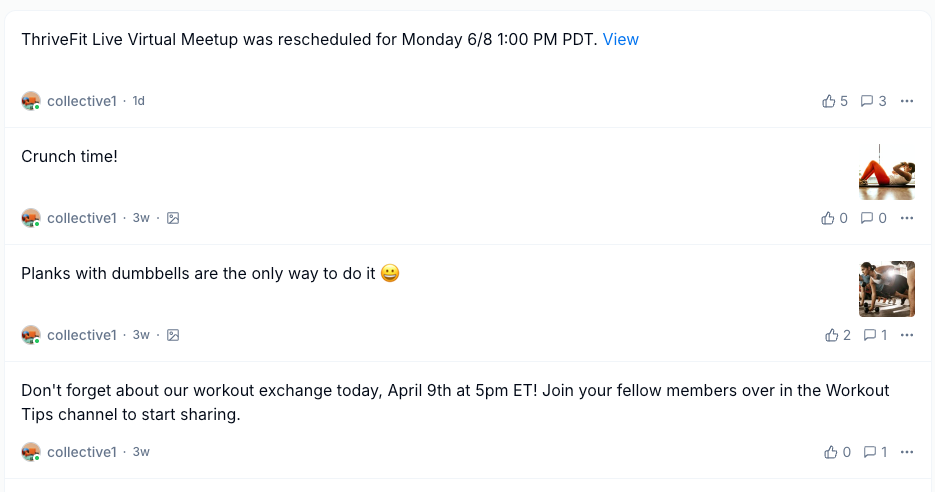
 **Forum** - A compact table layout for scanning topics, replies, and activity.
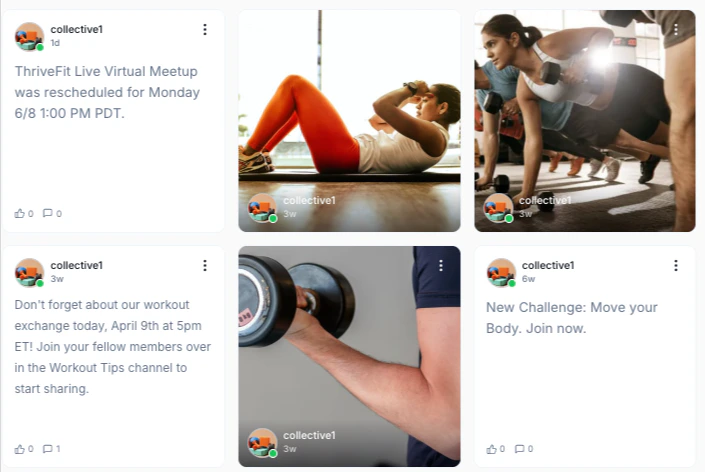
 **Gallery** - A responsive image grid for showcasing photos, designs, and visual content.
 10. Then, select the **Default View Mode** members see when they first open the Channel.
11. Set the privacy setting for your Channel:
* **Public Channel** — All members in the selected Access Group are automatically added
* **Private Channel** — Only people you invite will have access
12. Click **Save** to create a Public Channel, or click **Next** for a Private Channel.
For a Private Channel, a members modal opens displaying all **Access Group** members.
1. Use the **checkboxes** to select which members to grant access.
2. Select the **checkbox** at the top of the list to select all members.
3. Click **Save**.
**Note:** If you want to upload an image or video file to your Channel, there is a 1 GB upload limit for videos and a 40 MB upload limit for photos. Videos and rich content can also be added directly into a feed post by adding a link.
**Note:** Add or remove members from a Private Channel at any time in your Channel settings by clicking the members link at the right of the **Privacy** setting. A notification appears in the Channel feed when members are added. If a member is removed from the Community, any content they posted remains visible with an indication that the original author's account was deleted.
10. Then, select the **Default View Mode** members see when they first open the Channel.
11. Set the privacy setting for your Channel:
* **Public Channel** — All members in the selected Access Group are automatically added
* **Private Channel** — Only people you invite will have access
12. Click **Save** to create a Public Channel, or click **Next** for a Private Channel.
For a Private Channel, a members modal opens displaying all **Access Group** members.
1. Use the **checkboxes** to select which members to grant access.
2. Select the **checkbox** at the top of the list to select all members.
3. Click **Save**.
**Note:** If you want to upload an image or video file to your Channel, there is a 1 GB upload limit for videos and a 40 MB upload limit for photos. Videos and rich content can also be added directly into a feed post by adding a link.
**Note:** Add or remove members from a Private Channel at any time in your Channel settings by clicking the members link at the right of the **Privacy** setting. A notification appears in the Channel feed when members are added. If a member is removed from the Community, any content they posted remains visible with an indication that the original author's account was deleted.
## Create a Channel on mobile
1. Open the mobile app.
2. Go to the **Channels** tab at the bottom of the screen.
3. Click the **pencil** **icon** in the top right corner.
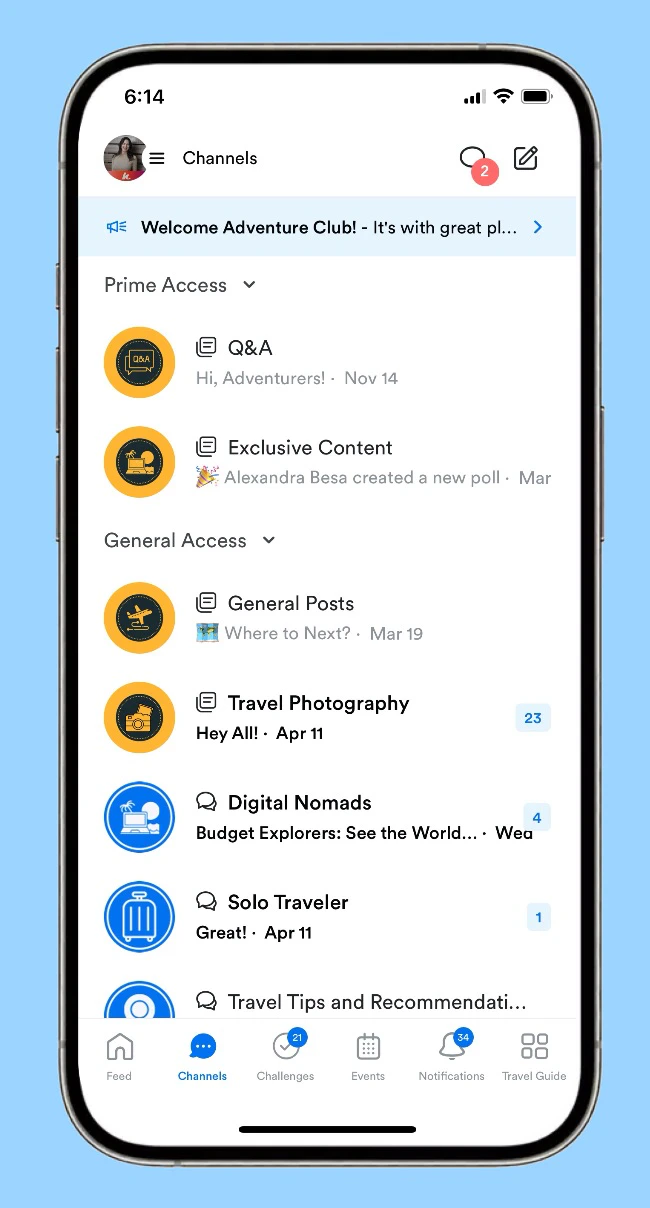 4. Click **Start a new Channel**.
5. Fill out all the details.
6. Select the type of Channel you want to create:
* A **Feed** layout supports posts and topic threads
* A **Chat** is a group chat where you can exchange messages with others
7. Set the privacy setting for your Channel:
* **Public Channel** — All members in the selected Access Group are automatically added
* **Private Channel** — Only people you invite will have access
8. Click **Save** to create a Public Channel, or click **Next** for a Private Channel.
For a Private Channel:
1. Use the **checkboxes** to select which members to grant access.
2. Click **Save**.
## Set a Channel to Read-only
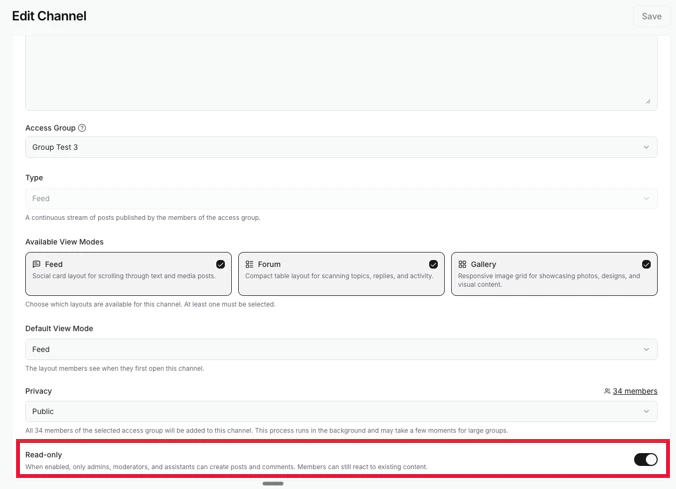
When editing a Public or Private Channel, you may use a toggle to set it to **Read-only**. When enabled, only Admins, Moderators and Assistants can create Posts and Comments. Members are able to react to existing content.
4. Click **Start a new Channel**.
5. Fill out all the details.
6. Select the type of Channel you want to create:
* A **Feed** layout supports posts and topic threads
* A **Chat** is a group chat where you can exchange messages with others
7. Set the privacy setting for your Channel:
* **Public Channel** — All members in the selected Access Group are automatically added
* **Private Channel** — Only people you invite will have access
8. Click **Save** to create a Public Channel, or click **Next** for a Private Channel.
For a Private Channel:
1. Use the **checkboxes** to select which members to grant access.
2. Click **Save**.
## Set a Channel to Read-only
When editing a Public or Private Channel, you may use a toggle to set it to **Read-only**. When enabled, only Admins, Moderators and Assistants can create Posts and Comments. Members are able to react to existing content.
 ## Feed Channel cover photo
Add a cover photo to Feed Channels to give your Channel a polished look.
1. Go to the **Feed** Channel.
2. In the top left corner, click **Edit Page**.
3. Click **Choose File** and upload your cover image.
4. Click **Save** to apply changes.
## FAQs
### Can anyone create a Channel?
Only **Admins** are allowed to create a Channel.
### What Channels should I create?
Choose topics that align with your goals and provide value for your members. Consider topic-based Channels (e.g., advice, book clubs, wellness) or location-based Channels (e.g., regional chapters).
## Feed Channel cover photo
Add a cover photo to Feed Channels to give your Channel a polished look.
1. Go to the **Feed** Channel.
2. In the top left corner, click **Edit Page**.
3. Click **Choose File** and upload your cover image.
4. Click **Save** to apply changes.
## FAQs
### Can anyone create a Channel?
Only **Admins** are allowed to create a Channel.
### What Channels should I create?
Choose topics that align with your goals and provide value for your members. Consider topic-based Channels (e.g., advice, book clubs, wellness) or location-based Channels (e.g., regional chapters).