> ## Documentation Index
> Fetch the complete documentation index at: https://help.kajabi.com/llms.txt
> Use this file to discover all available pages before exploring further.
# Customize a Cohort Course
> View, add, and delete cohorts, update cohort product details, and edit cohort content and settings.
Cohort Courses allow you to deliver time-bound learning experiences with scheduled content releases and live sessions. This guide covers how to manage cohorts, customize content, and configure settings.
**Note:** Cohort Courses are only available with Growth and Pro Plans announced. Check out [kajabi.com/pricing](https://kajabi.com/pricing) for more details.
## View Course cohorts
To view the cohort groups inside a Cohort Course, first open your Course:
1. Select **Products** from the Dashboard.
2. Then, select **Courses.**
3. Click to open your Cohort Course. This will take you to the **Cohorts** page.
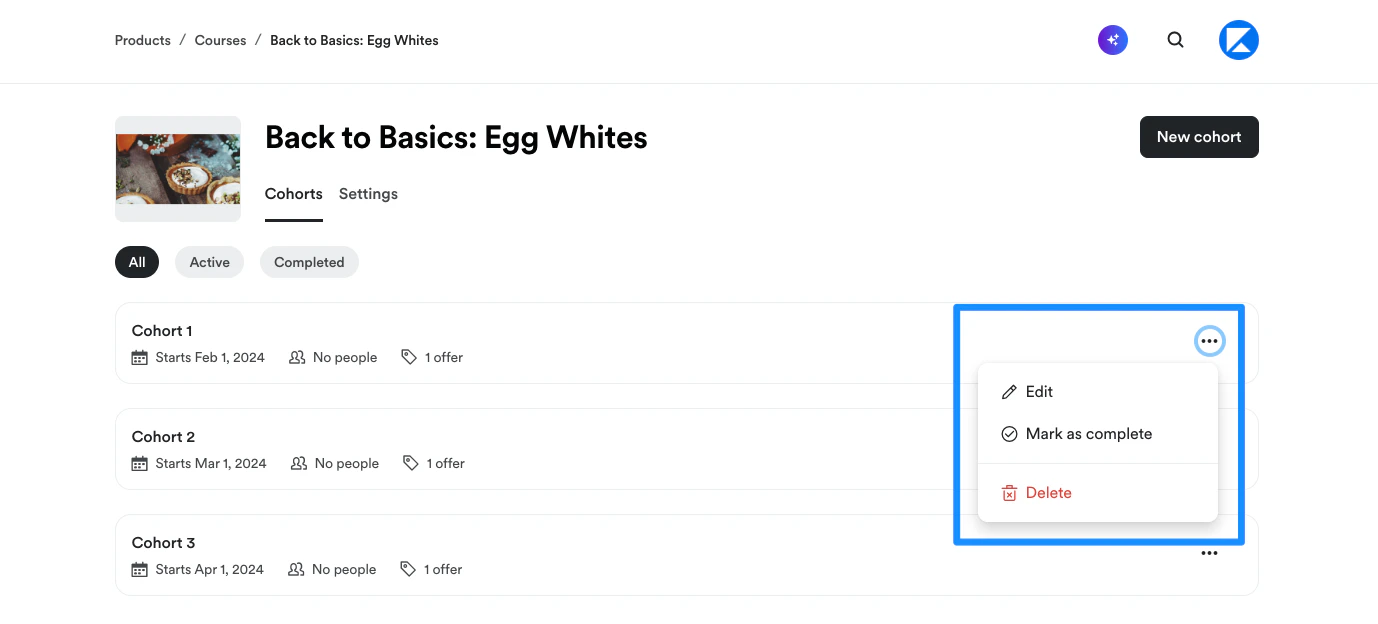
4. On the Cohorts page, you'll see a list of all active cohorts for the Course. Click the pill buttons to toggle between viewing **All**, **Active**, or **Completed** cohort groups: 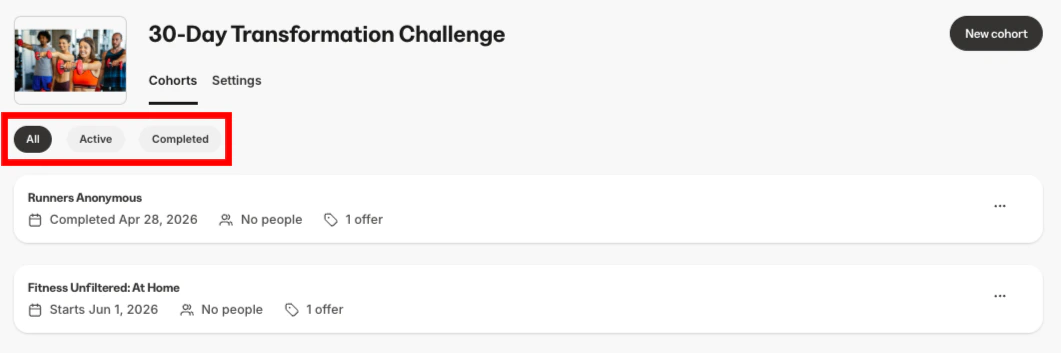 5. Edit a cohort or toggle the cohort **Status** between Active and Completed by clicking the **ellipsis menu** `…` to the right of the cohort:
 ## Add a cohort
1. At the top right corner of the Cohorts Index page, click **Add cohort**. A modal popup will appear.
2. First, select an existing cohort to use as the template for your cohort.
3. Then, enter a cohort **Name.**
4. Choose a **Start date** for the cohort.
5. Next, choose to create either a **Free** or **Paid** cohort. If you choose to create a Paid cohort, enter your desired **Payment frequency**, **Price**, and **Payment method**.
6. Click **Add cohort** to create your cohort.
## Update Cohort Course details
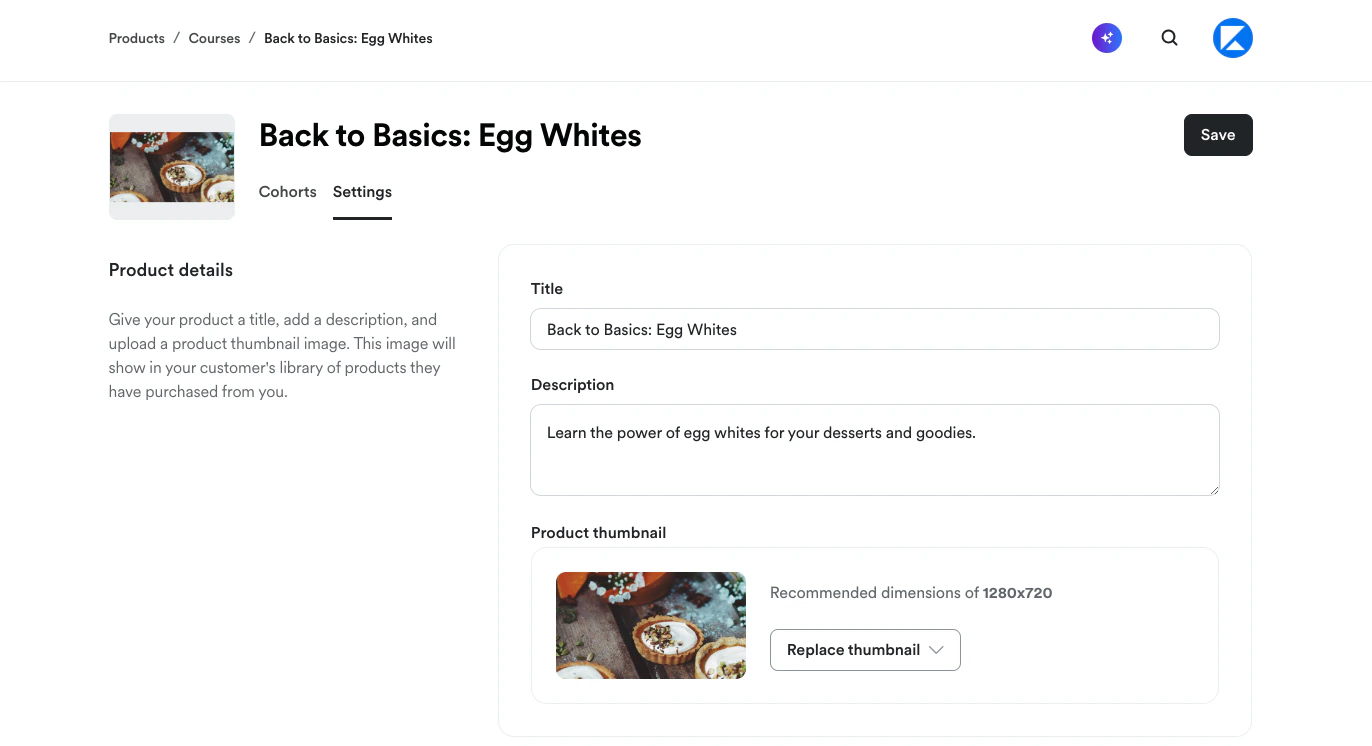
1. From the **Cohorts** index page, click the **Settings** tab to update the Course **Title**, **Description**, and/or **Thumbnail image**:
## Add a cohort
1. At the top right corner of the Cohorts Index page, click **Add cohort**. A modal popup will appear.
2. First, select an existing cohort to use as the template for your cohort.
3. Then, enter a cohort **Name.**
4. Choose a **Start date** for the cohort.
5. Next, choose to create either a **Free** or **Paid** cohort. If you choose to create a Paid cohort, enter your desired **Payment frequency**, **Price**, and **Payment method**.
6. Click **Add cohort** to create your cohort.
## Update Cohort Course details
1. From the **Cohorts** index page, click the **Settings** tab to update the Course **Title**, **Description**, and/or **Thumbnail image**:
 ## Edit cohort content and settings
### Open a cohort for editing
1. From the **Cohorts** index page, either click the name of the cohort you want to edit, or -
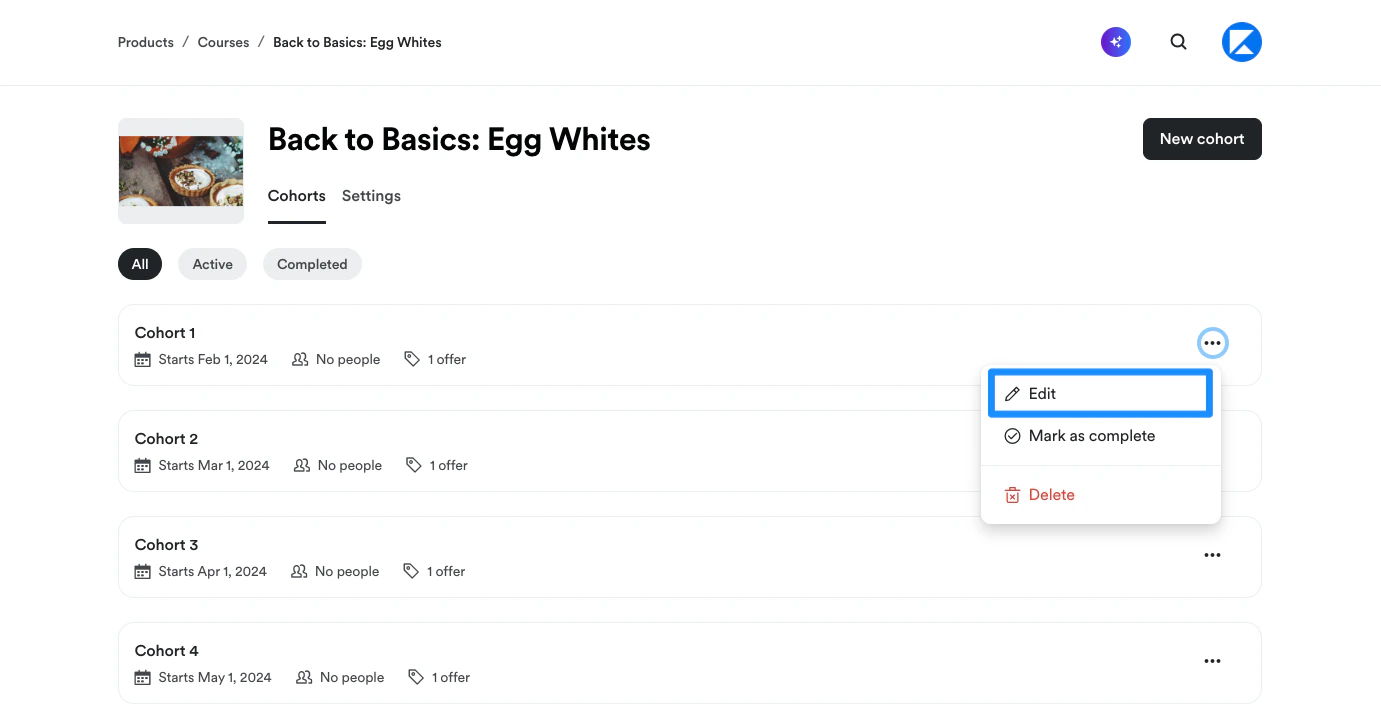
2. Click the **ellipsis menu** `…` to the right of the cohort and select **Edit**:
## Edit cohort content and settings
### Open a cohort for editing
1. From the **Cohorts** index page, either click the name of the cohort you want to edit, or -
2. Click the **ellipsis menu** `…` to the right of the cohort and select **Edit**:
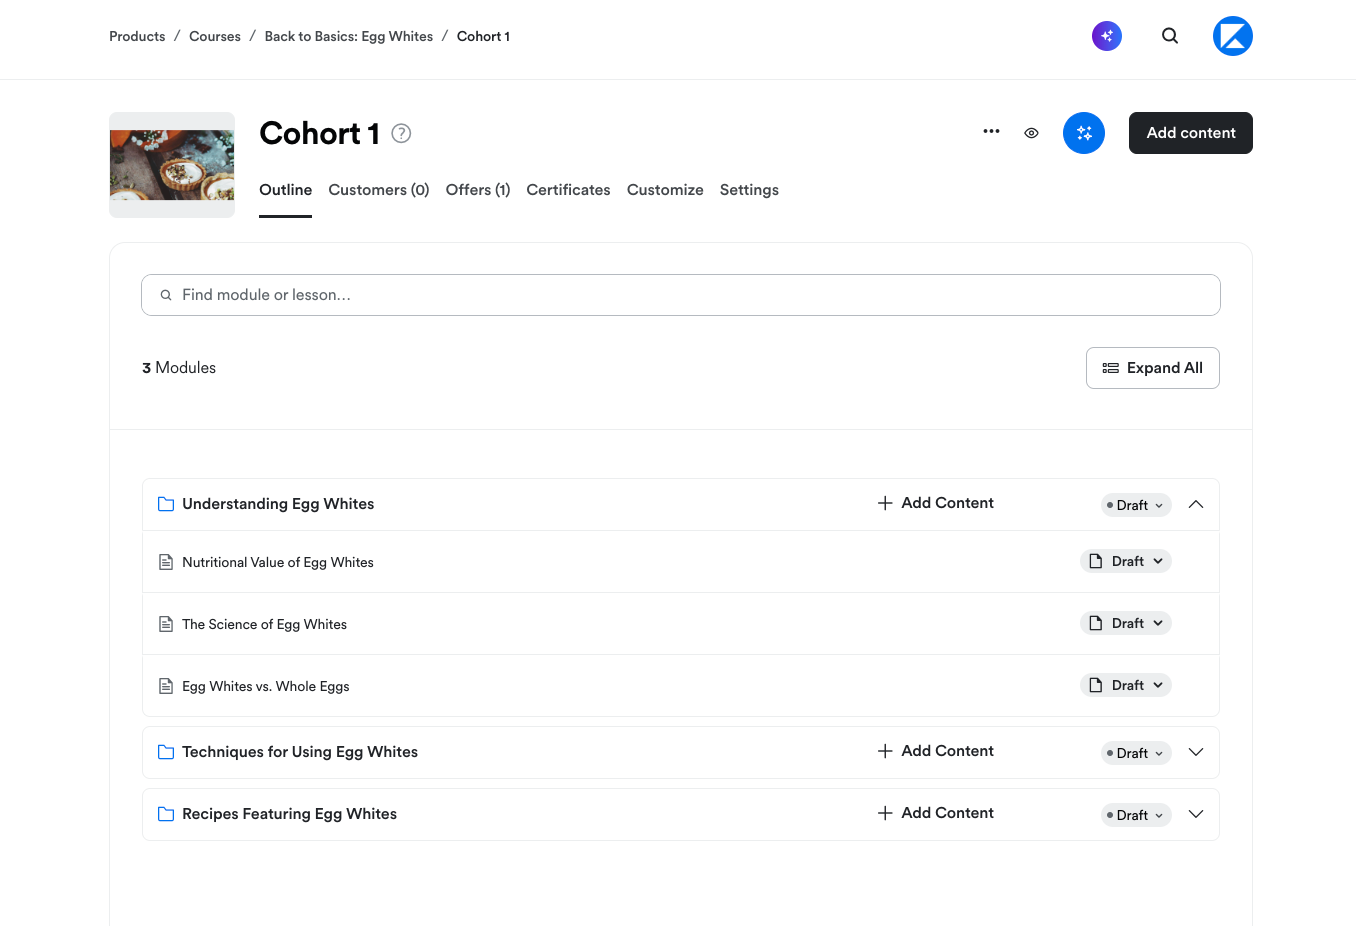
 3. Inside the cohort editor, you can view and edit the Course **Outline**, **Customers**, **Offers**, and **Certificates**, customize the **Course template**, and update **Course settings**:
 ### Outline
On the **Outline** tab, you can:
* Create [Modules, Lessons](/articles/products/products-overview/kajabi-products-overview), and [Quizzes](/articles/products/courses/course-quizzes)
* Add and schedule [Live Sessions](/articles/products/courses/how-to-schedule-live-video-sessions-for-a-cohort-based-course)
* Publish, unpublish, delete or [lock](/articles/products/courses/lock-content-in-your-course-product) your content
* Drip your content on specific dates in cadence with your live session dates
### Outline
On the **Outline** tab, you can:
* Create [Modules, Lessons](/articles/products/products-overview/kajabi-products-overview), and [Quizzes](/articles/products/courses/course-quizzes)
* Add and schedule [Live Sessions](/articles/products/courses/how-to-schedule-live-video-sessions-for-a-cohort-based-course)
* Publish, unpublish, delete or [lock](/articles/products/courses/lock-content-in-your-course-product) your content
* Drip your content on specific dates in cadence with your live session dates
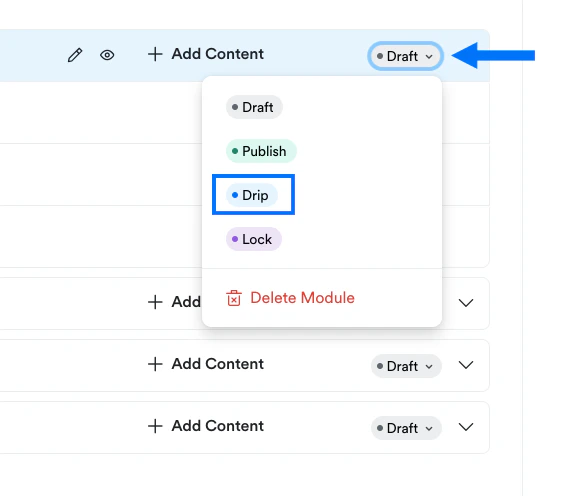
 Change the **Drip date** for each Course module (i.e. the date the content becomes visible in your Course) to match your live session schedule by clicking the gray **Draft** button, then selecting the blue **Drip** button and choosing your desired date:
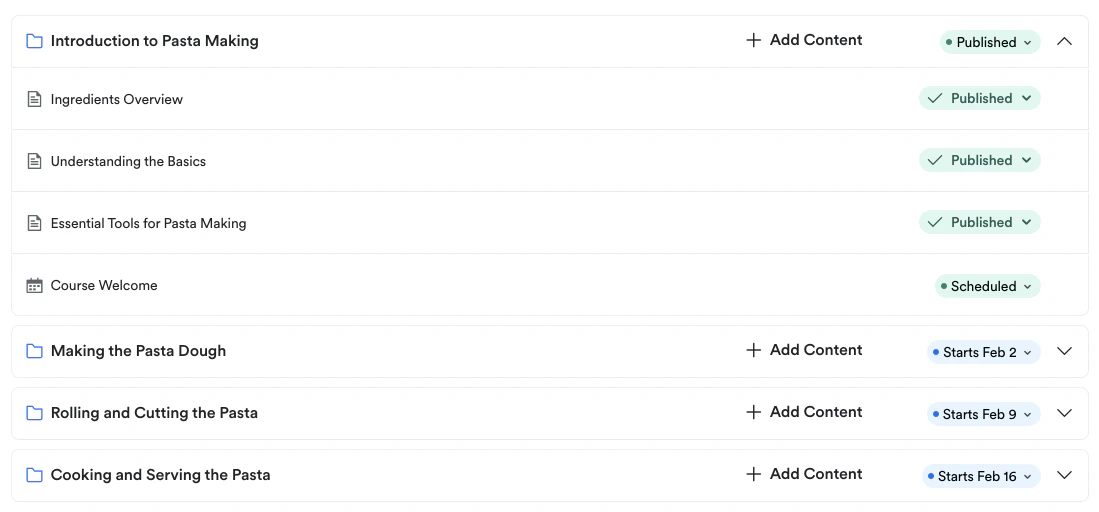
 Here's an example of a published first Course module followed by a series of modules set to drip at one week intervals:
 ### Customers
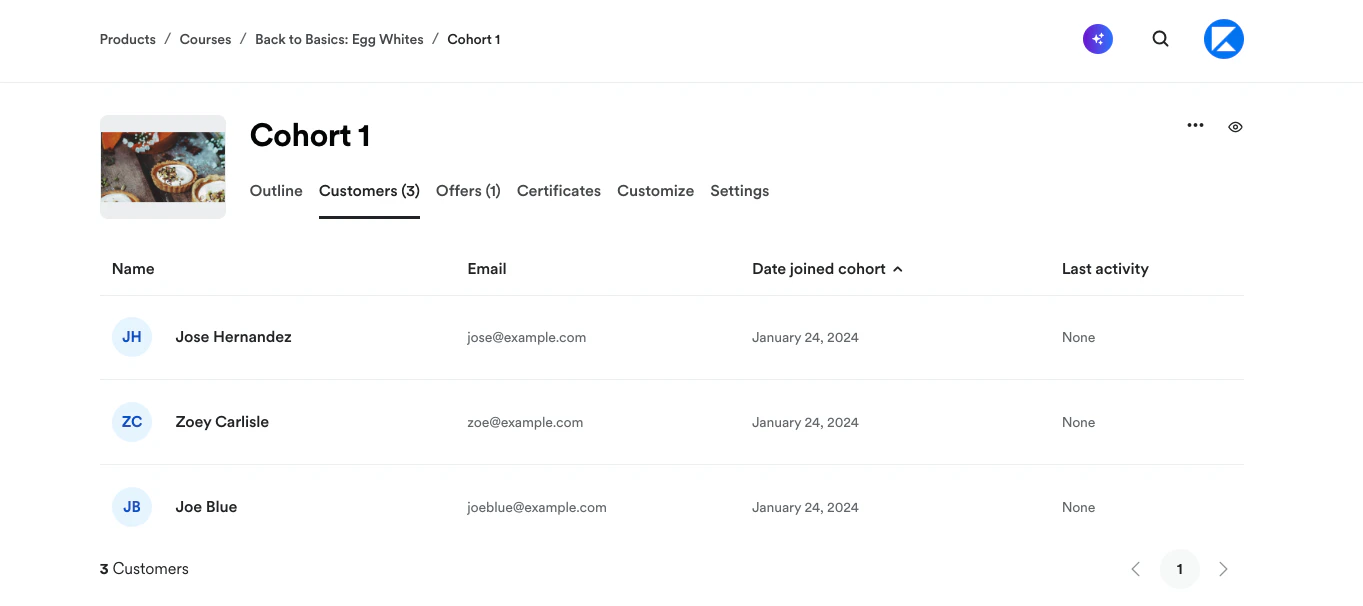
Select the **Customers** tab to view a list of all Course customers. You can also click on each customer to view additional customer details:
### Customers
Select the **Customers** tab to view a list of all Course customers. You can also click on each customer to view additional customer details:
 ### Offers
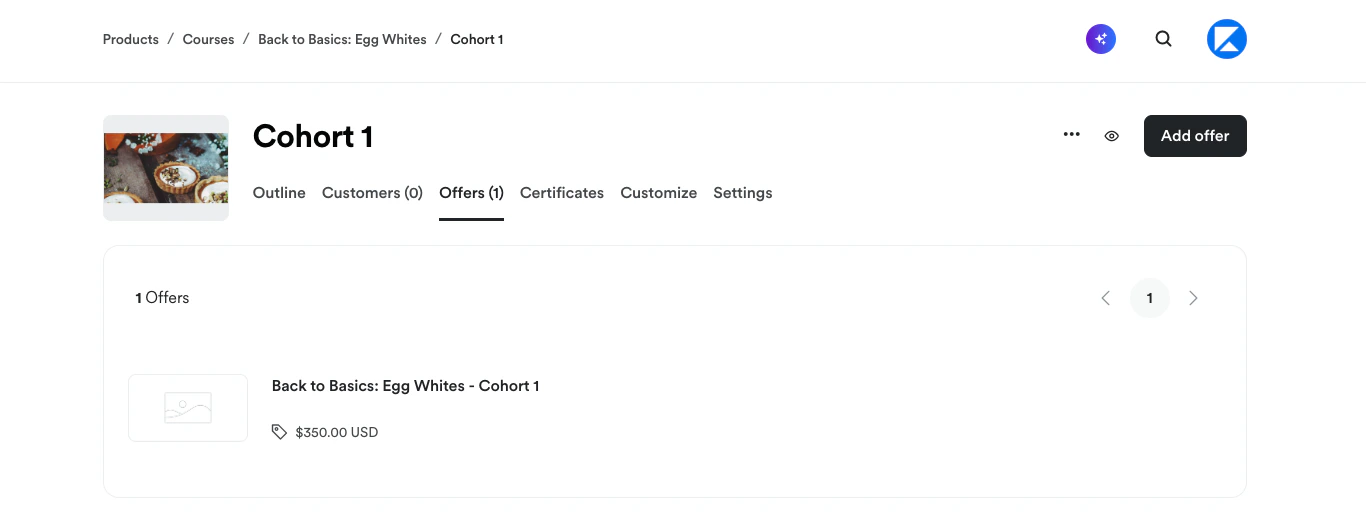
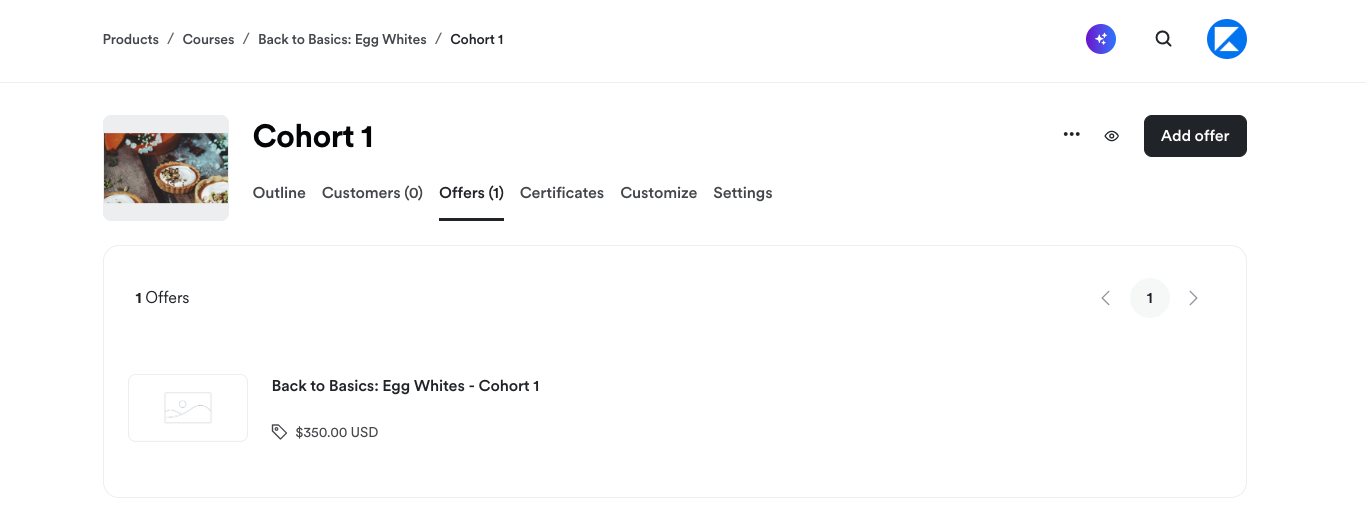
Select the **Offers** tab to view the Offer(s) created to sell the Course or to [create a Course Offer](/articles/sales/offers/create-an-offer):
### Offers
Select the **Offers** tab to view the Offer(s) created to sell the Course or to [create a Course Offer](/articles/sales/offers/create-an-offer):
 ### Certificates
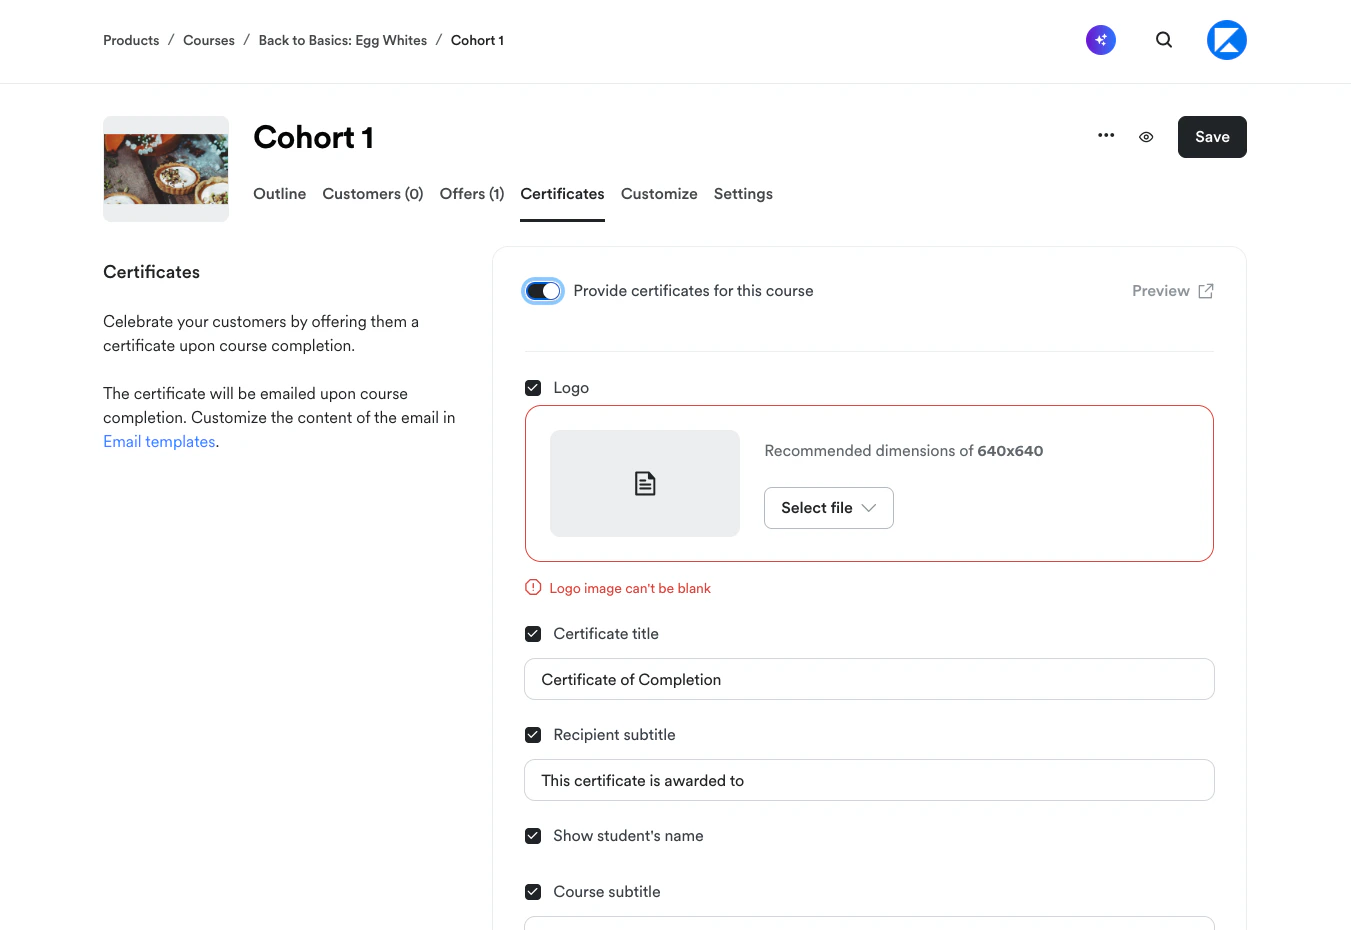
Select the **Certificates** tab to [create a Certificate of Completion](/articles/products/courses/course-completion-certificates) to send your students when they complete the Course:
### Certificates
Select the **Certificates** tab to [create a Certificate of Completion](/articles/products/courses/course-completion-certificates) to send your students when they complete the Course:
 ### Customize
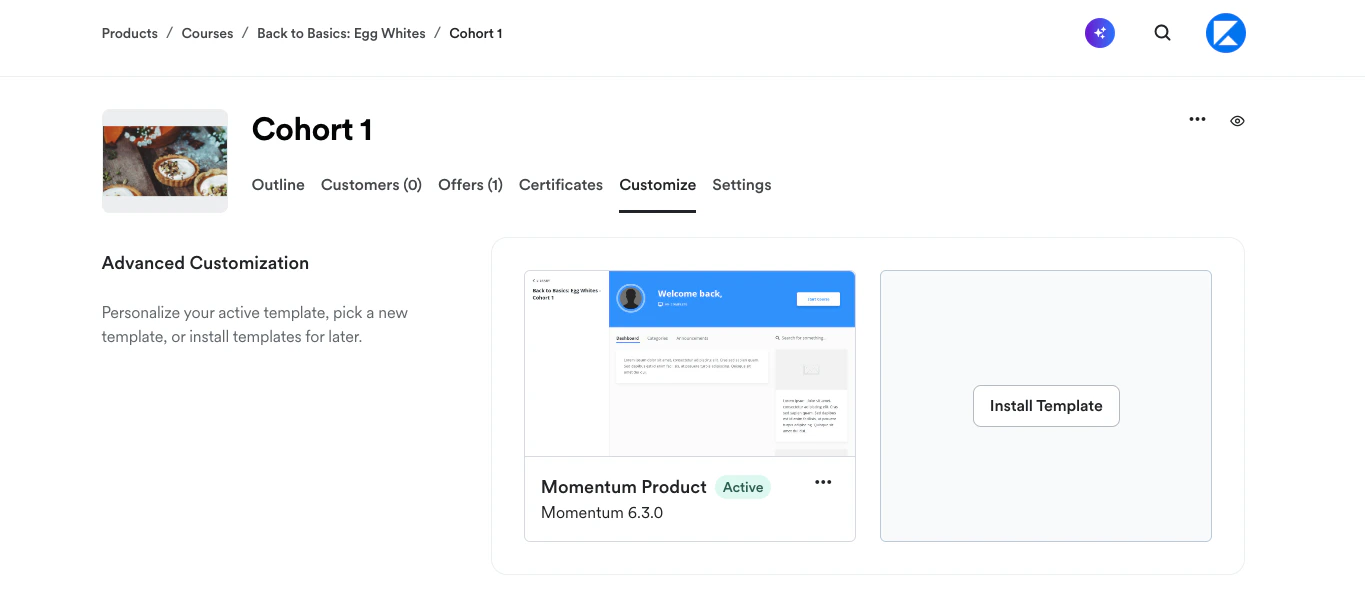
Select the **Customize** tab to [customize the Course template design](/articles/products/courses/how-to-customize-the-template-for-a-cohort-based-course):
### Customize
Select the **Customize** tab to [customize the Course template design](/articles/products/courses/how-to-customize-the-template-for-a-cohort-based-course):
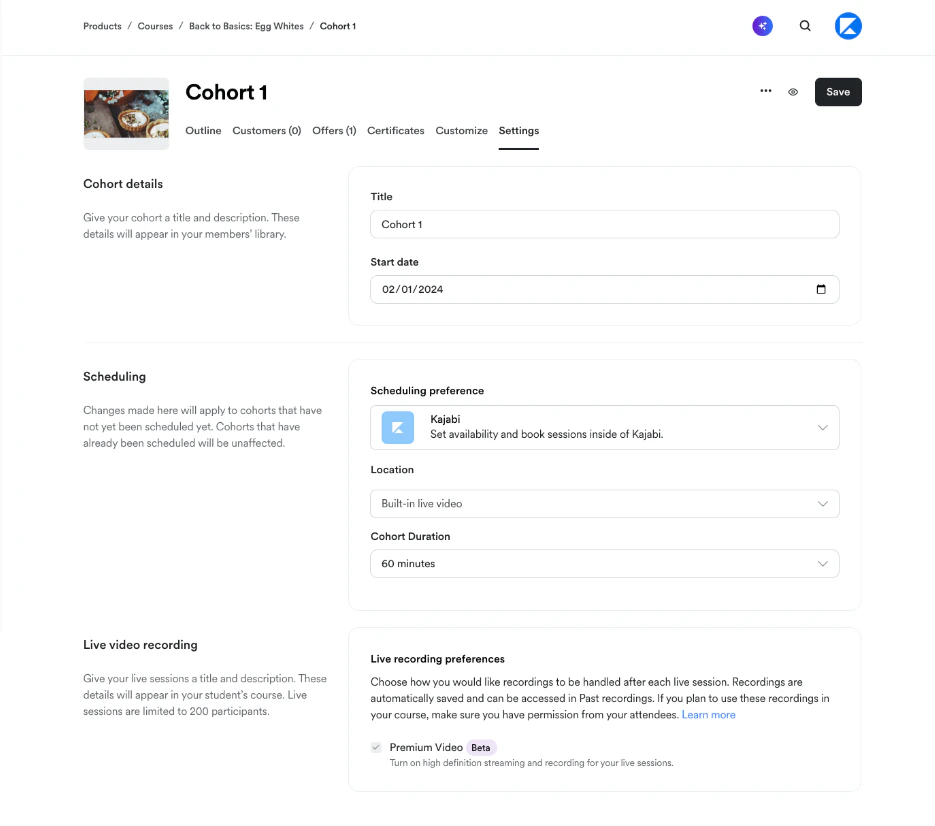
 ### Settings
Select the **Settings** tab to update the cohort **Title** and **Start date** or to change live video scheduling preferences (location and/or session duration):
### Settings
Select the **Settings** tab to update the cohort **Title** and **Start date** or to change live video scheduling preferences (location and/or session duration):
 ## Delete a Cohort
1. From the Cohorts index page, click the **ellipsis menu** `…` to the right of the cohort you want to delete.
2. Select **Delete.**
3. A modal popup will appear. Click **Delete** to confirm the deletion.
## Delete a Cohort
1. From the Cohorts index page, click the **ellipsis menu** `…` to the right of the cohort you want to delete.
2. Select **Delete.**
3. A modal popup will appear. Click **Delete** to confirm the deletion.