> ## Documentation Index
> Fetch the complete documentation index at: https://help.kajabi.com/llms.txt
> Use this file to discover all available pages before exploring further.
# Embed a Community Channel in a Course
> Link a Course and Community by adding a Channel widget to a Course template.
## Embed a Channel
**Note:**
Only Public Channels can be embedded into Courses at this time. It is not currently possible to embed a Private Channel.
Choose to embed either a chat-style or feed-style Channel. The embedded Channel will appear in the main body of your Course page:
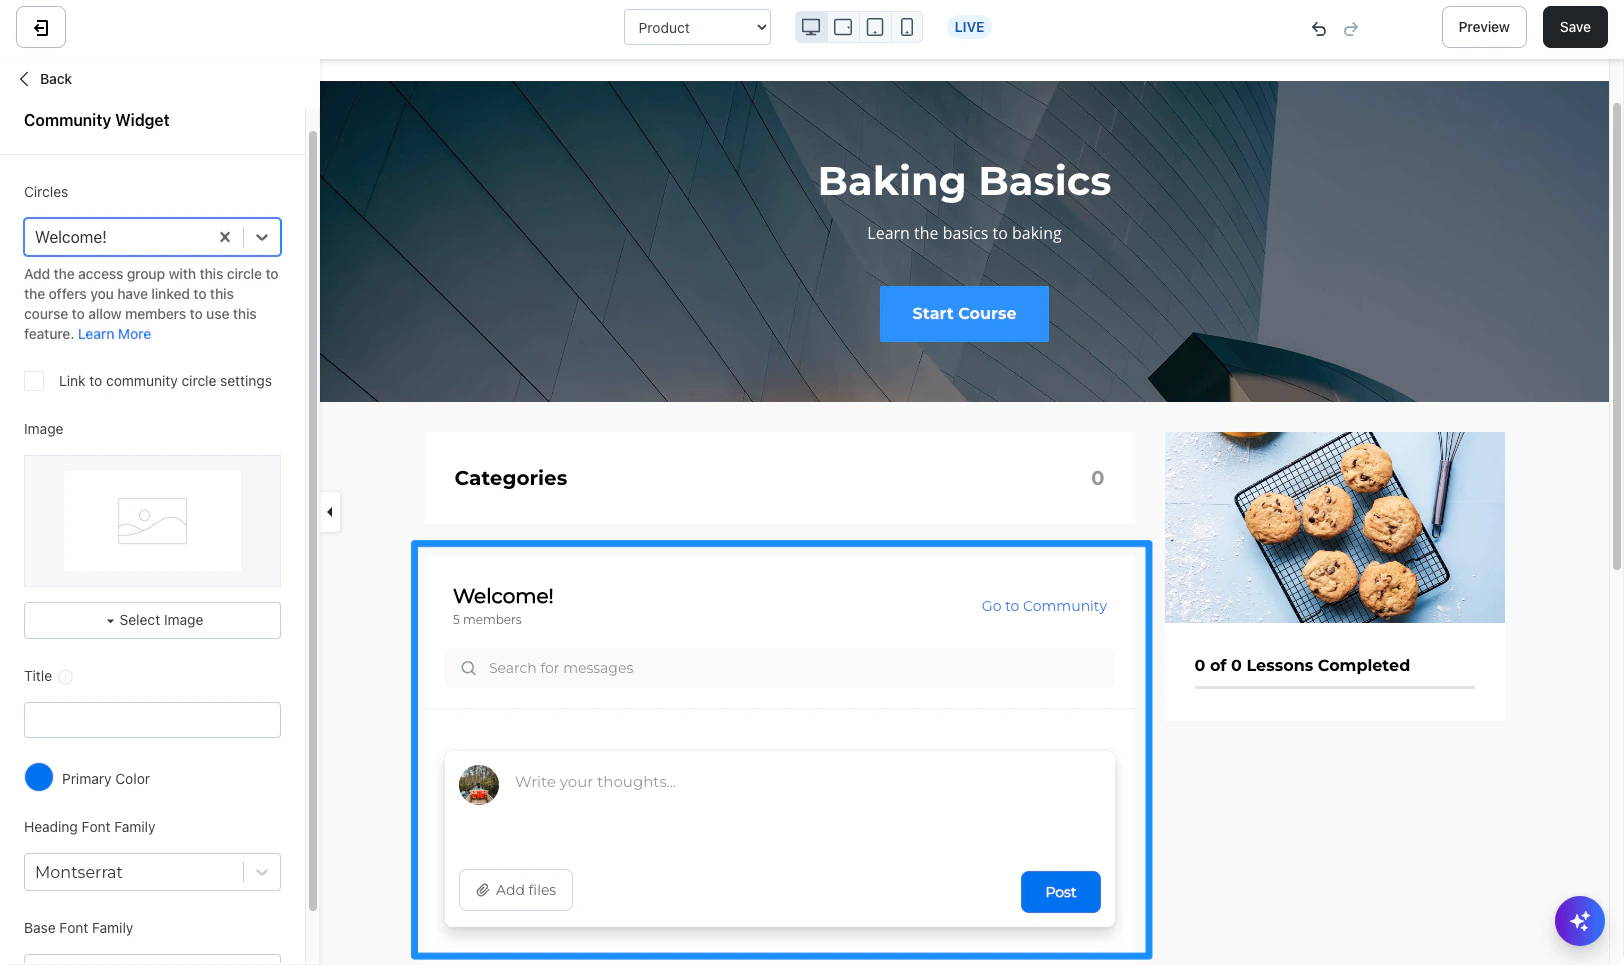 **Note:**
The Channel widget is currently only available for the updated Premier and Momentum templates. If you're using a different Course template, or an older template version, you'll need to switch to the latest version of either Premier or Momentum before you can embed a Channel in your Course. If you embed a Channel and later change your Course template, you'll need to add the Channel widget to your new template manually. [Learn to install and activate a new Course template](../../products/courses/course-templates).
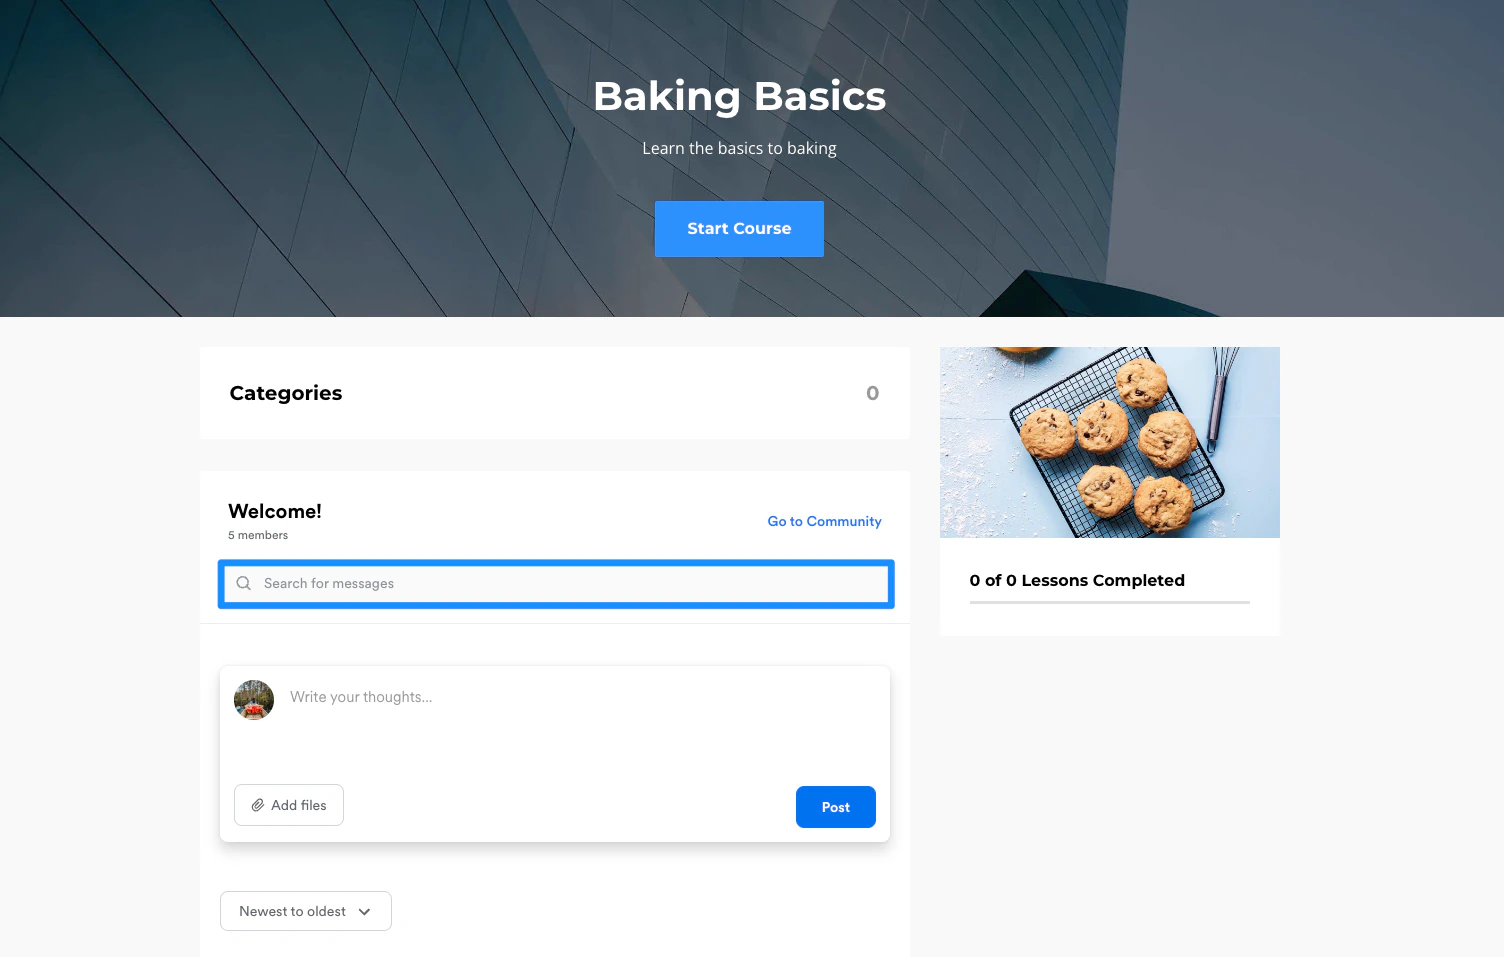
Use the search bar at the top of the Channel widget to search the Channel feed for a specific post:
**Note:**
The Channel widget is currently only available for the updated Premier and Momentum templates. If you're using a different Course template, or an older template version, you'll need to switch to the latest version of either Premier or Momentum before you can embed a Channel in your Course. If you embed a Channel and later change your Course template, you'll need to add the Channel widget to your new template manually. [Learn to install and activate a new Course template](../../products/courses/course-templates).
Use the search bar at the top of the Channel widget to search the Channel feed for a specific post:
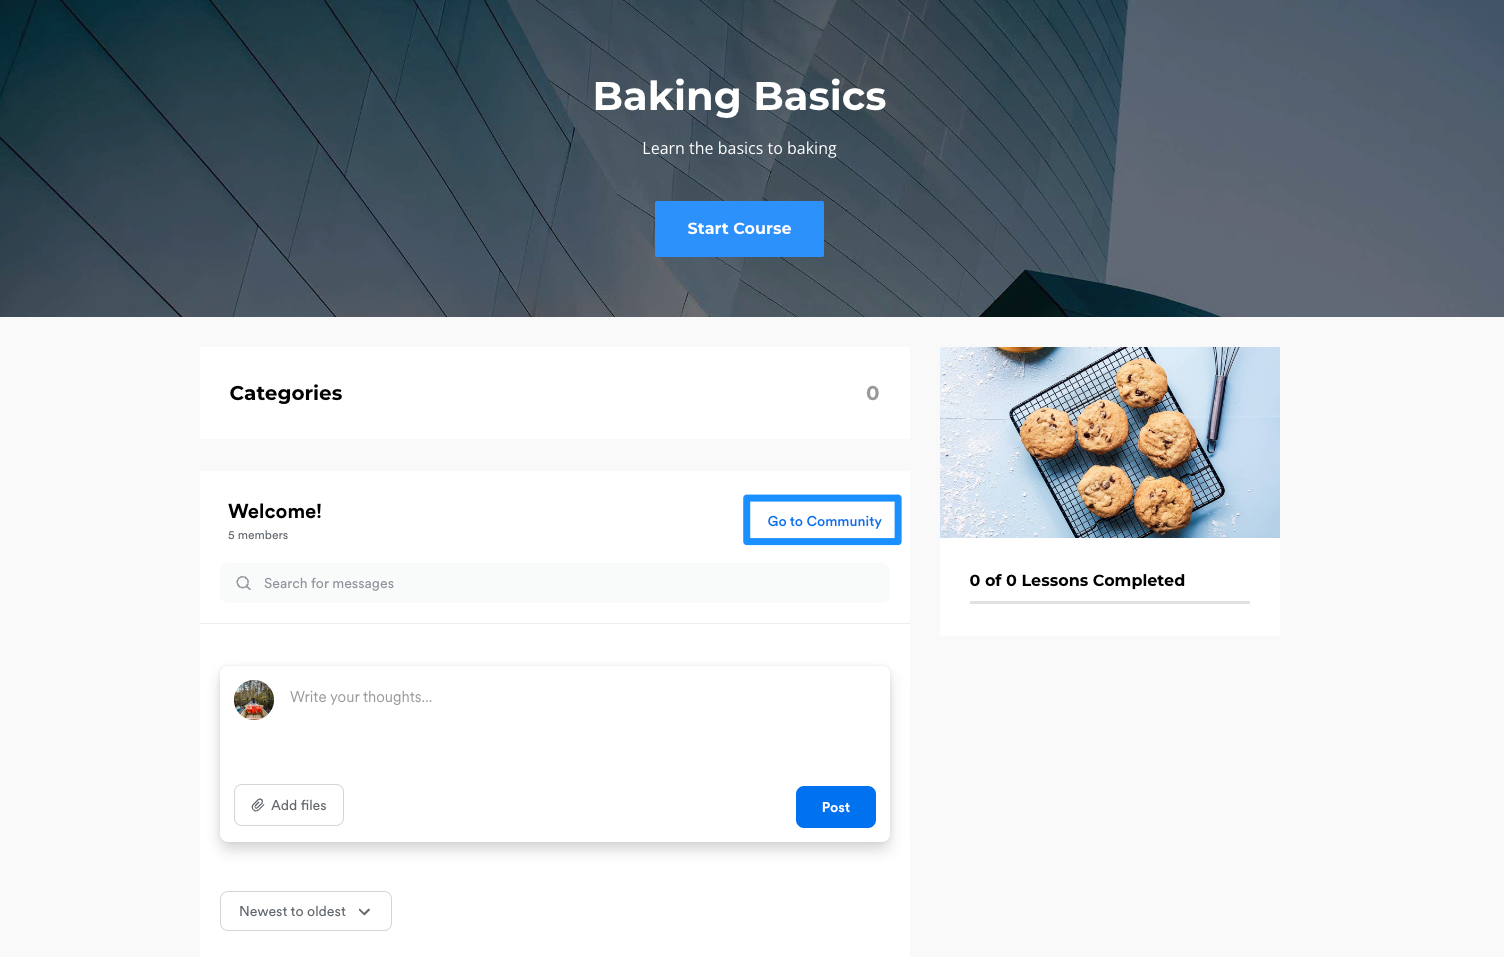
 Click the link at the top right of the Channel widget to easily access the full Community product:
 **Note:**
Embedded Channels in Courses will only appear on the web at this time. This feature is not currently available for the Kajabi mobile app.
## Link an Access Group to a Course
To embed a Channel, first link the Channel's Access Group in your Course settings and ensure that the Access Group is added to your Course Offer(s).
**Note:**
There are two requirements for linking to an Access Group from your Course: (1) Your Course Theme must be Momentum 6.3.0, Premier 7.3.0, or newer and (2) There must be a Kajabi Community Product created on the same site as your Course.
### Set up the link
1. From your dashboard, select **Products**.
2. Open the Course product where you want to link your Community.
3. Click the **Settings** tab.
4. Navigate to the Community settings.
5. Click to **toggle on** "Enable community for this course."
6. Then, select your Community **Access Group** from the drop-down menu.
7. Click **Save**:
**Note:**
Embedded Channels in Courses will only appear on the web at this time. This feature is not currently available for the Kajabi mobile app.
## Link an Access Group to a Course
To embed a Channel, first link the Channel's Access Group in your Course settings and ensure that the Access Group is added to your Course Offer(s).
**Note:**
There are two requirements for linking to an Access Group from your Course: (1) Your Course Theme must be Momentum 6.3.0, Premier 7.3.0, or newer and (2) There must be a Kajabi Community Product created on the same site as your Course.
### Set up the link
1. From your dashboard, select **Products**.
2. Open the Course product where you want to link your Community.
3. Click the **Settings** tab.
4. Navigate to the Community settings.
5. Click to **toggle on** "Enable community for this course."
6. Then, select your Community **Access Group** from the drop-down menu.
7. Click **Save**:
Next, check if your Community Access Group is included in all of your Course Offers. If not, you'll need to add it to the Offer(s) or else your students won't be able to view the Channel you embed in your Course. [Learn to add an additional product to an Offer](../../sales/offers/how-to-connect-additional-products-to-your-offer).
## Add a Channel Widget to a Course template
Once you've linked your Course to a Community Access Group, you must embed the Community widget in your Course template to make it viewable directly inside of your Course.
**Important:**
Publishing a post to the Community Widget in Preview Mode will post directly to your Community.
**Important:**
Before you proceed, make sure you've updated to the latest version of the Premier or Momentum template.
### Update the template
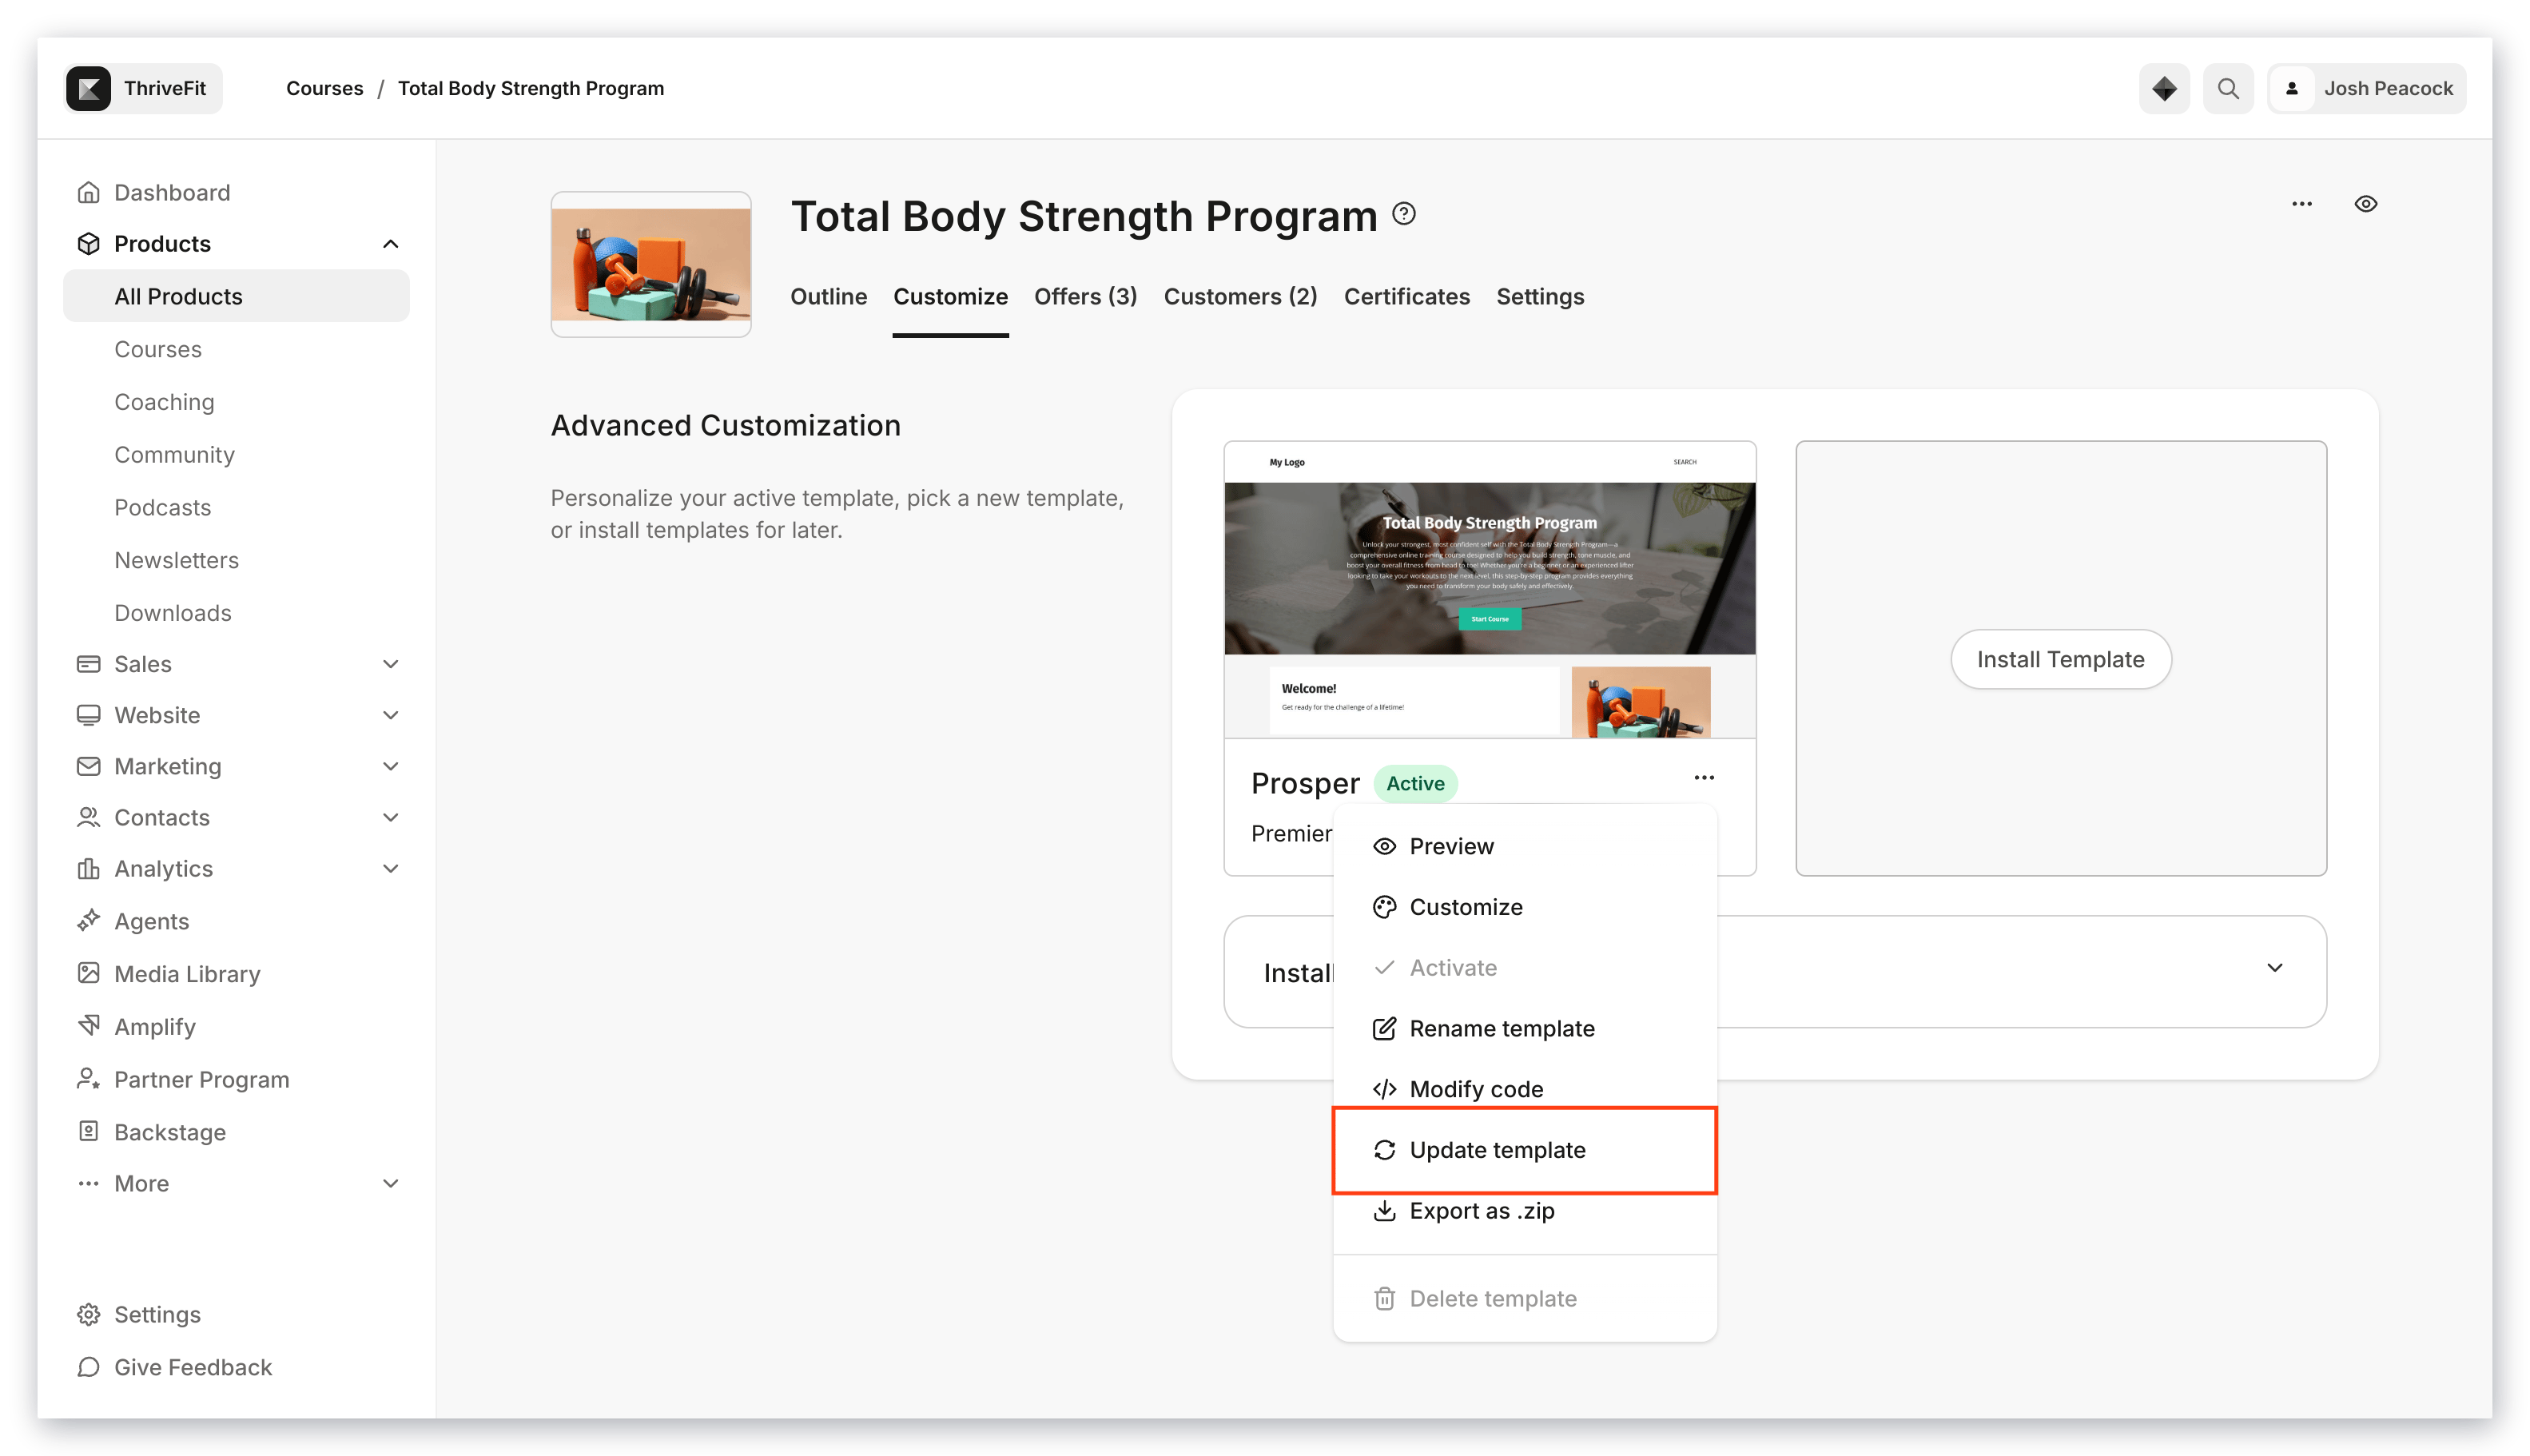
1. From inside your Course product, click the **Customize** tab.
2. Click … on your active Course template to open the options menu.
3. Select **Update template**:
 ### Add a Channel widget
1. From inside your Course product, click the **Customize** tab.
2. Place your cursor over your active Course template and click **Customize**.
3. Navigate to the left sidebar editor Sections tab and select **Community widget**.
4. Then, choose the Channel you want to embed from the Channel's drop-down menu:
### Add a Channel widget
1. From inside your Course product, click the **Customize** tab.
2. Place your cursor over your active Course template and click **Customize**.
3. Navigate to the left sidebar editor Sections tab and select **Community widget**.
4. Then, choose the Channel you want to embed from the Channel's drop-down menu:
## Choose Channel branding
Finally, choose to either apply the branding settings from your Community to your Channel widget or manually select your branding choices.
**To choose your branding:**
* Option 1: Check the **Link to community Channel settings** checkbox to import your Community branding settings.
* Click **Preview** to view your changes. (Important note: If you submit a Channel post on the Preview page, your post will appear in your live Community Channel).
* Once you're satisfied with your branding, click **Save**: