> ## Documentation Index
> Fetch the complete documentation index at: https://help.kajabi.com/llms.txt
> Use this file to discover all available pages before exploring further.
# Customize a Newsletter
> Design the look and feel of your Newsletter for subscribers and visitors, including theme settings, text editing, and post configuration.
Your **Newsletter** appearance is controlled by your Website Theme Settings, rich text editor options, and post-level configuration. Customize these to create a consistent brand experience for subscribers and visitors.
## Design the member experience
Kajabi keeps your branding colors aligned and consistent by using your Website Theme Settings to determine the primary colors of your Newsletter.
[Learn to update your website theme settings](../../website/pages/creating-your-website).
Customize the member experience with your Newsletter Product(s) by editing your Website Theme and designing a look and feel consistent with your brand and voice.
**Note:** If you have multiple Newsletter Products, any changes you make in the builder to Newsletter pages in your Website Theme apply to all of your Newsletter Products.
### Edit the website theme
1. Open the **Website** tab from your Dashboard
2. Click **Design**
3. Click **Customize** in the corner of your **Design** page
4. Use the left sidebar to customize the look and feel of your Newsletter page
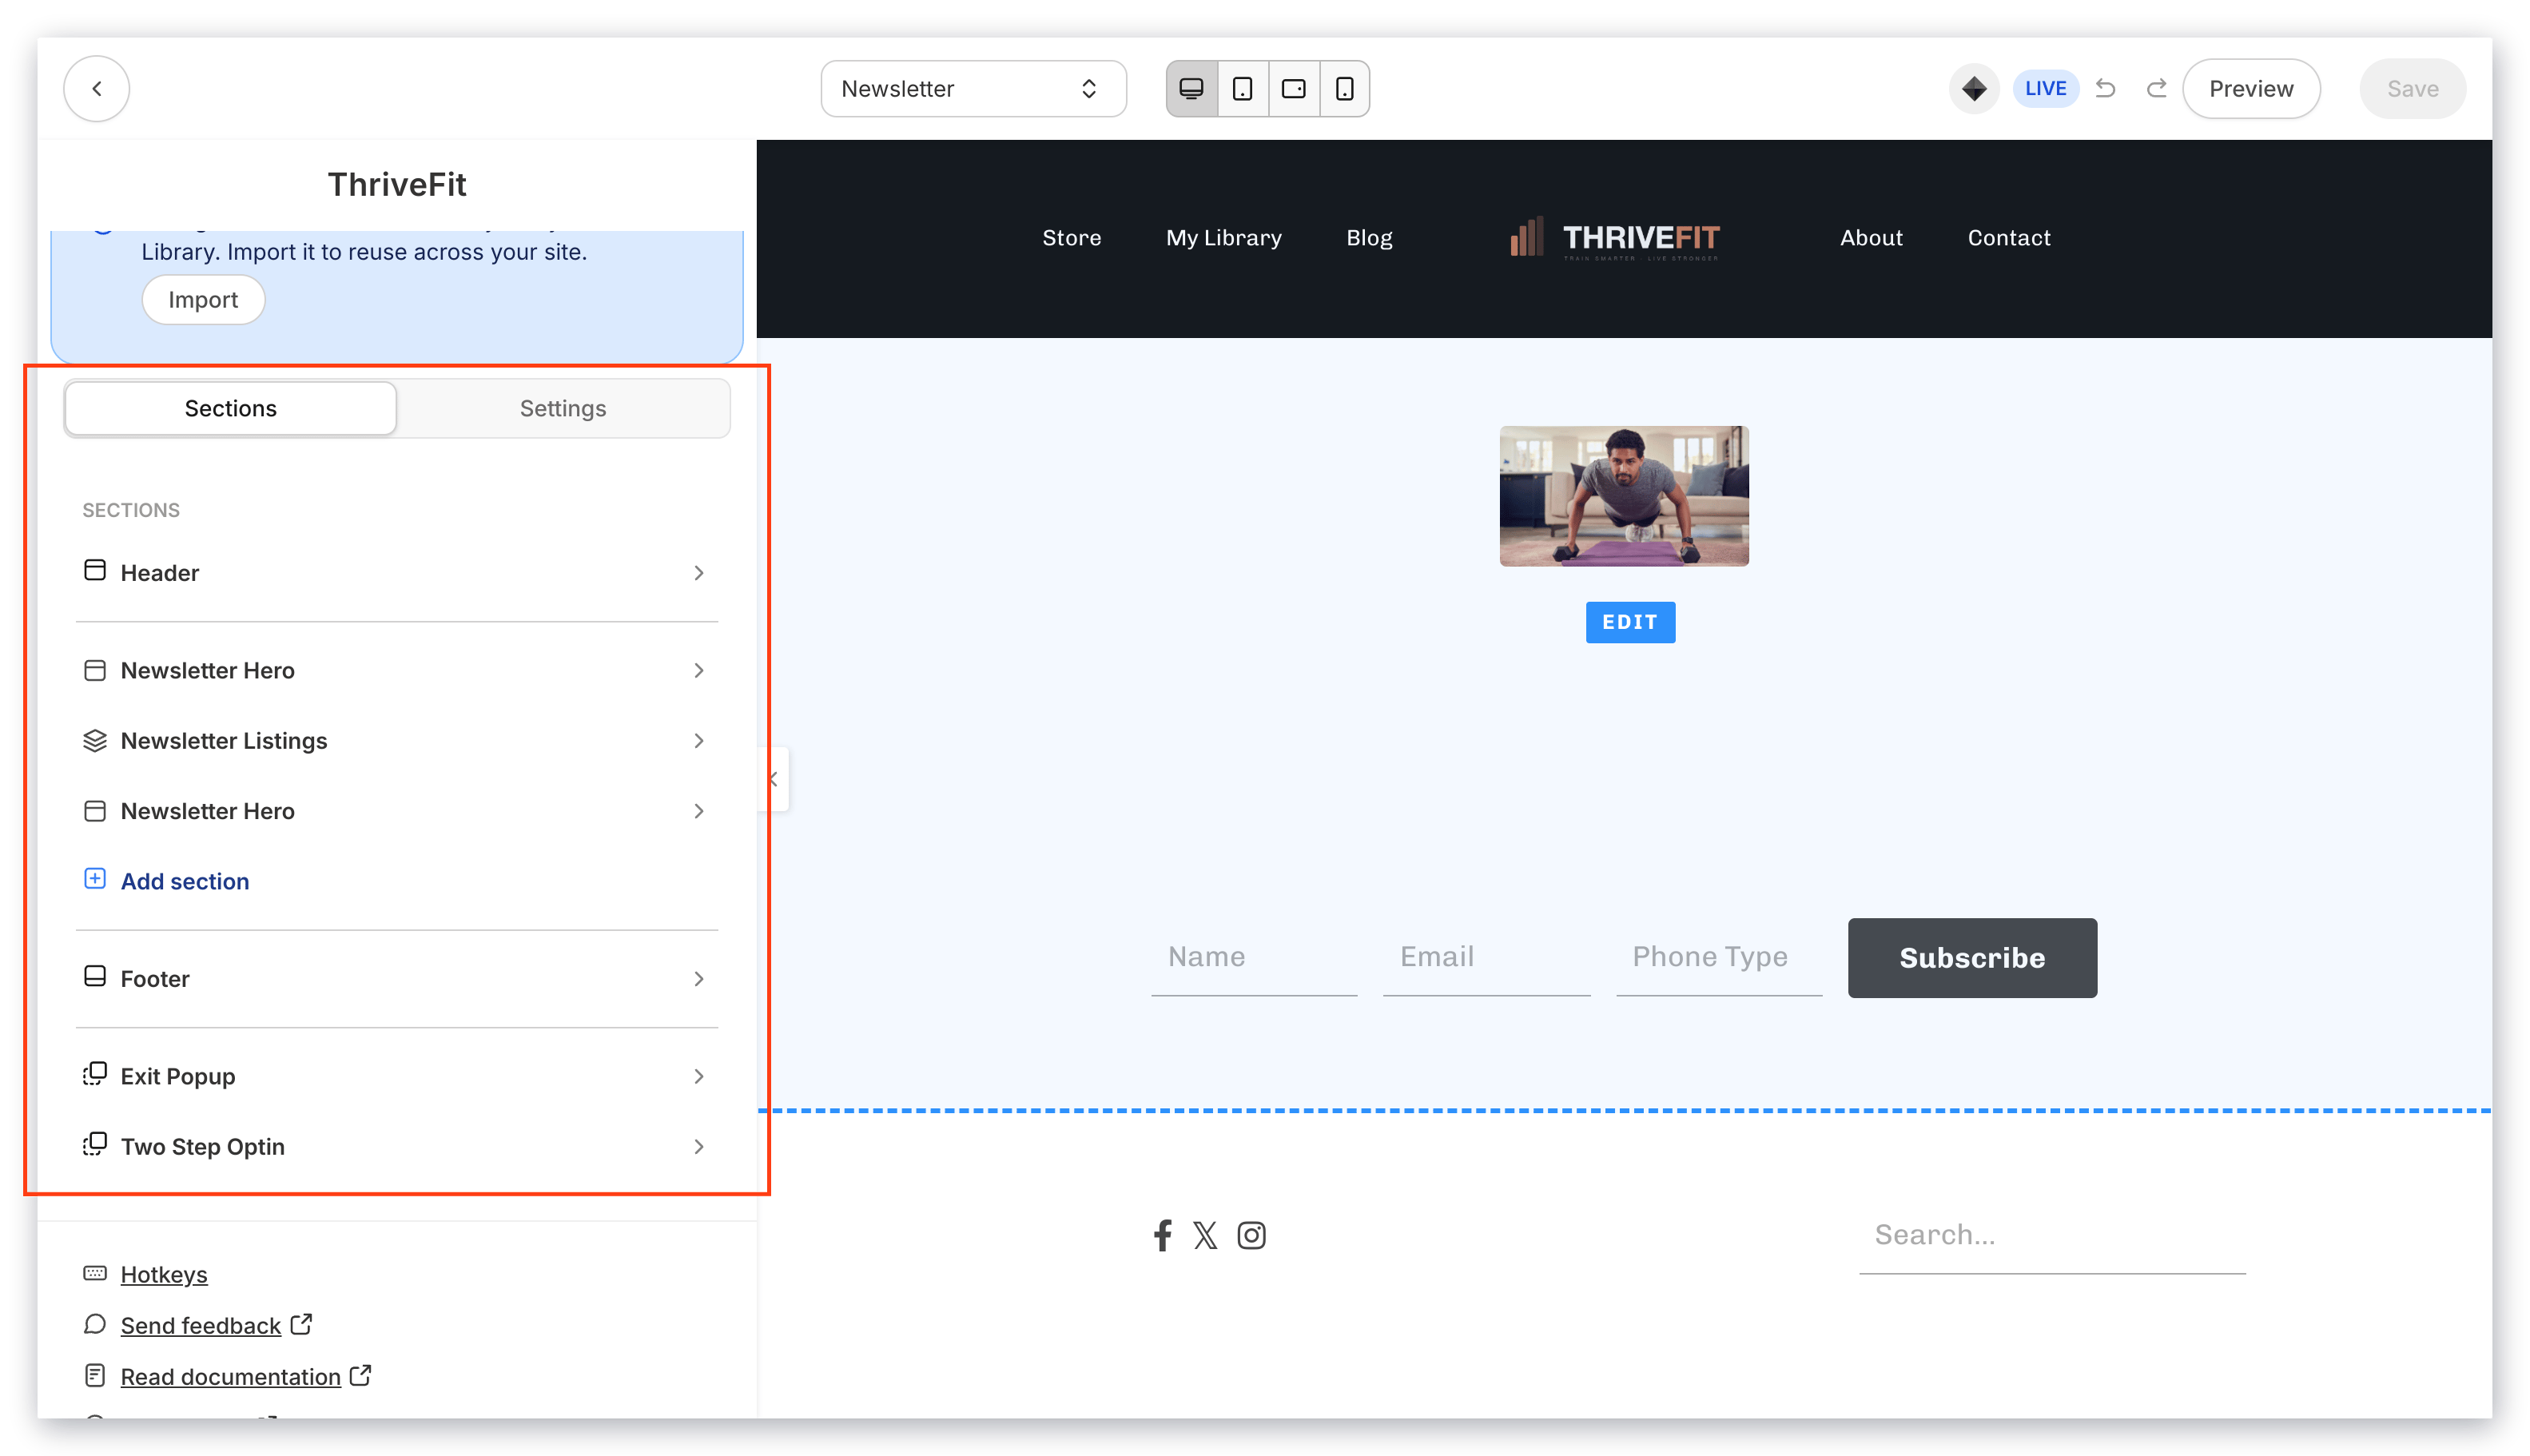 Once you have accessed your Website Theme, you can design your page with the Kajabi Page Builder. [Learn more about the Page Builder](../../website/pages/pages-explained).
5. Use the page selector at the top of the builder to navigate between different page views
Once you have accessed your Website Theme, you can design your page with the Kajabi Page Builder. [Learn more about the Page Builder](../../website/pages/pages-explained).
5. Use the page selector at the top of the builder to navigate between different page views
**Note:** Your Website Theme gives you the best preview of the member experience with your Newsletter. As you create Newsletter Posts, the text appears plain in the Newsletter Builder, but you can customize the appearance within the Website Theme to match your brand and voice.
## Personalize Newsletter post and email display
Customize your Newsletter settings for emails and web posts. By default, your Newsletter uses your website theme for the appearance of your email. You can override these default settings to customize your Newsletter Posts and emails without changing your website display settings. Navigate to your settings to use a custom email template with custom fonts, colors, and content blocks.
### Customize the email template and override website settings
1. Open the **Products** tab from your Dashboard
2. Click the **Newsletters** tab
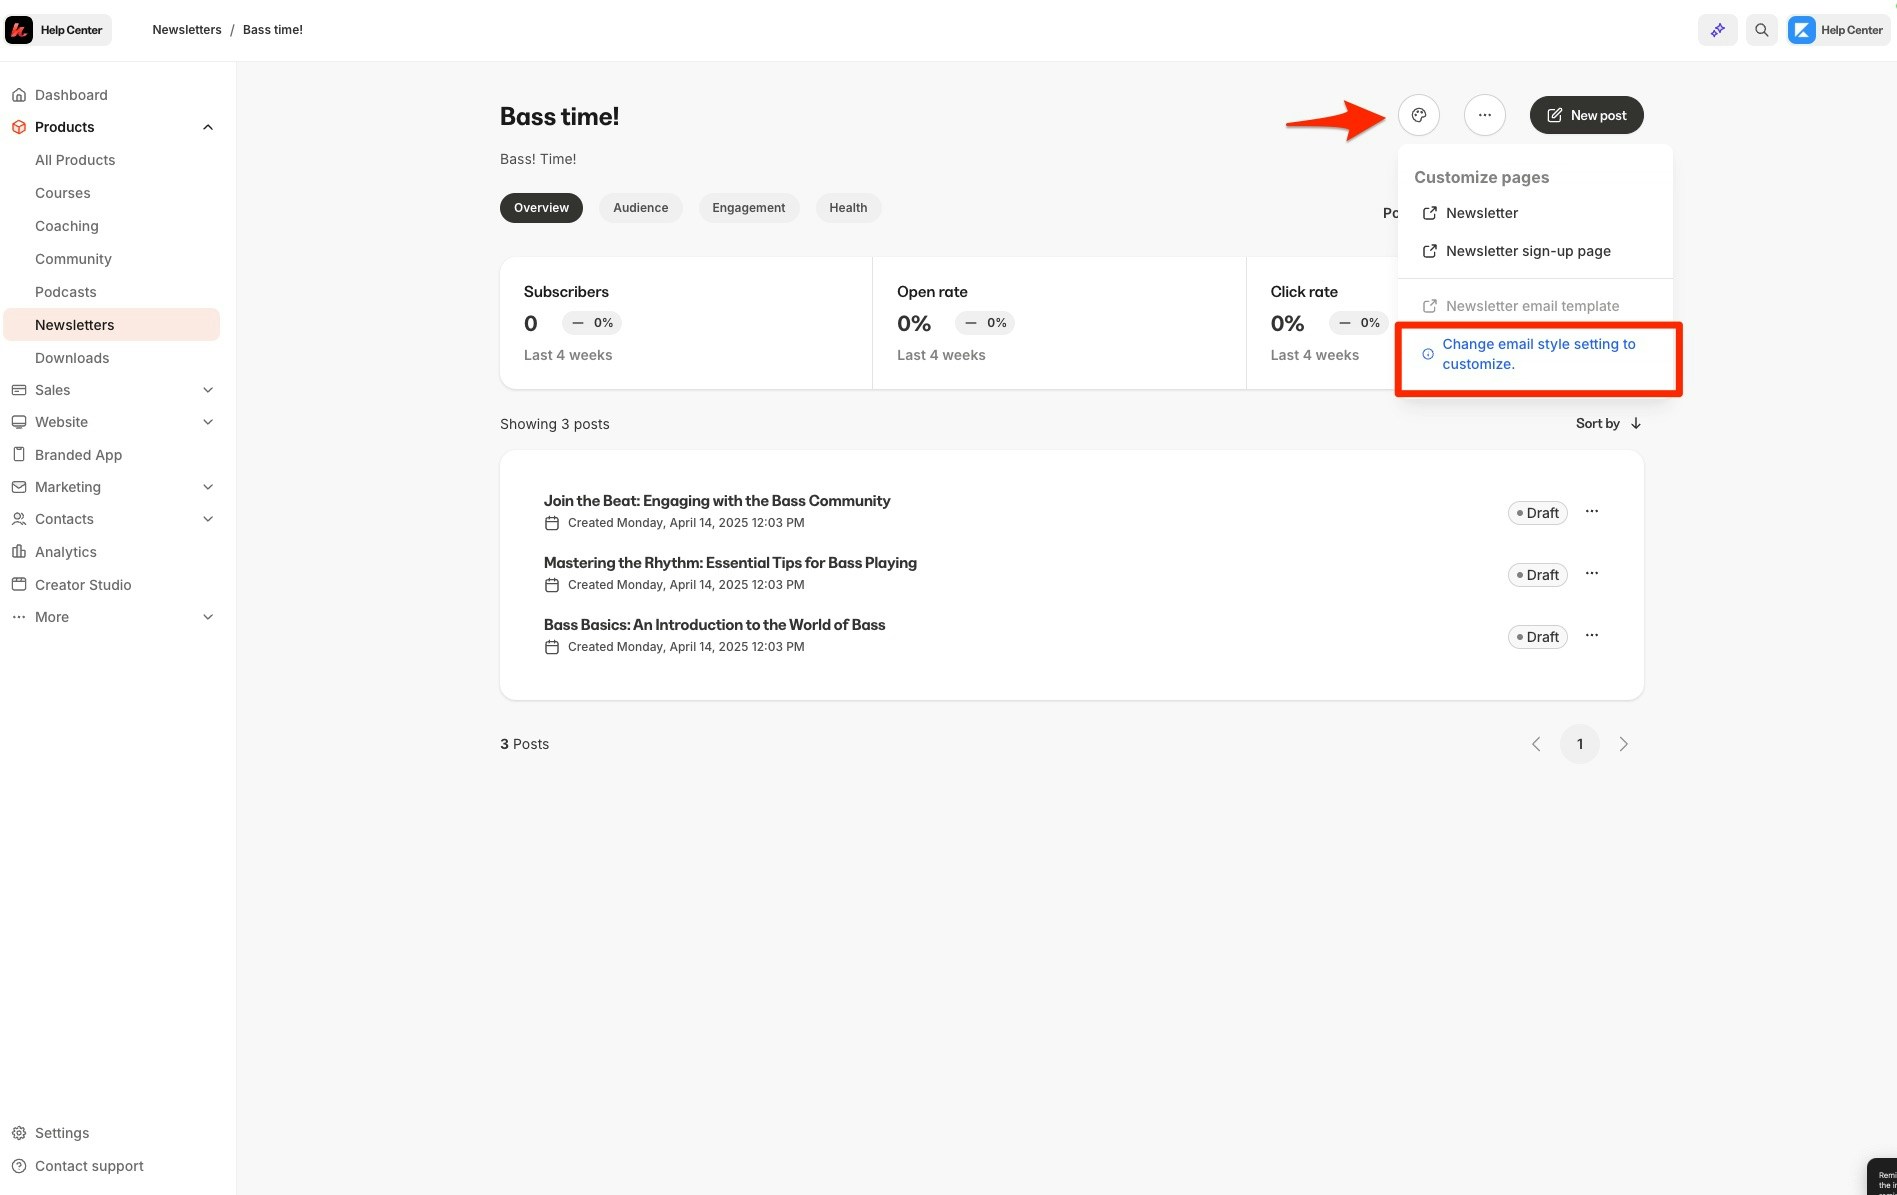
3. Click the **Customize** icon (the artist palette located in the top right)
4. Click **Change email style setting** to customize
 ### Override font styles in web posts
1. Open the **Products** tab from your Dashboard
2. Click the **Newsletters** tab
3. Open the **...** icon
4. Click **Settings**
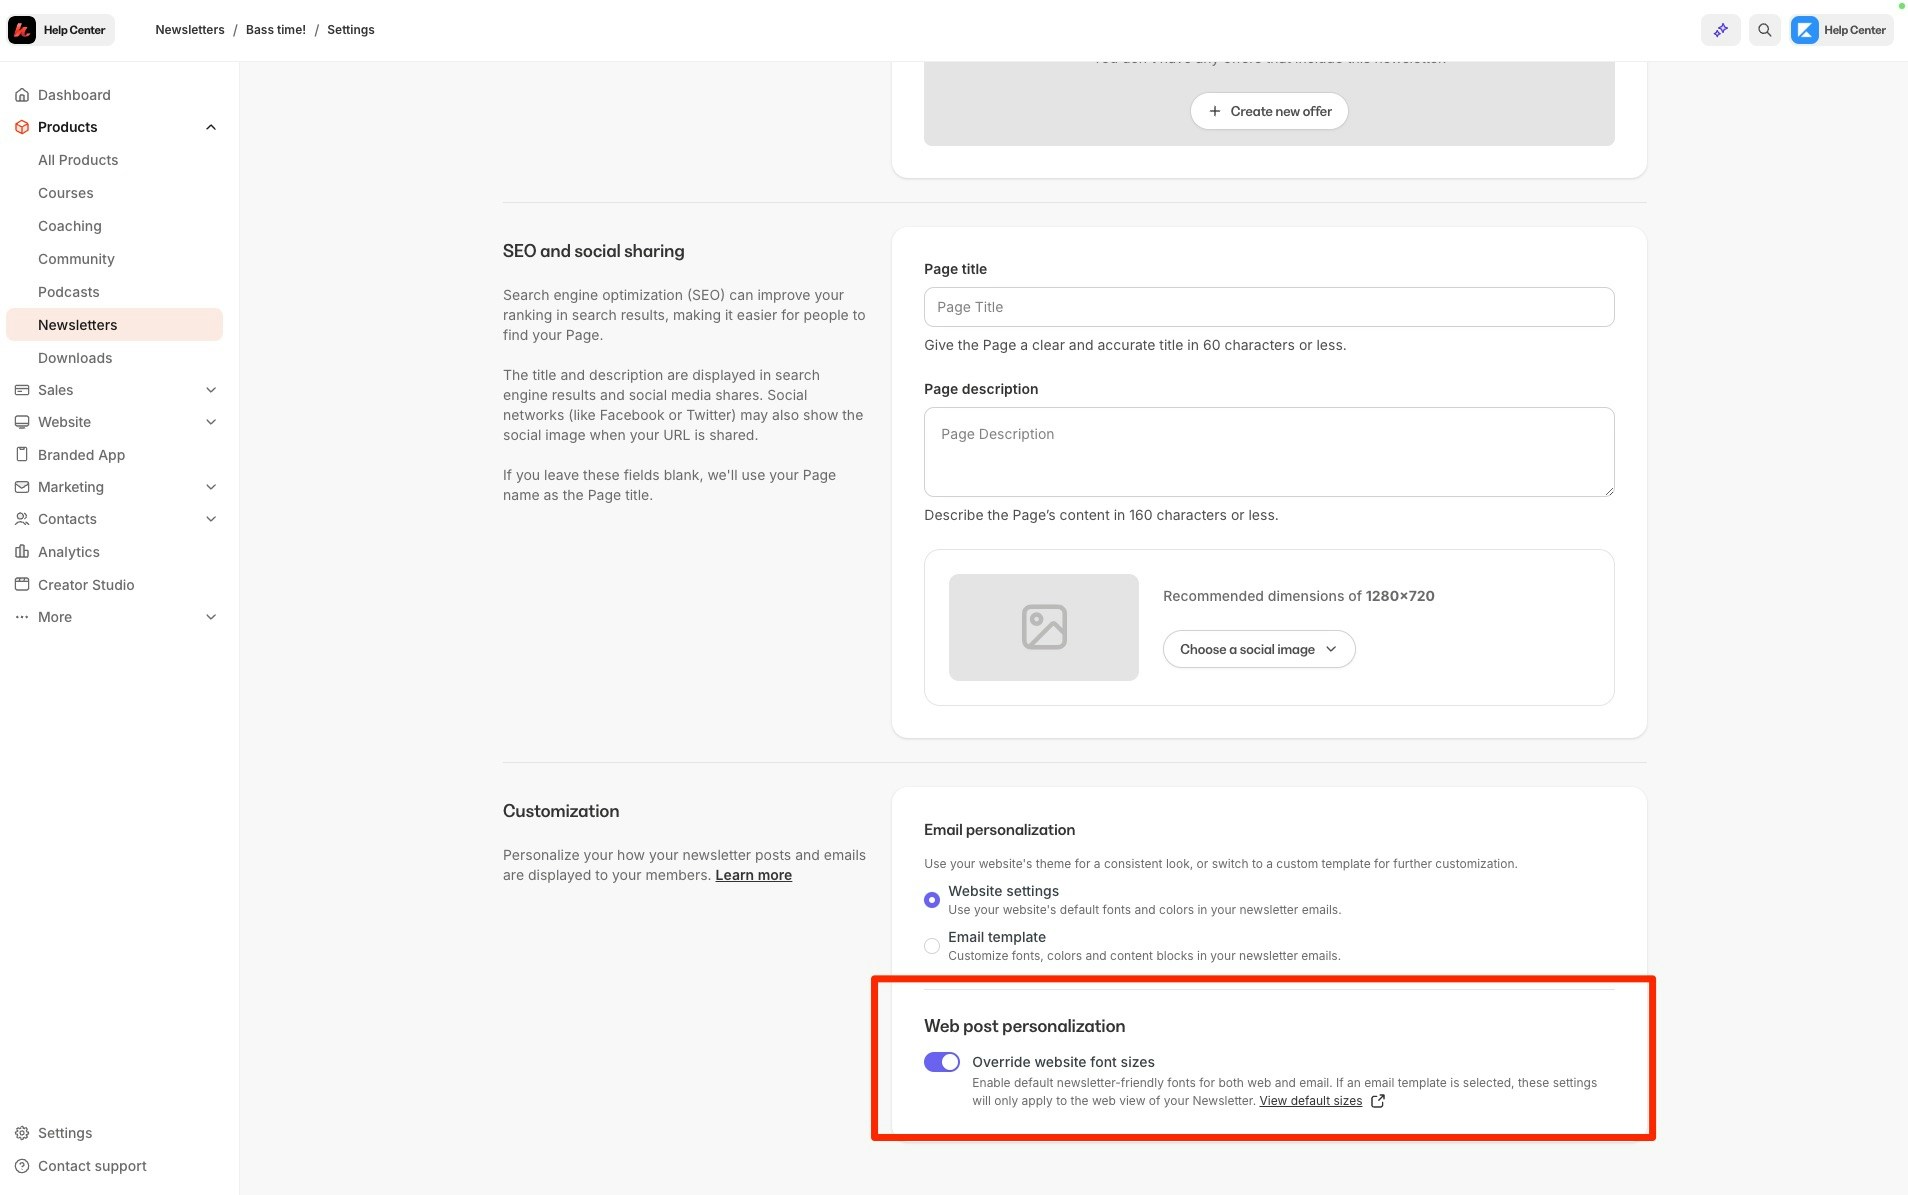
5. Within your Newsletter Settings, scroll to the **Customization** settings
6. Use the toggle to **Override website font styles** under "Web post personalization"
### Override font styles in web posts
1. Open the **Products** tab from your Dashboard
2. Click the **Newsletters** tab
3. Open the **...** icon
4. Click **Settings**
5. Within your Newsletter Settings, scroll to the **Customization** settings
6. Use the toggle to **Override website font styles** under "Web post personalization"
 ## Newsletter text editing
Customize your text with the Newsletter rich text editing tool. As you develop content, you can quickly apply formatting with the forward slash (/) to create blockquotes, highlights, lists, and more.
**Tip:** Add and edit images with Adobe Express for free using the rich text editing tool. [Learn more about Adobe Express in Kajabi](../../website/pages/how-to-customize-your-images-on-kajabi-with-adobe-express).
### Use the rich text editing tool
1. Open the **Products** tab from your Dashboard
2. Open the **Newsletters** tab
3. Click **New post** or select a drafted post
4. Press **Enter** to place your cursor on a line
5. Press the **command key** (⌘) + **forward slash** (**/**) on your keyboard
6. Select your desired stylization from the pop-up
## Newsletter text editing
Customize your text with the Newsletter rich text editing tool. As you develop content, you can quickly apply formatting with the forward slash (/) to create blockquotes, highlights, lists, and more.
**Tip:** Add and edit images with Adobe Express for free using the rich text editing tool. [Learn more about Adobe Express in Kajabi](../../website/pages/how-to-customize-your-images-on-kajabi-with-adobe-express).
### Use the rich text editing tool
1. Open the **Products** tab from your Dashboard
2. Open the **Newsletters** tab
3. Click **New post** or select a drafted post
4. Press **Enter** to place your cursor on a line
5. Press the **command key** (⌘) + **forward slash** (**/**) on your keyboard
6. Select your desired stylization from the pop-up
**Note:** The Newsletter Title is controlled by the H1 setting in your Website Theme under your [Style Guide settings](../../website/pages/customize-your-page-font-and-style-with-the-style-guide) and the body size settings control the body of the post.
## Post settings
Customize your Post thumbnail, Tags, Authors, Post URL, and Email Settings to improve your Newsletter SEO and brand visibility.
### Post thumbnail
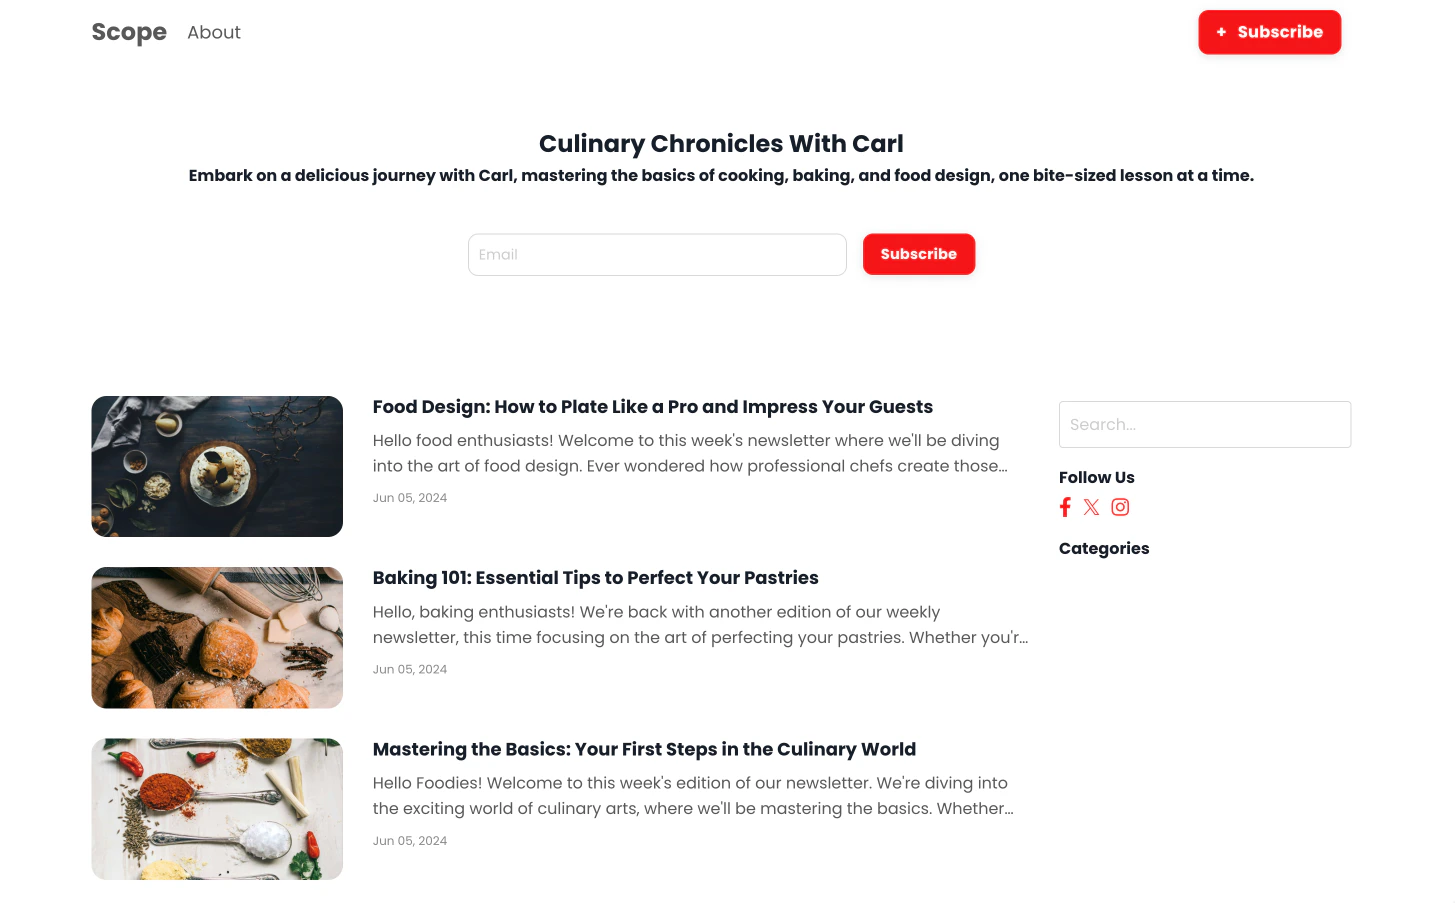
Upload a thumbnail for your Newsletter Post to capture potential readers and encourage them to click into the post. Your thumbnail is displayed in your Newsletter Dashboard:
 ### Tags
Help your Newsletter audience sort through topics with tags. By applying tags to your post, readers can filter their view of your web Newsletter Posts.
Add a tag by typing the name and pressing the **Enter** or **Tab** key.
### Authors
Build brand visibility and credibility by publicizing your authors.
Add an author by typing the name and pressing the **Enter** or **Tab** key.
### Hide from web
Enable or disable your post from the publicly visible Newsletter feed on the web. This is a great tool for giving exclusive access to your Newsletter email recipients. Navigate to **Audience** in your Newsletter Post Settings to choose which subscribers receive your Newsletter email.
Toggle off to make your post publicly visible on your Newsletter feed:
### Tags
Help your Newsletter audience sort through topics with tags. By applying tags to your post, readers can filter their view of your web Newsletter Posts.
Add a tag by typing the name and pressing the **Enter** or **Tab** key.
### Authors
Build brand visibility and credibility by publicizing your authors.
Add an author by typing the name and pressing the **Enter** or **Tab** key.
### Hide from web
Enable or disable your post from the publicly visible Newsletter feed on the web. This is a great tool for giving exclusive access to your Newsletter email recipients. Navigate to **Audience** in your Newsletter Post Settings to choose which subscribers receive your Newsletter email.
Toggle off to make your post publicly visible on your Newsletter feed:
 Toggle on to remove the post from your publicly visible Newsletter feed:
 ## SEO and sharing
### URL slug
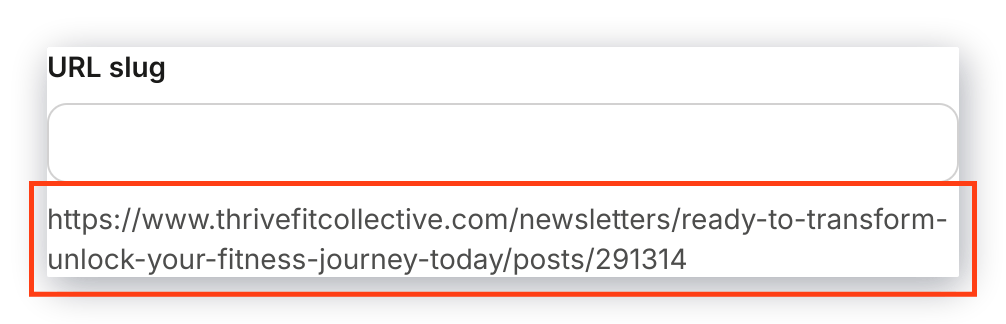
Update your Newsletter Post URL ID and customize your URL language to improve SEO and sharing capabilities. Entering text into the **Post URL** field adds your copy to the end of your link.
Preview your URL directly below the **Post URL** text field:
## SEO and sharing
### URL slug
Update your Newsletter Post URL ID and customize your URL language to improve SEO and sharing capabilities. Entering text into the **Post URL** field adds your copy to the end of your link.
Preview your URL directly below the **Post URL** text field:
 ### Page title
Give your Newsletter Page a clear and accurate title for SEO and sharing in 60 characters or less.
### Page description
Describe your Newsletter Page content in 160 characters or less.
## Email settings
* **Email Subject** — Capture your email recipient's attention with a strong subject line. [Learn email subject best practices](../../marketing/email-campaigns/best-practices-for-email-subject-lines).
* **Preview Text** — A snippet of copy commonly displayed beneath the sender name and subject line in your subscriber's email inbox. Depending on the email client, the Preview Text may appear next to the subject line:
### Page title
Give your Newsletter Page a clear and accurate title for SEO and sharing in 60 characters or less.
### Page description
Describe your Newsletter Page content in 160 characters or less.
## Email settings
* **Email Subject** — Capture your email recipient's attention with a strong subject line. [Learn email subject best practices](../../marketing/email-campaigns/best-practices-for-email-subject-lines).
* **Preview Text** — A snippet of copy commonly displayed beneath the sender name and subject line in your subscriber's email inbox. Depending on the email client, the Preview Text may appear next to the subject line:
 [Learn tips to optimize your preview text](../../marketing/email-campaigns/how-to-edit-your-preview-text).
* **Audience** — Choose which subscribers receive your Newsletter email:
* All subscribers
* A segment of your subscribers — Create and manage segments in your **Contacts** tab. [Learn more about segmenting contacts](../../contacts/manage-your-contacts/segment-your-contacts).
* Only free subscribers
* [Only paid subscribers](../../products/newsletters/how-to-create-exclusive-access-to-your-newsletter)
* None
**Note:** To delete a post, open your Newsletter Post Settings and navigate to **Delete Post** to permanently delete a post from your Newsletter.
[Learn tips to optimize your preview text](../../marketing/email-campaigns/how-to-edit-your-preview-text).
* **Audience** — Choose which subscribers receive your Newsletter email:
* All subscribers
* A segment of your subscribers — Create and manage segments in your **Contacts** tab. [Learn more about segmenting contacts](../../contacts/manage-your-contacts/segment-your-contacts).
* Only free subscribers
* [Only paid subscribers](../../products/newsletters/how-to-create-exclusive-access-to-your-newsletter)
* None
**Note:** To delete a post, open your Newsletter Post Settings and navigate to **Delete Post** to permanently delete a post from your Newsletter.