> ## Documentation Index
> Fetch the complete documentation index at: https://help.kajabi.com/llms.txt
> Use this file to discover all available pages before exploring further.
# Create custom campaign links
> Use any URL as a trackable Kajabi Partner link with custom campaign links.
**Custom campaign links** drive traffic to any content you've created on your own website or any content Kajabi has published, from blog posts to webinars. You receive credit for any referrals who click your link and sign up for Kajabi within a 30-day period.
## How do custom campaign links work?
Kajabi Partner Links (including custom campaign links) place a 30-day tracking cookie on the link clicker's browser. This means that when someone clicks on your Partner link and signs up for Kajabi within 30 days of clicking the link, you will receive credit for the referral. Once the referral becomes a paying Hero, they are considered an "active referral." As a Kajabi Partner, you will begin earning commissions for your Active Referrals.
## Create a custom campaign link
### Navigate to the Kajabi Partner Dashboard
1. From the Kajabi Dashboard, click your account icon in the top right corner.
2. Select **Partner Program** to open the Kajabi Partner Dashboard.
* If you do not have a Kajabi account, log in [here](https://kajabi.com/partnerprogram)
3. In your Partner Dashboard, navigate to **Campaigns** in the left side bar.
4. Click the **Create a campaign** button.
5. Locate the **Custom Campaign** card.
6. Click **Create Campaign**.
### Create the custom campaign link
To create a custom campaign link:
* Give it a title. A great title to use for a Custom Campaign would be the URL's Page Name. For example, if you were to generate a Custom Campaign from a blog post URL, use the title of the blog post.
* Copy and paste the URL you'd like to use for your Custom Campaign.
* Next, title the link you're generating for your Custom Campaign. You can re-use this campaign's title, or if you plan on promoting the link in different places or channels, we suggest adding the channel's name to the link's title. That way, you can create additional links for each channel under this campaign and see which channel is converting best.
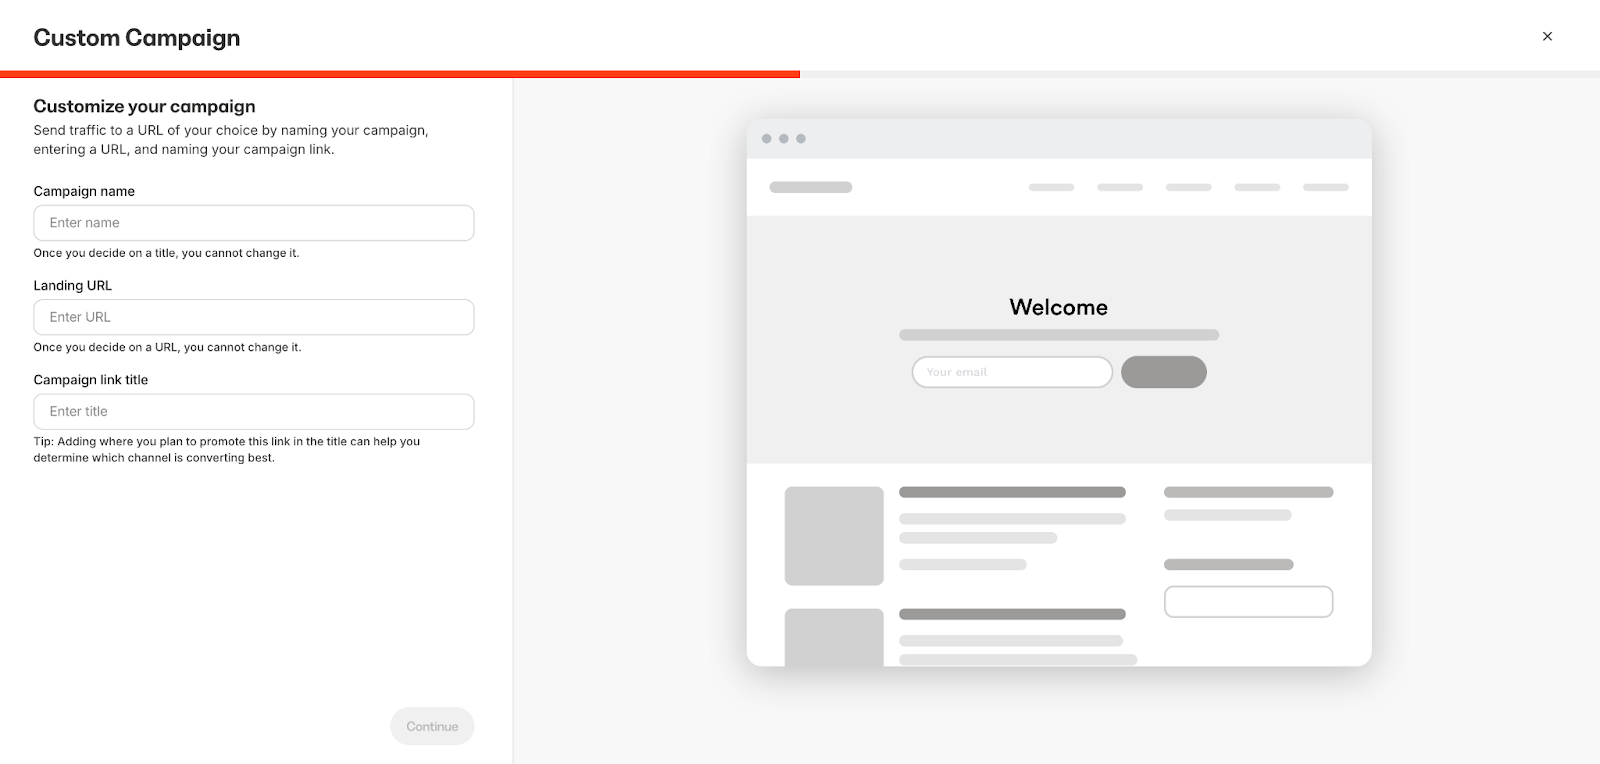 Once you've completed the Custom Campaign Link form, Kajabi will take the URL you inputted and generate a URL that has your 30-day tracking cookie attached for you to go out and share.
A custom campaign link might look like this:
```
https://app.kajabi.com/r/abcD3FGHi/t/jklmnopq
```
**Note:**
Although your custom campaign link may be formatted to look similar to the link above, it will still direct your visitors to the URL you input. Test your custom campaign link by copying and pasting it into your browser to confirm that it leads to the correct page.
Once you've completed the Custom Campaign Link form, Kajabi will take the URL you inputted and generate a URL that has your 30-day tracking cookie attached for you to go out and share.
A custom campaign link might look like this:
```
https://app.kajabi.com/r/abcD3FGHi/t/jklmnopq
```
**Note:**
Although your custom campaign link may be formatted to look similar to the link above, it will still direct your visitors to the URL you input. Test your custom campaign link by copying and pasting it into your browser to confirm that it leads to the correct page.