> ## Documentation Index
> Fetch the complete documentation index at: https://help.kajabi.com/llms.txt
> Use this file to discover all available pages before exploring further.
# Add Sections to pages
> Learn how a Section can be used to build a beautifully designed Page.
## Overview
A **Section** describes a specific area of your page containing [Block(s)](../../website/pages/add-blocks-to-your-page) used to organize and break up your content.
Your page will typically contain multiple Sections, which can be customized and previewed in the sidebar editor:
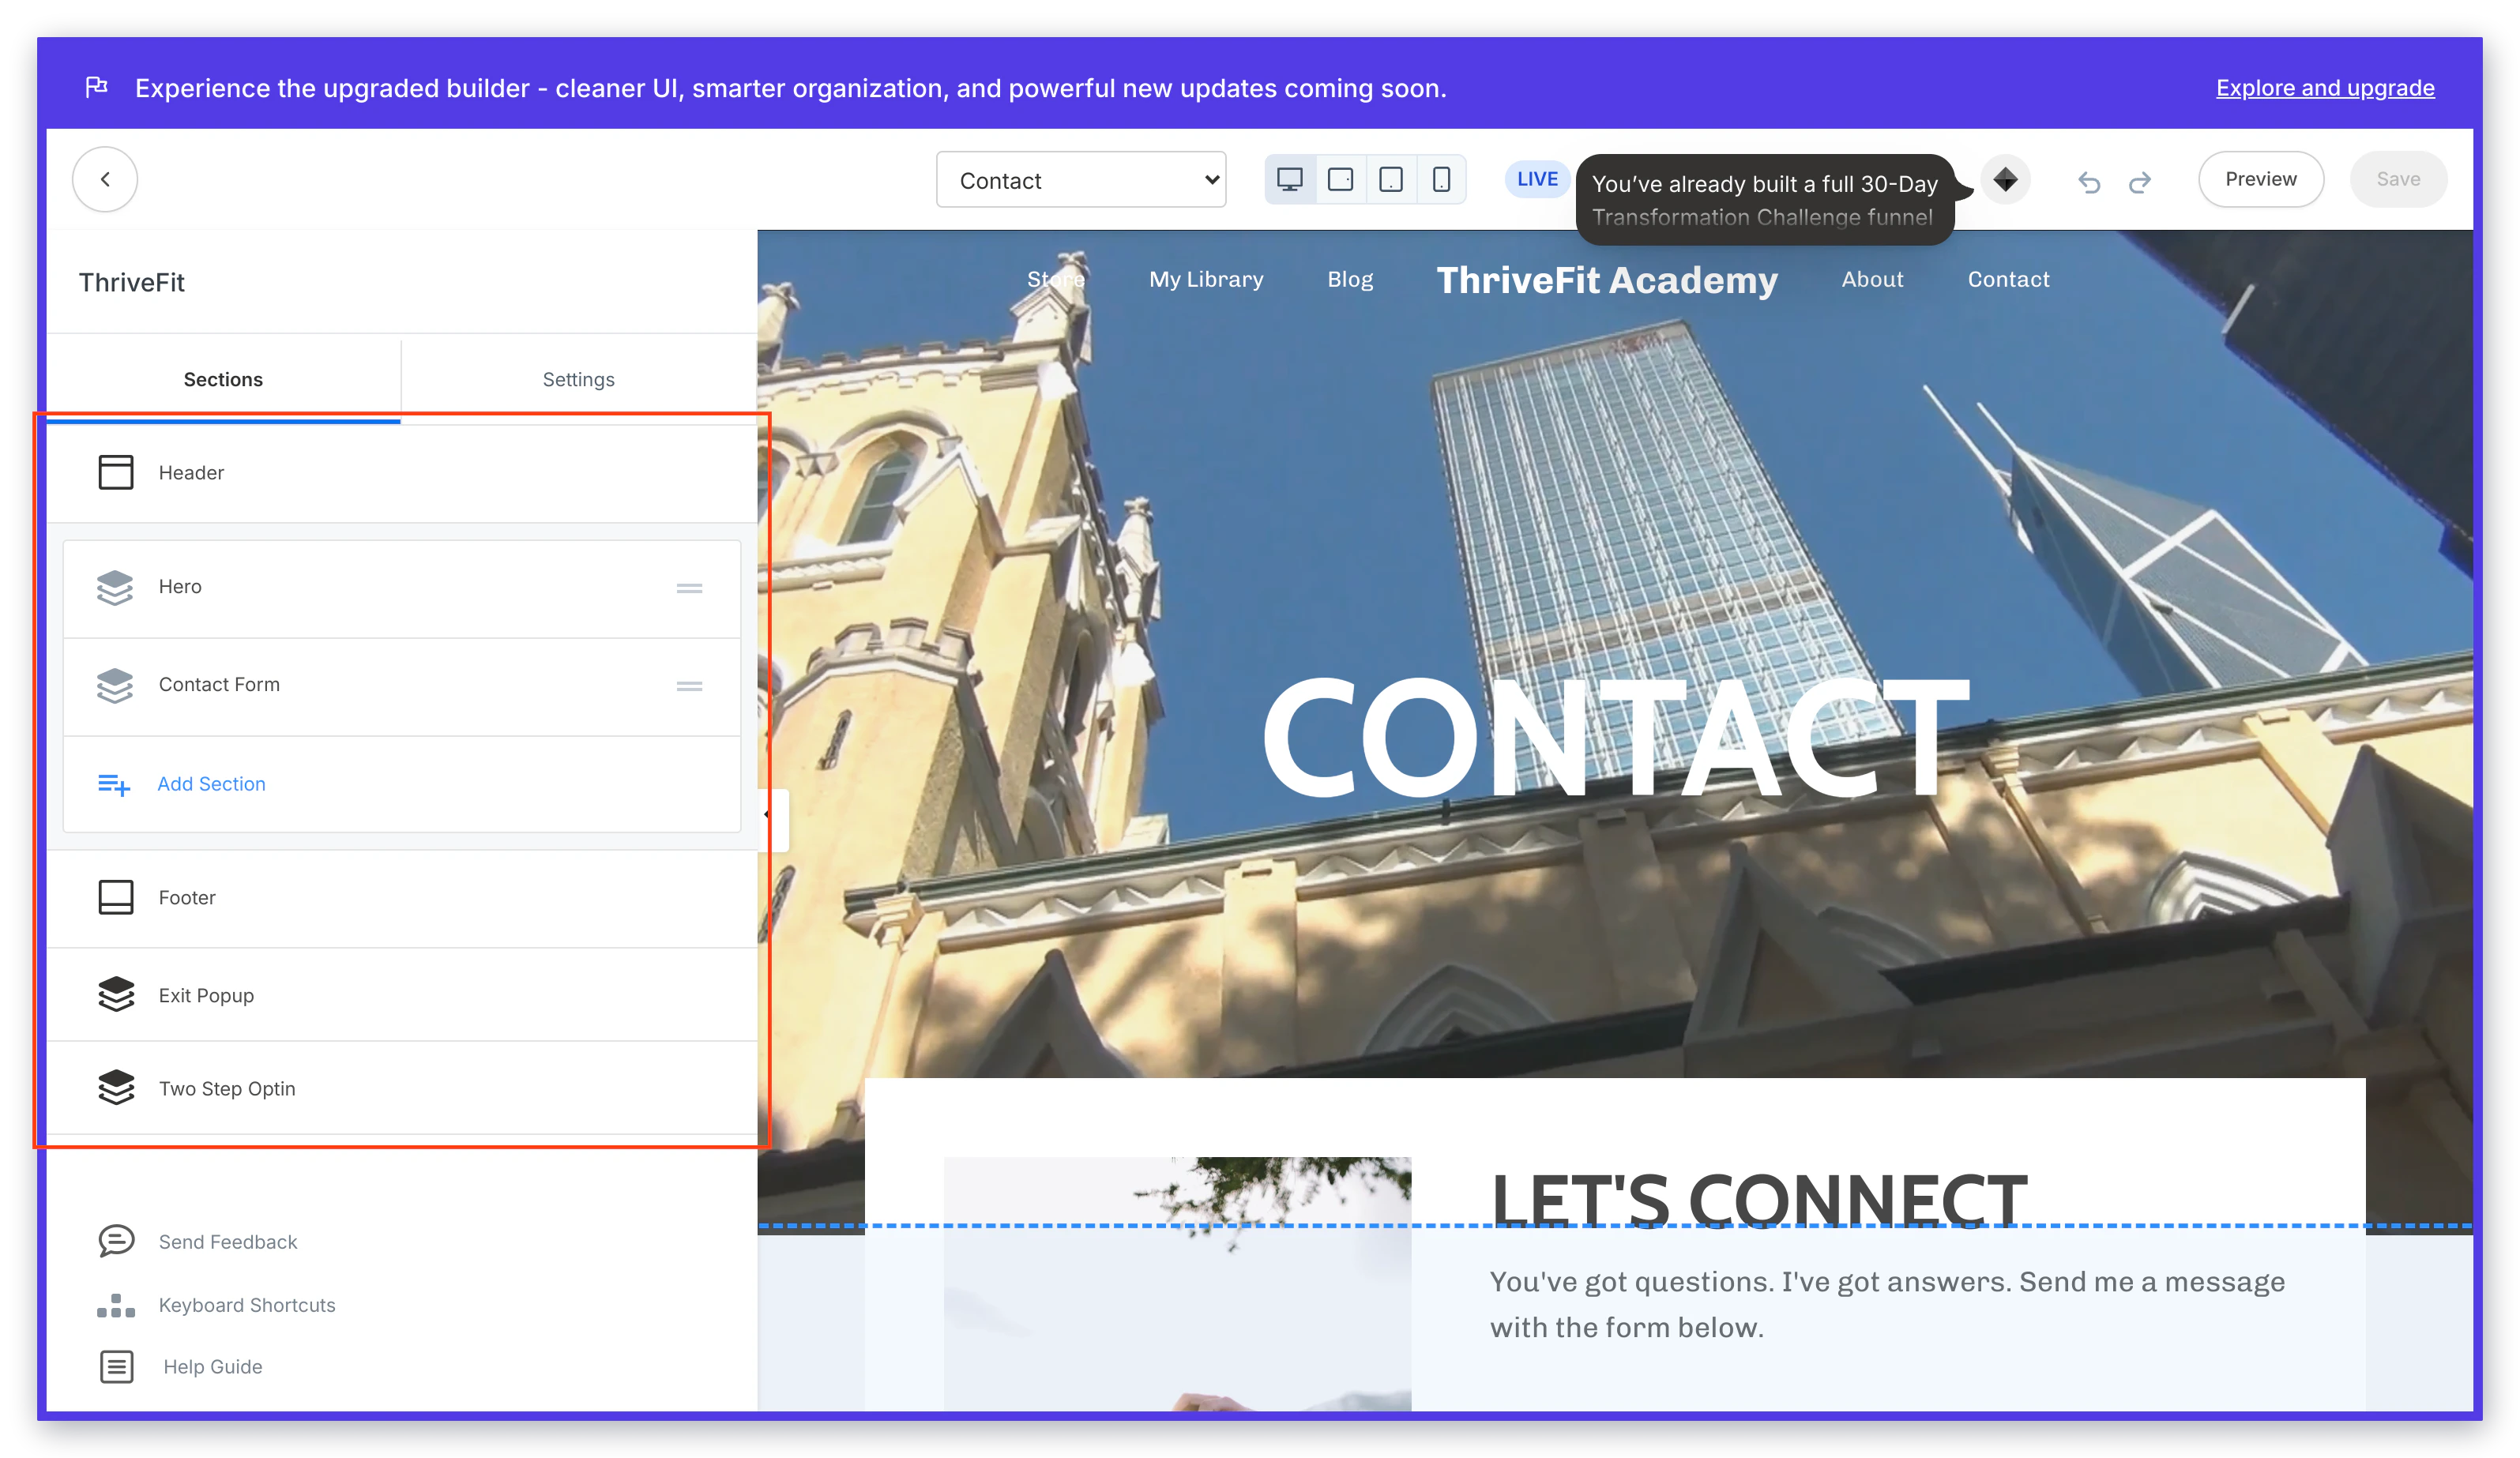 Sections are used to enhance your user's experience by organizing and presenting your content in an easy-to-consume, beautifully designed Page.
All Sections are made up of Blocks. This means that any Section can be replicated by adding Block Types to a Section.
However, it is important to note that Preset Sections with Preset Block Types (e.g., Text in Panel, Hero with Countdown) will differ in appearance compared to Sections in which you "Add Content" to include additional Block Types.
**Tip:** Enable Guides from your [Design Tools](../../website/pages/build-your-page-with-design-tools) to help you differentiate each element on your page.
***
## Preset Sections
To help you build fully-integrated, powerful pages even faster, we've added more Preset Sections. With over 45 preset Sections to choose from, design your page exactly as you want:
* **[Basic Content](../../website/pages/add-a-basic-content-section-to-your-page)** sections include various preset Text Blocks, a Text Block with a Call to Action preset, or a Form Block and a Text Block.
* **[Hero](../../website/pages/how-to-add-a-hero-section)** sections have preset backgrounds that can include a Countdown overlay, Form overlay, Image overlay, or a Video overlay.
* **[Features](../../website/pages/how-to-add-a-features-section)** can be used to showcase your brand, product, or service with Feature Cards or Feature Columns.
* **[Carousel](../../website/pages/how-to-add-a-carousel-section)** can be used to display images, testimonials, and videos in an interactive Carousel section.
* **[Marketing & Events](../../website/pages/how-to-add-a-marketing-events-section)** sections help you grow your list, register visitors to an event, and more with Forms, Event Blocks, and more.
**Tip:** Looking to add even more functionality to your page sections? Custom Website Widgets enable you to easily add a large variety of functionality to your online pages to increase user engagement, no code required. [Learn how to add a Website Widget to your page](../../website/pages/how-to-add-a-website-widget-to-your-page). (Note: This feature may be subject to an additional cost outside of your base Kajabi plan fee).
***
## Add a Section
1. Open the **Website** tab from the Dashboard.
2. Click the **Pages** tab.
3. Select the **Landing** tab.
4. Open the page editor for your Page. [Learn more](../../website/pages/how-to-get-to-the-page-editor)
5. Click **+ Add Section** from the sidebar.
6. Select your desired Section and click **Add**.
7. Click **Save** to keep your changes:
Sections are used to enhance your user's experience by organizing and presenting your content in an easy-to-consume, beautifully designed Page.
All Sections are made up of Blocks. This means that any Section can be replicated by adding Block Types to a Section.
However, it is important to note that Preset Sections with Preset Block Types (e.g., Text in Panel, Hero with Countdown) will differ in appearance compared to Sections in which you "Add Content" to include additional Block Types.
**Tip:** Enable Guides from your [Design Tools](../../website/pages/build-your-page-with-design-tools) to help you differentiate each element on your page.
***
## Preset Sections
To help you build fully-integrated, powerful pages even faster, we've added more Preset Sections. With over 45 preset Sections to choose from, design your page exactly as you want:
* **[Basic Content](../../website/pages/add-a-basic-content-section-to-your-page)** sections include various preset Text Blocks, a Text Block with a Call to Action preset, or a Form Block and a Text Block.
* **[Hero](../../website/pages/how-to-add-a-hero-section)** sections have preset backgrounds that can include a Countdown overlay, Form overlay, Image overlay, or a Video overlay.
* **[Features](../../website/pages/how-to-add-a-features-section)** can be used to showcase your brand, product, or service with Feature Cards or Feature Columns.
* **[Carousel](../../website/pages/how-to-add-a-carousel-section)** can be used to display images, testimonials, and videos in an interactive Carousel section.
* **[Marketing & Events](../../website/pages/how-to-add-a-marketing-events-section)** sections help you grow your list, register visitors to an event, and more with Forms, Event Blocks, and more.
**Tip:** Looking to add even more functionality to your page sections? Custom Website Widgets enable you to easily add a large variety of functionality to your online pages to increase user engagement, no code required. [Learn how to add a Website Widget to your page](../../website/pages/how-to-add-a-website-widget-to-your-page). (Note: This feature may be subject to an additional cost outside of your base Kajabi plan fee).
***
## Add a Section
1. Open the **Website** tab from the Dashboard.
2. Click the **Pages** tab.
3. Select the **Landing** tab.
4. Open the page editor for your Page. [Learn more](../../website/pages/how-to-get-to-the-page-editor)
5. Click **+ Add Section** from the sidebar.
6. Select your desired Section and click **Add**.
7. Click **Save** to keep your changes:
**Tip:** To preview a Section without adding it to your page, simply click the Section but don't click **Add**. The section will appear at the bottom of the landing page for you to preview. If you choose to proceed with adding it, select **Add**.
**Note:**
Each page supports a maximum of 50 Sections. If you need additional content, consider consolidating related content into fewer Sections with multiple Blocks.