> ## Documentation Index
> Fetch the complete documentation index at: https://help.kajabi.com/llms.txt
> Use this file to discover all available pages before exploring further.
# Add a countdown block to a page
> Learn to add a customized countdown timer to your pages with the Countdown Block.
**Note:** This guide refers to the latest page editor available with the Website Builder and Kajabi Pages. If you are using the Premier Legacy Templates, please refer to the guide [here](/articles/website/pages/how-to-add-a-countdown-to-your-page-with-premier).
***
## Adding a countdown block
Countdown timers are a great way to make your page visitors aware of an Event and create a sense of urgency around a specific date.
### To add a countdown block
* Open the **Website** tab from the Dashboard
* Select the **Pages** tab
* Open the page editor for your Page. [Learn more](/articles/website/pages/how-to-get-to-the-page-editor)
* Click the Section you want to edit or [create a new Section](/articles/website/pages/add-sections-to-your-pages)
* In the sidebar, click **Add Content**
* From the list, select **Countdown**
* Your newly created Countdown block will generate at the bottom of the Section
* Select an existing [Event](../../marketing/events/event-overview) to display the Countdown Timer in the block
* Click **Save** to keep your changes:
***
## Customizing your countdown block
In a Countdown block, you configure the [Block Width](/articles/website/pages/how-to-customize-the-block-width), select your Event, change the Countdown Style, enable or disable a Countdown Action, set an action to complete after the countdown ends, choose to remove the Section entirely after the Event Countdown timer expires, and configure the Countdown Block Settings.
### Select and edit your event
To customize your Countdown duration, select an Event from the dropdown.
If you have not created an Event, you must first create an Event in your Marketing tab. Learn more about [Events in Kajabi](../../marketing/events/event-overview) for details.
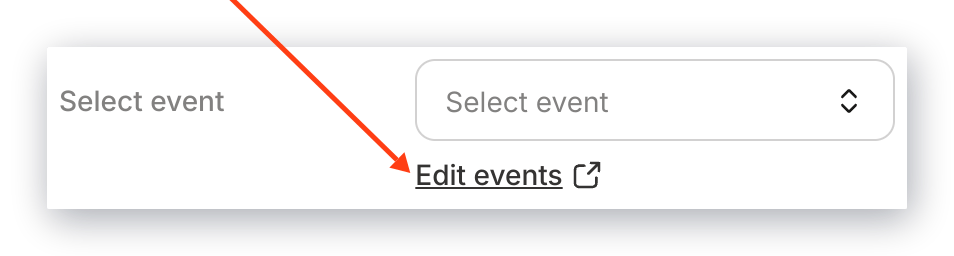
* In the Countdown Block Editor, navigate to the Event dropdown
* Click **Edit your Events** directly below the Event dropdown:
 ### Countdown style
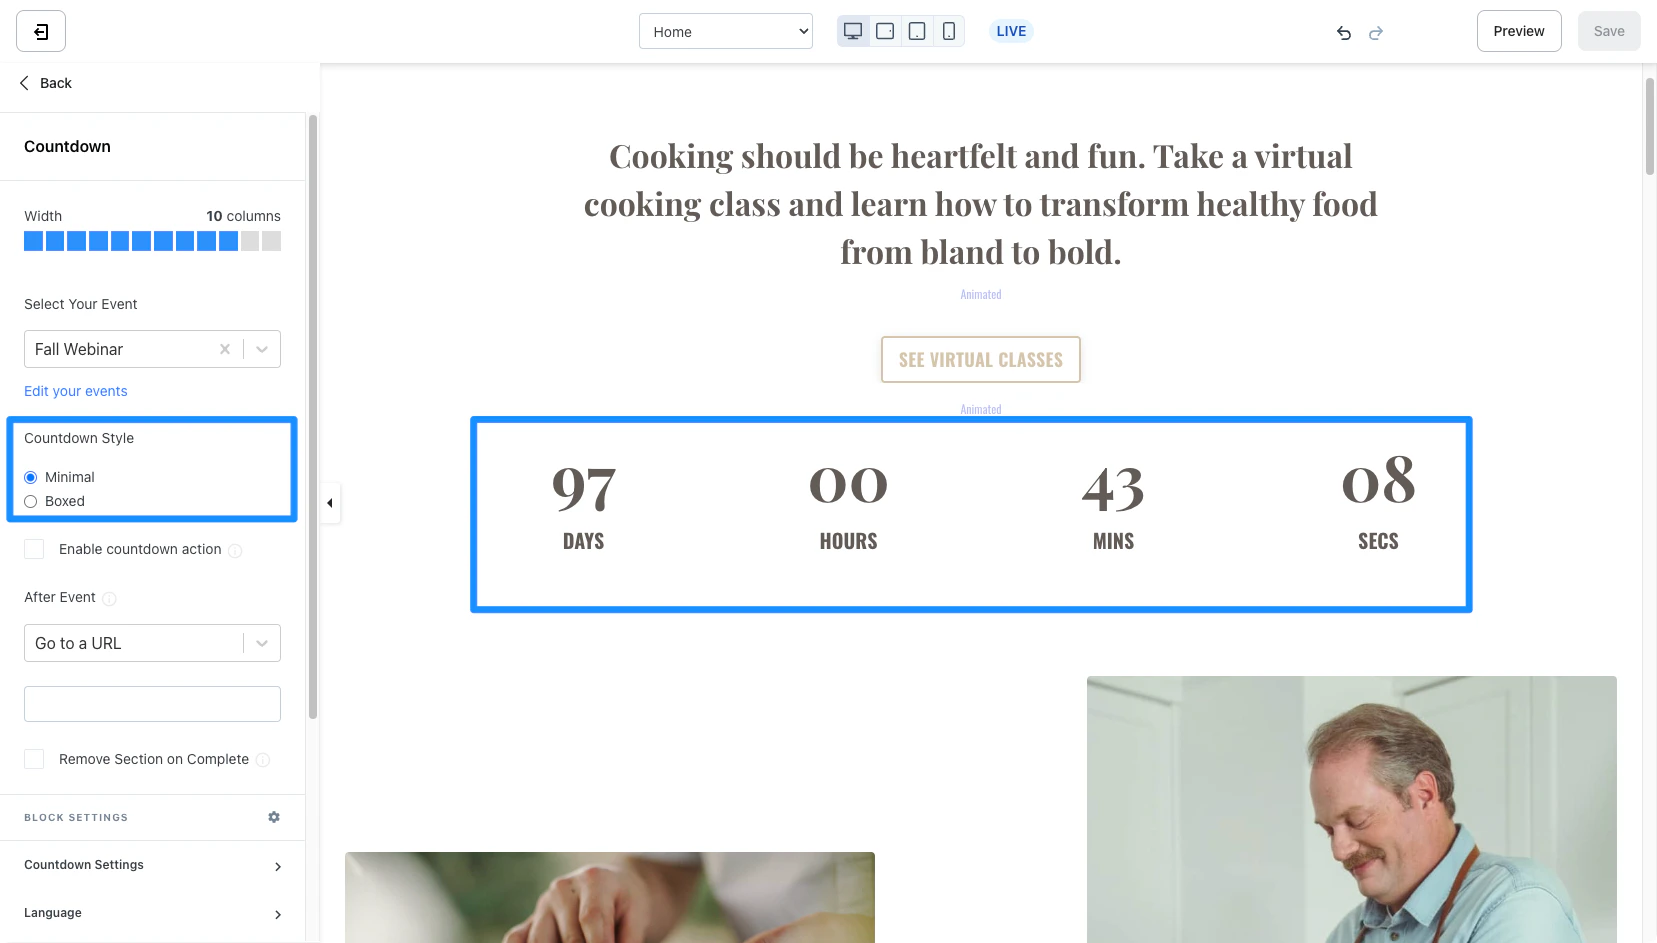
**Minimal**
### Countdown style
**Minimal**
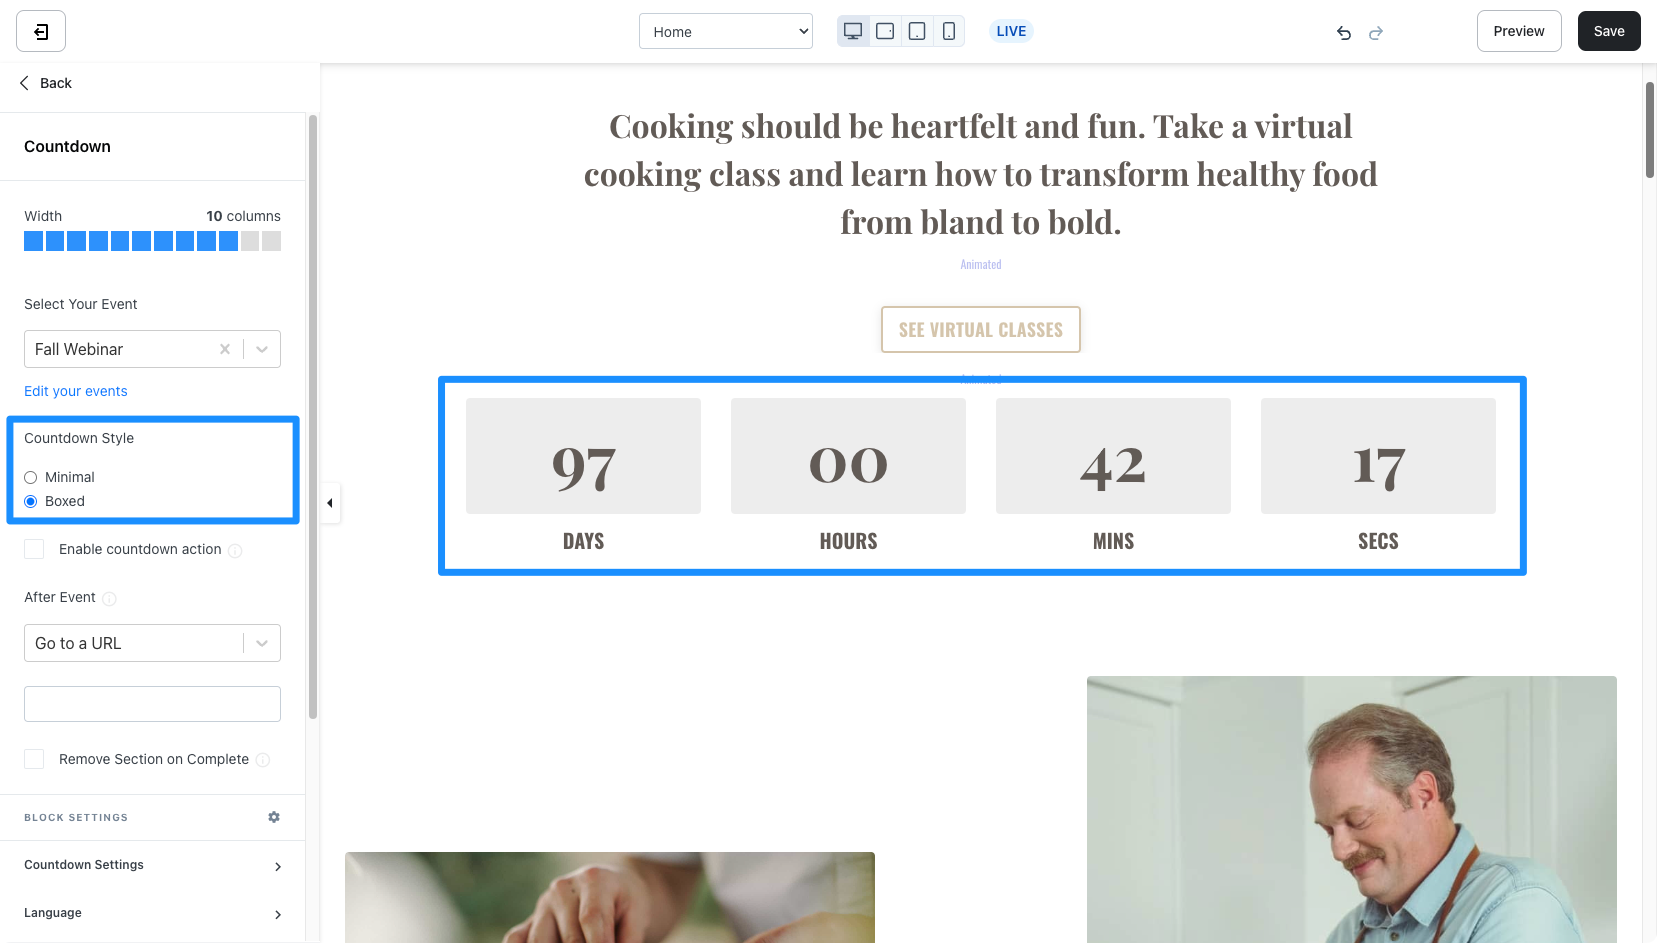
 **Boxed**
 ### Countdown action
#### After event
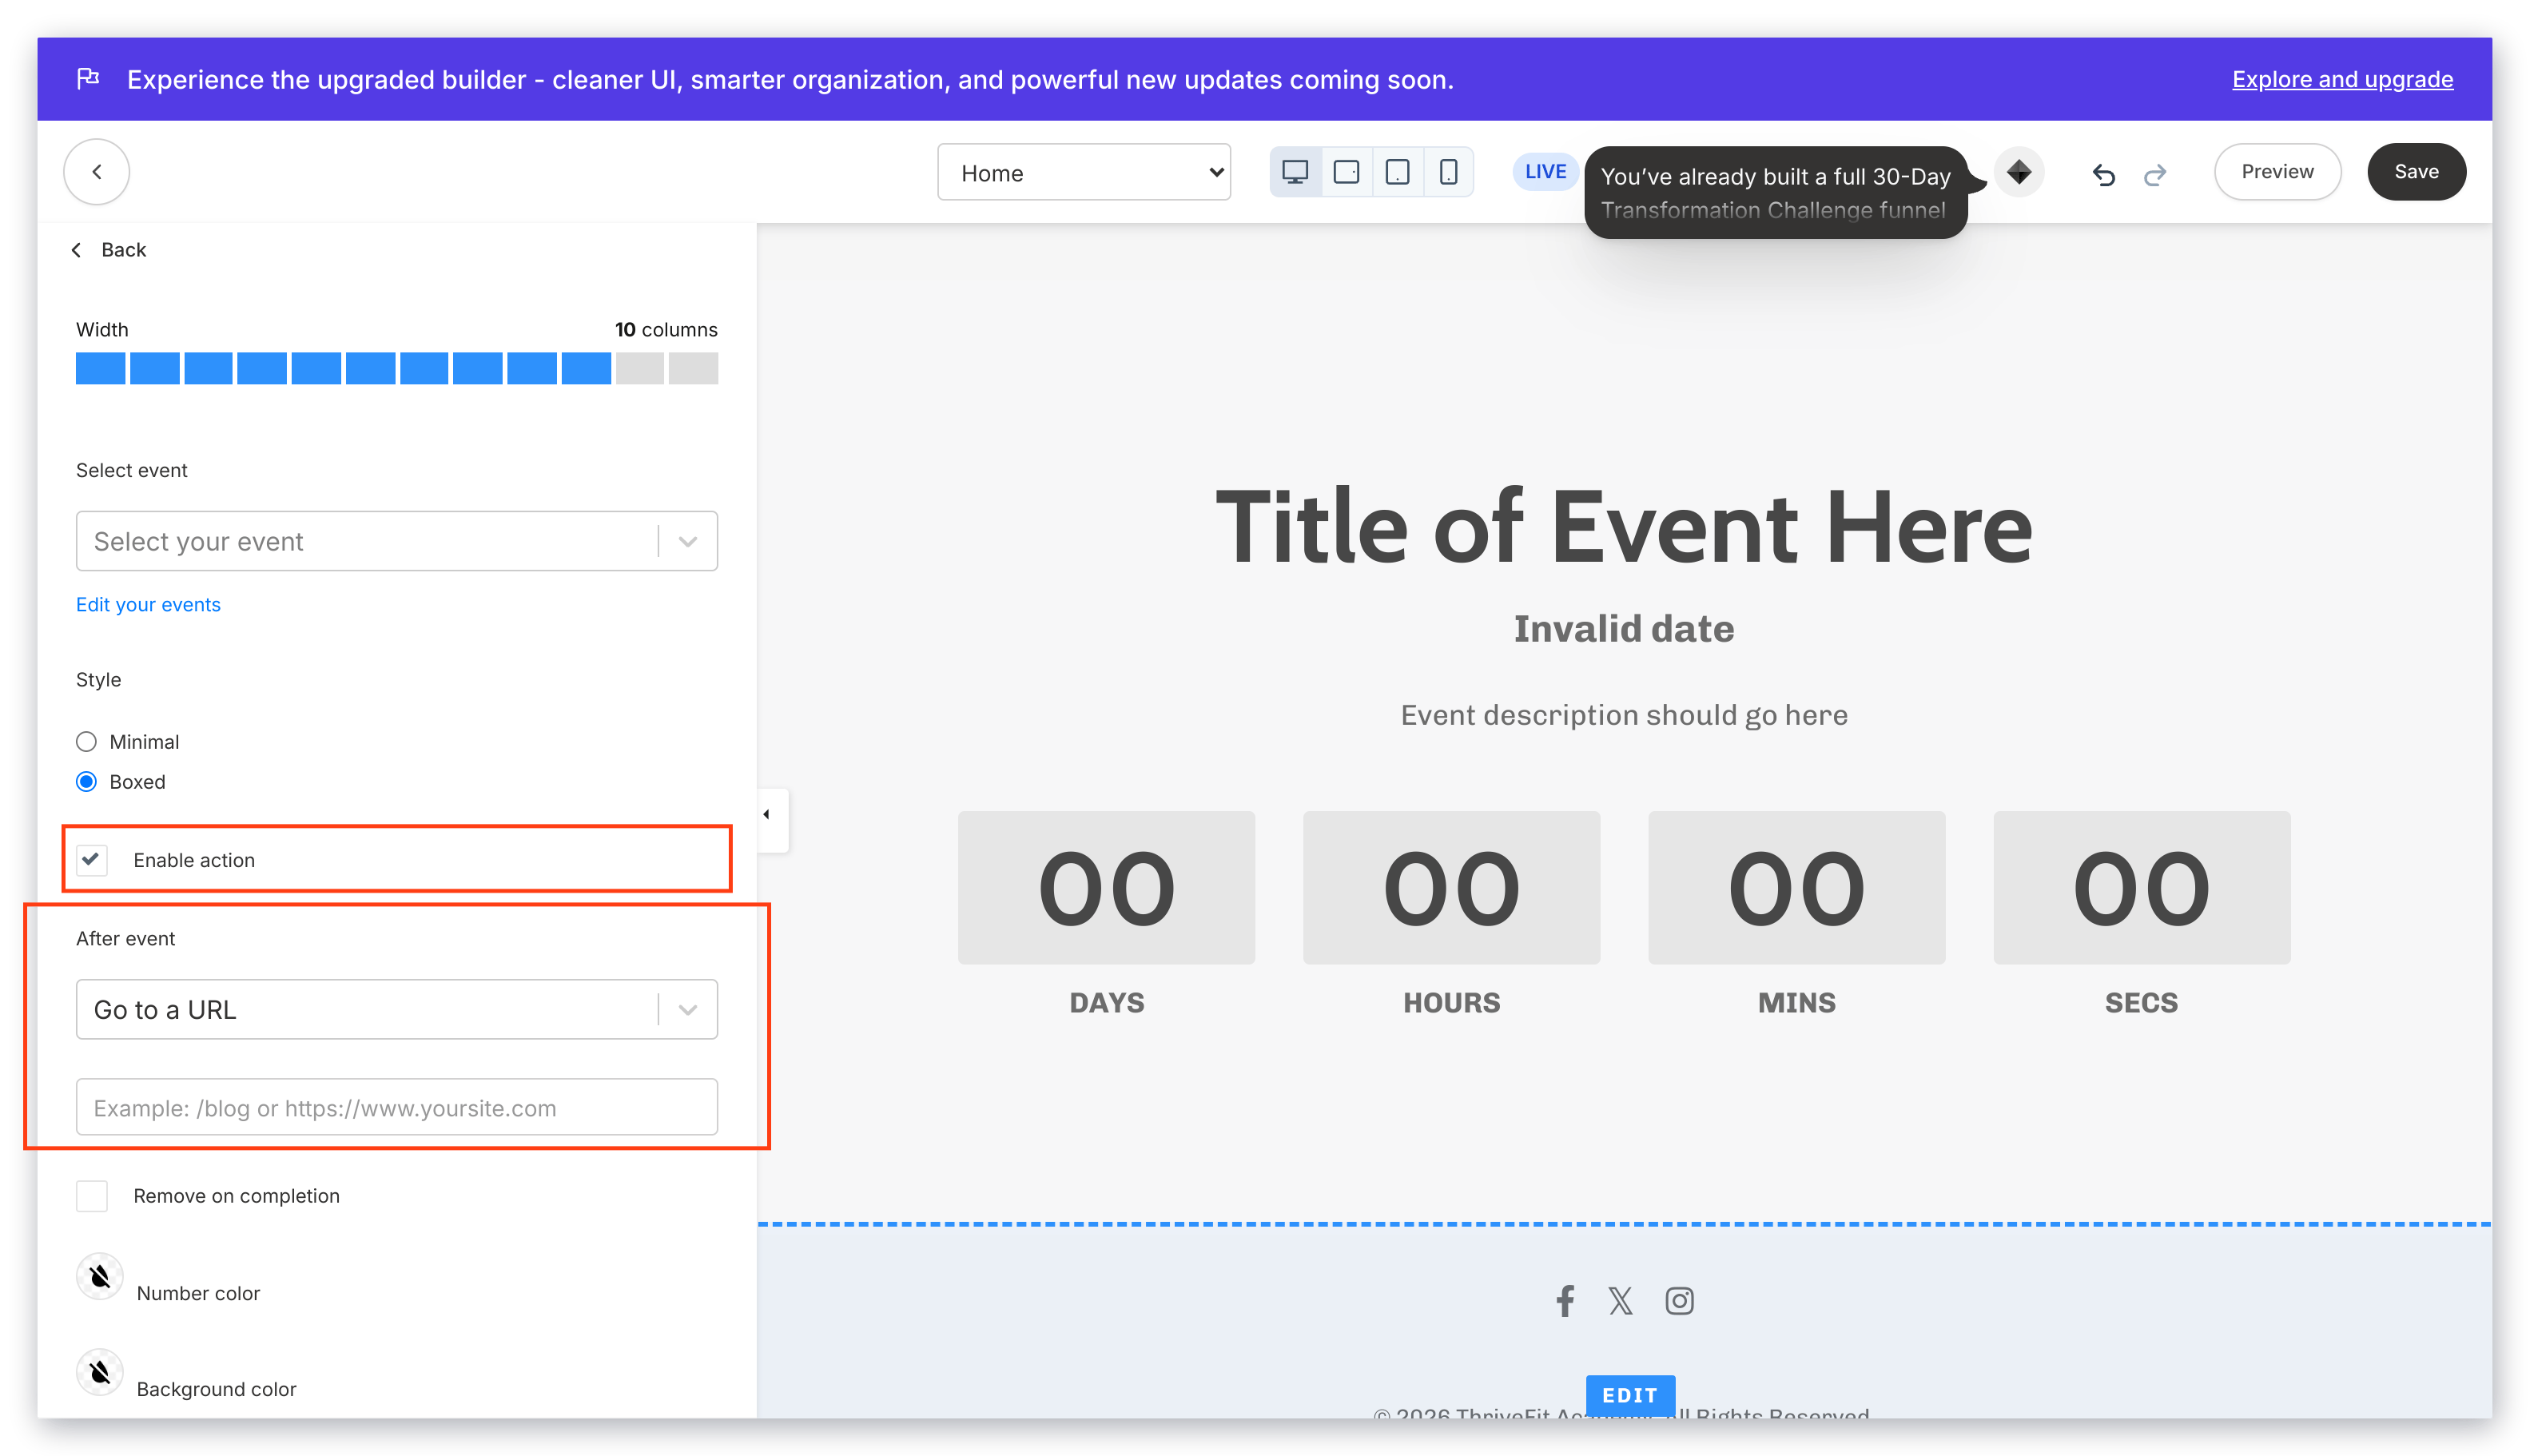
The After Event is the action triggered at the end of the countdown. This event will only occur if you choose to enable the Countdown Action setting.
After the countdown expires, enabling the Countdown Action can enable you to:
* Redirect your page visitors to a Landing Page
* Redirect your page visitors to a Checkout Page
* Download a File
* Redirect your page visitors to any URL
#### To enable a countdown action
* In the sidebar, check **Enable countdown action**
* Once enabled, use the dropdown menu under the **After Event** header to select the Action that will occur at the end of the countdown
* Click **Save** to keep your changes:
### Countdown action
#### After event
The After Event is the action triggered at the end of the countdown. This event will only occur if you choose to enable the Countdown Action setting.
After the countdown expires, enabling the Countdown Action can enable you to:
* Redirect your page visitors to a Landing Page
* Redirect your page visitors to a Checkout Page
* Download a File
* Redirect your page visitors to any URL
#### To enable a countdown action
* In the sidebar, check **Enable countdown action**
* Once enabled, use the dropdown menu under the **After Event** header to select the Action that will occur at the end of the countdown
* Click **Save** to keep your changes:
 ### Remove section on complete
Check this setting to remove the entire Section containing the Countdown Block at the conclusion of your Countdown Timer.
**Note:** Checking this setting will remove visibility of all Blocks contained in the Section after the Countdown timer expires.
***
## Block settings
To adjust the look and feel of the block, configure your Block Settings by customizing the:
* **Countdown Settings**: Customize the color and size for your Countdown Numbers and Labels
* **Language**: Customize the language used to describe your countdown values (day, hour, minutes, seconds)
* [Background](/articles/website/pages/customizing-block-background-settings)
* [Desktop and Mobile Layout](/articles/website/pages/customizing-block-layout-settings)
* [Animations](/articles/website/pages/customizing-block-animations)
* [Time Reveal](/articles/website/pages/customizing-time-reveal-settings)
### Remove section on complete
Check this setting to remove the entire Section containing the Countdown Block at the conclusion of your Countdown Timer.
**Note:** Checking this setting will remove visibility of all Blocks contained in the Section after the Countdown timer expires.
***
## Block settings
To adjust the look and feel of the block, configure your Block Settings by customizing the:
* **Countdown Settings**: Customize the color and size for your Countdown Numbers and Labels
* **Language**: Customize the language used to describe your countdown values (day, hour, minutes, seconds)
* [Background](/articles/website/pages/customizing-block-background-settings)
* [Desktop and Mobile Layout](/articles/website/pages/customizing-block-layout-settings)
* [Animations](/articles/website/pages/customizing-block-animations)
* [Time Reveal](/articles/website/pages/customizing-time-reveal-settings)