> ## Documentation Index
> Fetch the complete documentation index at: https://help.kajabi.com/llms.txt
> Use this file to discover all available pages before exploring further.
# Add a form to a page with Premier
> In Kajabi, Forms can be used to perform many actions, including subscribing someone to an email sequence, granting an offer, registering a person to an event, and segmenting subscribers based on which Forms they filled out.
**Note:** This article refers to the Premier Legacy Templates, which may be outdated. If you are using the Kajabi Pages Templates, please refer to the updated guide [here](/articles/website/pages/how-to-add-a-form-to-your-page).
***
## Adding a form to your page
* Open the **Website** tab from the Dashboard
* Click **Pages**
* Select the page you wish to customize or [create a new page](/articles/website/pages/how-to-create-a-new-page-with-premier)
* Click **Customize** to open the template editor
* Click **+ Add Section** from the sidebar
* Select **Opt In Form**
* Click **Add**
* Your newly created Form Section will generate at the bottom of the page
* Select the Form from the dropdown to display in your Section
* Click **Save** to keep your changes:
***
## Customizing your form section
In a Form Section, select the Form used, configure the Thank You Page, and edit the Text.
### Select the form
Click **Edit your forms** to change or create Offers in the Product tab:
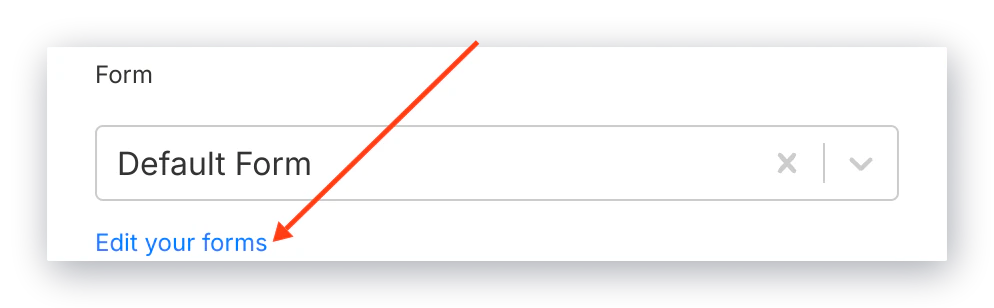 **Tip:** To select a Form from the dropdown, you must first [create a Form](../../marketing/forms/create-and-build-your-form) in your Marketing tab. Click "Edit Forms" to edit and create a Form.
### Thank you page
Set up the the action triggered after the Form is submitted from the page:
* Go to a Landing Page
* Go to a Checkout Page
* Download a File
* Go to a URL
**Note:** Leave blank to send your customers to the default Thank You Page located under the Website Design tab or to the specified Thank You Page set up in the [After Submissions settings](../../marketing/forms/how-to-use-the-after-submission-settings-in-forms) of the Form editor. Selecting the Thank You Page from this dropdown will override the default Thank You Page and the After Submission Form settings Thank You Page.
### Button text
Customize your message displayed on the Button to submit the Form.
### Text
Choose to **Show Text** to provide additional context or information next to your Opt In Form.
Use the Text Editor to enter your custom messaging.
### Form appearance
Customize the appearance of your Opt In Form within the Section by editing the:
* Position
* Input Label
* Button Style
* Button Width
* Button Color
* Form Color
### Section appearance
Choose to include a Section Background Image with an overlay or select a solid background color.
Changing the Spacing of your Section Appearance Settings will create a Hero Image effect in the Opt In Form Section of your Page.
Learn more about the [Hero Image](/articles/website/pages/customizing-your-hero-image-overlay-in-premier) and how to customize the overlay.
**Tip:** To select a Form from the dropdown, you must first [create a Form](../../marketing/forms/create-and-build-your-form) in your Marketing tab. Click "Edit Forms" to edit and create a Form.
### Thank you page
Set up the the action triggered after the Form is submitted from the page:
* Go to a Landing Page
* Go to a Checkout Page
* Download a File
* Go to a URL
**Note:** Leave blank to send your customers to the default Thank You Page located under the Website Design tab or to the specified Thank You Page set up in the [After Submissions settings](../../marketing/forms/how-to-use-the-after-submission-settings-in-forms) of the Form editor. Selecting the Thank You Page from this dropdown will override the default Thank You Page and the After Submission Form settings Thank You Page.
### Button text
Customize your message displayed on the Button to submit the Form.
### Text
Choose to **Show Text** to provide additional context or information next to your Opt In Form.
Use the Text Editor to enter your custom messaging.
### Form appearance
Customize the appearance of your Opt In Form within the Section by editing the:
* Position
* Input Label
* Button Style
* Button Width
* Button Color
* Form Color
### Section appearance
Choose to include a Section Background Image with an overlay or select a solid background color.
Changing the Spacing of your Section Appearance Settings will create a Hero Image effect in the Opt In Form Section of your Page.
Learn more about the [Hero Image](/articles/website/pages/customizing-your-hero-image-overlay-in-premier) and how to customize the overlay.