> ## Documentation Index
> Fetch the complete documentation index at: https://help.kajabi.com/llms.txt
> Use this file to discover all available pages before exploring further.
# Add a menu to a page header
> Learn to add a Navigation Menu to your page Header for your users to easily navigate through your website.
***
## Adding a menu to your page header
### Step 1. Select the menu block
* Open the **Website** tab from your Dashboard.
* Select the **Website Pages or Landing Pages** tab.
* Open the page editor for your Page. [Learn more](../../website/pages/how-to-get-to-the-page-editor)
* Navigate to the sidebar panel and click **Header**.
* Click **Add Content**.
* Select **Menu**:
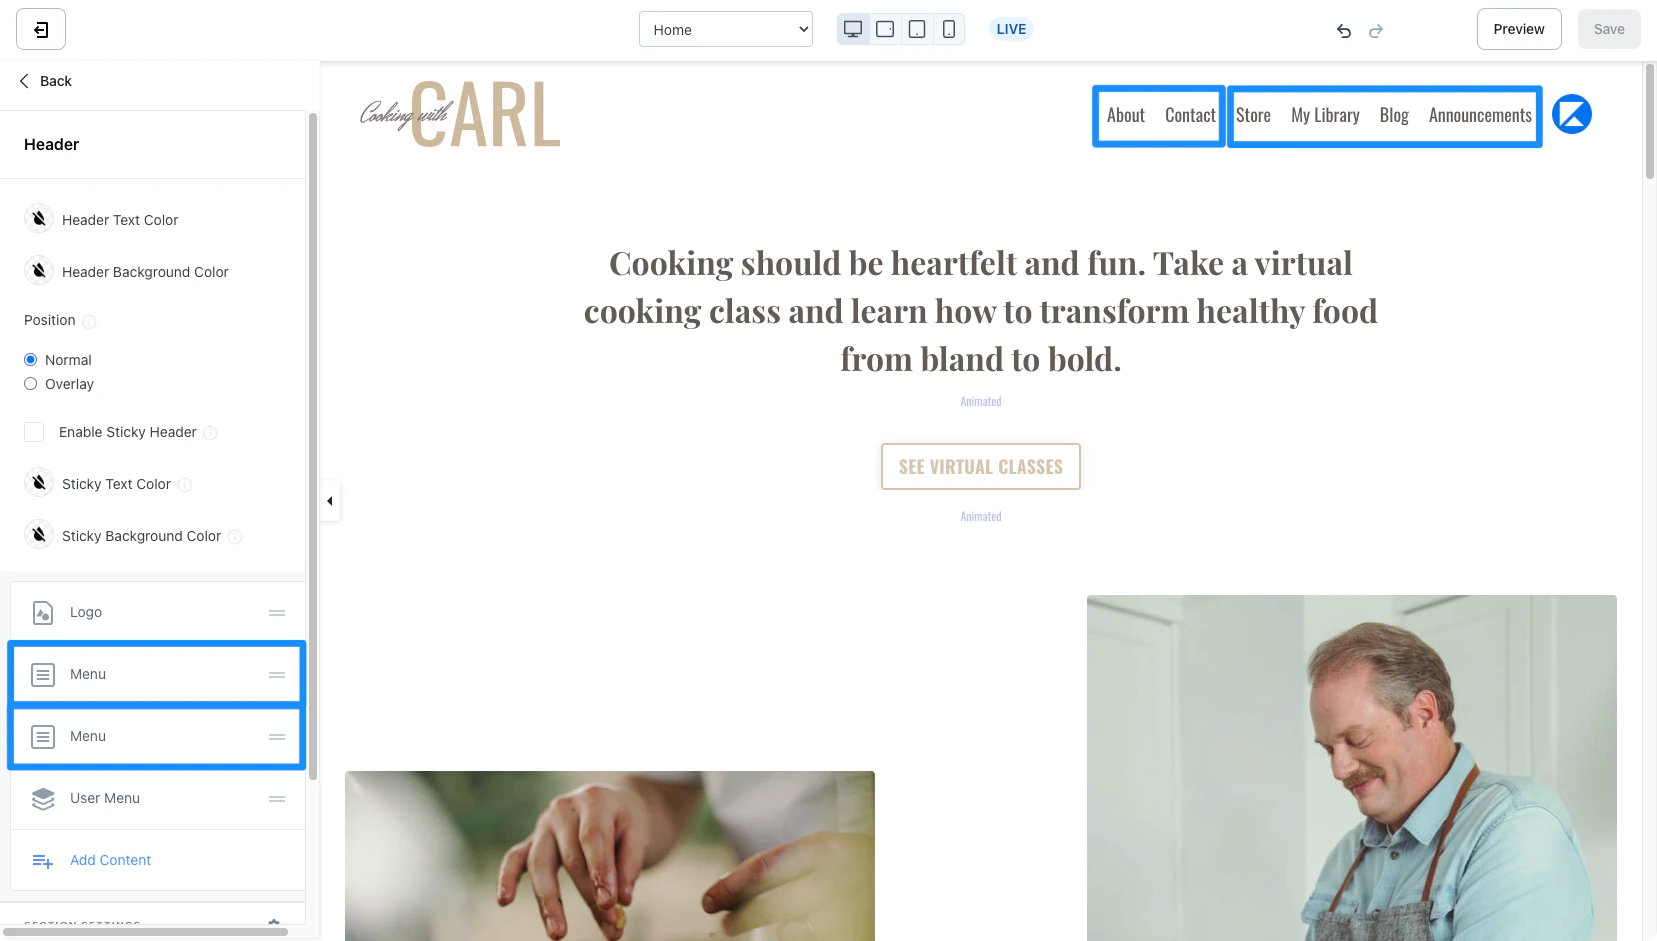 **Note:**
To create and edit your menu links, click **Edit your link lists** below the Menu Header in the sidebar editor.
### Step 2. Select your navigation menu
* Open the **Menu** dropdown.
* Select the **Menu/Link List** that you wish to add to your Header.
***
## Customizing your menu
### Open in new tab
Enable this setting to open the item selected from your menu in a new tab of your page visitor's browser.
### Stretch block
**Note:**
Only available with the Website Builder pages. [Learn more](../../website/pages/customizing-your-website-pages-with-the-website-builder)
Enable the Stretch Block setting to fill the remaining space of the Header section.
A good rule for using the Stretch Block feature is to enable the Stretch Block feature for the block on the far left of your Header section.
For example, if you want to have a Logo on the far left side of your Header and a Menu and User Menu on the far right side, select **Stretch Block** for your Logo:
**Note:**
To create and edit your menu links, click **Edit your link lists** below the Menu Header in the sidebar editor.
### Step 2. Select your navigation menu
* Open the **Menu** dropdown.
* Select the **Menu/Link List** that you wish to add to your Header.
***
## Customizing your menu
### Open in new tab
Enable this setting to open the item selected from your menu in a new tab of your page visitor's browser.
### Stretch block
**Note:**
Only available with the Website Builder pages. [Learn more](../../website/pages/customizing-your-website-pages-with-the-website-builder)
Enable the Stretch Block setting to fill the remaining space of the Header section.
A good rule for using the Stretch Block feature is to enable the Stretch Block feature for the block on the far left of your Header section.
For example, if you want to have a Logo on the far left side of your Header and a Menu and User Menu on the far right side, select **Stretch Block** for your Logo:
Control the alignment and positioning of your blocks by adjusting the Stretch Block and Block Alignment for the Blocks in your Header.
### Text alignment
Adjust the horizontal alignment of your block in the Header to appear more left, centered, or right-aligned.
Keep in mind, this setting will be impacted by the positioning and alignment of surrounding blocks.