> ## Documentation Index
> Fetch the complete documentation index at: https://help.kajabi.com/llms.txt
> Use this file to discover all available pages before exploring further.
# Customize a header in a page with Premier
> Learn to customize your Header with the Premier Template.
## Overview
Customize your Header with the Premier Template to showcase your brand and provide navigation for your visitors.
**Note:** This article refers to the Premier Legacy Templates, which may be outdated. If you are using the Kajabi Pages Templates, please refer to the updated guide [here](./customizing-your-header).
***
## Accessing your page header
The Header is a critical element of your website that runs across the top of every web page on your site.
Typically, it contains your logo and site navigation. The Header is a great place to showcase your brand colors and logo, and display announcements you want all of your users to see.
* Open the **Website** tab from the Dashboard.
* Click **Pages**.
* Select the page you wish to customize or [create a new page](./how-to-create-a-new-page-with-premier).
* Click **Customize** to open the [page editor](./how-to-get-to-the-page-editor).
* In the sidebar, click **Header**:
***
## Customizing your page header
In the Header Section, you have the option to add a Logo, a Navigation Menu, a User Dropdown, an Announcement, and a Call to Action.
### Logo
#### Step 1. Select your logo type
After adding the Logo Block Type, select:
* Text
* Image
#### Step 2. Upload your logo
Depending on the Logo Type selected:
* Upload your Logo Image by clicking **Select Image** and choosing a new file or a recent file.
* Enter text in the **Logo Text** field.
#### Step 3. Customize your logo
* Adjust your Logo Height by entering a number using the format 10px or 10. The recommended range is between 30 and 100.
### Menu
Choose to Show Menu to display a link list/navigation menu in your Page Header.
**Note:** To create and edit your menu links, click **Edit your link lists** below the Menu Header in the sidebar editor.
### User menu
Check to Show User Menu or uncheck to hide User Menu in your Page Header.
Including a User Menu in the Header of your custom landing page is a great way to give your customers easy access to the Products they have purchased from your site and change their [customer settings](../../contacts/manage-your-contacts/customer-update-of-customer-settings).
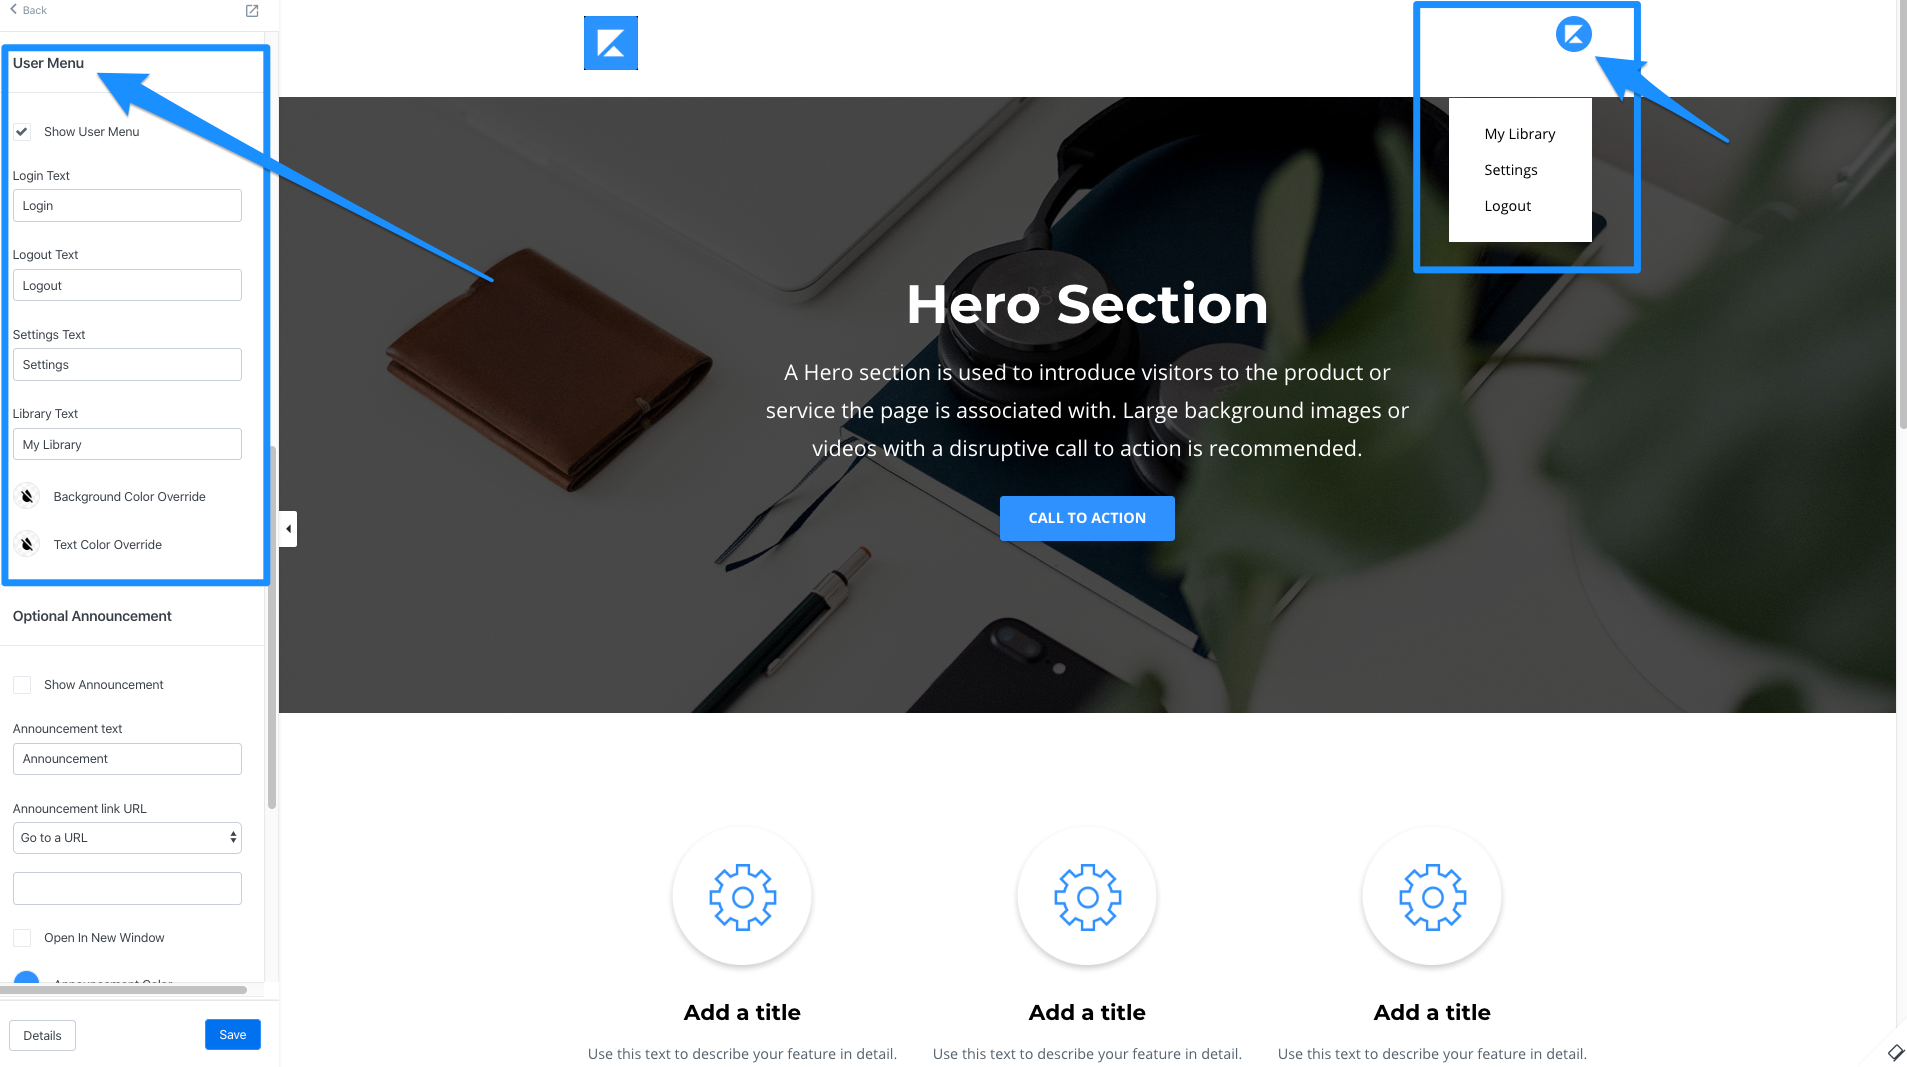 Keep in mind, the User Menu is displayed as the user's Avatar. When your page visitors click the Avatar, the dropdown User Menu opens for them to:
* Access the **Library**
* Edit and view their **Customer Settings**
* **Login/Logout** from your site
Customize your User Menu language and colors to match your brand.
**Note:** Previewing your page as a logged-in admin will display your uploaded Avatar (if you have uploaded an Avatar to your [Account Details](../../account-settings/my-kajabi/change-your-account-details)) or the default Avatar. Customers logged into your site will see their uploaded Avatar (if they uploaded an Avatar in their [customer settings](../../contacts/manage-your-contacts/customer-update-of-customer-settings)) or the default Avatar.
### Optional announcement
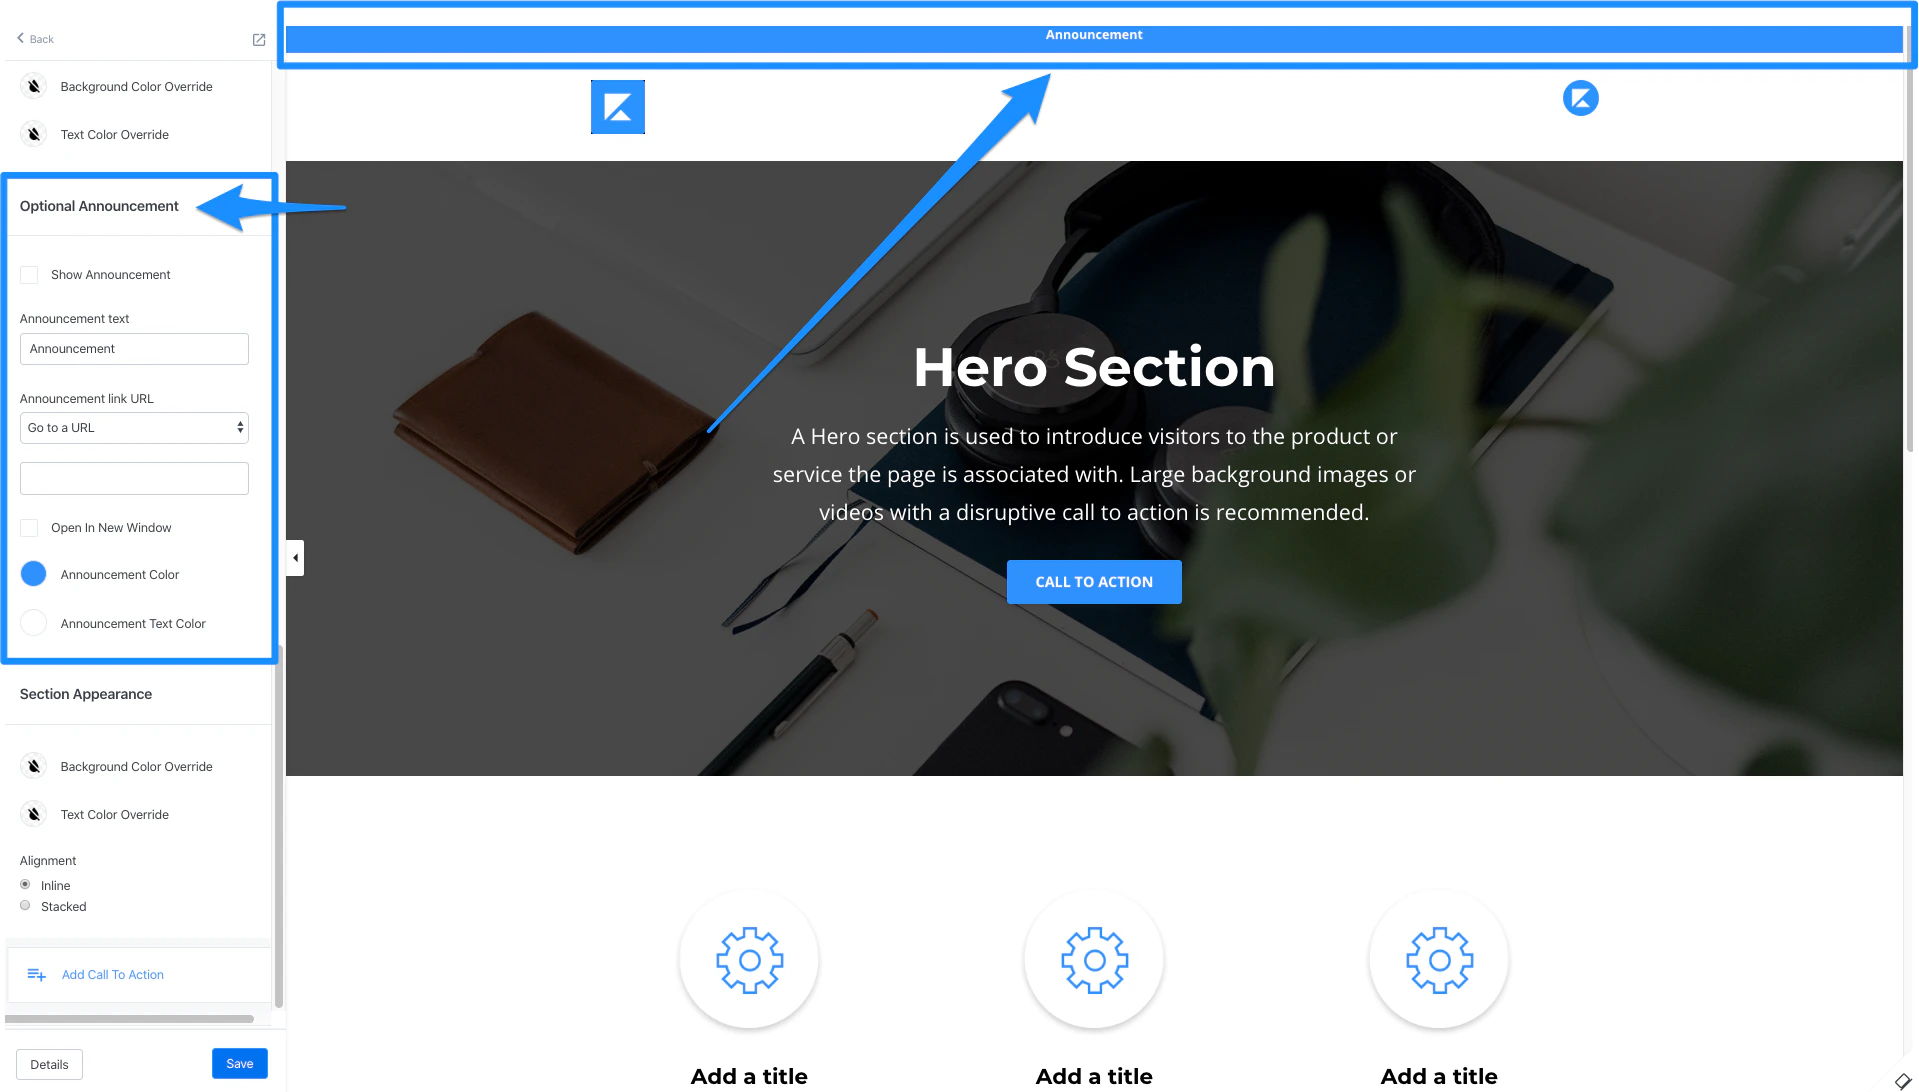
Display an announcement above your Page Header by checking the **Show Announcement** checkbox located in the sidebar editor.
[Learn to include your Announcement in your Page Header](./how-to-add-an-announcement-to-your-premier-page).
Configure an Announcement link to lead to a:
* Landing Page
* Checkout Page
* Downloadable File
* URL to another page
* Two Step Optin Popup
Keep in mind, the User Menu is displayed as the user's Avatar. When your page visitors click the Avatar, the dropdown User Menu opens for them to:
* Access the **Library**
* Edit and view their **Customer Settings**
* **Login/Logout** from your site
Customize your User Menu language and colors to match your brand.
**Note:** Previewing your page as a logged-in admin will display your uploaded Avatar (if you have uploaded an Avatar to your [Account Details](../../account-settings/my-kajabi/change-your-account-details)) or the default Avatar. Customers logged into your site will see their uploaded Avatar (if they uploaded an Avatar in their [customer settings](../../contacts/manage-your-contacts/customer-update-of-customer-settings)) or the default Avatar.
### Optional announcement
Display an announcement above your Page Header by checking the **Show Announcement** checkbox located in the sidebar editor.
[Learn to include your Announcement in your Page Header](./how-to-add-an-announcement-to-your-premier-page).
Configure an Announcement link to lead to a:
* Landing Page
* Checkout Page
* Downloadable File
* URL to another page
* Two Step Optin Popup
 ### Section appearance
Configure the color for the Background and Text and adjust the Alignment of the Section.
Alignment:
* Inline: keep all blocks in the Header in a single row
* Stacked: change the layout to stack all blocks in the Header Section
### Add call to action
Include a Call to Action to be displayed in the Announcement.
Learn to use a [Call to Action with Premier](./how-to-use-a-call-to-action-in-your-page-with-premier) for details.
### Section appearance
Configure the color for the Background and Text and adjust the Alignment of the Section.
Alignment:
* Inline: keep all blocks in the Header in a single row
* Stacked: change the layout to stack all blocks in the Header Section
### Add call to action
Include a Call to Action to be displayed in the Announcement.
Learn to use a [Call to Action with Premier](./how-to-use-a-call-to-action-in-your-page-with-premier) for details.