> ## Documentation Index
> Fetch the complete documentation index at: https://help.kajabi.com/llms.txt
> Use this file to discover all available pages before exploring further.
# Install an add to calendar button to a page
> Learn to use an Add to Calendar Button for your site visitors to easily add your events to their calendars.
Create a Calendar Button with AddEvent, a tool compatible with Apple Calendar, Google Calendar, Outlook, Outlook.com, and Yahoo Calendar, to help your site visitors easily add your events to their calendars.
**Important:** Kajabi now allows members to save upcoming coaching sessions to their personal calendar. [Learn more](/articles/products/coaching/how-to-create-a-coaching-product#add-to-calendar-for-coaching-sessions)
## Overview
Calendar Buttons provide a quick, effortless way for your users to add your events to their personal calendars. With Kajabi, you can add your preferred Calendar Button using the Custom Code Block. This guide walks you through adding a Calendar Button with [AddEvent](https://www.addevent.com/).
**Note:** If you have a custom domain connected to your Kajabi site, you will need to register your custom domain with AddEvent. Adding your domain to AddEvent is available with AddEvent's free "Hobby" plan.
The best recommendation is to research and find the tool that best fits your business.
***
## Add custom code to your page
Create a Custom Code Block:
1. Open the **Website** tab from the Dashboard.
2. Select the **Pages** tab.
3. Open the page editor for your Page. [Learn more](/articles/website/pages/how-to-get-to-the-page-editor)
4. In the sidebar, select the Section of your Page where you wish to include your Add to Calendar Button.
5. Click **Add Content**.
6. Select **Custom Code**:
Learn more about adding [Custom Code](/articles/website/pages/add-custom-code-to-pages#add-and-remove-a-custom-code-block) for details.
***
## Add calendar button code from AddEvent
To use the AddEvent add-to-calendar button, create an account with AddEvent. [Learn more](https://www.addevent.com/)
**Tip:** The add-to-calendar button is available with AddEvent's free "Hobby" plan!
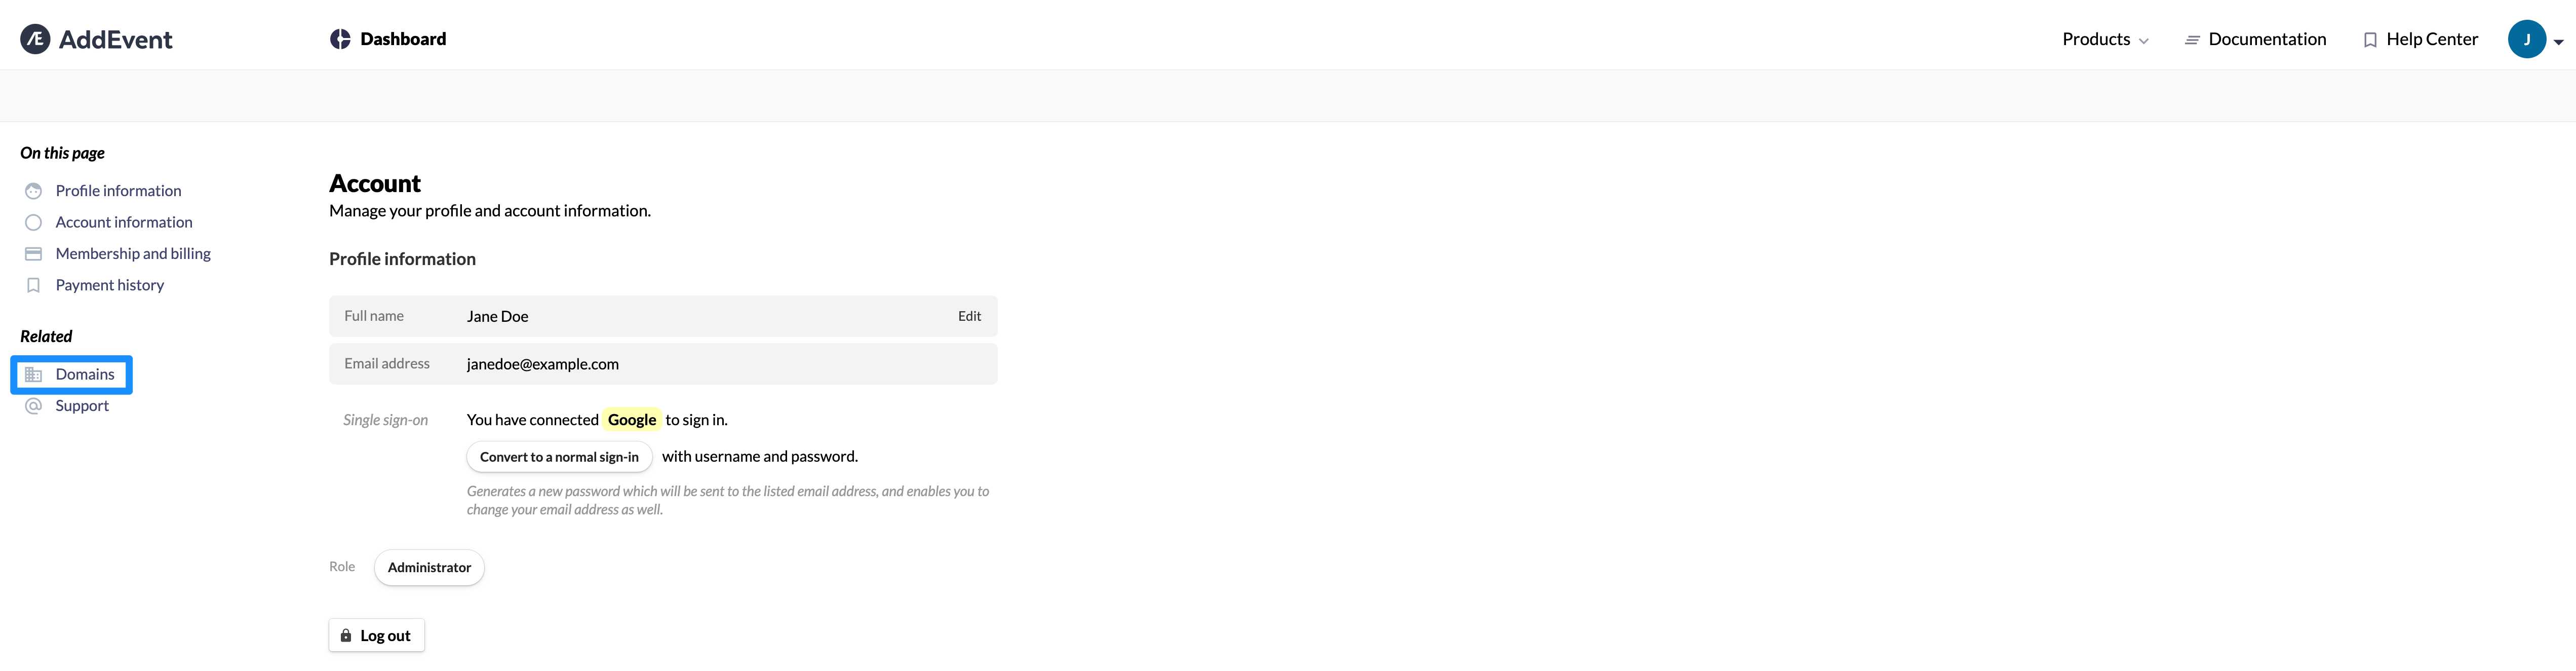
If your Kajabi site is connected to a custom domain, add your domain to your AddEvent account:
1. Navigate to your AddEvent account.
2. Click **Domains** from the left menu.
3. Enter your full custom domain.
4. Click **Add domain**:
 After creating your AddEvent account and adding a Custom Code Block to your page on Kajabi, add the AddEvent Calendar Code Snippet.
**Important:** Introducing custom code to your site can open you up to vulnerabilities and potential malware attacks. We recommend using vulnerability tools like [VirusTotal](https://www.virustotal.com/gui/home/url) or [Snyk](https://snyk.io/) to scan any custom code that you intend to use and apply certain [best practices](/articles/website/domains/code-based-customizations) to help reduce potential impact.
1. Copy the entire code exactly as shown below:
```html theme={null}
After creating your AddEvent account and adding a Custom Code Block to your page on Kajabi, add the AddEvent Calendar Code Snippet.
**Important:** Introducing custom code to your site can open you up to vulnerabilities and potential malware attacks. We recommend using vulnerability tools like [VirusTotal](https://www.virustotal.com/gui/home/url) or [Snyk](https://snyk.io/) to scan any custom code that you intend to use and apply certain [best practices](/articles/website/domains/code-based-customizations) to help reduce potential impact.
1. Copy the entire code exactly as shown below:
```html theme={null}
Add to Calendar 04/26/2020 06:00 PM 04/26/2020 11:00 PM America/Los_Angeles Summary of the event Description of the event Location of the event
```
2. Navigate back to your Custom Code Block on Kajabi.
3. Click the **Custom Code Block** to open the sidebar editor.
4. Navigate to the sidebar panel and paste the copied code into the **Custom Code** field.
5. Click **Save** to keep your changes:
***
## Edit your calendar event
To customize your Event information in your Add to Calendar Button:
1. Locate this snippet of Code in your newly pasted Add to Calendar code:
```html theme={null}
04/26/2020 06:00 PM 04/296/2020 11:00 PM America/Los_Angeles Summary of the event Description of the event Location of the event
```
**Tip:** Expand your view of the Code by clicking and dragging the bottom right corner of the Text Box field in the left sidebar.
2. Configure the parameters within each line of code.
3. Enter your Event information for each parameter as shown below:
To learn more about formatting your parameters, [click here](https://www.addevent.com/add-to-calendar-button/#parameters).
Be sure to click **Save** to keep your changes.
### Calendar parameters
**Start Date and Time**
```html theme={null}
04/26/2020 06:00 PM
```
**End Date and Time**
```html theme={null}
04/26/2020 11:00 PM
```
**Timezone**
```html theme={null}
America/Los_Angeles
```
**Title of Event**
```html theme={null}
Summary of the event
```
**Description of the Event**
```html theme={null}
Description of the event
```
**Location of the Event**
```html theme={null}
Location of the event
```
Learn more about customizing your Add to Calendar Button and including additional information to set alarm reminders, attach a Facebook event, include an organizer email, and more by visiting [AddEvent documentation](https://www.addevent.com/documentation/add-to-calendar-button).
***
## Customize your custom code block
After editing your Calendar Button to fit your Event, customize the appearance of your Block on your page. Learn to [customize your Custom Code Block](/articles/website/pages/add-custom-code-to-pages) for details.
Remember to click **Save** to keep your changes.
Lastly, [preview your page](/articles/website/pages/preview-your-page) and test your calendar button: