> ## Documentation Index
> Fetch the complete documentation index at: https://help.kajabi.com/llms.txt
> Use this file to discover all available pages before exploring further.
# Use the two step optin popup in a page with Premier
> Learn to add a Two Step Opt-in Popup to your page built with Premier.
Learn to add a Two Step Opt-in Popup to your page built with Premier.
***
**Note:** This article refers to the Premier Legacy Templates, which may be outdated! If you are using the Kajabi Pages Templates, please refer to the updated guide [here.](../../website/pages/how-to-use-the-two-step-optin-popup)
***
## Why use a Two Step Opt-In instead of the traditional One Step Opt-In Form?
A Two Step Optin can improve the rate of opt-ins by using an opt-in popup.
The Two Step OptIn launches an Opt-In Form popup after your website visitor clicks a Call to Action button to gain access to the promised value.
The **Two Step OptIn** has been shown to improve the rate of opt-ins because of the Foot-In-The-Door Phenomenon, a psychological event in which people are more likely to commit to a larger action when first asked to commit to a smaller action.
In this case, the user commits to clicking the Call to Action button before committing to filling out the Opt-In Form.
***
## How to create a Two Step Optin
### Step 1. Create and customize your Two Step Optin Popup
* Open the **Website** tab from the Dashboard.
* Click **Pages**.
* Select the page you wish to customize or [create a page](../../website/pages/how-to-create-a-new-page-with-premier).
* Click **Customize** to open the template editor.
* In the sidebar, scroll to the bottom and click **Two Step Optin**.
* Select **Show Popup**.
* Customize your Two Step Optin Popup appearance, and click **Save**:
### Step 2. Create a Call to Action button to trigger the Two-Step Opt-in popup
To enable your Two-Step Optin, set up a button or Call to Action to open the Two-Step Optin when clicked.
Keep in mind, although you can create multiple Call to Action buttons in one page to trigger your Two-Step Optin, you can only create and customize one Two-Step Optin on a single landing page.
* In the Template Editor, select or [create a Call to Action (CTA) Section](../../website/pages/how-to-use-a-call-to-action-in-your-page-with-premier) to trigger the Two-Step Optin.
* In the button or CTA, click **CTA or Button Action**.
* Then select **Open two step optin popup** as the action.
* Click **Save** to keep your changes:
***
## Customizing your Two Step Optin
Customize your Two Step Optin Popup by showing an Image, selecting an Opt-in Form to display, redirecting your users to a Thank You Page after Form Submission, and editing the overall appearance of your Two Step Optin Popup.
Include additional content to your popup to contain more images, text, and add a Progress Bar to encourage urgency.
### Show Popup
Toggle this setting on to show your popup in the editor. Be sure to uncheck this before you finish editing.
### Show Image
If you choose to display an image in your popup, be sure to toggle **Show Image** on to display your uploaded image.
### Form Settings
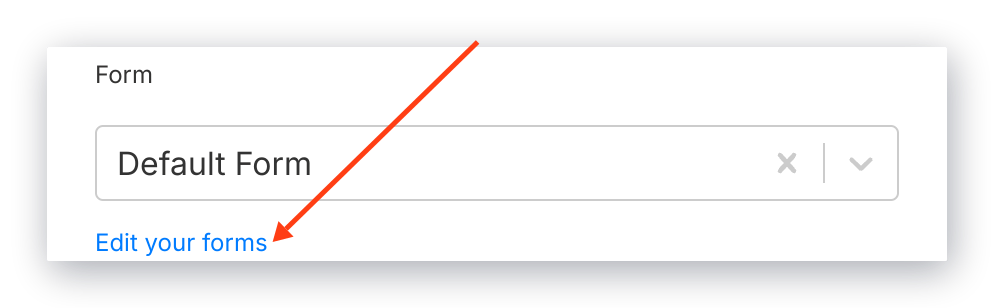
To select a Form from the dropdown, you must first [create a Form](../../marketing/forms/create-and-build-your-form) in your Marketing tab.
Click **Edit Forms** to edit and create a Form:
 ### Thank You Page
Setup the the action triggered after the Form is submitted from the page.
* Go to a Landing Page
* Go to a Checkout Page
* Download a File
* Go to a URL (be sure to include the full URL, for example [https://kajabi.com/](https://kajabi.com/))
**Note:** Leave blank to send your Form Submitters to the default Thank You Page located under the Website Design tab or to the specified Thank You Page set up in the [After Submissions settings](../../marketing/forms/how-to-use-the-after-submission-settings-in-forms) of the Form editor. Selecting the Thank You Page from this dropdown will override the default Thank You Page and the After Submission Form settings Thank You Page.
### Button Text
Customize your message displayed on the Button to submit the Form.
### Form Style
Customize the appearance of the Form displayed in your popup:
* Input Label: change the appearance of the labels for the Form Fields.
* Button Style: create a solid color button or an outlined button.
* Button Width: choose to take up the full width of the Form or the Auto Size based on the Button Text.
* Button Color: brand your button with your colors.
* Button Text Color: brand your button text for solid buttons (selected in Button Style).
### Section Appearance
Customize the Background Color and Text Color of your Two Step Optin Popup.
### Add Content
Include additional content in your popup:
* Images
* Text
* A Progress Bar to encourage urgency
### Thank You Page
Setup the the action triggered after the Form is submitted from the page.
* Go to a Landing Page
* Go to a Checkout Page
* Download a File
* Go to a URL (be sure to include the full URL, for example [https://kajabi.com/](https://kajabi.com/))
**Note:** Leave blank to send your Form Submitters to the default Thank You Page located under the Website Design tab or to the specified Thank You Page set up in the [After Submissions settings](../../marketing/forms/how-to-use-the-after-submission-settings-in-forms) of the Form editor. Selecting the Thank You Page from this dropdown will override the default Thank You Page and the After Submission Form settings Thank You Page.
### Button Text
Customize your message displayed on the Button to submit the Form.
### Form Style
Customize the appearance of the Form displayed in your popup:
* Input Label: change the appearance of the labels for the Form Fields.
* Button Style: create a solid color button or an outlined button.
* Button Width: choose to take up the full width of the Form or the Auto Size based on the Button Text.
* Button Color: brand your button with your colors.
* Button Text Color: brand your button text for solid buttons (selected in Button Style).
### Section Appearance
Customize the Background Color and Text Color of your Two Step Optin Popup.
### Add Content
Include additional content in your popup:
* Images
* Text
* A Progress Bar to encourage urgency