What are Live Rooms?
Live Rooms are designed to help you and your Community connect in real-time. The following tools are available in a Live Room:- Record your session
- Screenshare
- Start breakout groups
- Ask people to turn on their videos/mics
- Spotlight the speaker or the shared screen
- Picture-in-Picture capabilities
- Meeting Timer
- Lock/Unlock live room
- Remove or kick out a person from the live room
- Chat in-line
- Send emojis
- Share files via chat
Start a Live Room
Open a Community Live Room
- Open the Products tab from your Dashboard.
- Select Community from the sidebar.
- Click Go to Community.
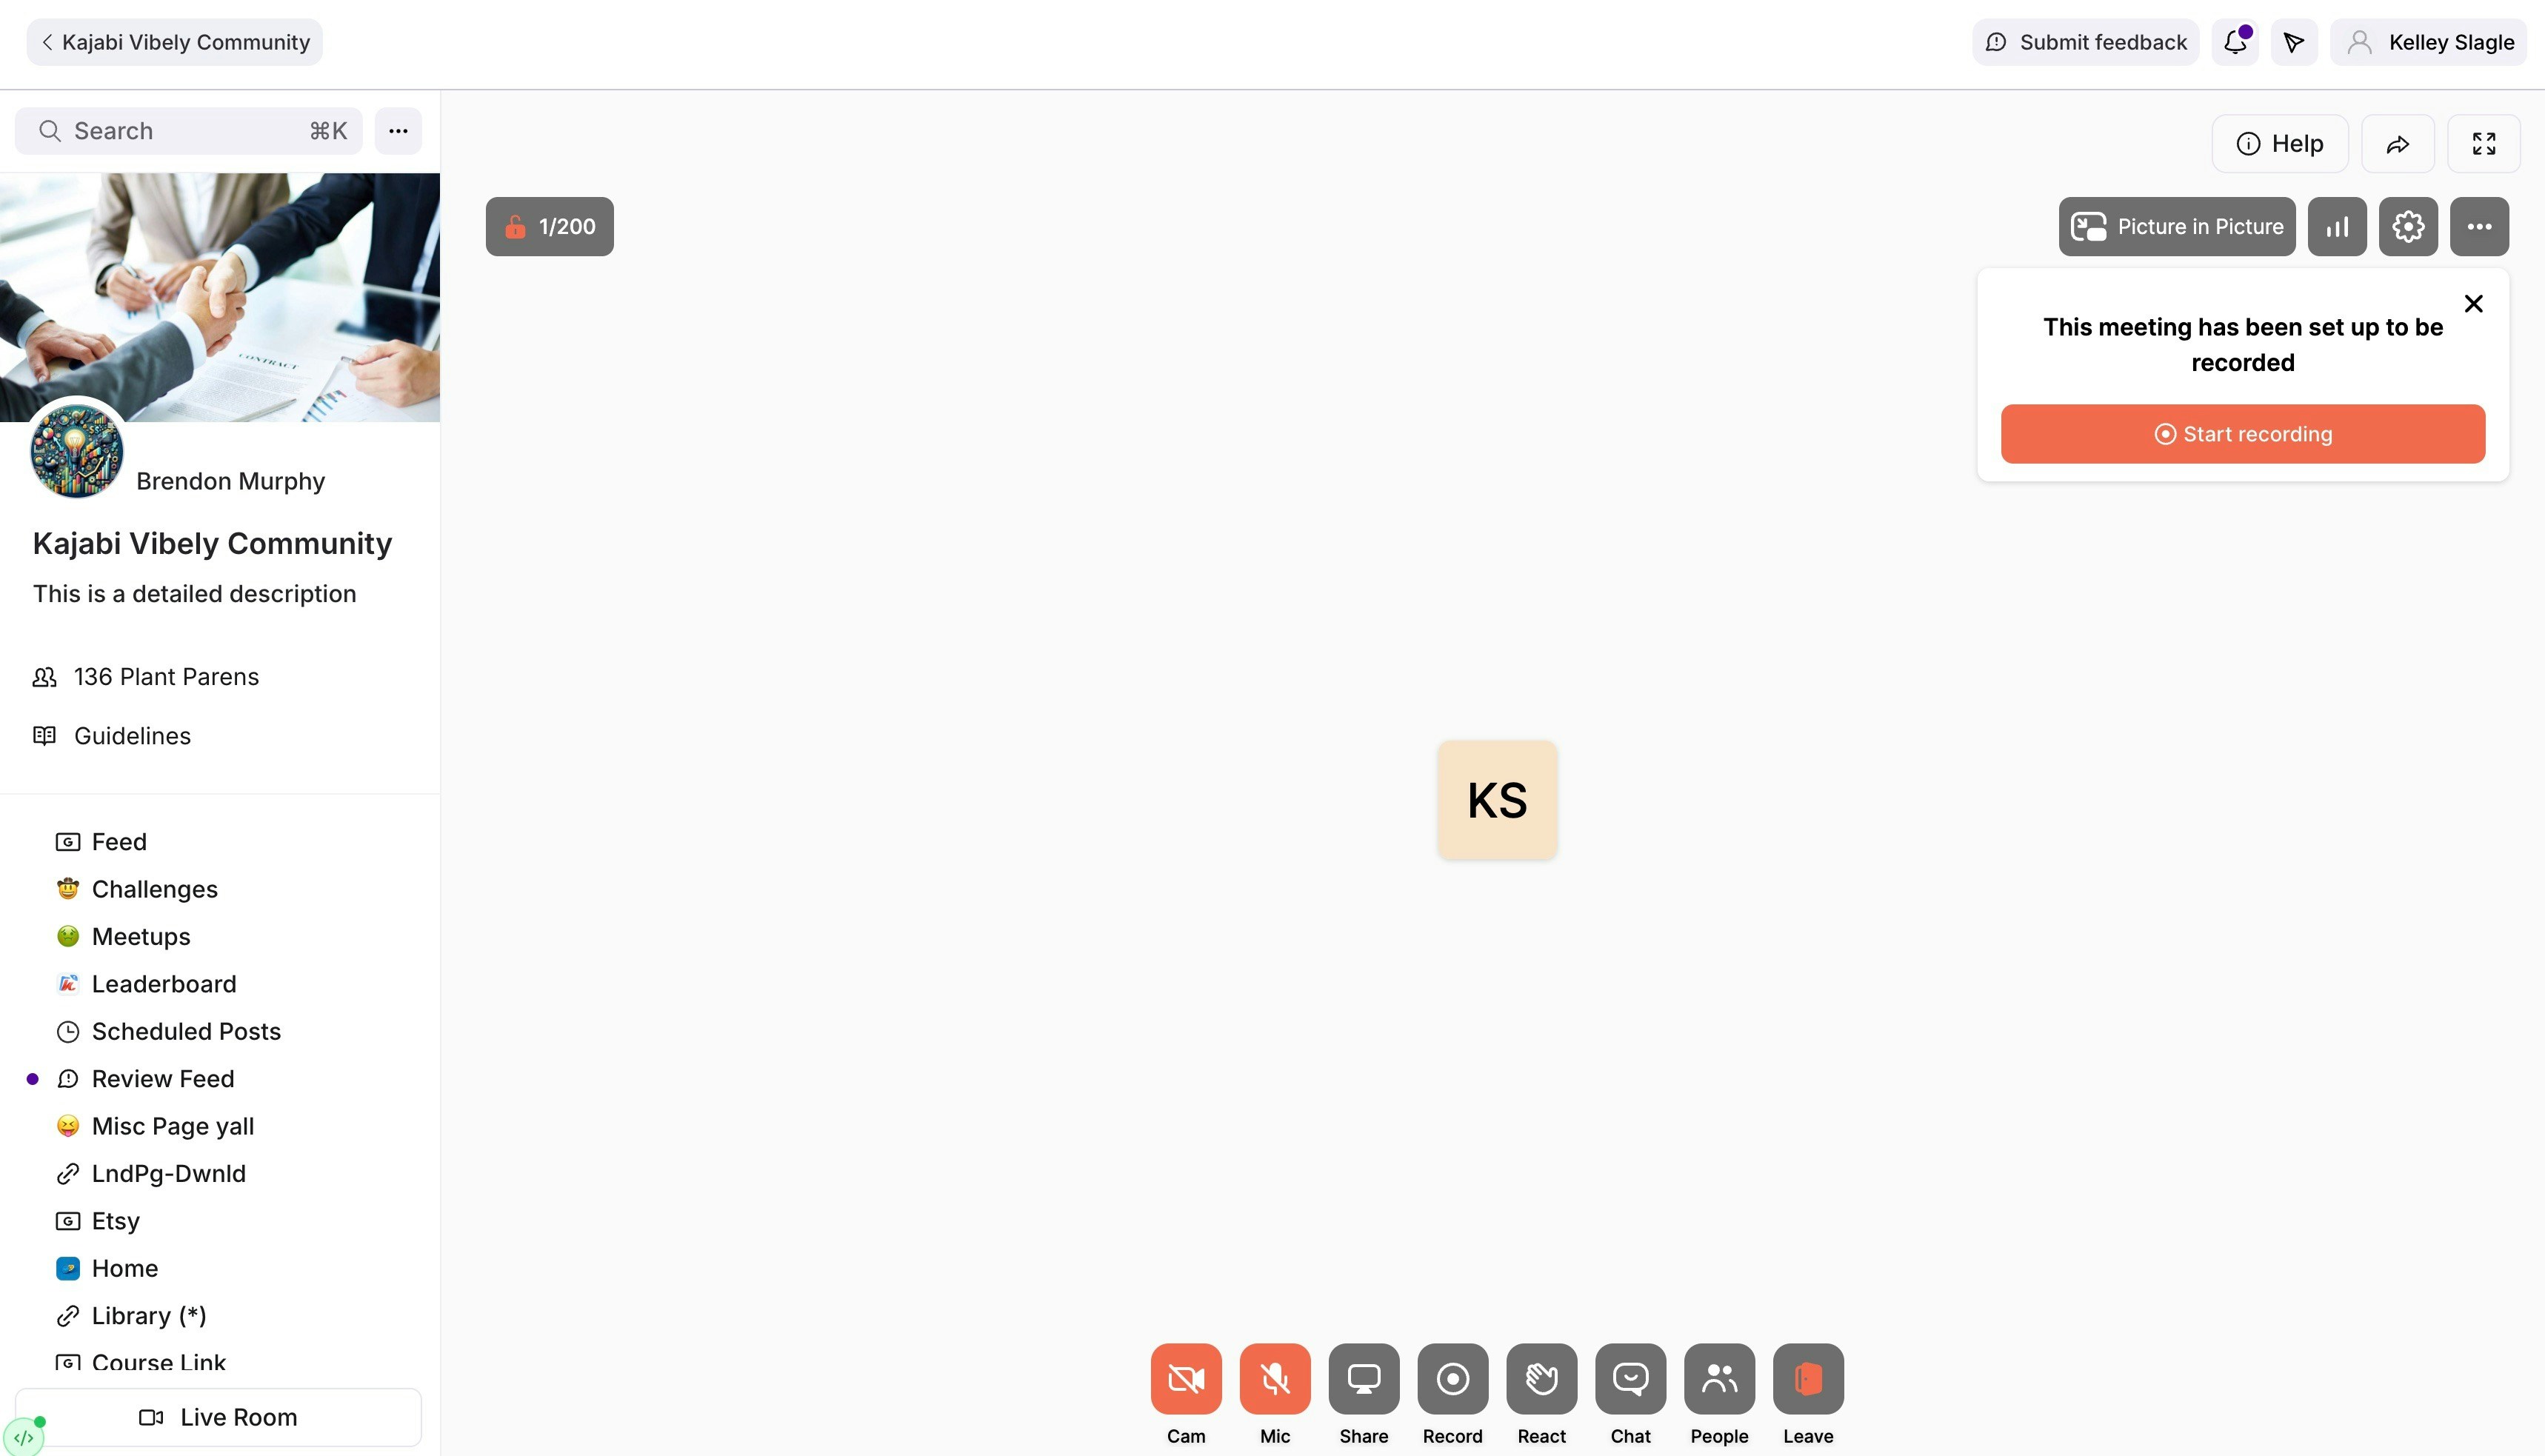
- In the left navigation bar of your Home page, locate the Live Room button in the lower-left corner.
- Click Live Room to start a live room.
- Optional: Notify your Community members that you are live, or click Don’t Notify.
- Optional: Click Start Recording to begin your Live Room session, or exit out of the recording notification to ignore it.
End a Live Room
There is no “end” button for the Live Room. Everyone will simply click out of the room. If you would like to remove everyone from the Live Room when the meeting is over, you can navigate to “people”, then click on the three dots … and select Remove All to remove everyone from the room: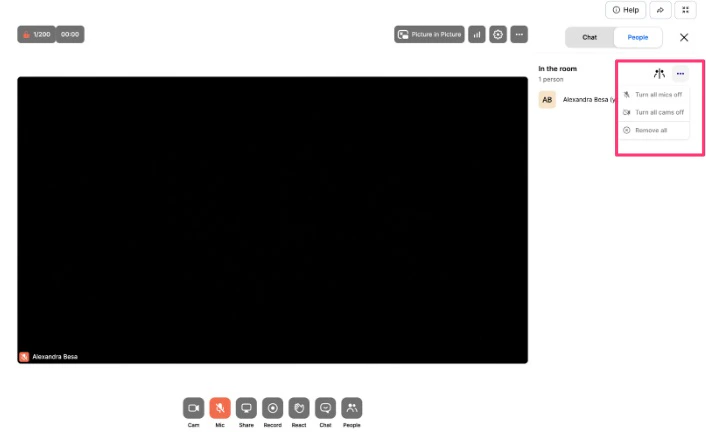
Disable a Live Room
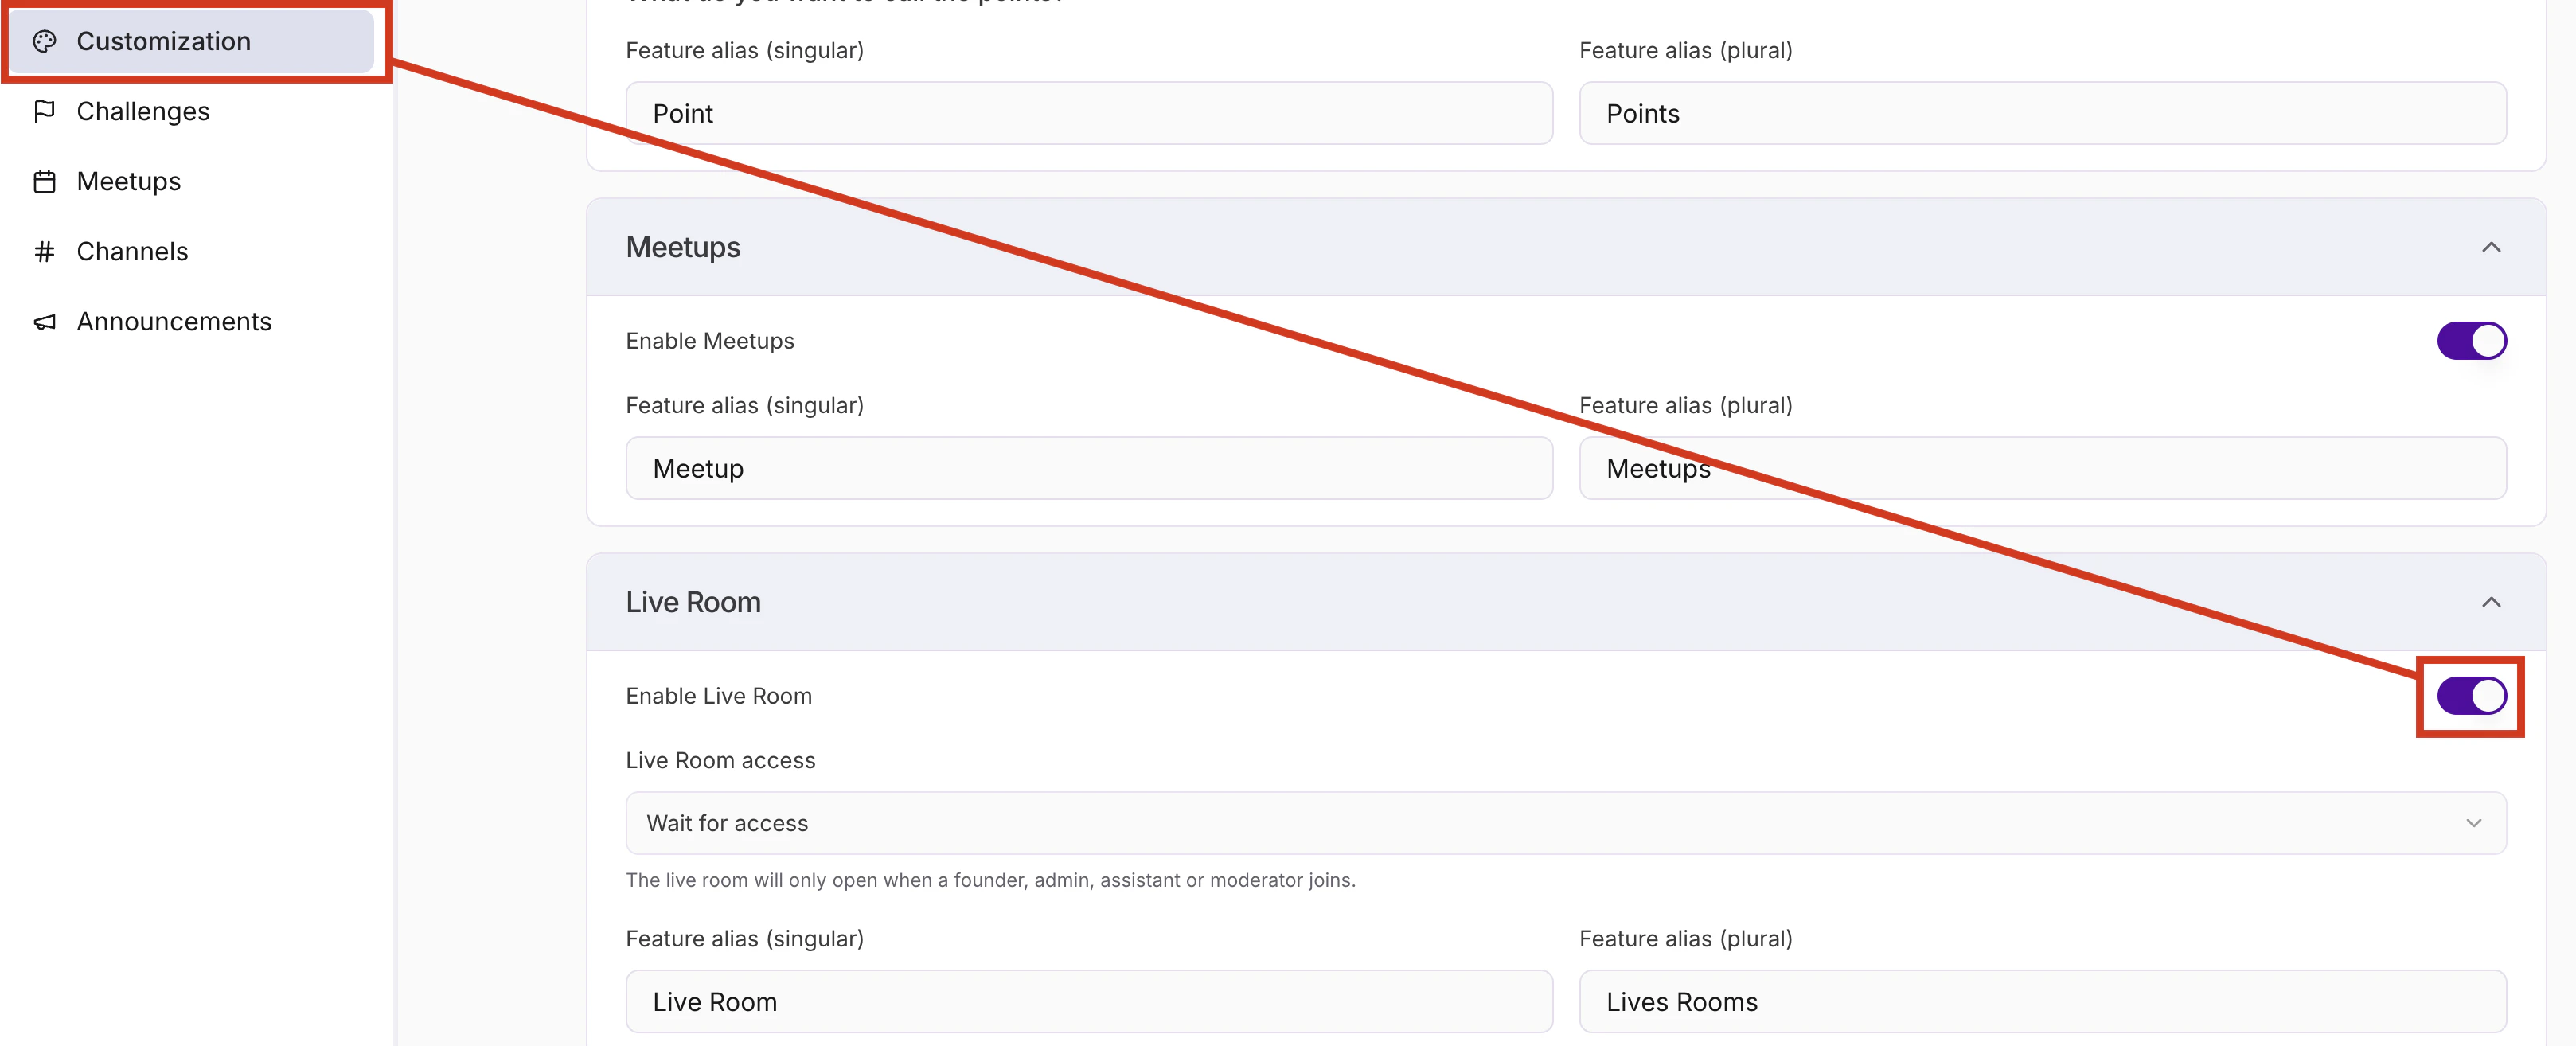
Disable your Live Room to only allow your Community members to join when you start a Live Room. To turn off your Live Room:- Open your Community Settings.
- Select Customization.
- Navigate to Features.
- Under the Live Room section, toggle off Live Room.
Meetup activity ideas
There are many ways to engage your member community with meetups. The following are example activities to connect with your community during a meetup:- Complete the current challenge together
- Q&A session
- Mastermind sessions
- Guest speaker
- Feedback channel
Create a Meetup
- Open the Products tab from your Dashboard.
- Select Community from the sidebar.
- Click Go to Community.
- Click the ellipsis icon beside the search bar in the left navigation window.
- Click Community Settings.
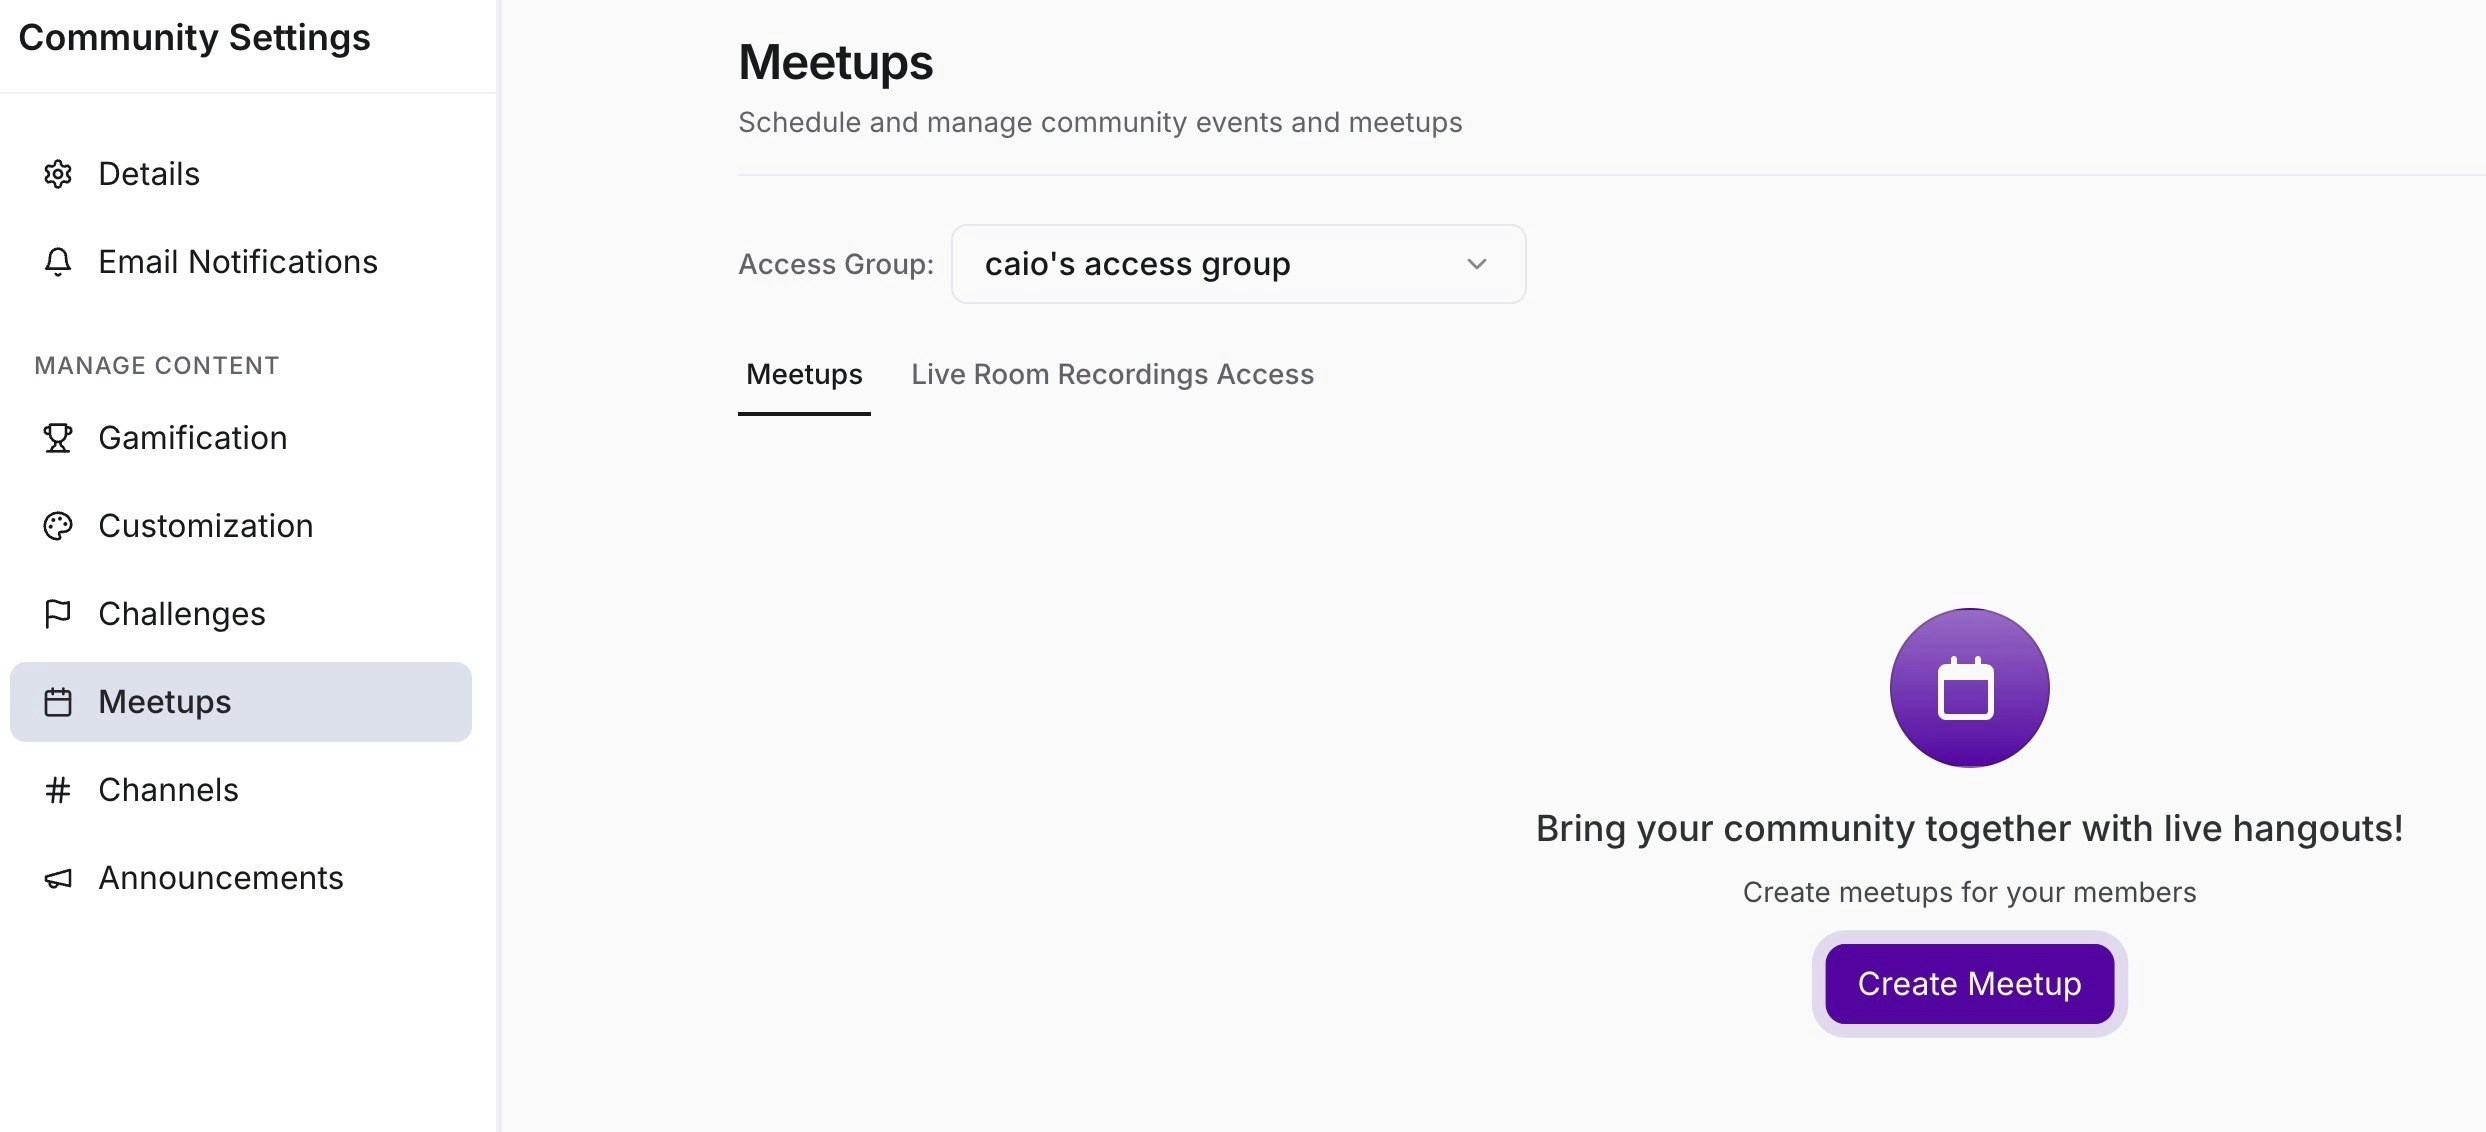
- Navigate to Meetups.
- Click Create Meetup.
- Enter a Title.
- Enter the event link for the virtual Meetup in the Location field, or use a Live Room by clicking the Use Live button. You may also write the physical address if you are meeting in person.
- Set the date and time for the start and end of the event.
- Set the Timezone.
- Optional: Make it a recurring Meetup by checking Repeat Every and selecting the desired day(s).
- Add a Description.
- Assign the Access Group.
- Optional: Select a Channel to receive in-app updates.
- Then, click Save to keep and apply your changes.
Keep a Live Room safe and private
When you create a Meetup, click the Use Live Room button to choose if you want to use your default Live Room for the Meetup or create a Private Room by clicking the Create Private Room button in the pop-up modal: Your default Live Room will be accessible to all members of your Community, whereas a Private Room will only be accessible to the Access Group members who are invited to your Meetup. You also have the ability to lock your room so you can moderate who can join:- In the live room, click the gear icon to open Settings in the top-right corner of the live room.
- In the sidebar of the settings, click Room.
- Toggle on/off the Locked room button to lock or unlock your room:
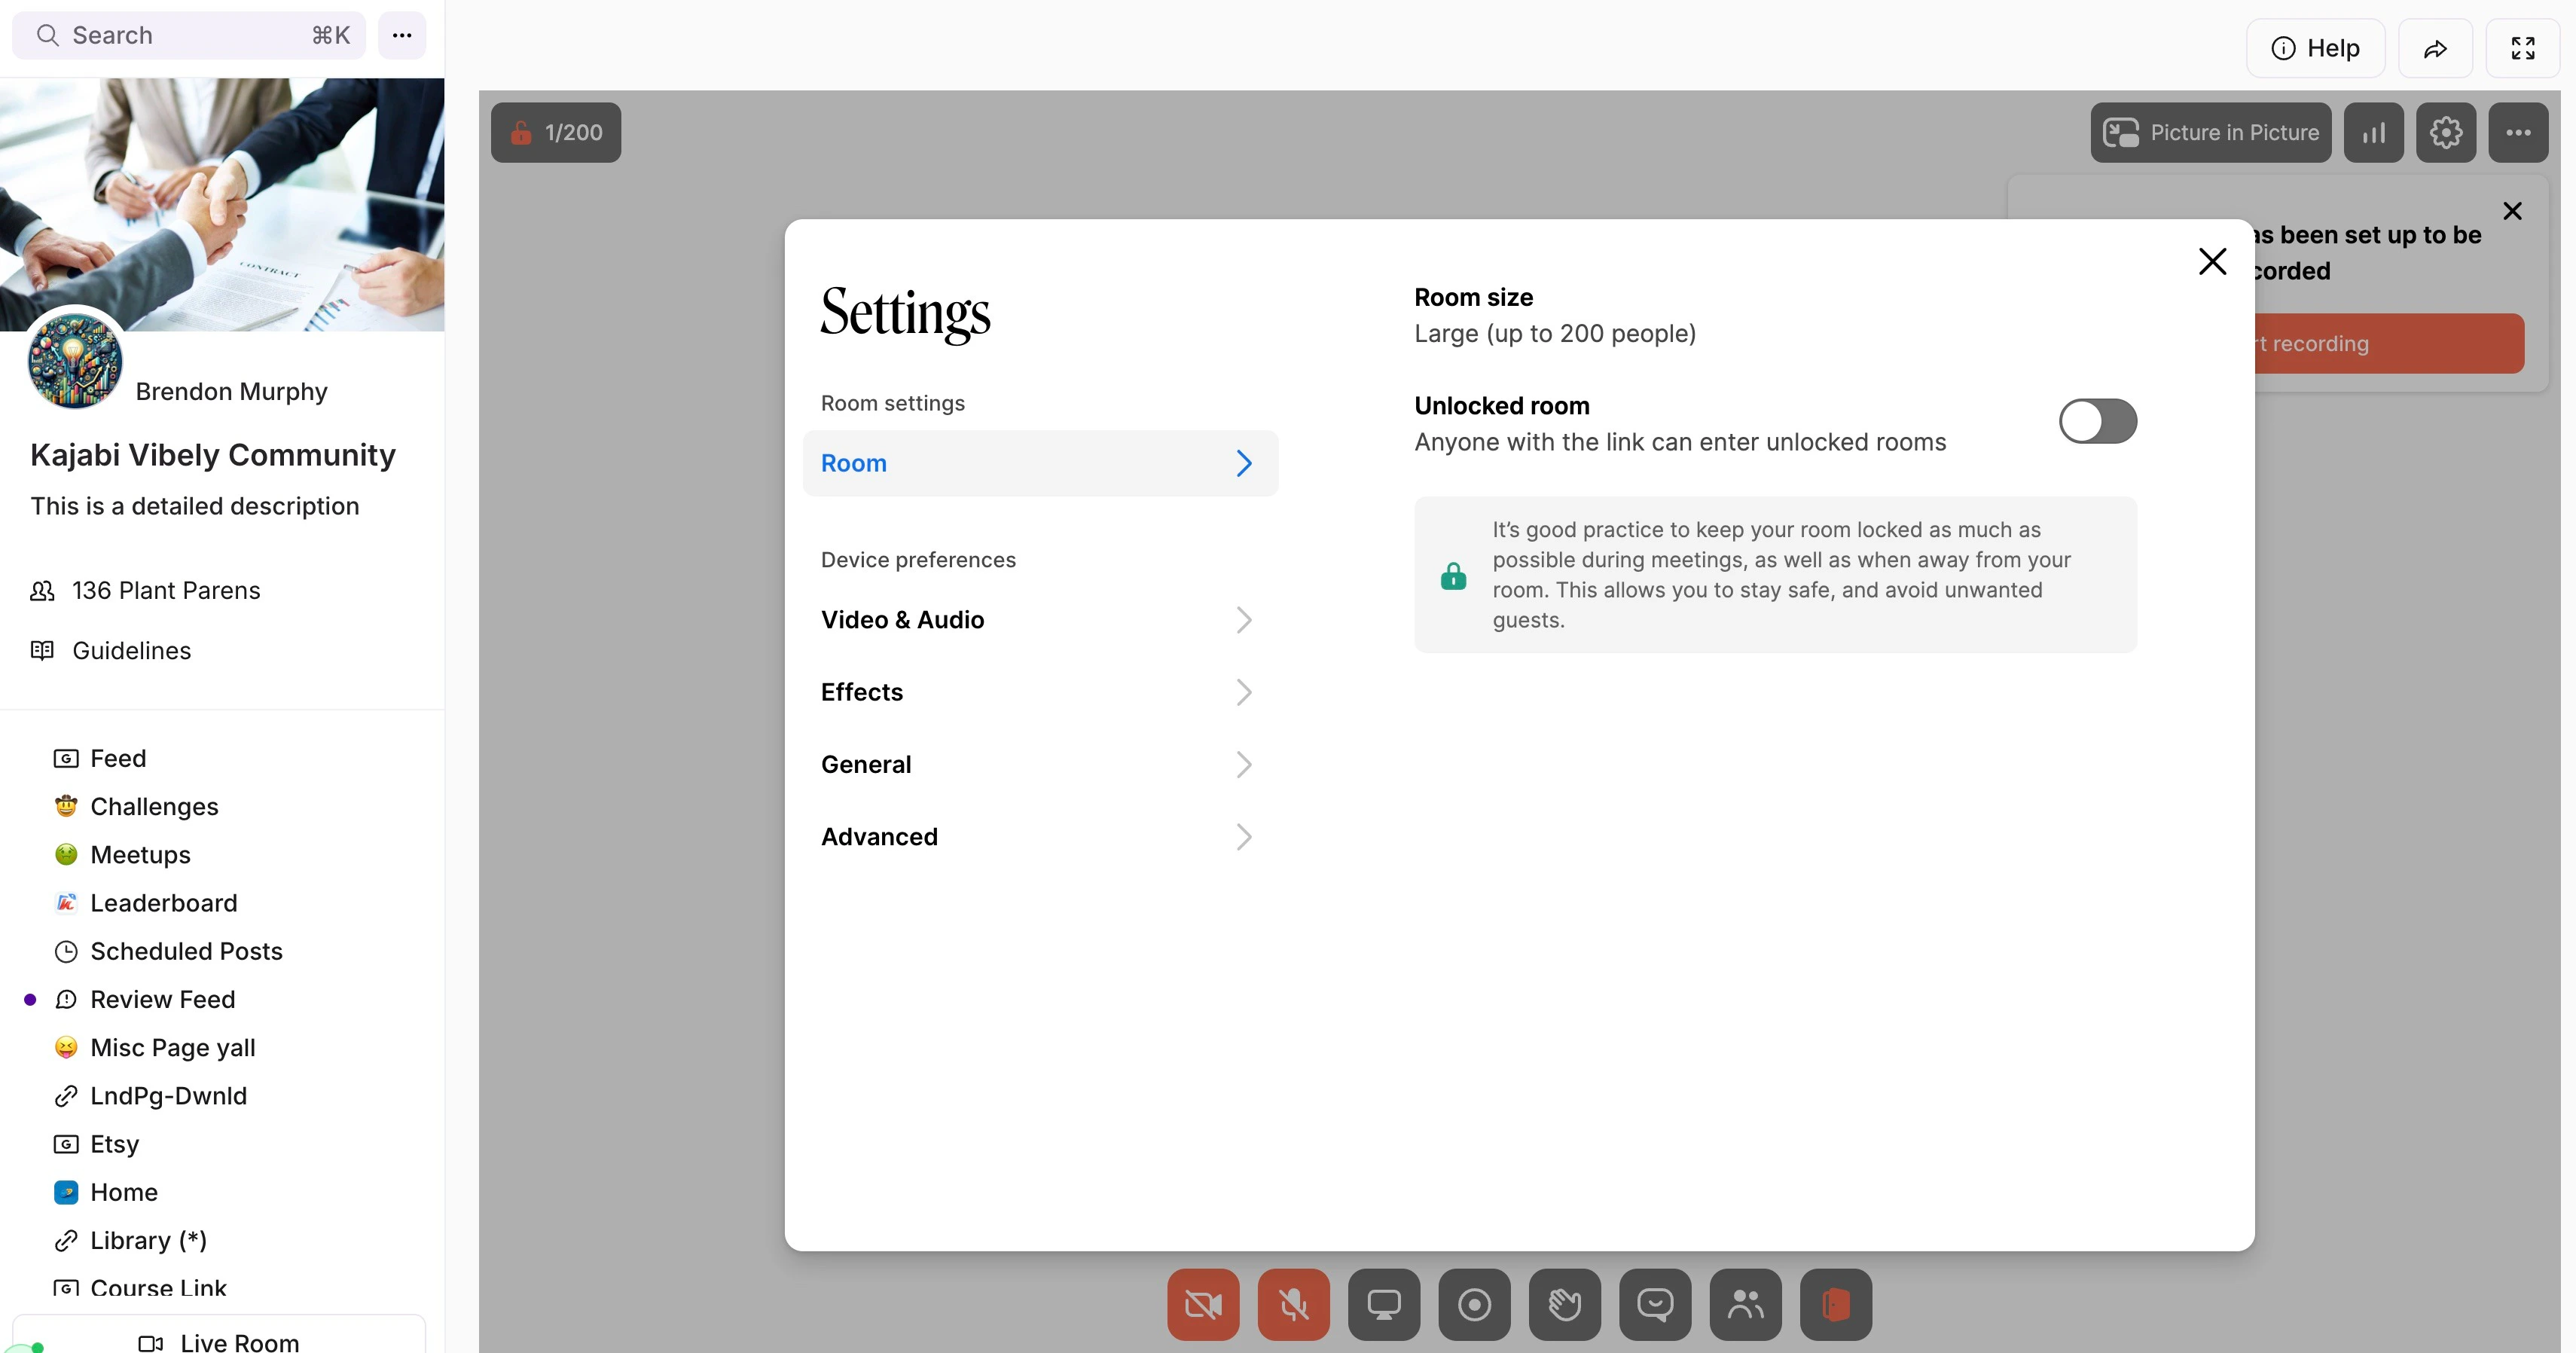
Note: It’s good practice to keep this room locked as often as possible, both during a meeting and away from your room. This allows you to stay safe, and avoid unwanted guests.
Screen sharing, breakout rooms, and recording
Yes, you can do all of those with the admin controls. Meetings in both the default Live Room and your Private Rooms can be recorded.Record a Live Room
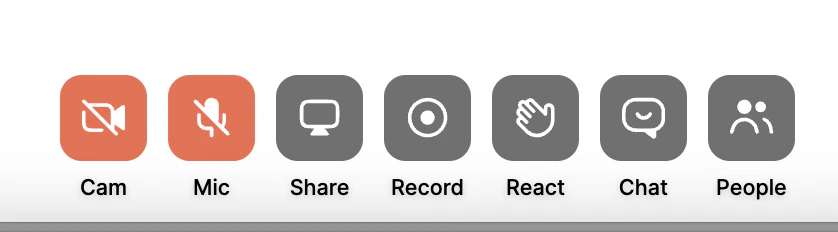
- Click the record button to begin recording.
- Once the meeting is over, click on the record button again to stop recording:
Find Live Room recordings
Your recordings can be viewed in the Meetups tab under Recordings.Edit and control access to a Live Room recording
Determine the Access Group that can view your Live Room recording:- Open the Products tab from your Dashboard.
- Select Community from the sidebar.
- Click Go to Community.
- Open Meetups from the left navigation bar.
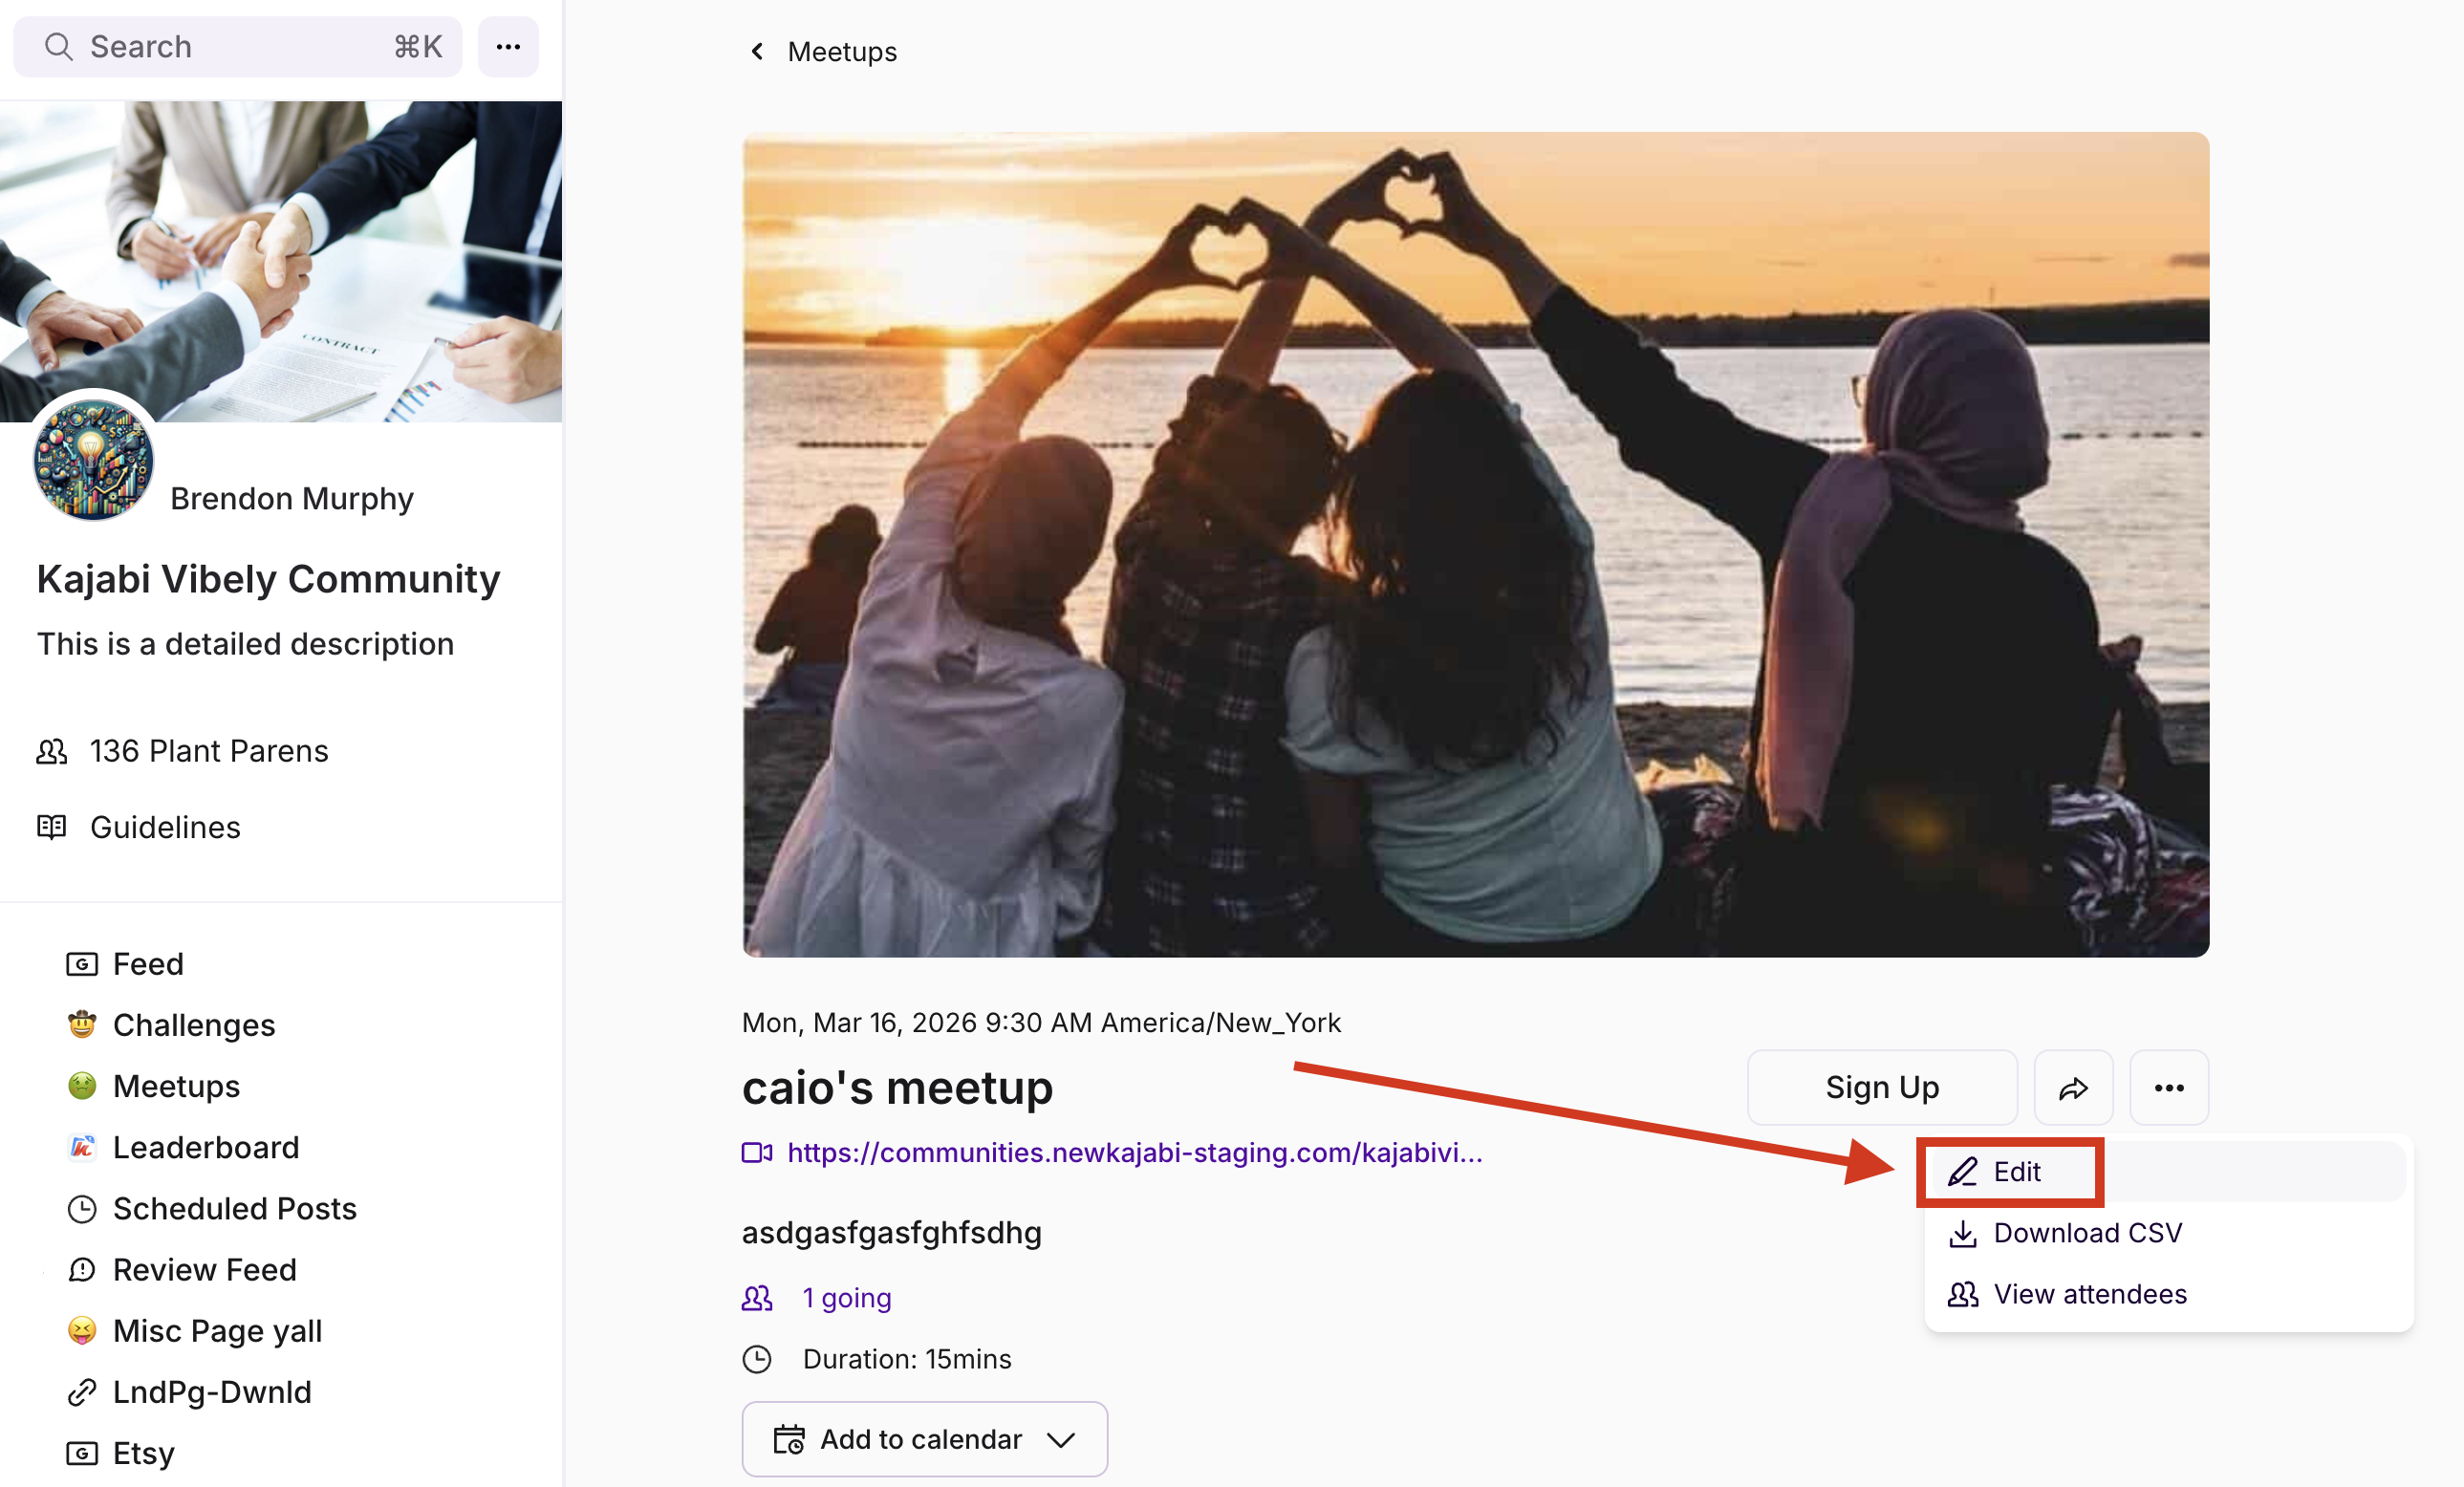
- Select the ellipsis icon next to your Live Room recording date and time indicator.
- Select Edit – Make the changes you want.
- You can edit the Title, Access Group Description, or Delete the Recording and or Meetup.
- Click Save to keep and apply your changes:
Set a default Access Group
You can set a default Access Group, which means the members of that Access Group will automatically get access to your recordings. If you need to change the Access Group, you can do so after the recording is published. We recommend setting the default Access Group as the most general group.- Click the ellipsis (⋯) icon on your Community cover image, located beside the search bar.
- Select Community Settings.
- Click Meetups.
- Under Live Room Recordings Access, select a Default Access Group. If you do not select one, a default group will be automatically assigned.
- The page will save automatically.
Live Room recording resolution
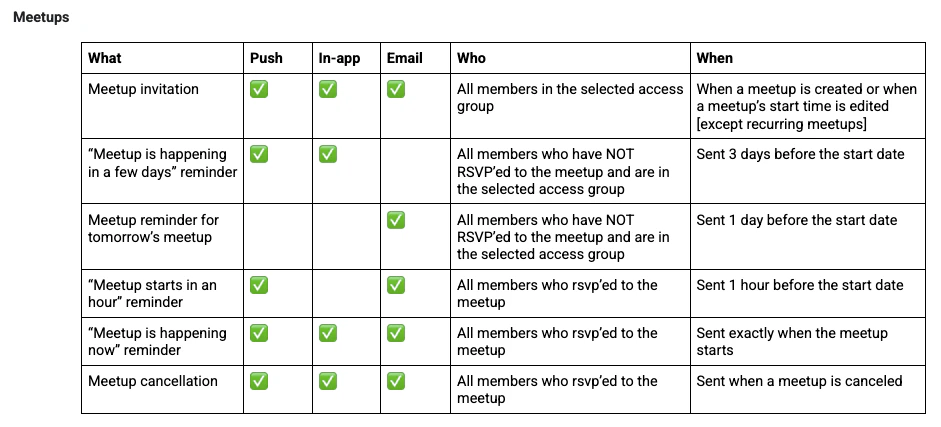
The resolution of the Live Room recordings is 720p.Understanding Meetup Notifications
Community notifications are sent out in three ways:- Emails
- In-app notifications (in your notification center)
- Mobile notifications (push notifications)
- On an individual basis, in an individual’s profile settings
- By you, the Hero, at the community level in community settings