

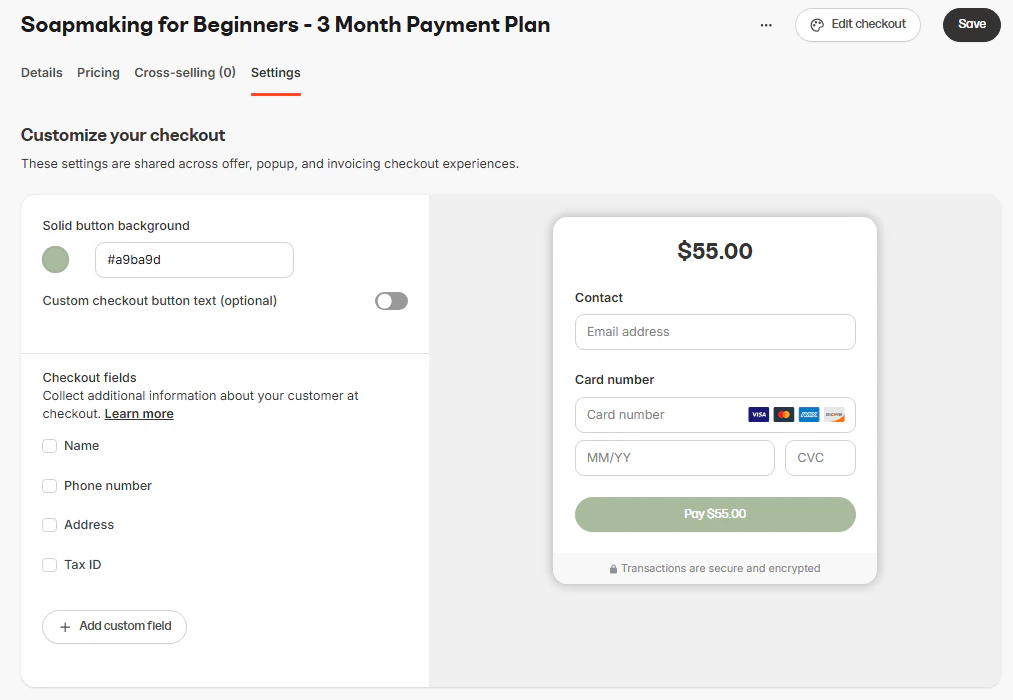
Kajabi checkout pages automatically collect the information required to complete a purchase, including payment and contact details. You can customize additional checkout fields to collect more information from your customers for fulfillment, communication, or account access. All checkout fields are managed directly from the Offer’s Settings tab and apply across your Offer’s checkout experiences, including popup and standard checkout pages.Documentation Index
Fetch the complete documentation index at: https://help.kajabi.com/llms.txt
Use this file to discover all available pages before exploring further.
Note: Cart checkout pages have their own field settings that are managed separately.
Edit checkout fields
To customize which fields are collected at checkout:- Open the Sales tab from your Kajabi Dashboard.
- Click Offers.
- Edit an existing Offer or create a new one.
- Select the Settings tab.
- In the Customize your checkout section, locate Checkout fields.
- Check or uncheck the fields you want to collect:
- Name
- Phone number
- Address
- Tax ID
- Click Save to apply your changes.
Set default country for the address field
When collecting addresses at checkout, you can control how the Country field defaults. Under Checkout fields, choose one of the following options:- Use customer’s geolocation: Automatically detects and pre-fills the customer’s country based on their IP address.
- Set default country at checkout: Select a specific country to appear by default, regardless of location.
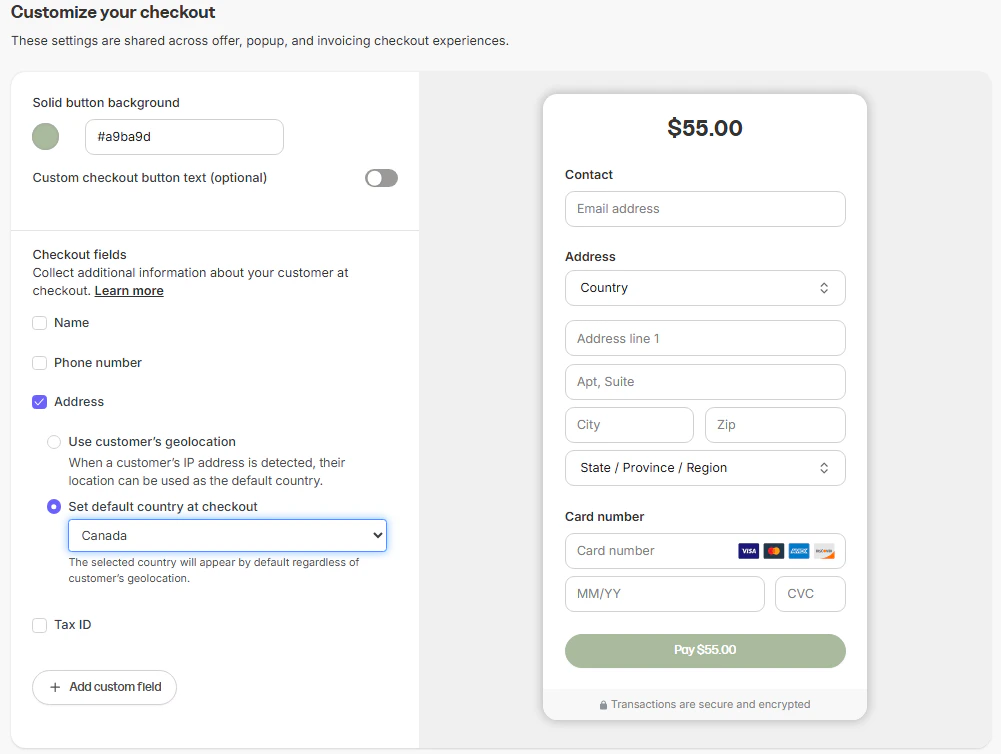
Note: Default country settings apply automatically to Popup Checkout, Enhanced Checkout, and Legacy Checkout pages. Invoice checkout forms are not yet supported.
Customer account settings
Manage how customers interact with their Kajabi account after checkout. These settings control whether customers must agree to your Terms and Conditions and whether new customers are prompted to create a password. To access these settings:- Open the Sales tab from your Kajabi Dashboard.
- Click Offers.
- Edit an existing Offer or create a new one.
- Select the Settings tab.
Service agreement
Choose whether customers must consent to your Terms and Conditions before completing their purchase. Options include:- Not required
- Required
- Custom service agreement
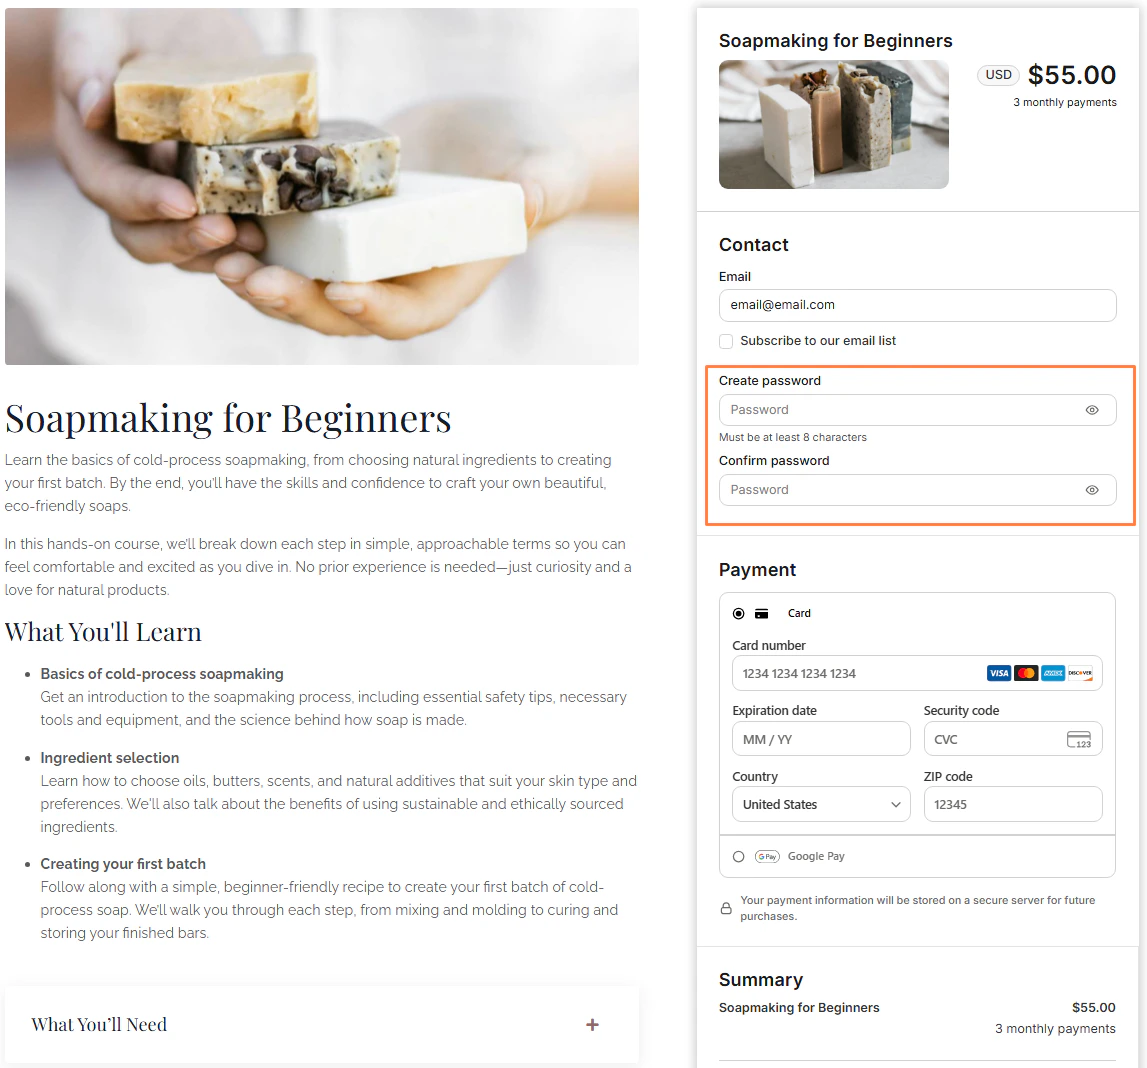
Require new customers to create password at checkout
You can require new customers to create a password during checkout so that their account is created immediately after purchase. When this setting is enabled:- If the customer enters an email that is not linked to an existing account, two password fields appear:
- Create Password
- Confirm Password
- If the customer enters an email that belongs to an existing account, the password fields do not appear and checkout continues directly to payment.
Note: To configure password collection in a Legacy checkout template, go to Edit Checkout > Additional Settings.
Tax ID field
If your business requires it, you can collect a customer’s tax identification number during checkout. To enable this field:- Open your Offer and select the Settings tab.
- In Checkout fields, check Tax ID.
- Click Save.