Access Community Settings
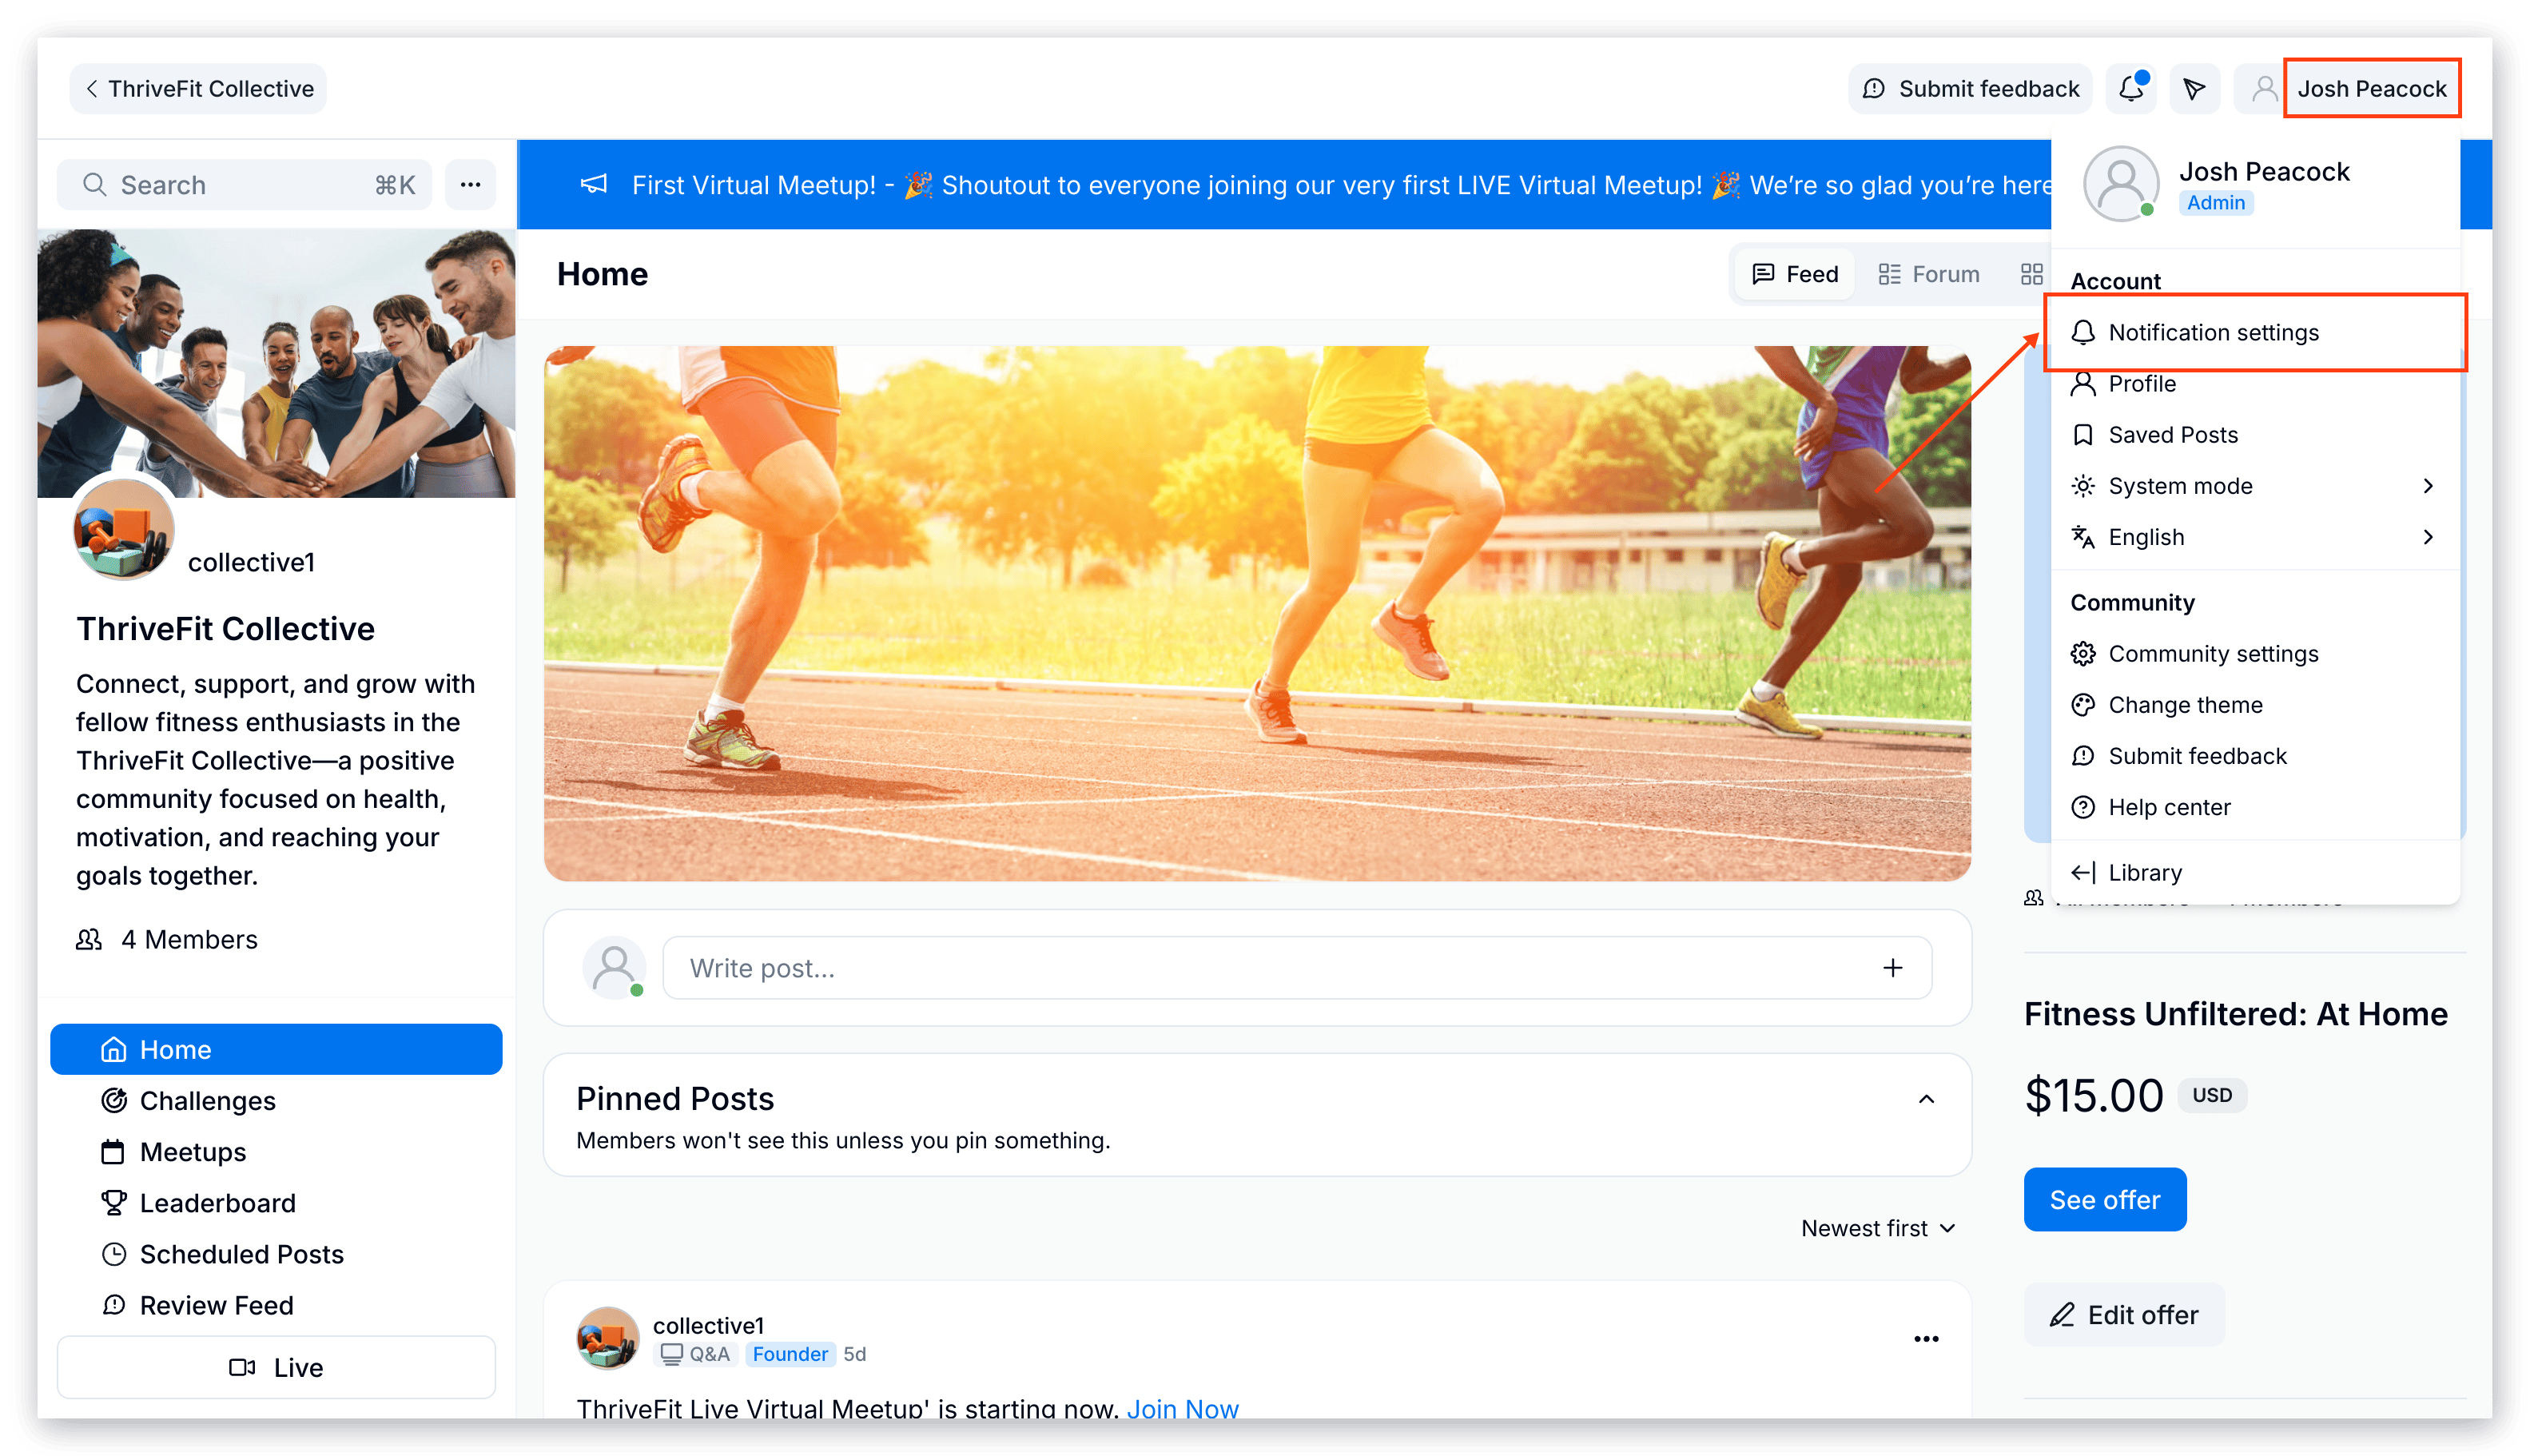
There are two places where you may click to access your Community Settings page: the ellipsis icon at the top left corner of the Community cover photo and the profile icon on the right top navigation bar: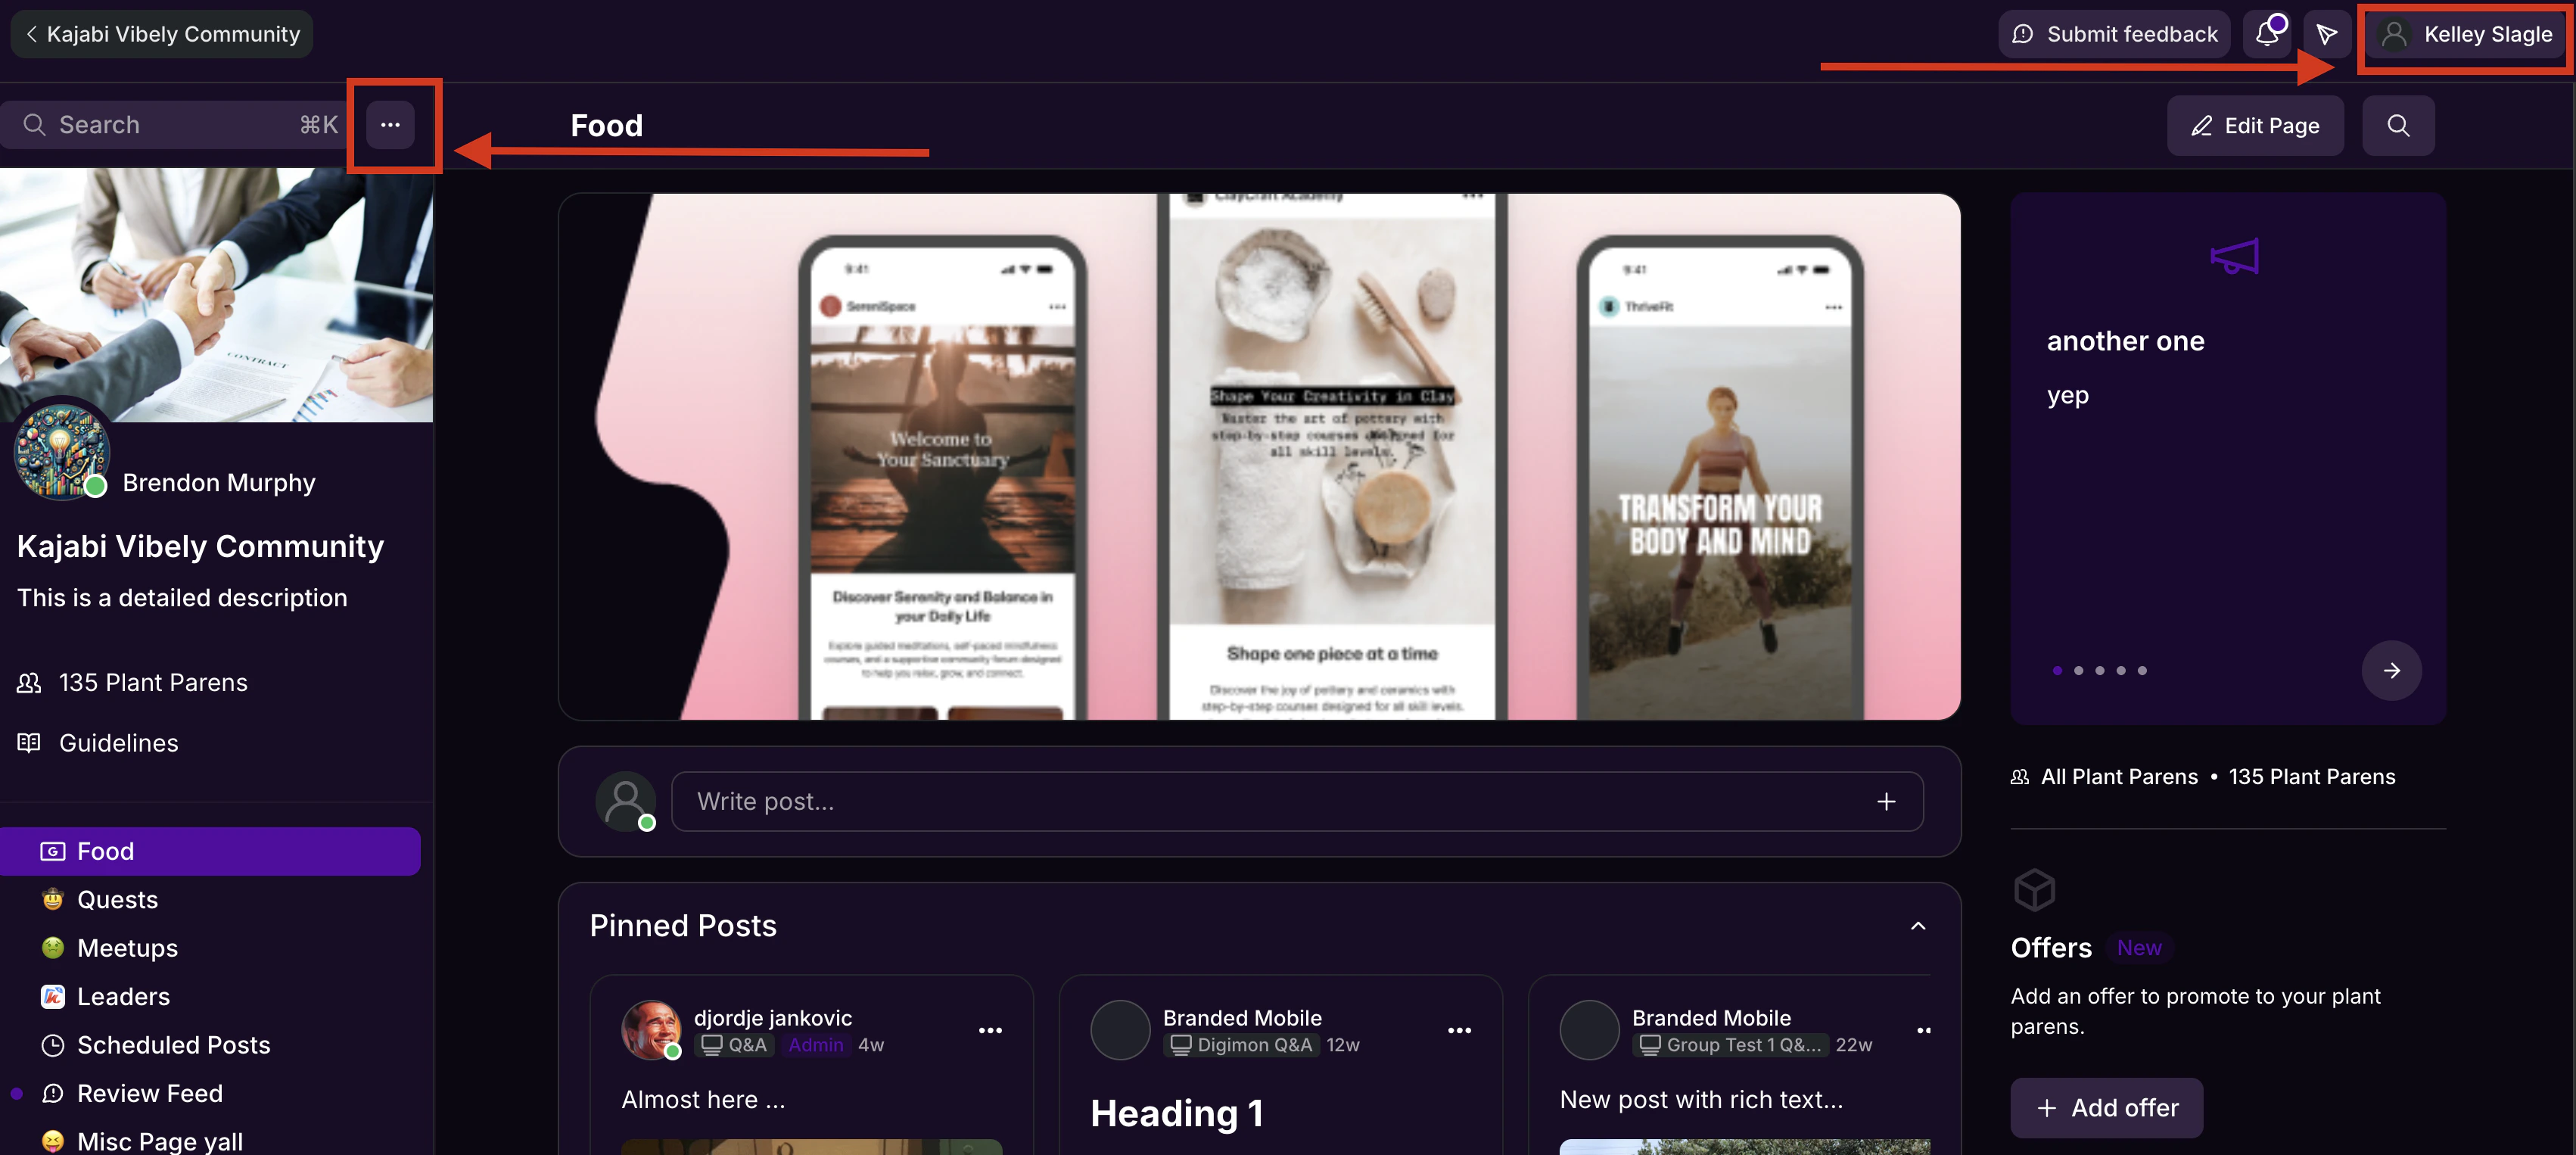
Note: The steps below use the ellipsis icon to gain access to the Community; however, you may use whichever access point you prefer.
Add Social Links to the Community sidebar
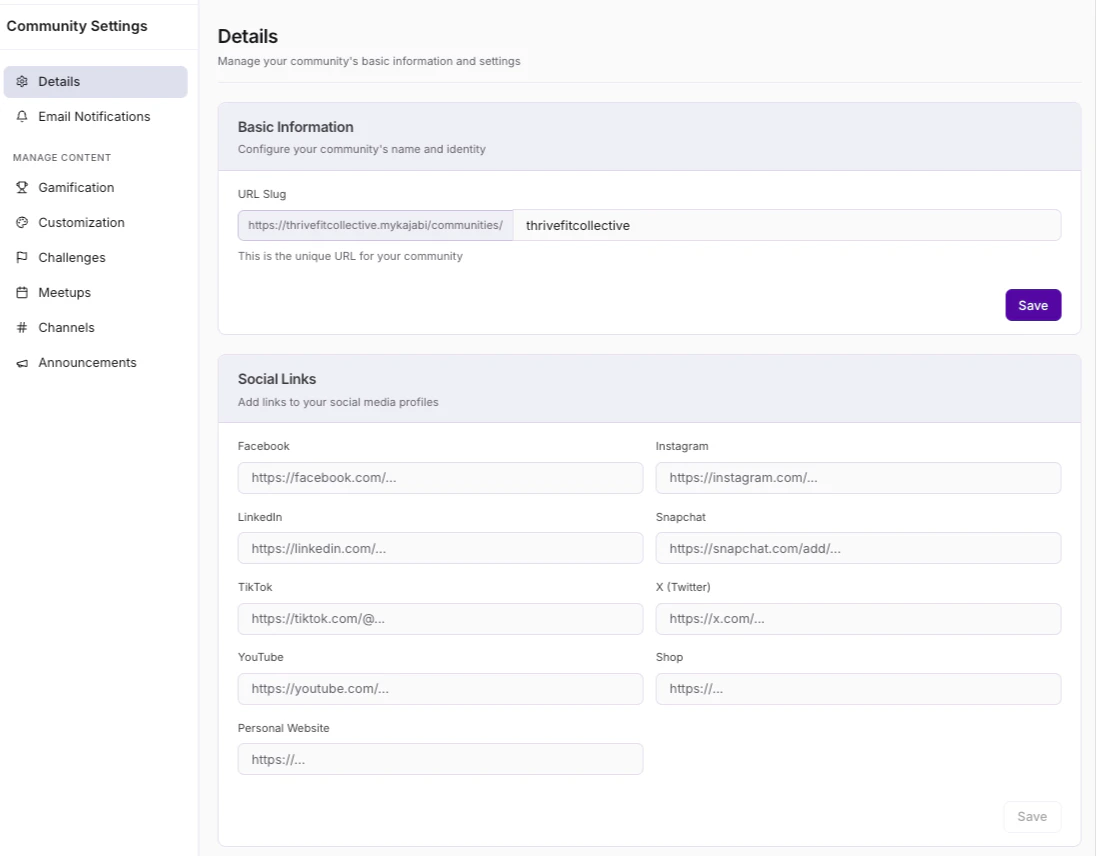
Add icons to the Community sidebar that link to your TikTok, YouTube, Facebook, X (Twitter), Snapchat, YouTube, and Shop accounts, as well as your personal website. To add Social Links:- Click the ellipsis icon next to the Community cover photo, then select Community Settings.
- Then, in the left sidebar, select Details.
- On the Community Details page, navigate to the Social Links section.
- Enter the social media account and website URLs in the associated Social Link fields.
- Click Save.
- Click Back to community to view the social link(s):
Note: Any Social Links added to the Community sidebar will also appear on your User Profile page.
Create Community Guidelines
Community Guidelines detail your expectations for members’ participation in your Community. These guidelines are presented to members to accept before they can join, and all members must re-accept them anytime the guidelines are edited. To create Community Guidelines:- Click the ellipsis icon next to the Community cover photo, then select Community Settings.
- Then, in the left sidebar, select Details.
- On the Community Details page, navigate to the Community Guidelines section.
- Click Add guidelines.
- Add a Title and optional Image.
- Under Description, add a welcome message for members, and detail the guidelines you would like to implement for members of your Community.
- Click Save.
- Click Back to community to view the guidelines pop-up.
Change Member and Moderator aliases
Under Customization, you can change how you refer to your Members and Moderators within the Community. To update Member and Moderator aliases:- Click the ellipsis icon next to the Community cover photo, then select Community Settings.
- Then, in the left sidebar, select Customization.
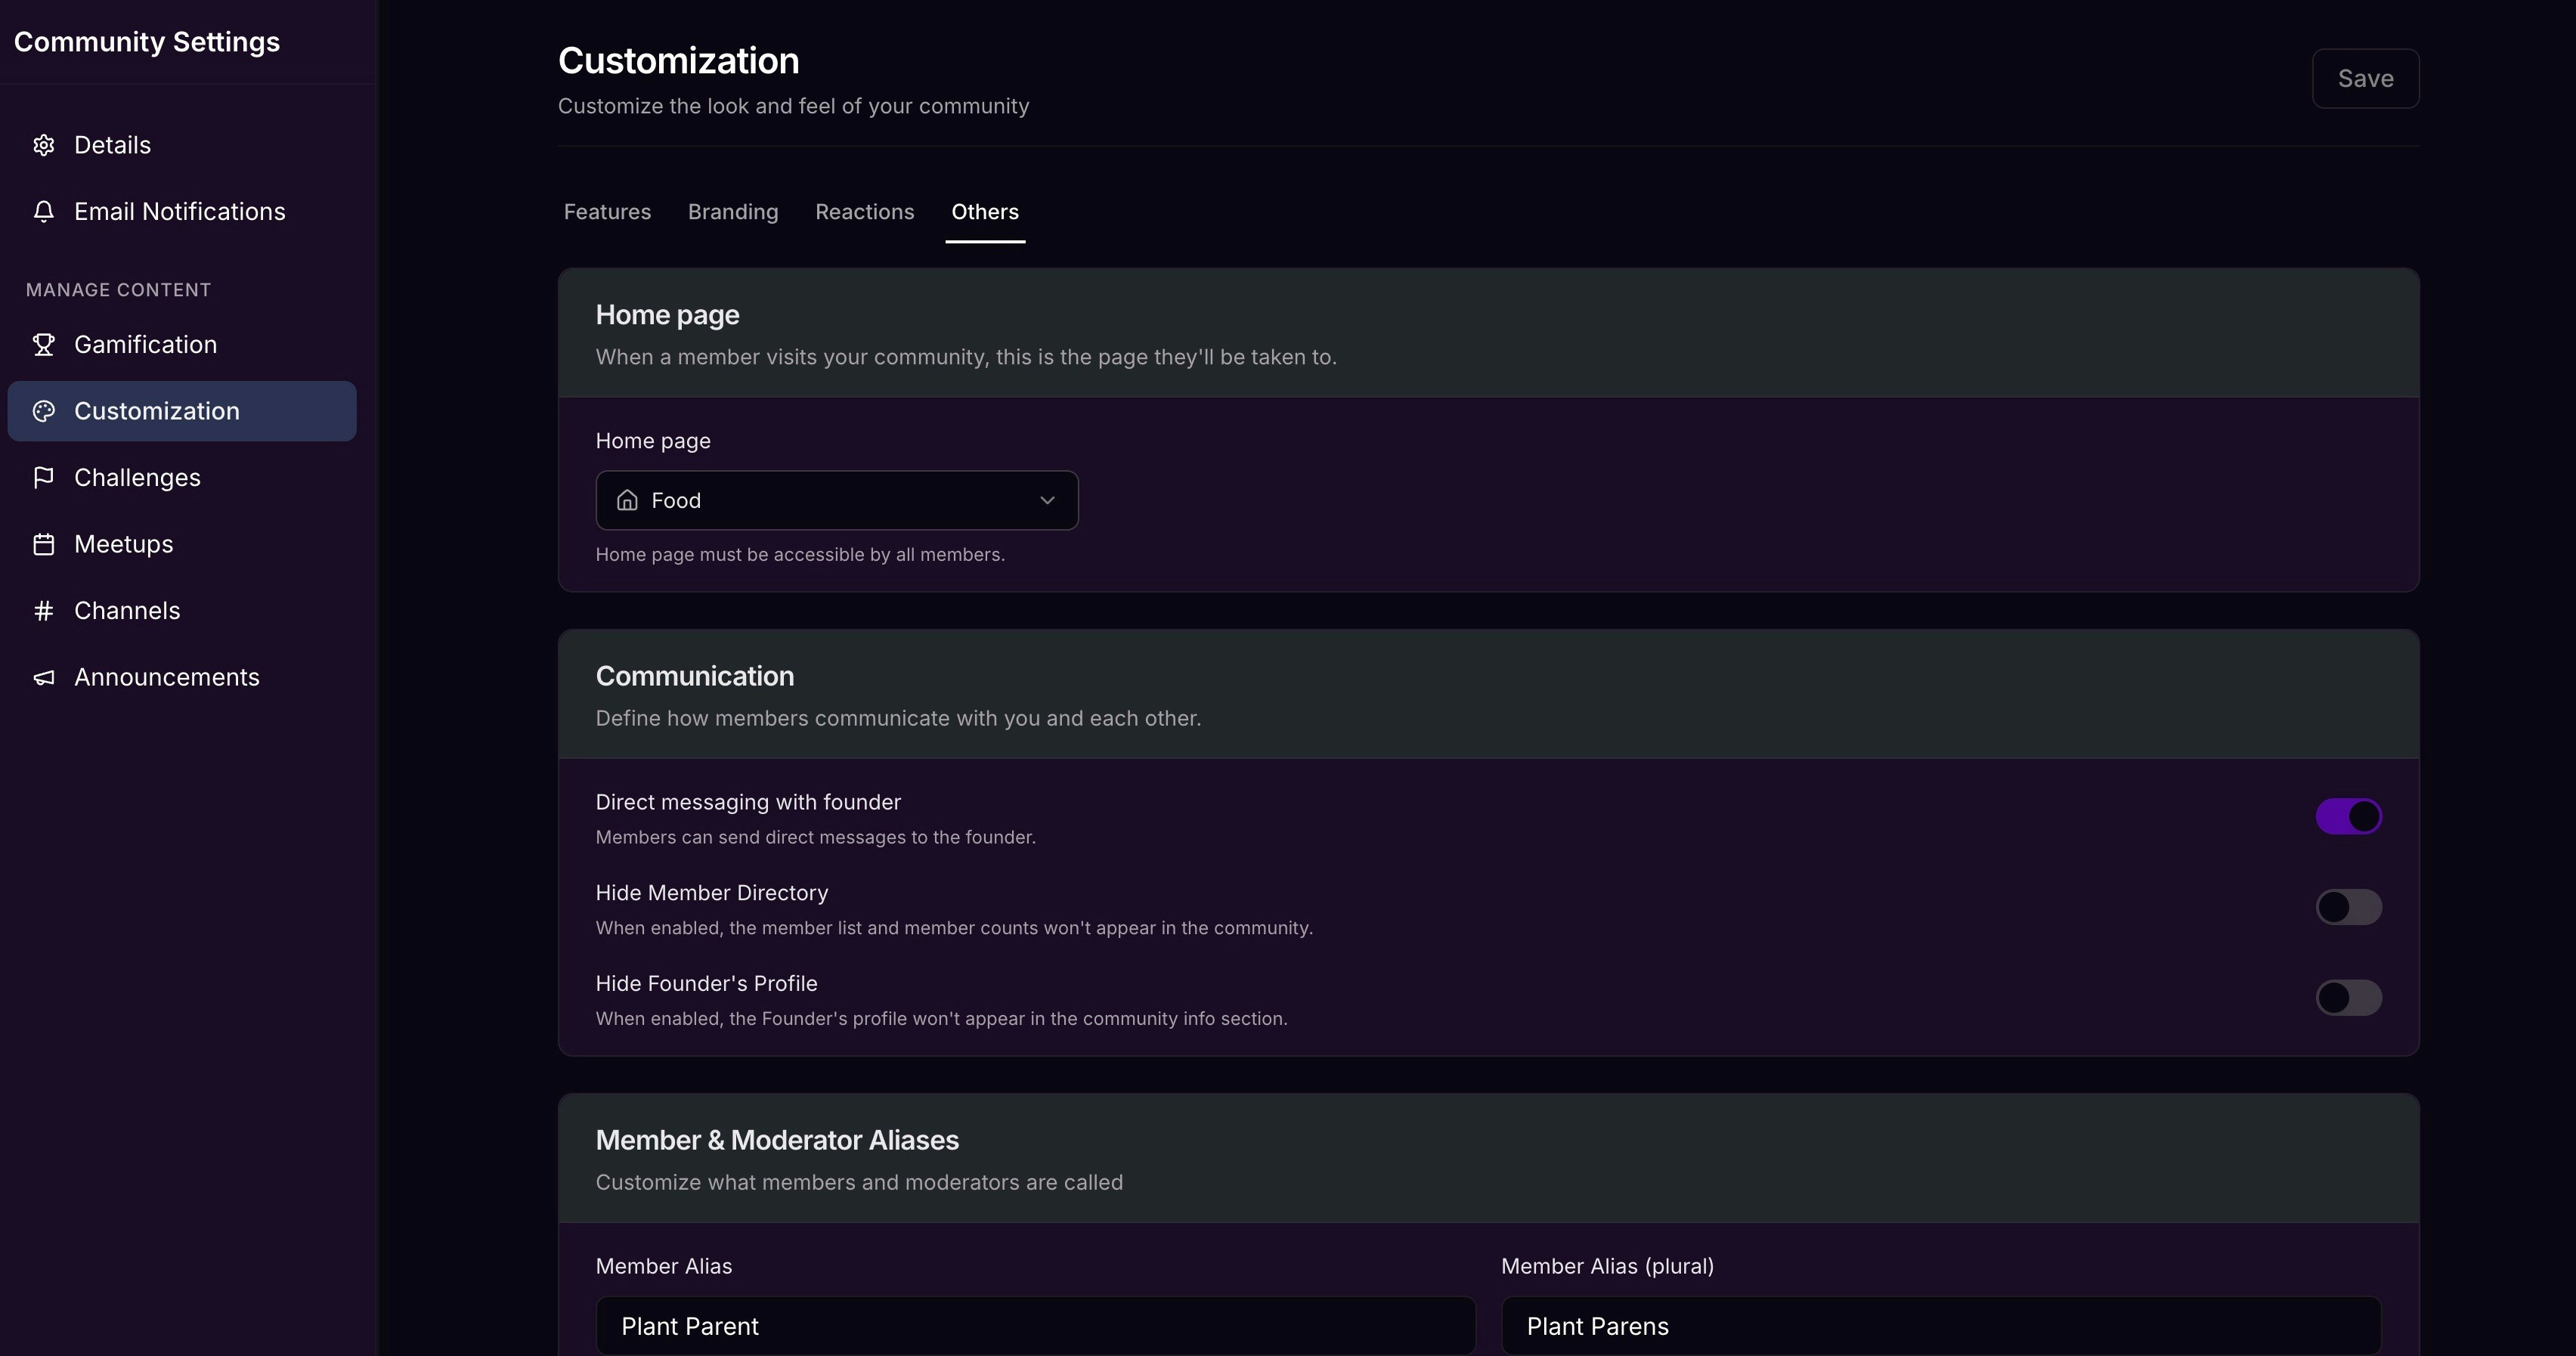
- Navigate to the Others tab in the top menu.
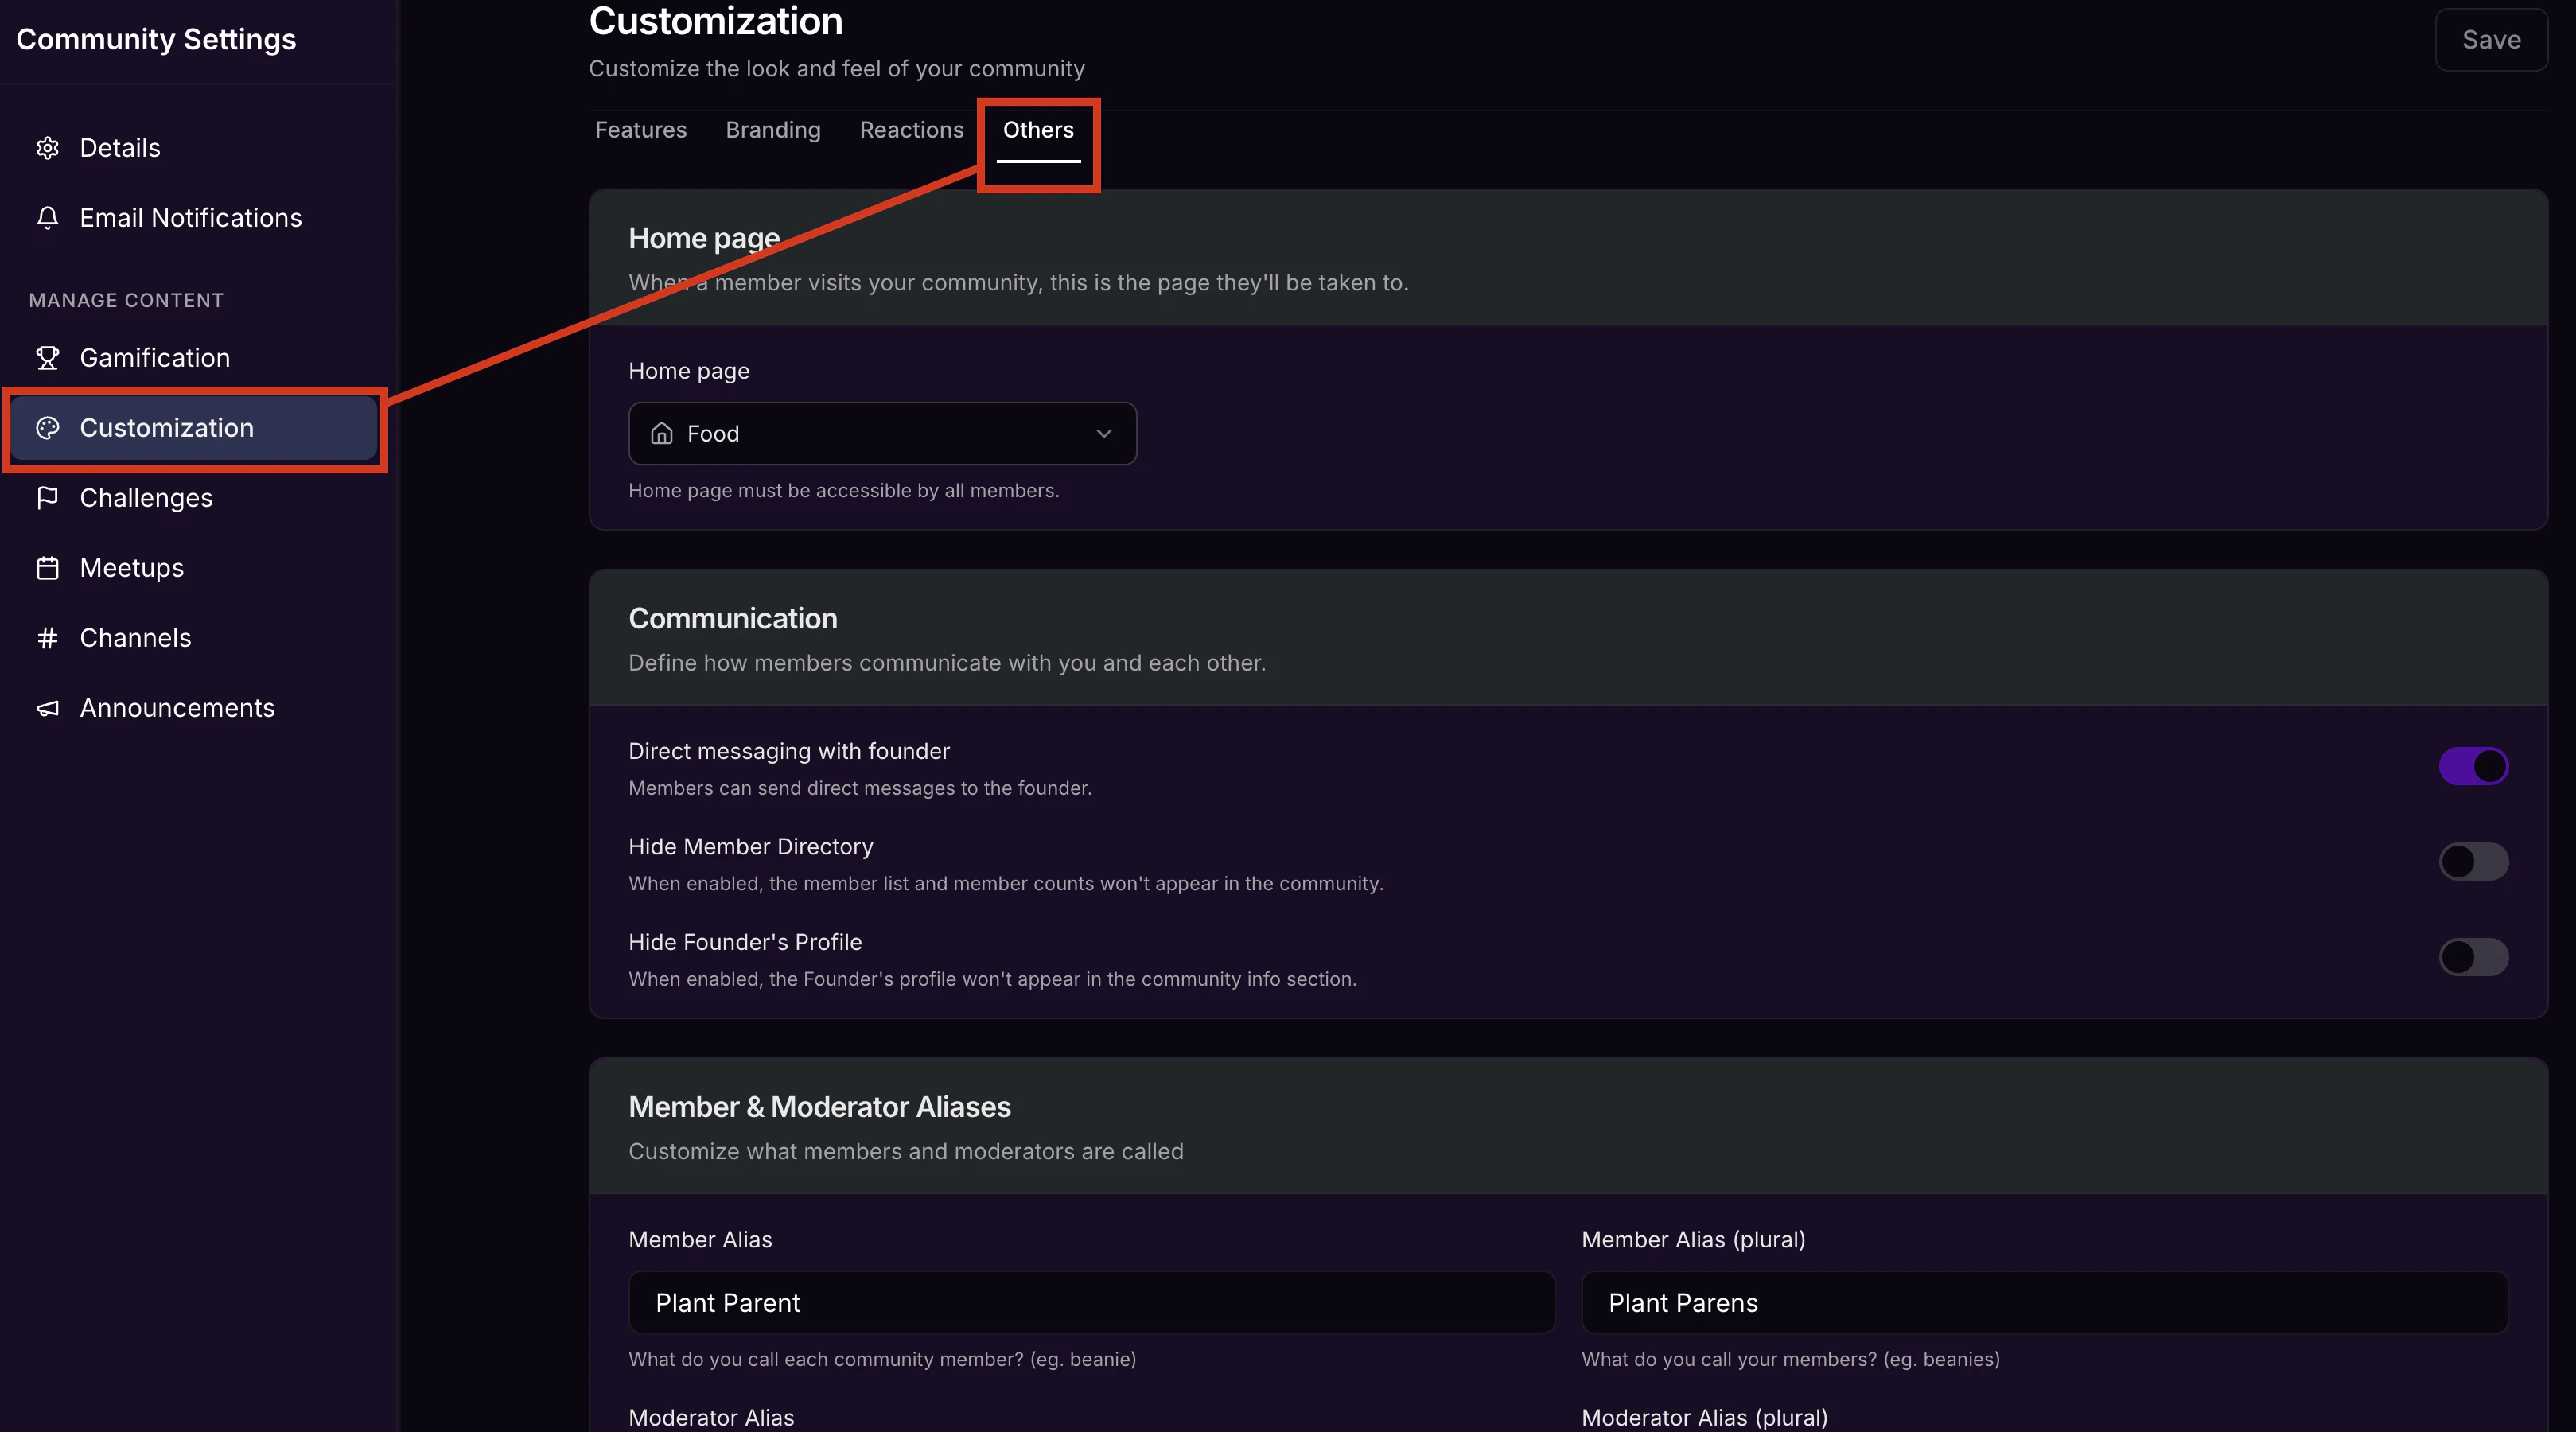
- Scroll down and update aliases as desired by overwriting the default terms.
- Click Save.
- Click Back to community to view your changes.
Update Email Notifications
Choose which types of Email Notifications your Community members receive and add your own branding and business information to any Community emails you send. To enable or disable each type of Email Notification:- Click the ellipsis icon next to the Community cover photo, then select Community Settings.
- Select Email Notifications.
- On the Email Controls tab, click each toggle on or off as desired to enable or disable notification emails for Community features, including Channels, Challenges, Meetups, Live Rooms, Announcements, and Weekly Digest.
Update Community feature settings
Enable or disable the following Community feature settings:- Direct messaging with founder
- Live Room access
- Hide Member Directory
- Hide Founder’s Profile
- Customize Reactions
Direct messaging with founder
Allow or deny Community members’ access to start direct messages with the Community Account Owner. Any existing conversations will remain open. To allow or disallow direct messaging with founder access:- Click the ellipsis icon next to the Community cover photo, then select Community Settings.
- Then, in the left sidebar select Customization.
- Navigate to Others.
- Toggle on or toggle off Direct messaging with founder under the Communication section to update your preference:
Live Room access
Allow the Live Room to stay open even when you weren’t the one who started it (Always open), or disable it, so it only opens when a Leader, Admin, or Ambassador starts it (Wait for access). To update Live Room access settings:- Click the ellipsis icon next to the Community cover photo, then select Community Settings.
- Then, in the left sidebar select Customization.
- Select your desired Live Room access setting.
- Then, click Save to keep and apply your changes:

Hide Member Directory
To update the visibility of your Member Directory:- Click the ellipsis icon next to the Community cover photo, then select Community Settings.
- Then, in the left sidebar select Customization.
- Navigate to Others.
- Under the Communication section, select your desired setting for Hide Member Directory.
- Click Save to keep and apply your changes.
Display the Founder’s Profile
Choose whether or not to allow your Community members to view the Community leader’s name and profile photo. To update the visibility of the Community leader:- Click the ellipsis icon next to the Community cover photo, then select Community Settings.
- Then, in the left sidebar, select Customization.
- Navigate to Others.
- Under the Communication section, select your desired setting for Hide Founder’s Profile.
- Then, click Save to keep and apply your changes.
Customize Reactions
Customize the emoji terminology your Community members can use to react to feed-style Channel posts and comments, as well as Challenge entries.Note: Only the thumbs-up emoji can be used to react to Challenge entries. However, the custom label you assign to this emoji will appear alongside it in all locations (Channel posts/comments and Challenge entries).
- Click the ellipsis icon next to the Community cover photo, then select Community Settings.
- Then, in the left sidebar, select Customization.
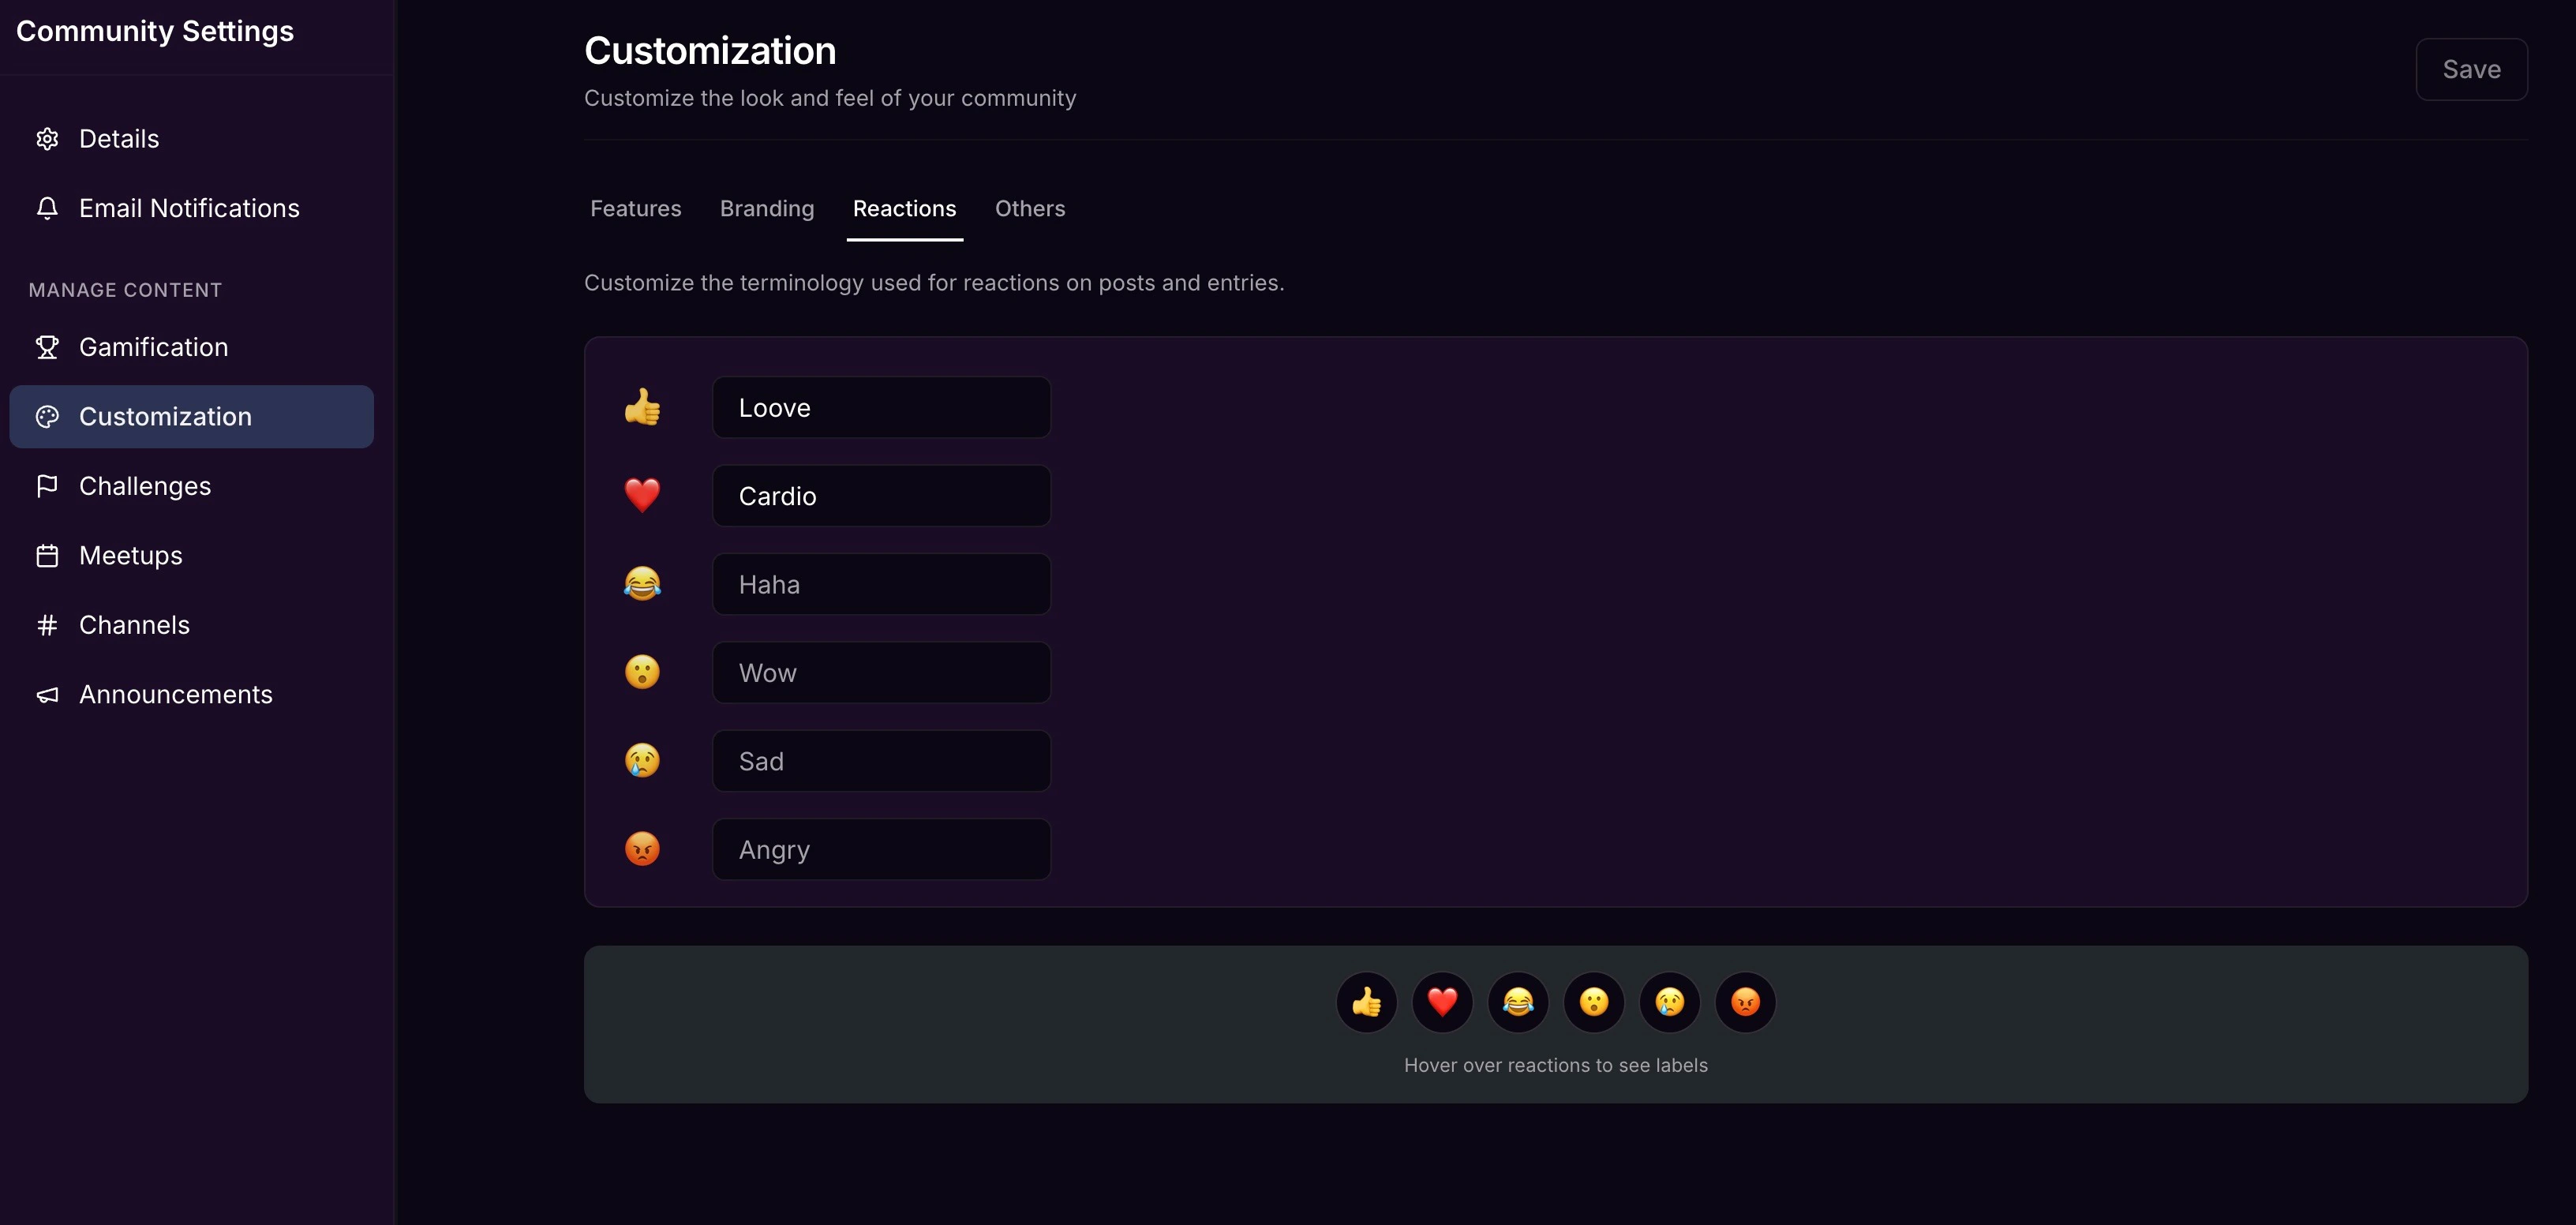
- Navigate to Reactions.
- Use the text input field next to each emoji to enter a label as desired:
Update Account Settings
In your Kajabi Community Account Settings, you can:- Update Founder Profile Photo
- Add Social Links to your User Profile
- Add Bio information
- Control Push, In-app, and Email Notifications
Update Founder Profile Photo
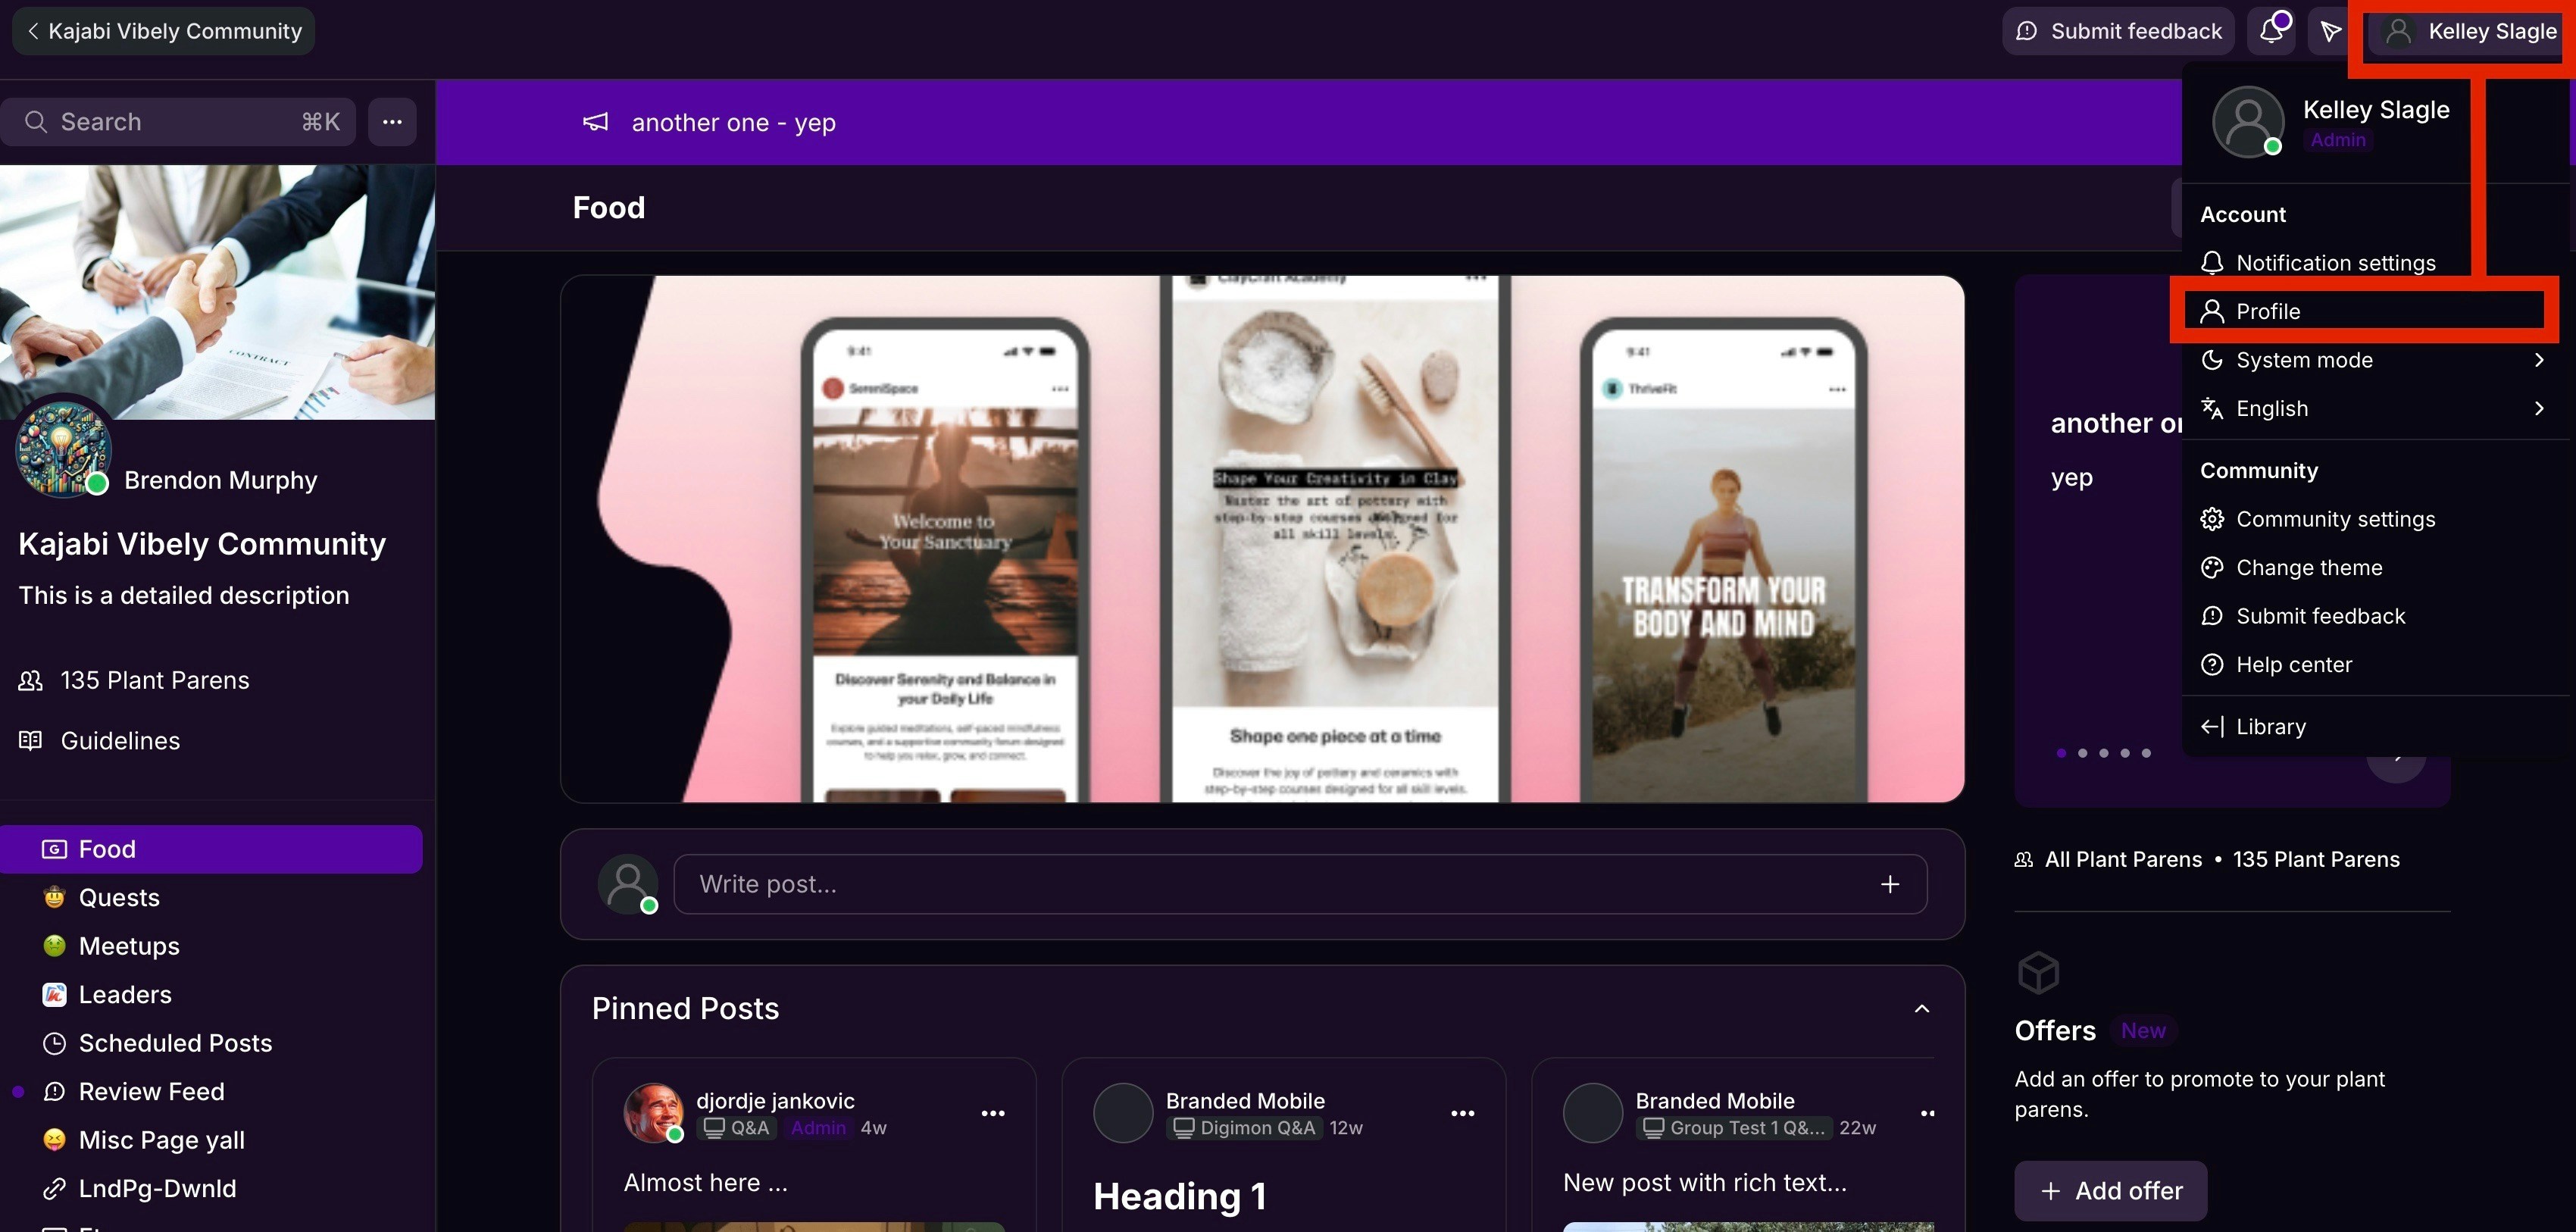
To update the Profile Photo for your Founder Profile:- Click the profile icon at the top right of the Community to open the options menu.
- Select Profile:
- Place your cursor over the Profile Photo and click Change photo:
- Select a photo in the file uploader.
- Click Save to apply your changes.
Add Social Links to a User Profile
To add social media account links to your User Profile page:- Click the profile icon at the top right of the Community to open the options menu.
- Select Profile.
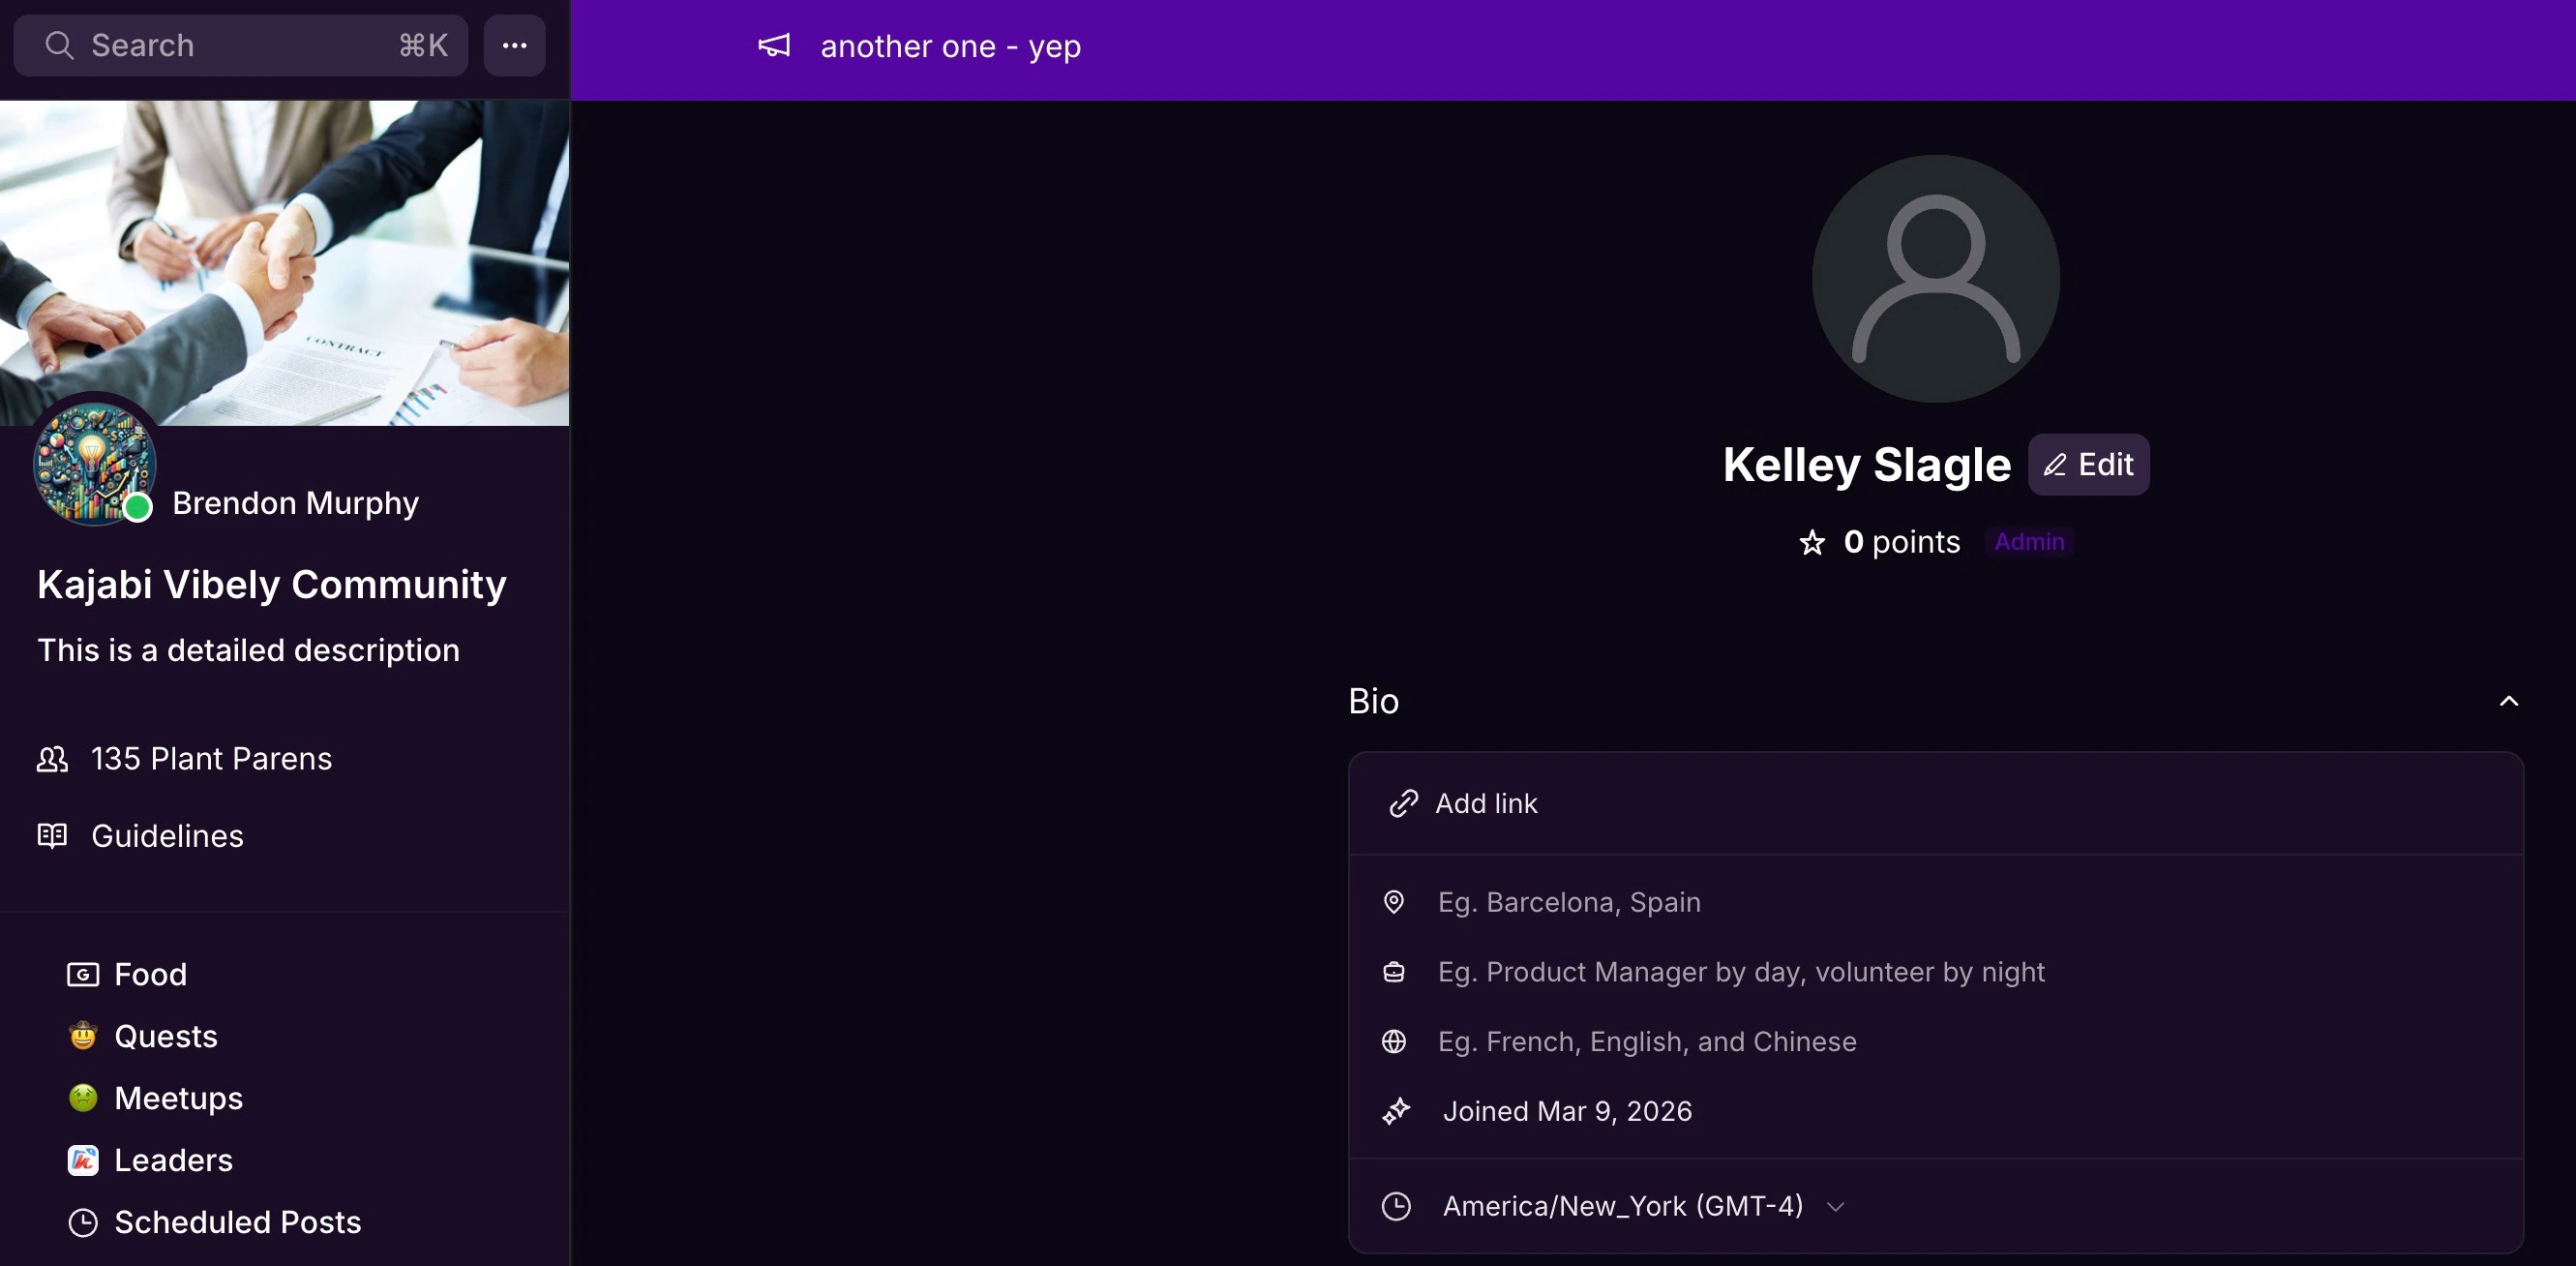
- Under Bio, click Add link.
- Enter your social URLs in the Social Link fields that appear.
- Click Save to apply your changes.
- To view your changes, click Back to community, then click your Profile Photo in the sidebar to open your Profile page.
Note: Any Social Links you add to your User Profile page will also appear on your Community sidebar.
Add Bio information
To add information about your personal interests to your Kajabi Community user profile page:- Click your profile icon at the top right to open the options menu.
- Select Profile.
- Under Bio, complete the relevant fields with personal information you wish to share, including your location, job, languages, join date, and timezone.
- Use the prompts provided below Bio to write about your personal interests and goals.
- Click Save to apply your changes.
- To view your changes, click the Community Title in the top left to return to the Kajabi Dashboard, then click your name in the top right corner to open your Profile.
Note: If you don’t immediately see your updates on your User Profile page, try refreshing your browser.
Control Push, In-app, and Email notifications
Choose to mute or unmute both Push and Email notifications for your Community’s Announcements, Challenges, Channels, Meetup Reminders, Live Room Alerts, and Direct Messages. To enable or disable these Community-related notifications:- Click your profile icon at the top right of the Community to open the options menu.
- Select Notification settings:
- Click the toggles next to Push, In-app and/or Email to adjust settings as desired for each Community feature:
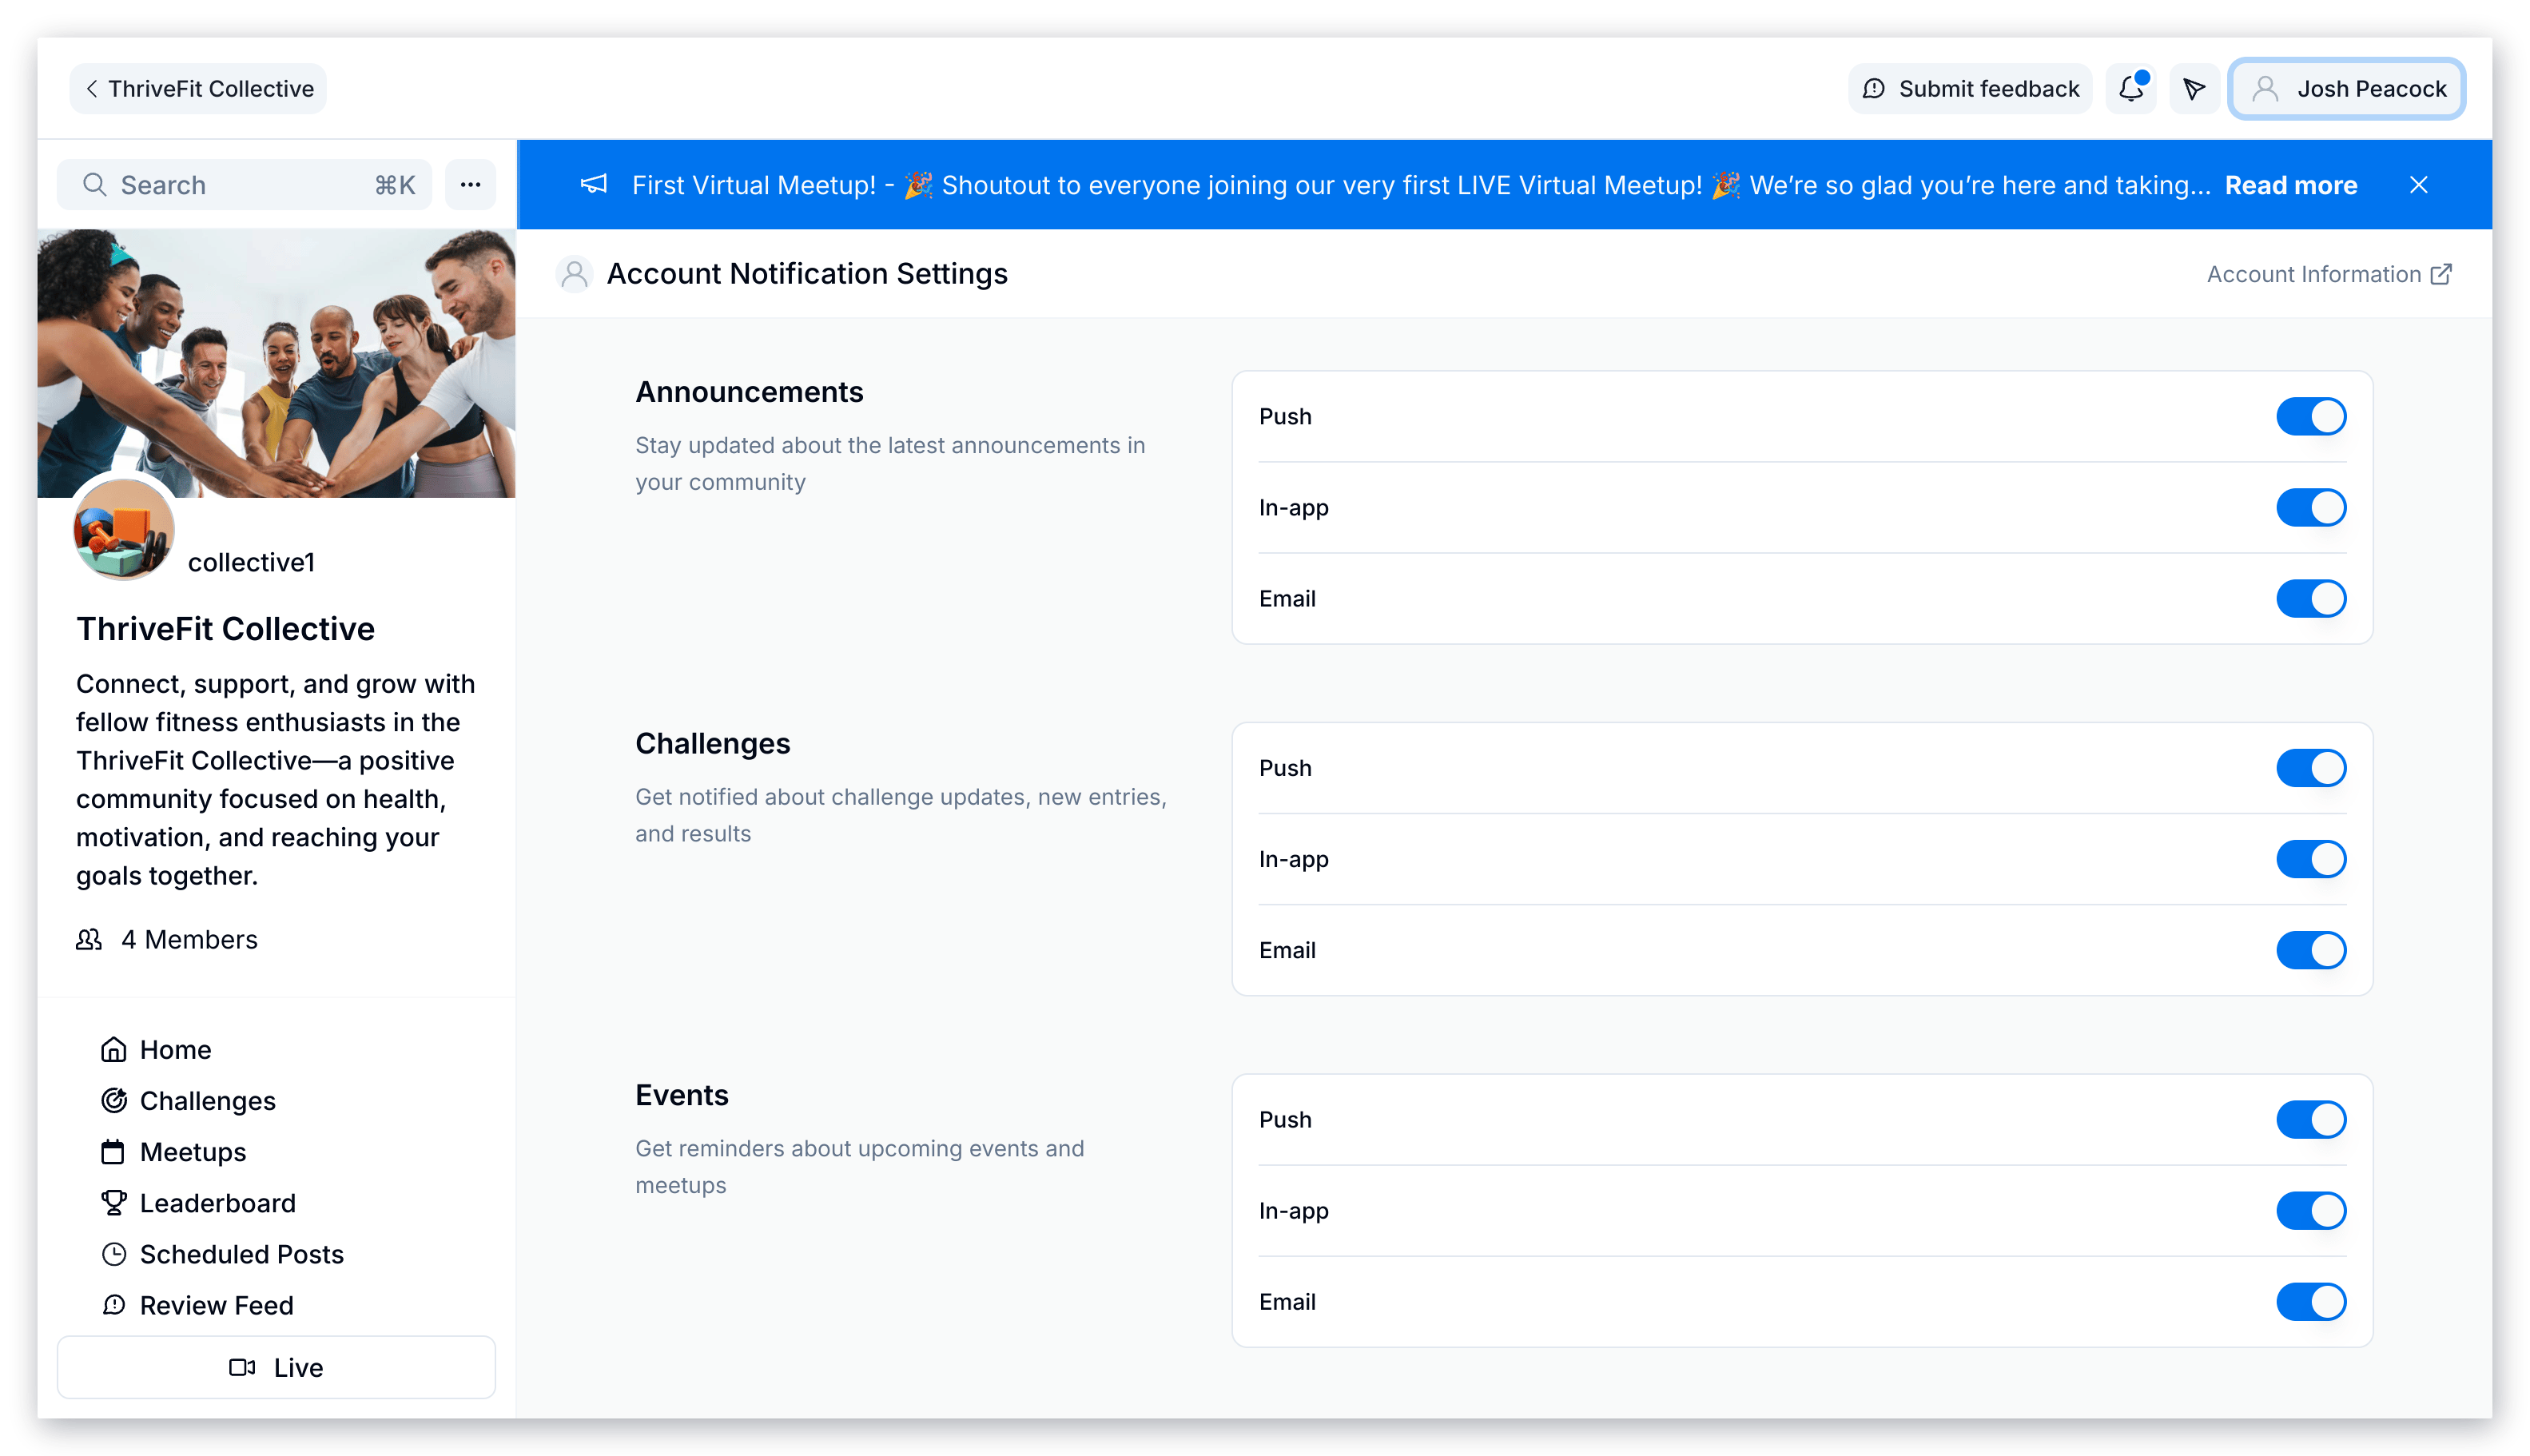
- Click Save to apply your changes.
Update User Profile Name
The User Profile Name that appears next to your personal Profile Photo in your Kajabi Community is automatically populated with your Kajabi Account Name. To update your Community User Profile Name, you’ll need to update your name in your Kajabi Account Settings. To update your User Profile Name:- Go to your Kajabi Dashboard and click Settings in the lower left sidebar.
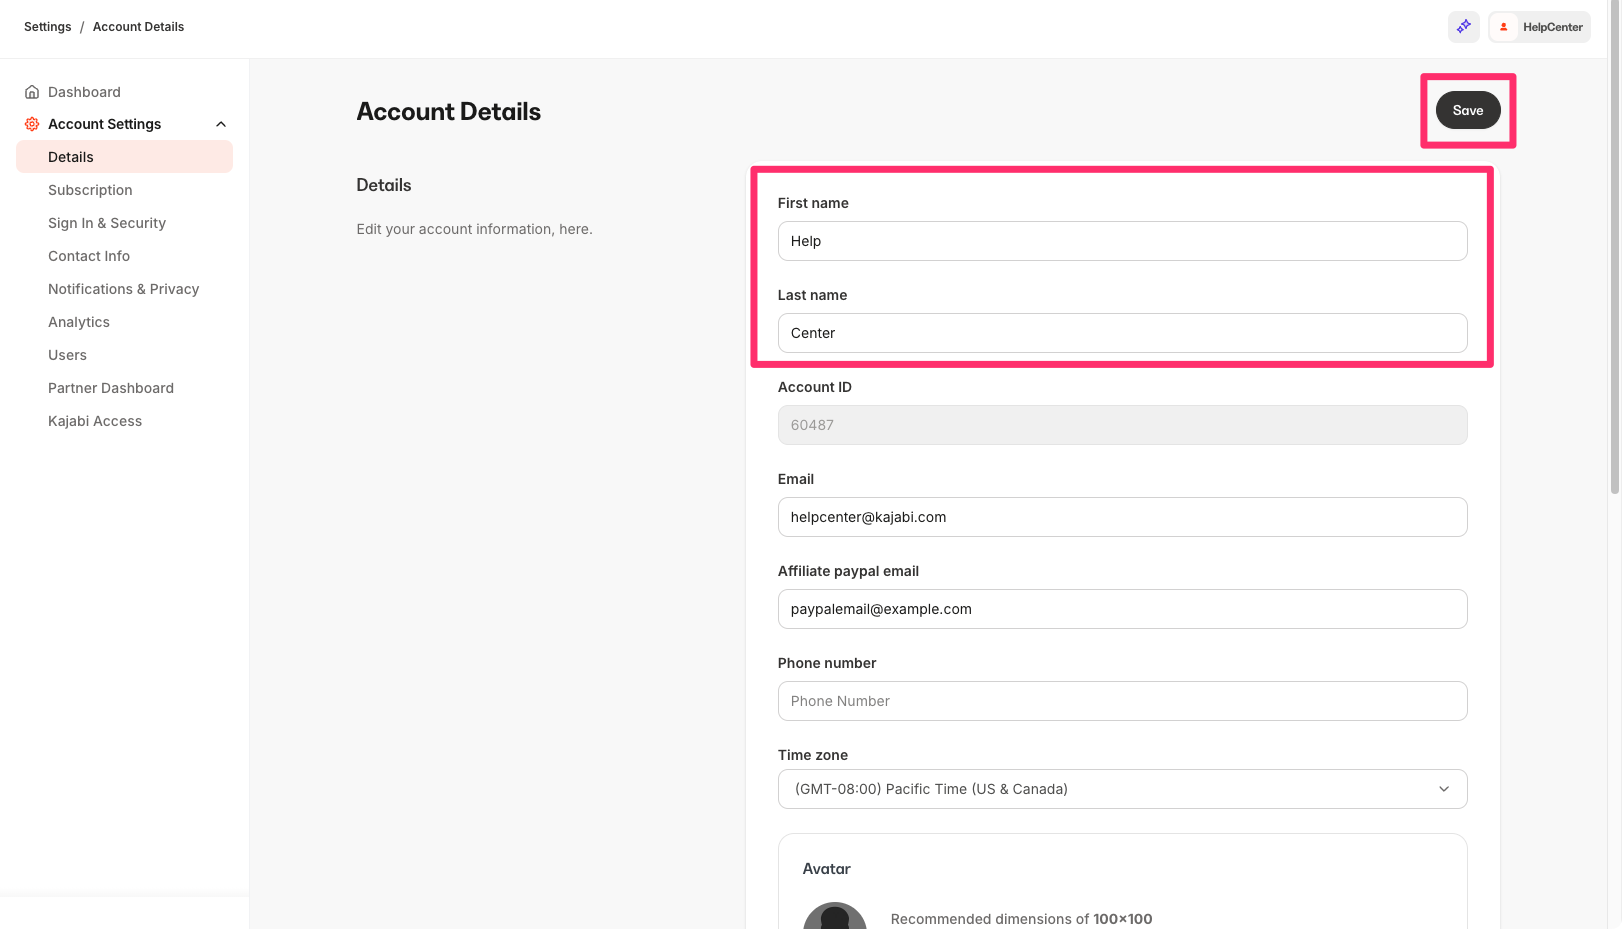
- Scroll down to Account Settings and select Account Details:

- Update your First name and Last name as you wish them to appear in your profile.
- Click Save to apply your changes:
Update Community Title, Description, and Cover Image
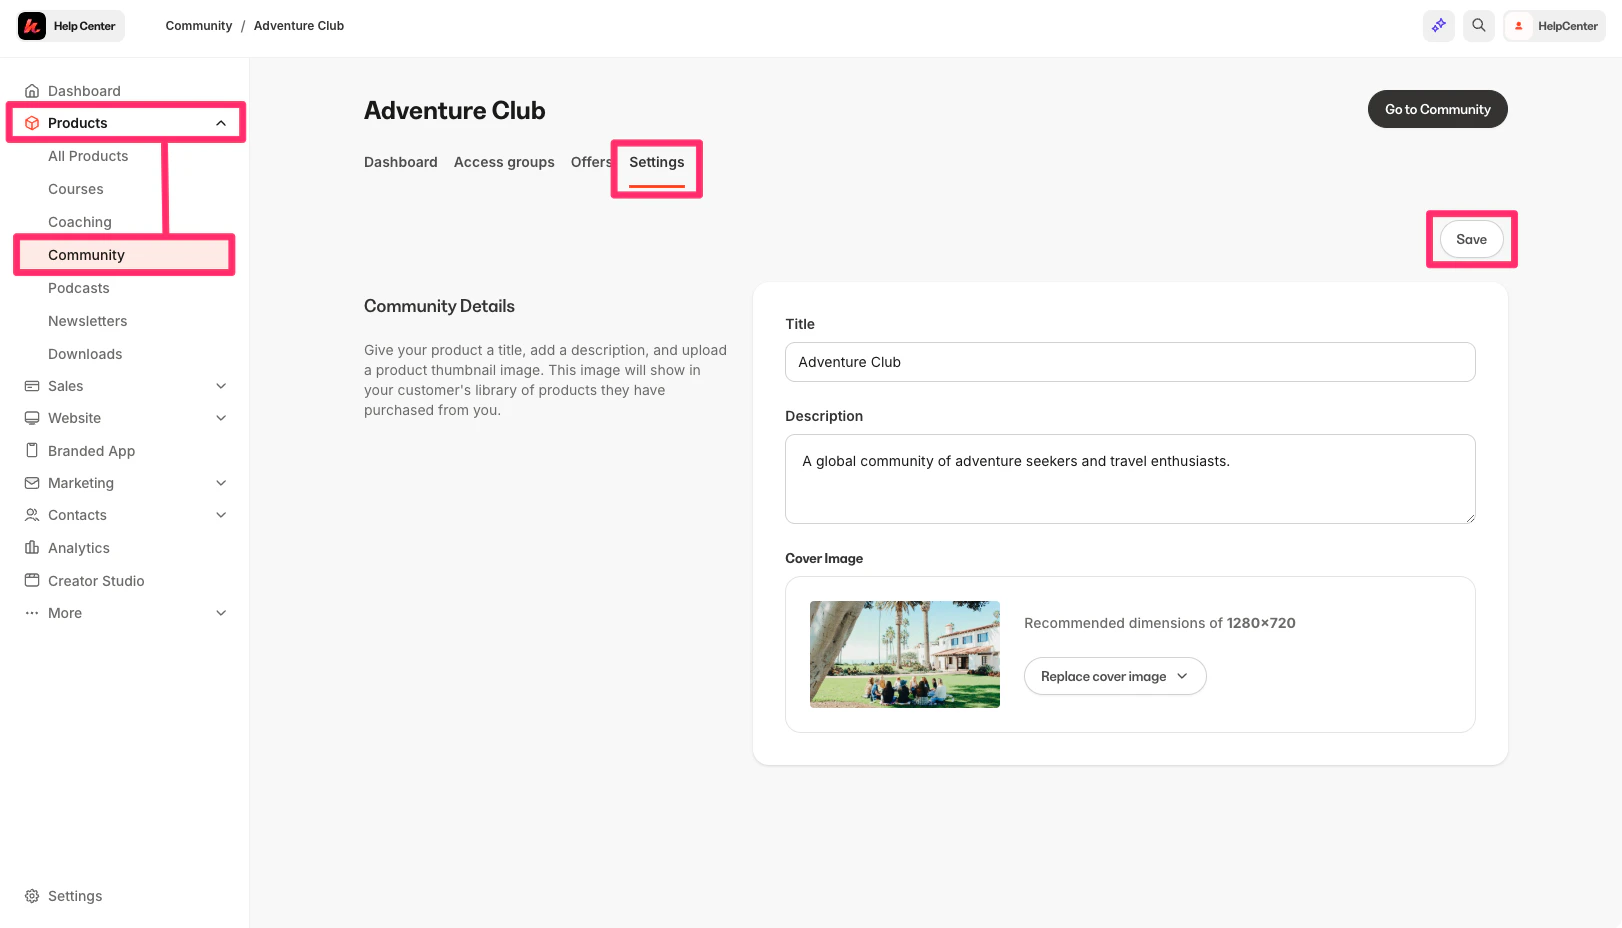
Your Community Title, Description, and Cover Image can be updated from your Community Product in the Kajabi app. To update the Community Name, Description, and/or Cover Image:- Go to your Kajabi Dashboard and select Products from the left sidebar.
- Then, select Community.
- Click the Settings tab in the top menu.
- Update the Title, Description, and/or Cover Image for your Community as desired.
- Click Save to apply your changes:
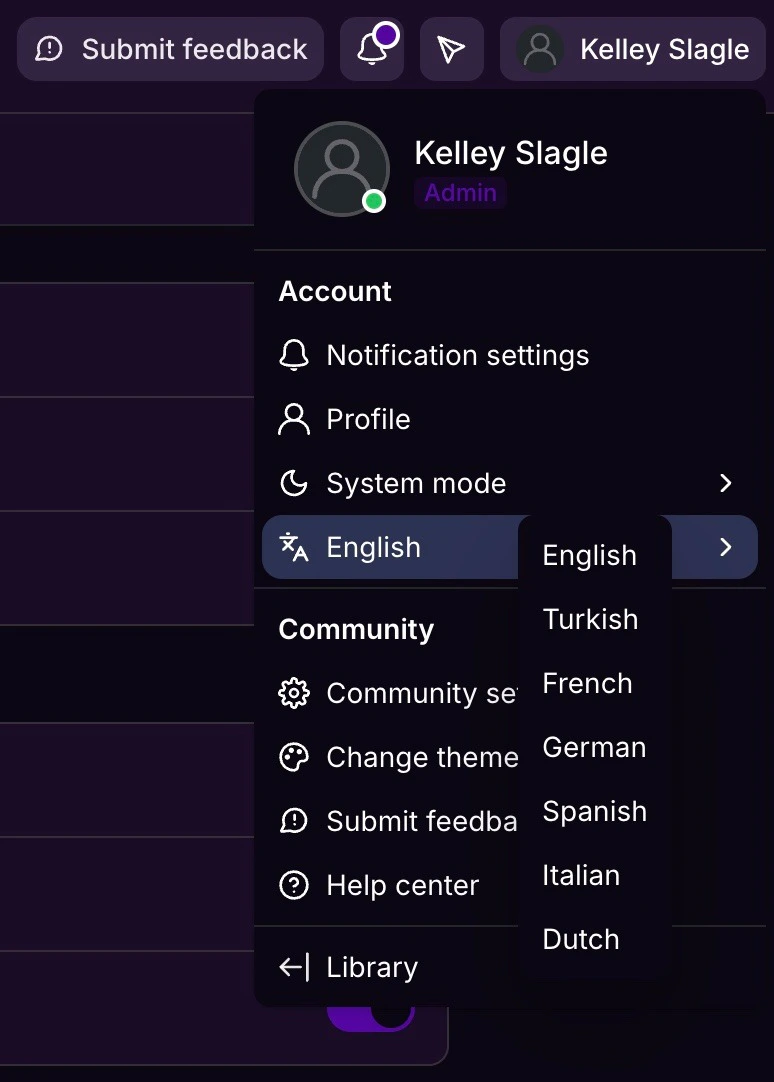
Select preferred language
Community members can view posts and items in the Community in their preferred language.Note: This setting changes the language for each individual Community member, not for all members.
- Click the profile icon at the top right of the Community to open the options menu.
- Click the language selector and choose a language from the dropdown.
- Kajabi Communities can display in English, Dutch, French, German, Italian, Spanish, and Turkish.