

Note: This article covers connecting a custom email domain. If you are looking to connect a custom domain to Kajabi, learn how to connect a custom domain.
Email domains
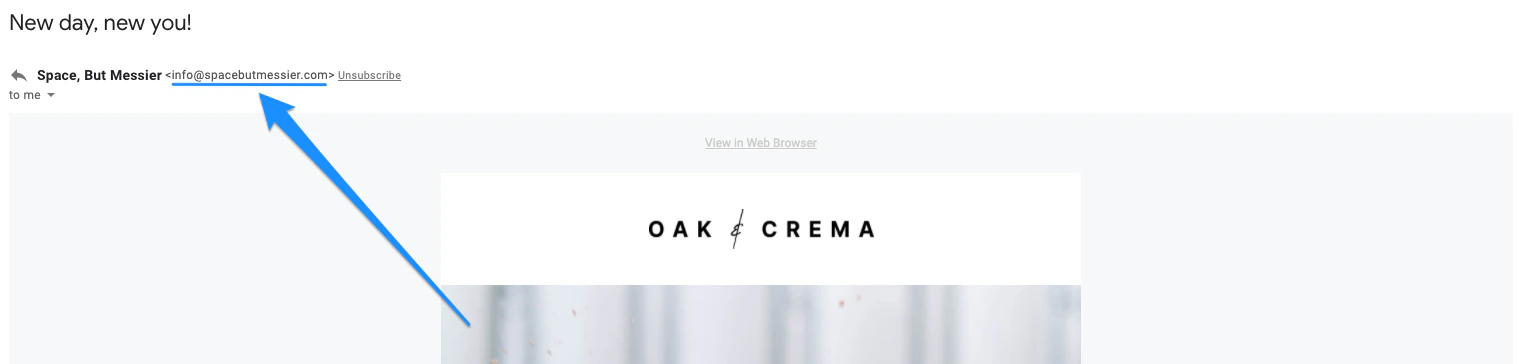
Custom email domains offer a great way to add credibility to your brand when sending marketing emails to your list. When you join Kajabi, you’re set up with Kajabi’s shared marketing email domain to benefit from the excellent sender reputation Kajabi has spent years building. Using Kajabi’s shared marketing email domain gives you the opportunity to build your own sender reputation as you scale your business. Kajabi Email Domain Example: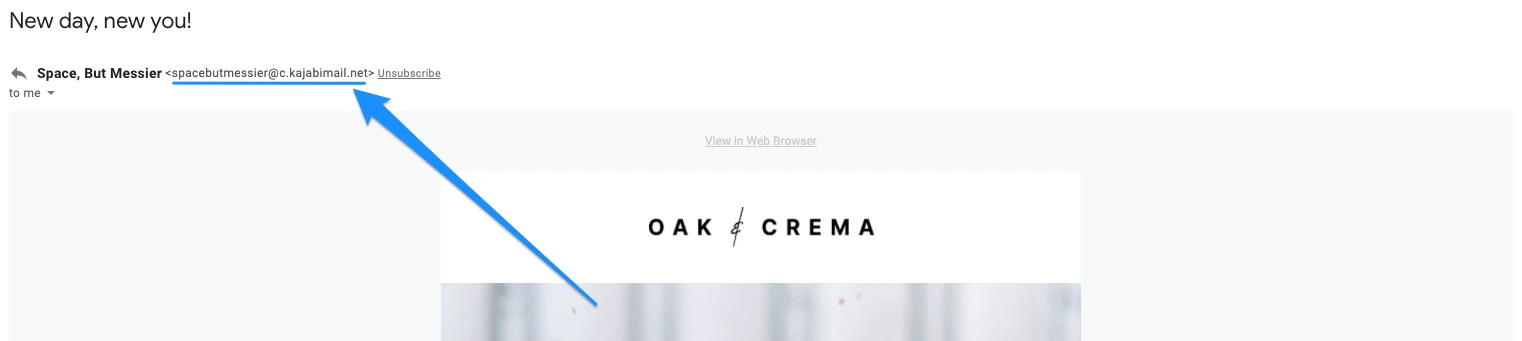
Why customize an email domain?
Building trust and credibility takes time and consistency. A custom email domain can help build trust and credibility with your email recipients by presenting a consistent, professional brand. Building trust and credibility is essential for any business. As an increasing number of people become familiar with your brand and the value you offer, using a custom email domain can encourage engagement with your marketing emails and improve your conversion rates.Note: We don’t recommend this feature if you’re sending only a few hundred emails or less per month so that you can continue to benefit from Kajabi’s sending reputation as you grow your list.
Create unique DNS records in Kajabi
In order to generate your unique DNS records in Kajabi, you must first add your custom email domain in your Kajabi Marketing Settings. To create your DNS records:- Open the Settings tab on the lower left of your Kajabi dashboard.
- Select Marketing Settings.
- Scroll down to the Email Settings section.
- Locate your Custom Email Domain settings.
- Input the From name, From email, and Reply-to email for your custom email domain.
- Then, click Setup Custom Email Domain.
- Your unique DNS records will appear on the Custom Email Domain Setup page:
Add DNS records to a domain registrar
To connect your custom email domain to Kajabi, you’ll need to add the following DNS records provided by Kajabi to your DNS provider:- Three TXT records
- Two MX records
- One CNAME record
- Connect a custom email domain with Bluehost
- Connect a custom email domain with GoDaddy
- Connect a custom email domain with Namecheap
- Connect a custom email domain with SiteGround
- Connect a custom email domain with CloudFlare
Note: Don’t delete or replace existing DNS records when you add DNS records provided by Kajabi.
What happens during the verification process?
The verification process can take up to 48 hours due to the timeframe for the Domain Name System (DNS) changes to propagate.What does this mean?
To create a successful connection:- A custom subdomain has been added to ensure that your records don’t interfere with existing domains.
- Your DNS changes must propagate, meaning that Internet Service Provider (ISP) nodes across the world must update their caches with your DNS information.
Can I send emails during this time?
Yes. As your custom email domain propagates, your marketing emails will continue to send via Kajabi’s shared marketing email domain.Can I make changes to my ‘from’ information during this time?
After updating your DNS records, you can continue to make changes to your “from name”, “from email”, and “reply-to email”. These changes will not impact your custom email domain setup. Regardless of your connection status (i.e. connection pending, error, or successful connection), you can continue to make changes to your ‘from’ information.How will I know when it’s done?
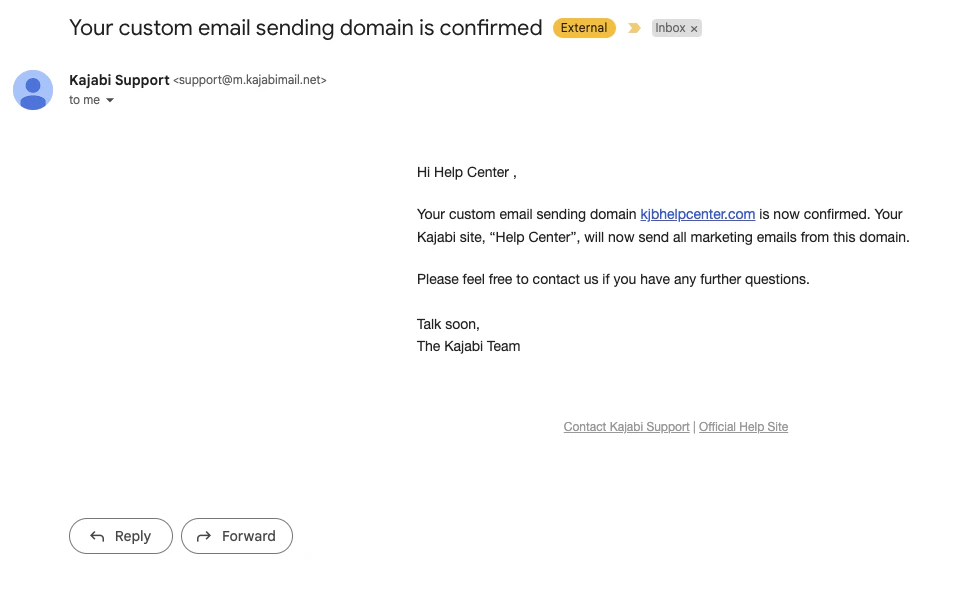
After the verification process has completed, you’ll receive an email notification from our support team:- Your custom email sending domain is confirmed
- There is a problem with your custom email sending domain
What if there’s a problem?
If there’s a problem verifying your email domain, Kajabi will notify you by changing the Marketing Email Domain Sending status to indicate that there’s been an error during the verification process: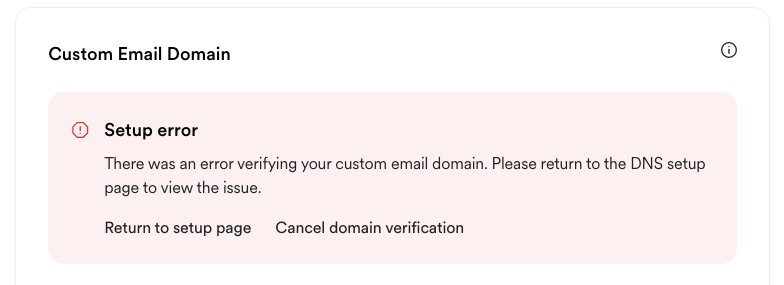
Remove a custom email domain
If you wish to remove your custom email domain and send your marketing emails with Kajabi’s shared marketing email domain instead:- Open the Settings tab from your Dashboard.
- Then, select Marketing Settings.
- Scroll down to Email Settings and locate your Custom Email Domain settings.
- Click Remove Custom Email Domain.
- Then confirm by clicking Continue: