

Overview
Invoicing is an all-in-one solution that lets you create, send, and manage invoices directly within Kajabi—where you already create and sell.Note:
Invoicing is exclusively available for Heroes using Kajabi Payments. Learn more about Kajabi Payments: Kajabi Payments Overview
- Offering a one-time discount on an existing offer to a customer
- Handling one-off payments, such as paying off a payment plan early or making a deposit
- B2B transactions, like speaking engagements or other services
- Flexible scenarios where custom pricing and direct billing streamline your business
Create an invoice
To create an Invoice:
- From your Kajabi Dashboard, go to Sales → Invoices
- Click + New Invoice
- Select or create a customer
- Add items:
- Search for existing offers or choose New offer to create one on the fly
- Click New item to add additional offers as line items to your invoice
- For each line item, set the Qty and Price. Use the trash icon to remove an item.
- Choose the due date and add an optional note
- Review the Summary:
- The Subtotal reflects all items and quantities
- If any item is taxable, the summary will reflect your selected tax treatment

Invoice statuses
Once created, Invoices move through a series of statuses as they’re created and processed. The basic lifecycle of an Invoice includes:- Draft: A newly created invoice starts with this status
- Open: Once you finalize and send the invoice to your customer, the status changes to Open. At this point, most details of the invoice can no longer be edited.
- Paid: After your customer pays the invoice, its status will automatically update to Paid, or if you collect payment for the Invoice outside of Kajabi you can mark it as paid.
- Void / Uncollectable (Optional): You have the option to manually change the status of an unpaid invoice to either Void or Uncollectable if needed.
Draft
When your invoice is in Draft, it has not yet been sent to your customer. While in this status, any part of the invoice can be edited. When the invoice is ready, it can be finalized and sent; a draft invoice cannot be paid: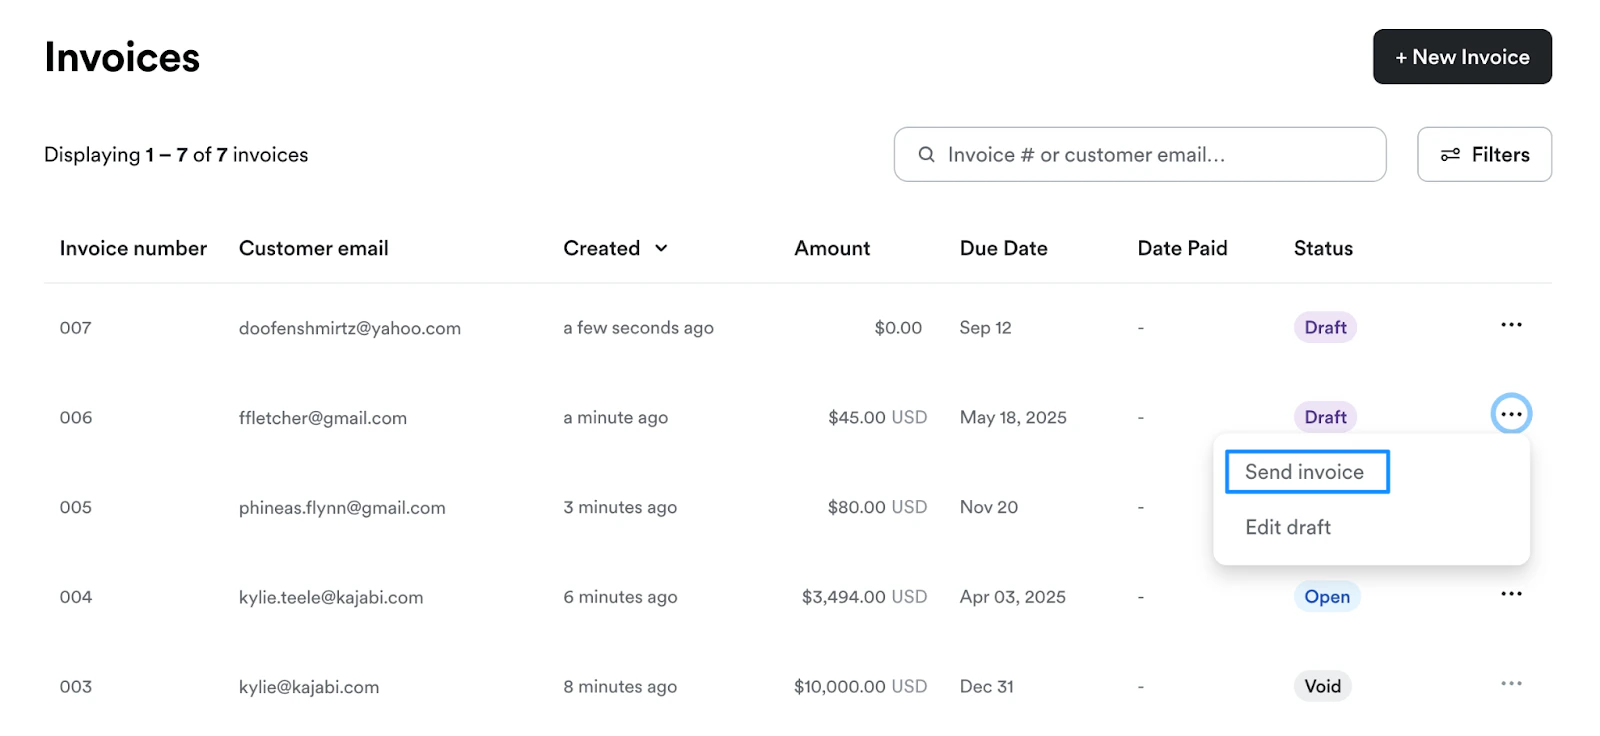
Note:
Once sent, an invoice cannot be moved back to draft status.
Open
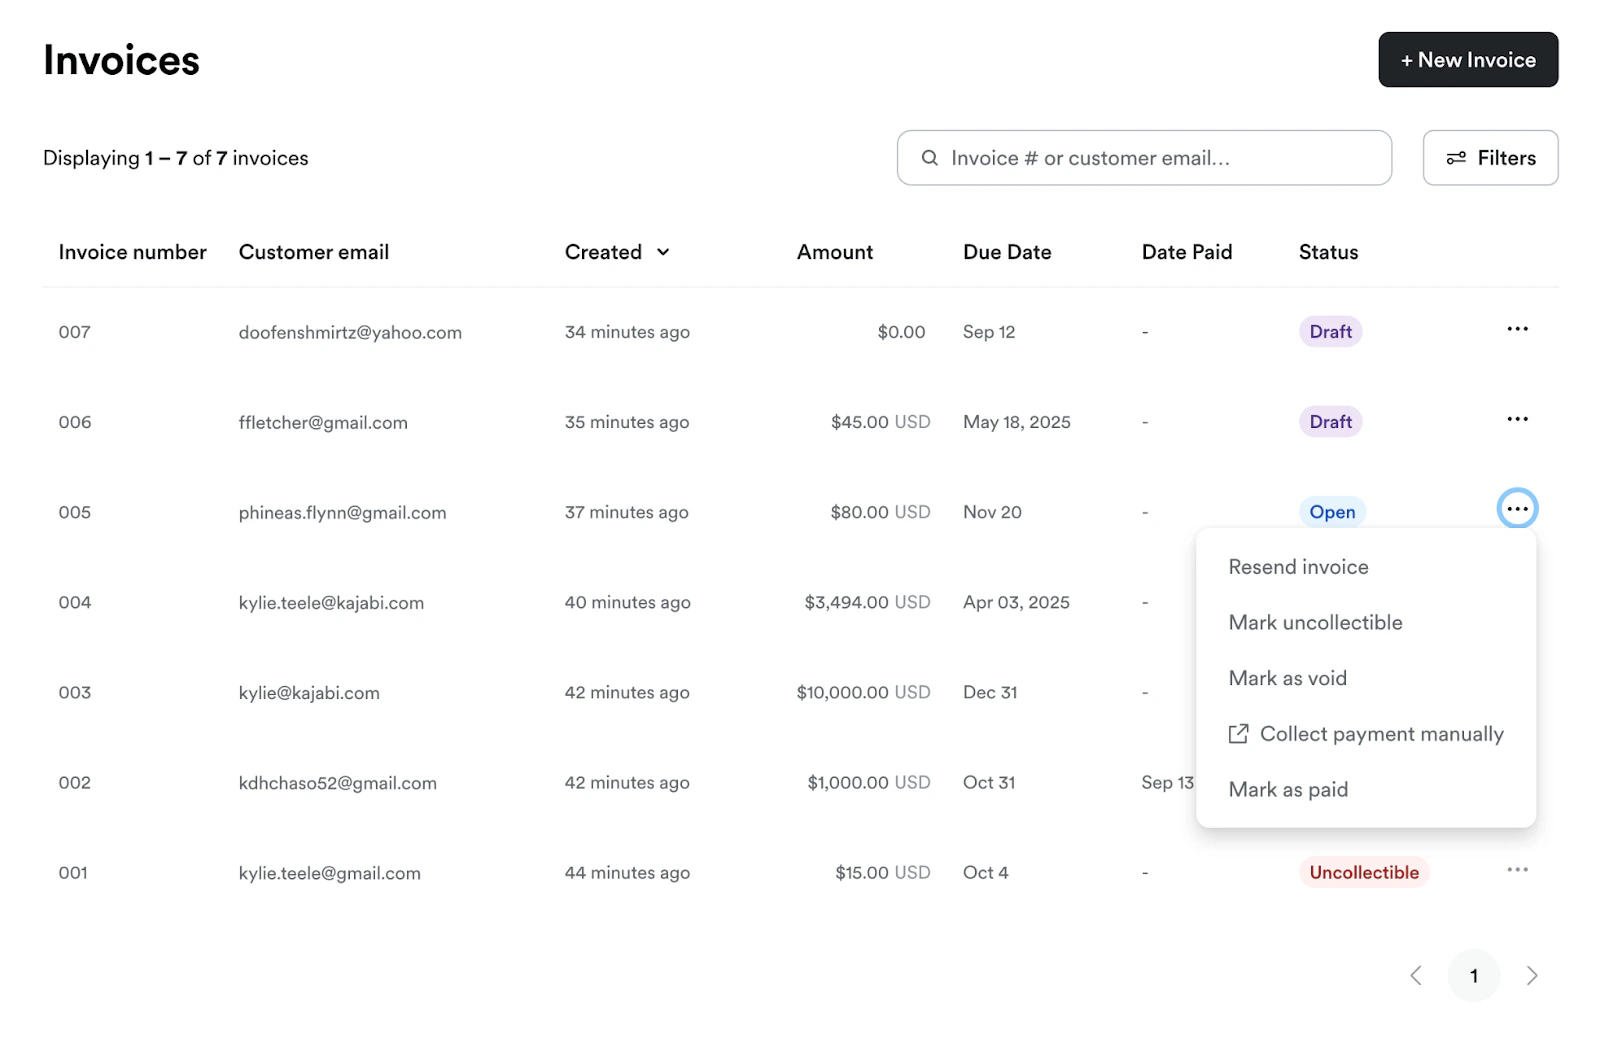
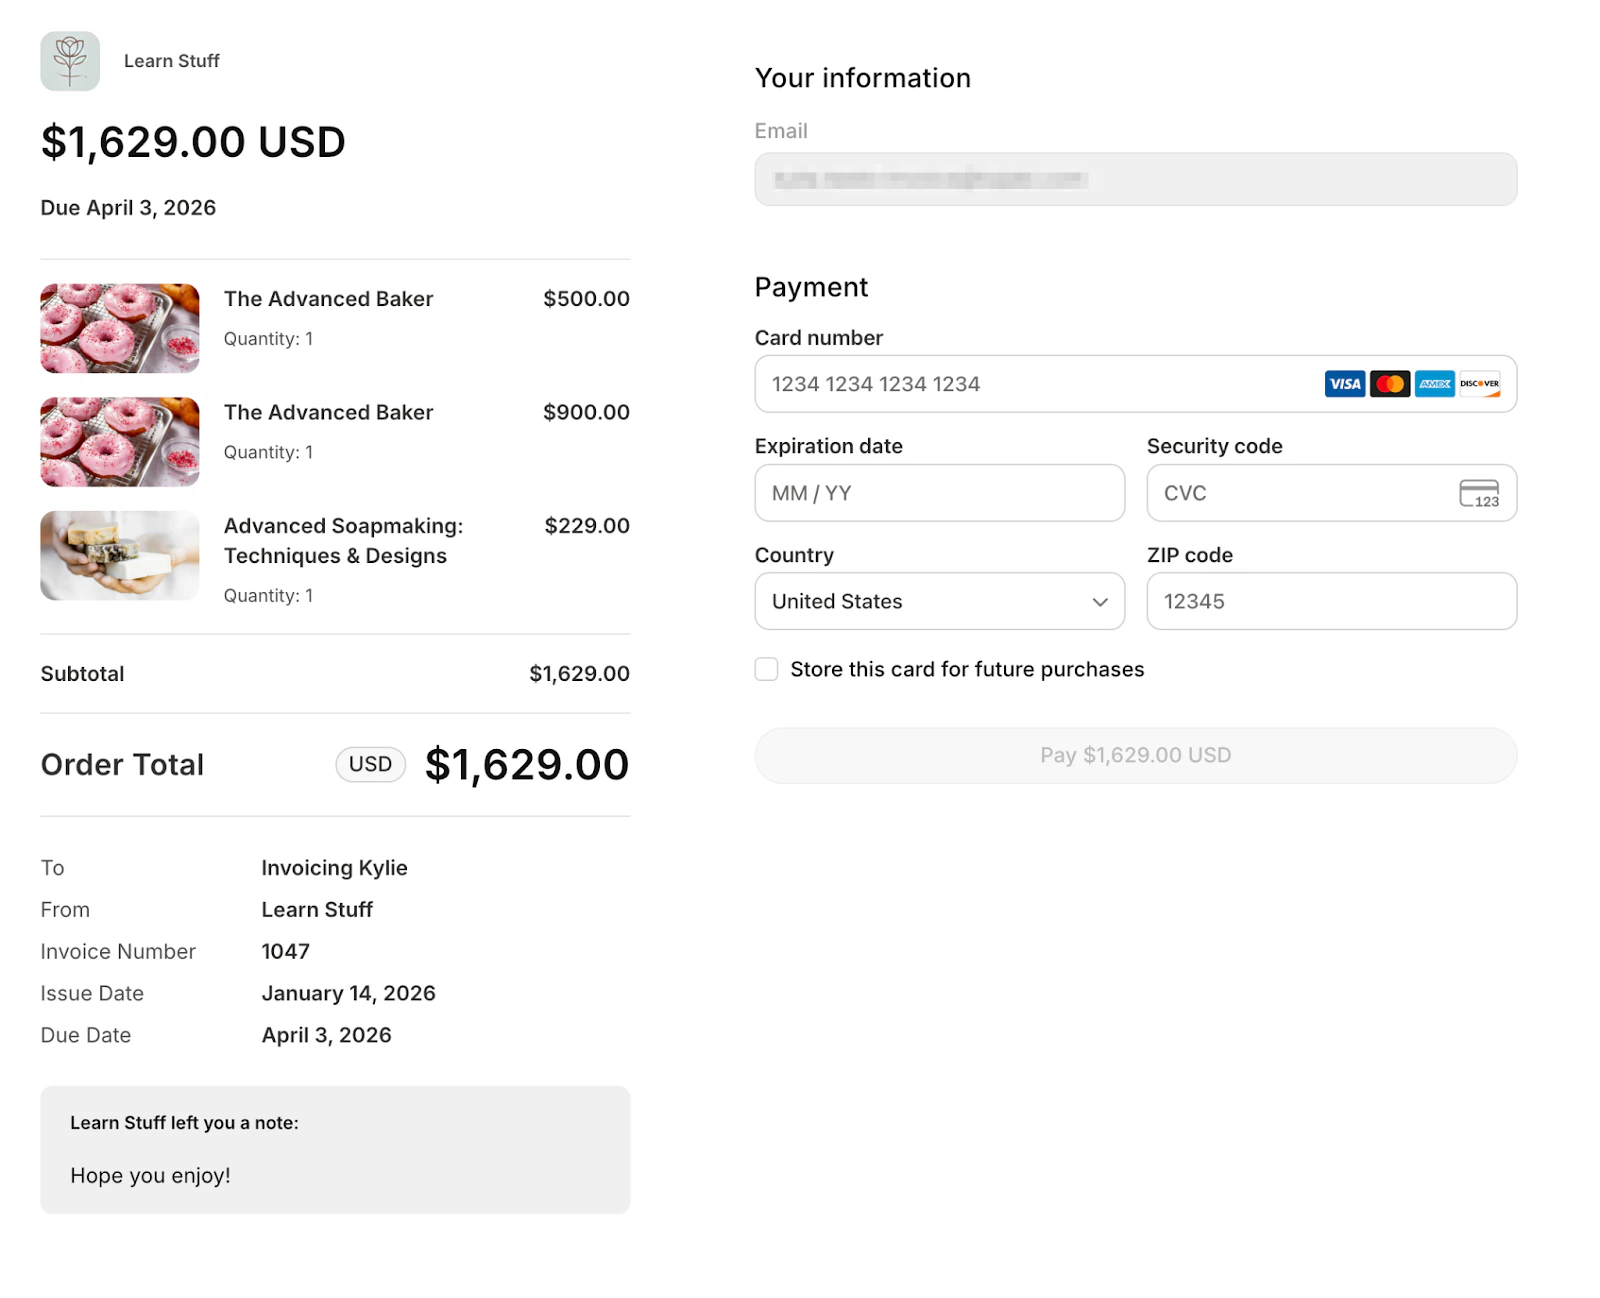
Once an invoice is sent, its status changes to Open. In this state, the invoice has been finalized and is awaiting payment from the customer. Finalizing and sending the invoice generates a unique URL for your customer to pay. After an invoice is sent, it cannot be altered. However, you can manage an open invoice using the following options:- Resend invoice: Send the same invoice email again to the recipient
- Mark as Uncollectible, Void, or Paid
- Collect payment manually: This opens the checkout form where you can manually enter your customer’s payment information
Note:
If you’d prefer to send your customer a direct link to the checkout page, click Collect payment manually to access the checkout page URL, which you can copy and send. This is also where you can preview the checkout experience from your customer’s perspective.
Paid
An invoice’s status changes to Paid once the customer completes payment. This status is terminal, meaning it cannot be altered:
Note:
Mark as PaidIf a customer pays through an external method (e.g., paper check), you can manually mark the invoice as Paid to reflect the transaction in Kajabi. Marking an invoice as paid ensures consistency, but keep in mind that these manually paid invoices will not appear in Kajabi’s analytics and reporting, as the transaction took place outside Kajabi.
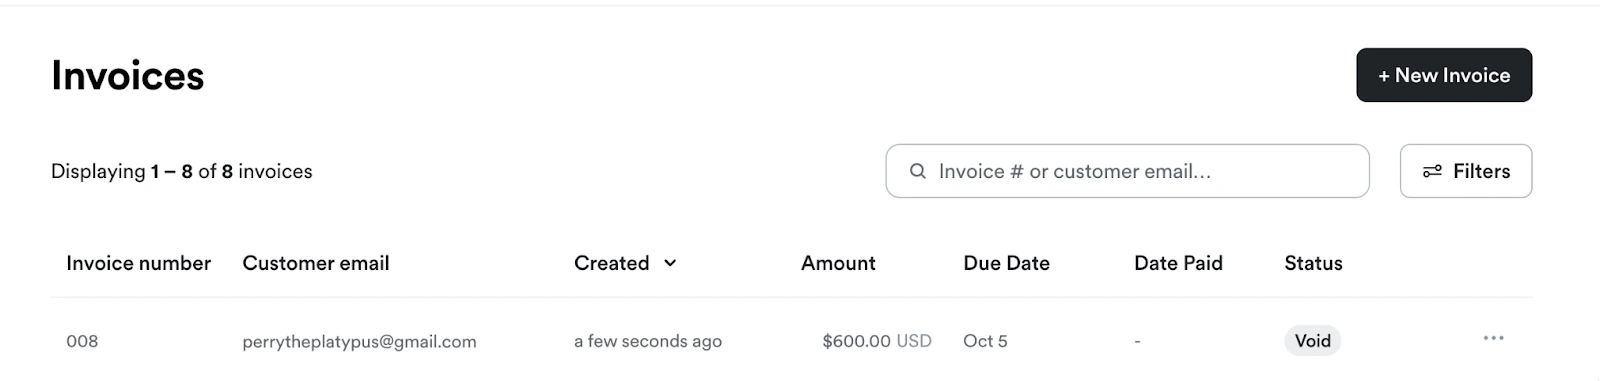
Void
Voiding an invoice is like canceling or deleting it, but it leaves a paper trail for future reference. You might void an invoice if it was sent by mistake or if updates are needed. Only invoices in Open status can be voided. Voided invoices cannot be reopened or edited. To void an invoice:- Navigate to the Sales tab in your Kajabi Dashboard
- Select Invoices
- Select the desired invoice, click on the … menu, then choose Mark as void
- The Invoice cannot be edited, and its status cannot be changed
- The invoice will no longer be payable
- The unique invoice URL becomes inaccessible
- No notification is sent to the customer
- The invoice is treated as zero-value for reporting purposes but remains accessible on the Invoice Page with a clear Void status
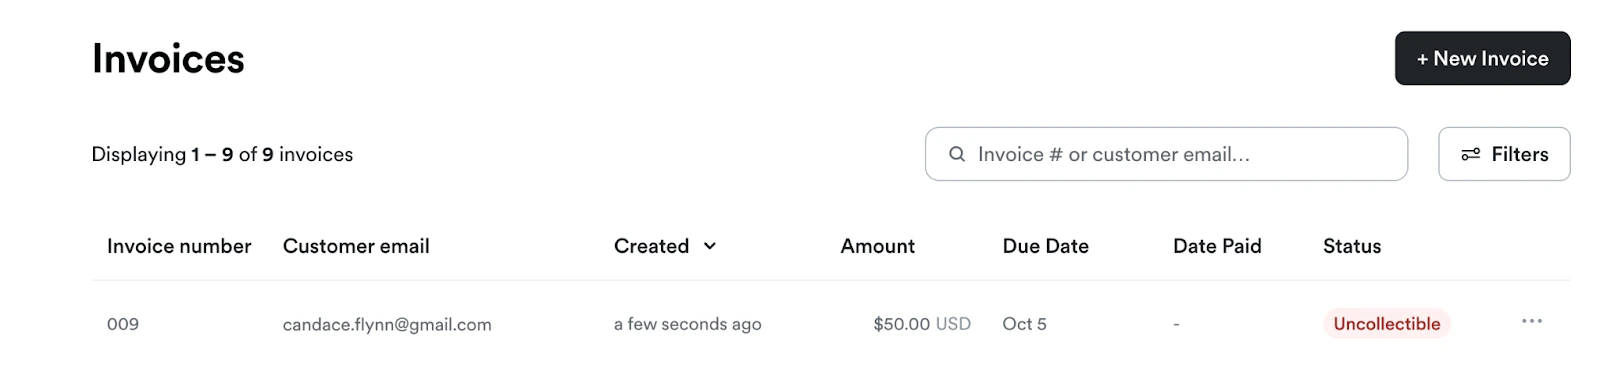
Uncollectable
Sometimes a customer is unable to pay. If you determine that an invoice is unlikely to be paid, you can update its status to Uncollectable. This helps track bad debt for reporting purposes. To mark an Invoice as Uncollectible:- Navigate to the Sales tab in your Kajabi Dashboard
- Select Invoices
- Select the desired Invoice, click on the … menu, then select Mark uncollectible
- The Invoice cannot be edited, and its status cannot be changed
- The invoice will no longer be payable
- The unique invoice URL becomes inaccessible
- No notification is sent to the customer
- The invoice is treated as zero-value for reporting purposes but remains accessible on the Invoice Page with a clear Uncollectable status
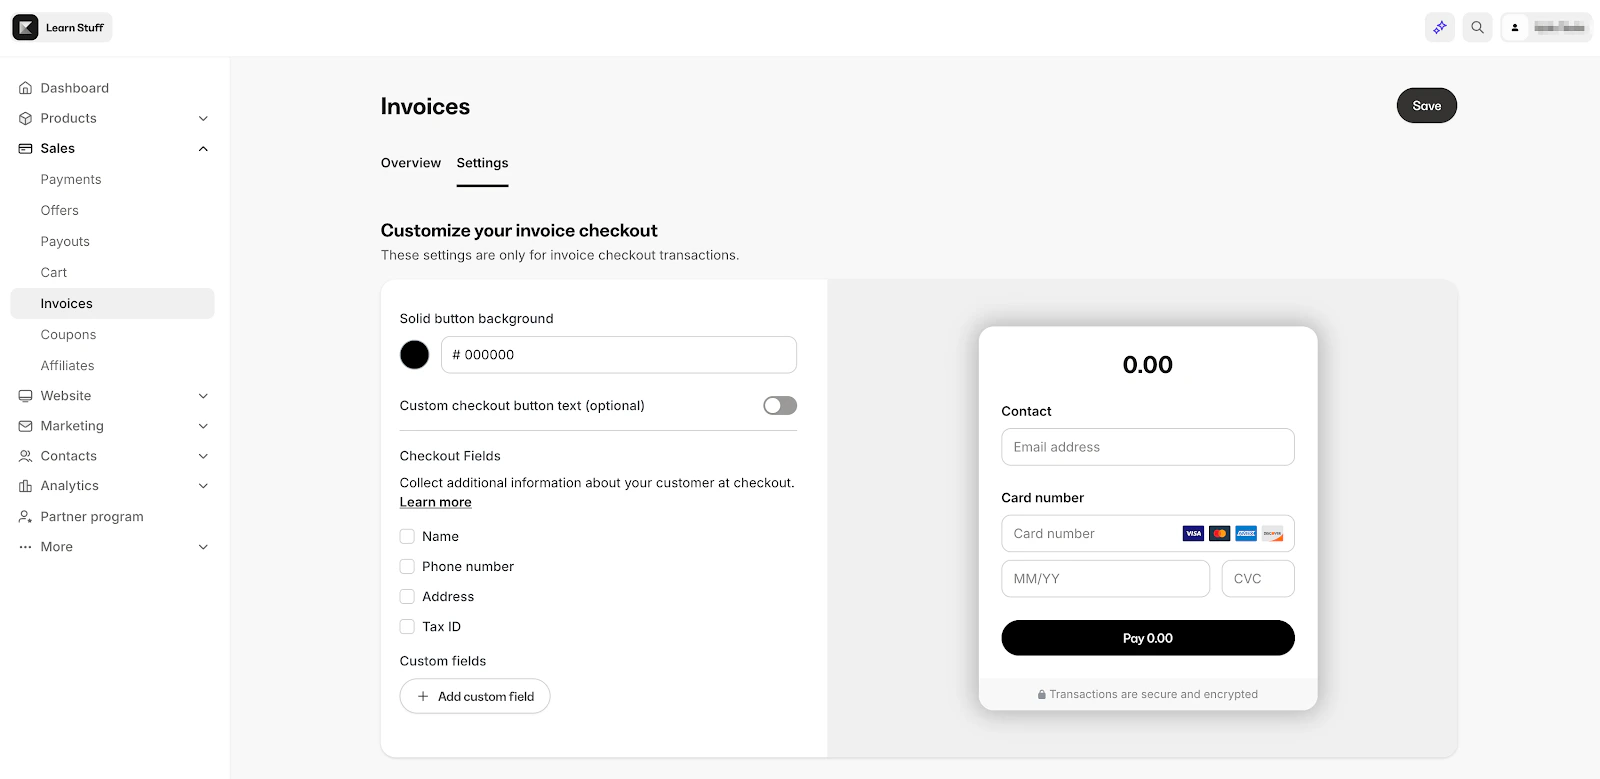
Invoicing settings
You can customize and configure defaults for invoices from the Invoice Settings page to ensure your checkout looks and functions the way you want it to.Customize Invoice Settings
- From your Kajabi Dashboard, go to Sales → Invoices → Settings
- Customize your checkout button color and text
- Checkout fields - Choose additional customer fields you want to collect at checkout (Name, Address, Phone, Tax ID, or add a custom field)
Note:
- An email address is always required and cannot be deselected.
- If you are using Kajabi Payments’ Sales Tax tool, the address field will still appear in checkout, even if it’s not selected here, in order to calculate tax.
Select payment providers
Select the payment options that will be available on your Invoices.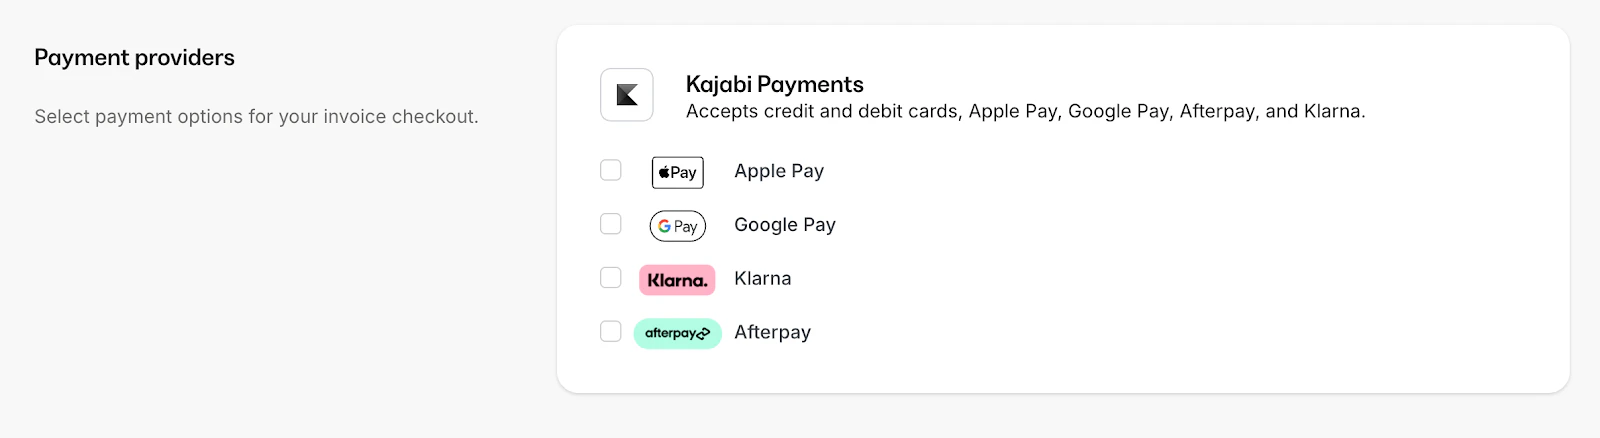
Note:
This setting will override the payment provider settings on any existing offers added to an invoice.
Add a service agreement
Customize to require your customers to consent to the Terms and Conditions policy for your business.
Sales tax
If you are using Kajabi Payments’ Sales Tax tool:- Check Include tax in the offer’s price if you want tax to be included in the offer price. If left unchecked, tax will be added on top of the price at checkout for all taxable offers.
- This setting overrides individual offer tax settings and applies to all invoices. Learn more about charging tax with Kajabi Payments.

Invoice email reminders
With invoice email reminders, you can automatically send up to three reminder emails to customers about unpaid invoices. These reminders can be customized to go out at specific intervals before, on the day of, or after the invoice due date. If you choose not to customize the timing, the default invoice email reminder settings are as follows:- 3 days before the due date
- On the due date
- 7 days after the due date
- From your Kajabi Dashboard, go to Sales → Invoices → Settings
- In Invoice Setting, toggle ON Send a reminder email if a one-off invoice hasn’t been paid.
- Use the drop-down menu to choose when the reminder email should be sent
- Click Add Reminder+ to add another reminder email to be sent. The maximum number of emails is 3.
- Remember to save your changes

Note:
Want to be notified when your customers receive an invoice reminder email? Enable notifications in your Account Notifications & Privacy settings. Learn More.
Customer experience with invoicing
When you send an invoice to your customer, they will receive an email with the details of the invoice, including a clear breakdown of the amount due and the due date. The email will look something like this: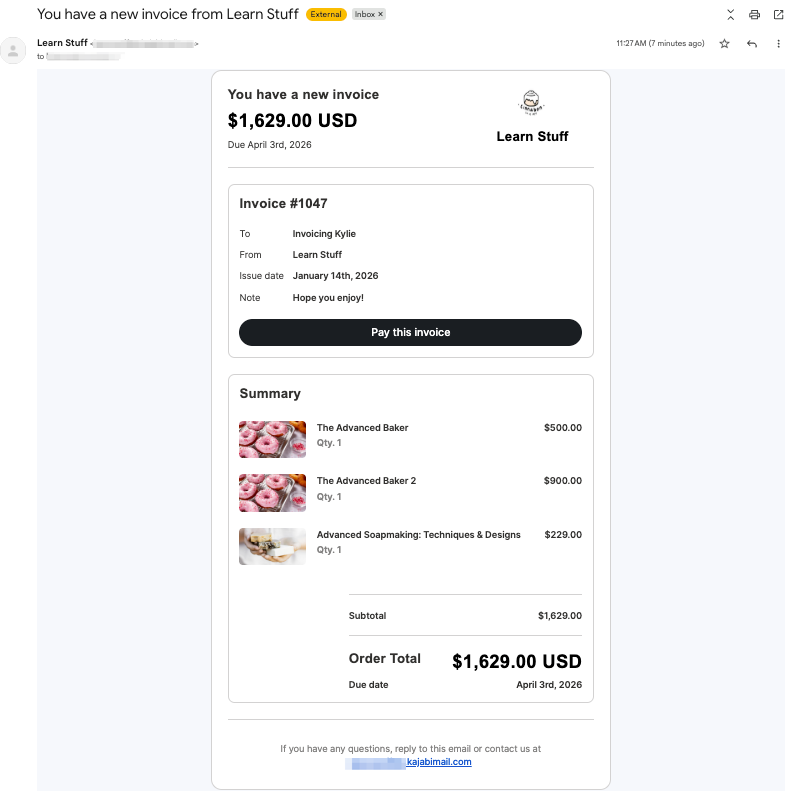
- Your customer will receive a confirmation of the payment
- If the invoice is linked to a product in Kajabi, they will immediately gain access to that product or service through their Kajabi account
- This seamless process ensures a smooth and professional experience for your customer, from receiving the invoice to completing the payment and accessing their purchase