

Newsletters help you grow your business by reclaiming control of your content and audience. Take back ownership from social media platforms while building a direct relationship with your subscribers through consistent, valuable written content. Think of a Newsletter as the digital version of a magazine subscription. Readers discover your content, subscribe for regular delivery, and become part of a growing audience you fully control. As your subscriber base expands, you can monetize your content — just as magazines use ads and other value-driven strategies.Documentation Index
Fetch the complete documentation index at: https://help.kajabi.com/llms.txt
Use this file to discover all available pages before exploring further.
Newsletter vs. Newsletter posts
With Kajabi, a Newsletter is like a magazine brand, and Newsletter Posts are individual issues released on your publishing schedule (weekly, monthly, etc.). Your Newsletter contains all of your Newsletter Posts: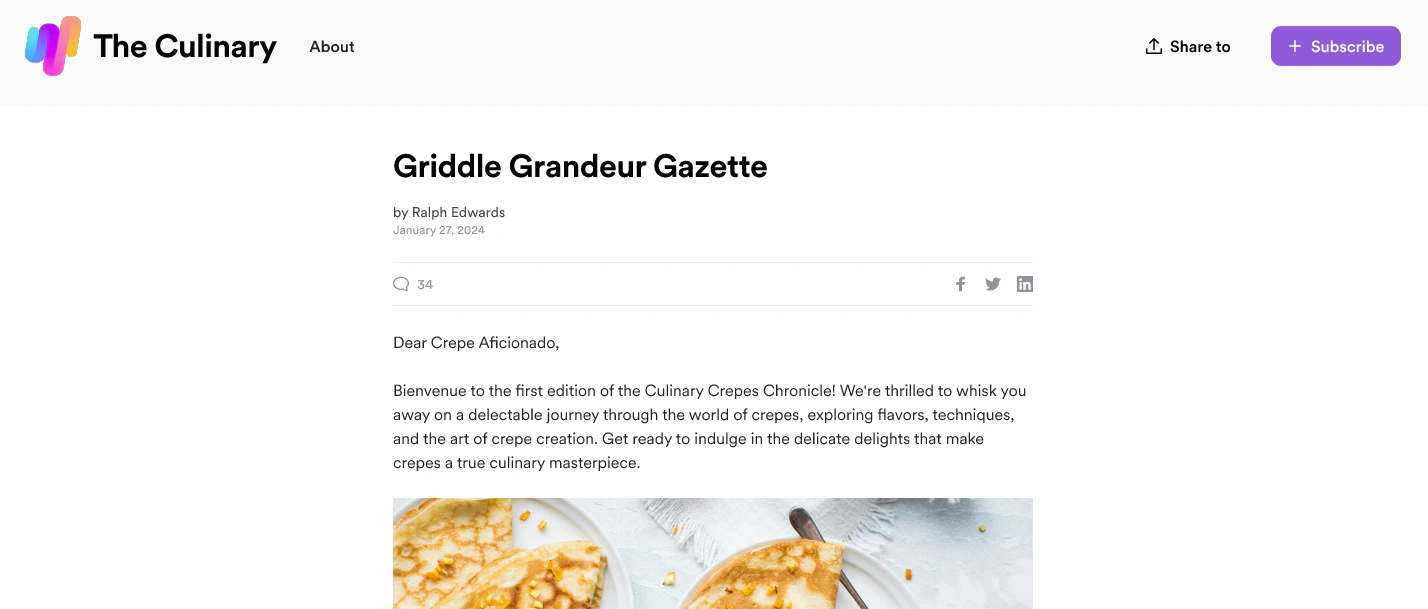
Note:
Newsletter monetization is coming to Kajabi in a future update.
What Newsletter readers see
Use your Newsletter as a tool to build your list and kickstart your business by making it your website homepage. By default, your Newsletter page uses your website theme’s home page. Learn to change your homepage. This brings visitors directly to your Newsletter for a frictionless experience. Visitors can consume your content and subscribe directly from your Newsletter page: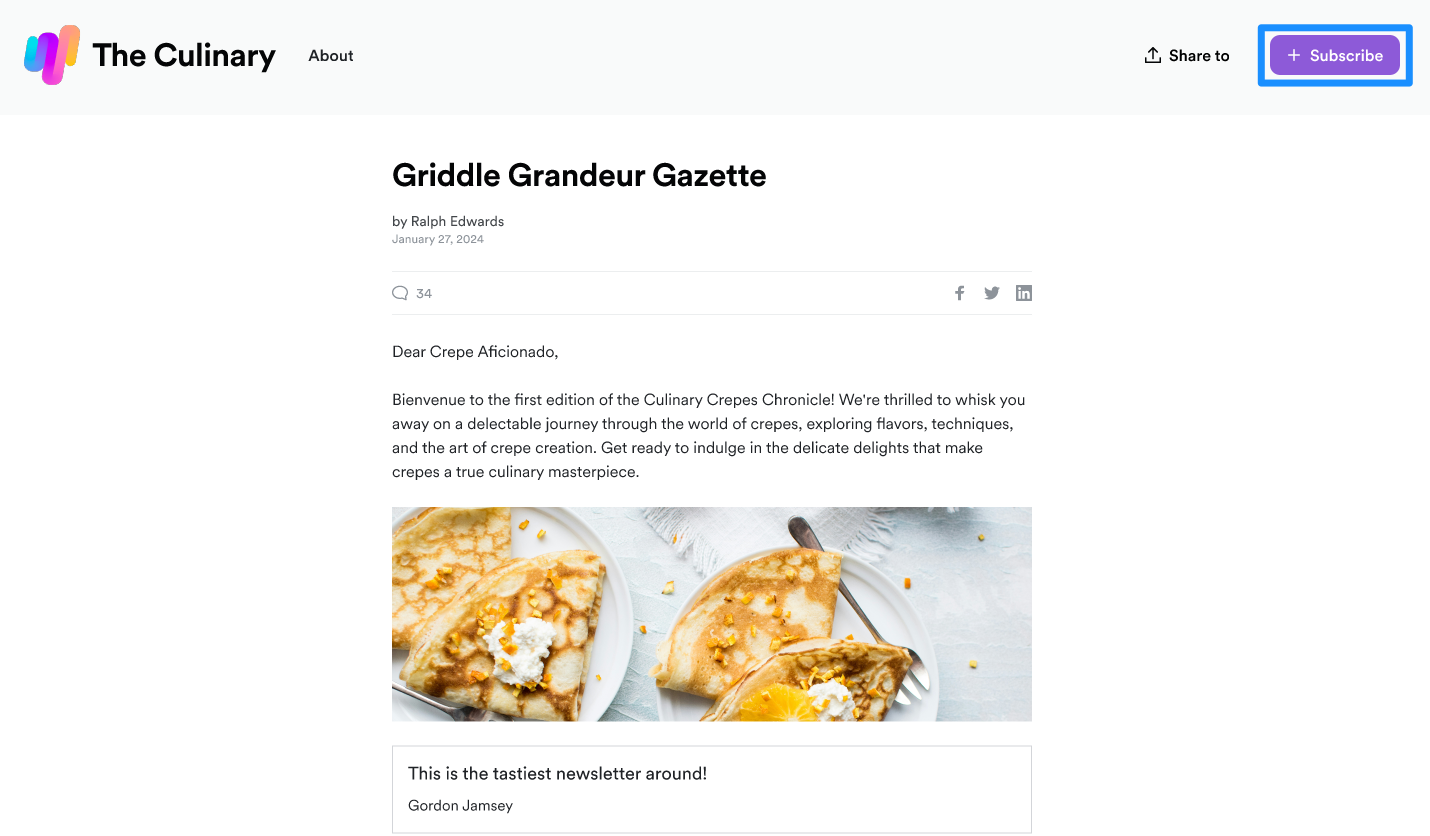
Note:
Double Opt-in is set up by default to ensure that your subscribers receive your Newsletter and strengthen your sender reputation. Learn more about Double Opt-in.
Create a Newsletter
Your first three Newsletter Posts have been pre-generated by Kajabi. From here you can edit those pre-generated posts or create a post from scratch.Create a Newsletter Post
- Open the Products tab from your Dashboard
- Open the Newsletters tab
- Click New post
Customize a Newsletter
Your account has a website theme designed specifically for Newsletters. Themes control how your written Newsletter content is viewed on the web. Kajabi offers additional website themes that you can explore and customize further. If you signed up for Kajabi Newsletters Beta before May 1st, 2023, you need to install the Scope website theme. Learn how to install a website theme.Design the member experience
Customize the member experience with your Newsletter Product by editing your Website Theme and designing a look and feel consistent with your brand and voice.Edit the website theme
- Open the Website tab from your Dashboard
- Click Design
- Click Customize in the corner of your Design page
- Use the left sidebar to customize the look and feel of your Newsletter page
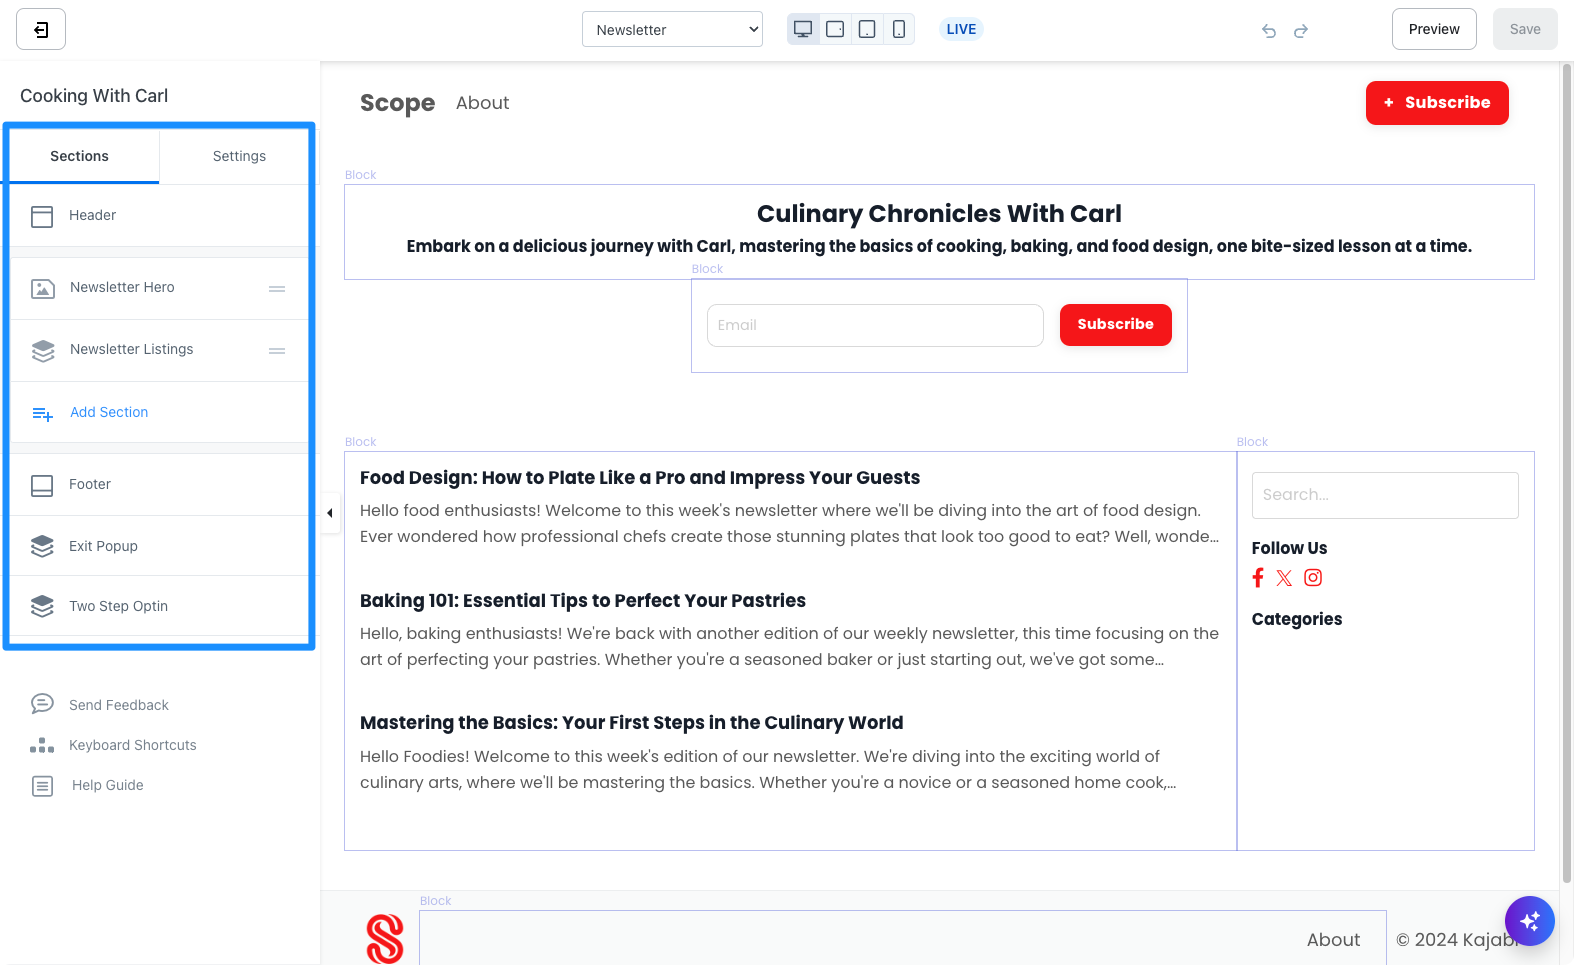
- Use the page selector at the top of the builder to navigate between different page views
Note:
Your Website Theme gives you the best preview of the member experience with your Newsletter. As you create Newsletter Posts, the text appears plain in the Newsletter Builder, but you can customize the appearance within the Website Theme to match your brand and voice.
Newsletter text editing
Customize your text with the Newsletter rich text editing tool. As you develop content, you can quickly apply formatting with the forward slash (/) to create blockquotes, highlights, lists, and more.Use the rich text editing tool
- Open the Products tab from your Dashboard
- Open the Newsletters tab
- Click New post or select a drafted post
- Press Enter to place your cursor on a line
- Press the command key (⌘) + forward slash (/) on your keyboard
- Select your desired stylization from the pop-up
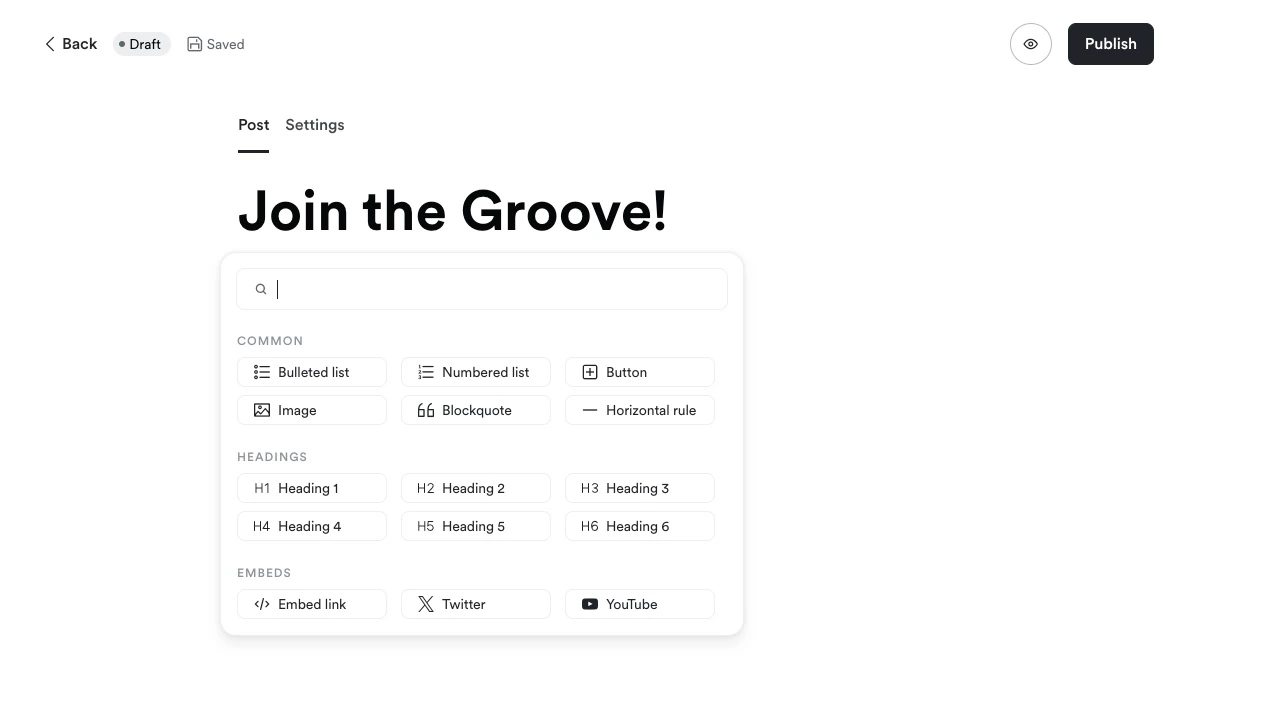

Text highlight features
- Header size 1 in a larger format
- Header size 1 in a smaller format
- Bold text
- Italicized text
- Underlined text
- Strikethrough text
- Highlighted text (defaulted to your chosen theme’s primary color, with other color options to choose from)
- Clear formatting — returns text to its original form
- Link — add a link in text
- Indentation
- Bulleted list
- Numbered list
Post settings
Customize your Post thumbnail, Tags, Authors, Post URL, and Email Settings to improve your Newsletter SEO and brand visibility: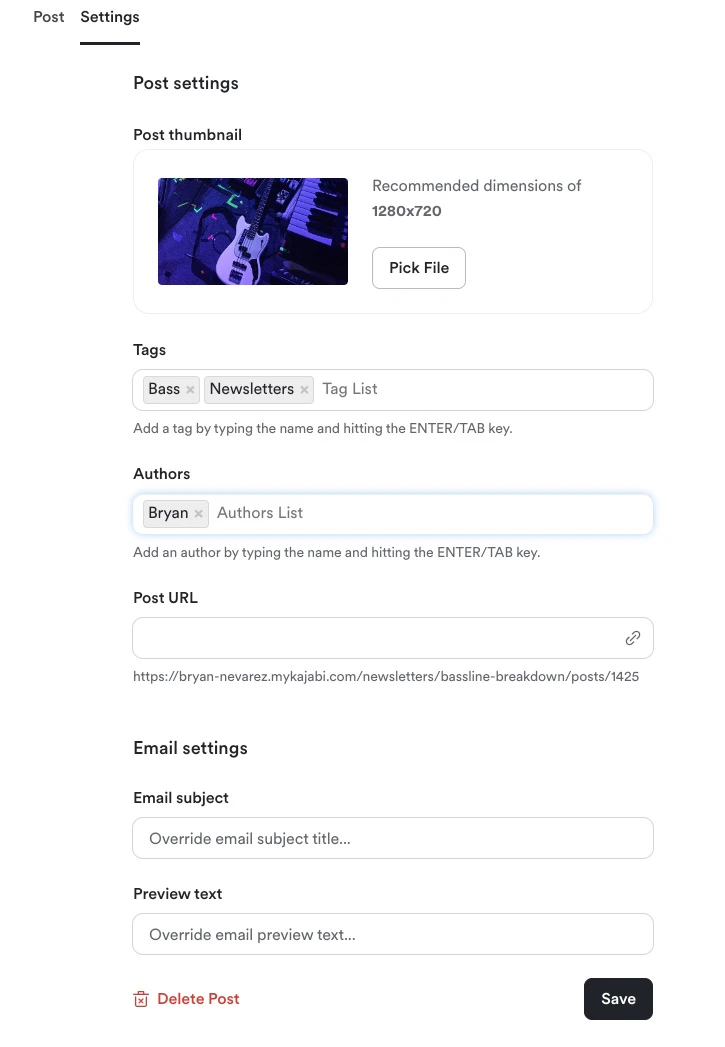
Post thumbnail
Upload a thumbnail for your Newsletter Post to capture potential readers and encourage them to click into the post. The chosen thumbnail image also appears in the Newsletter Hero content block that can be added to your Newsletter, Newsletter Post, and Newsletter Subscribe Pages, as well as being displayed in your Newsletter Dashboard: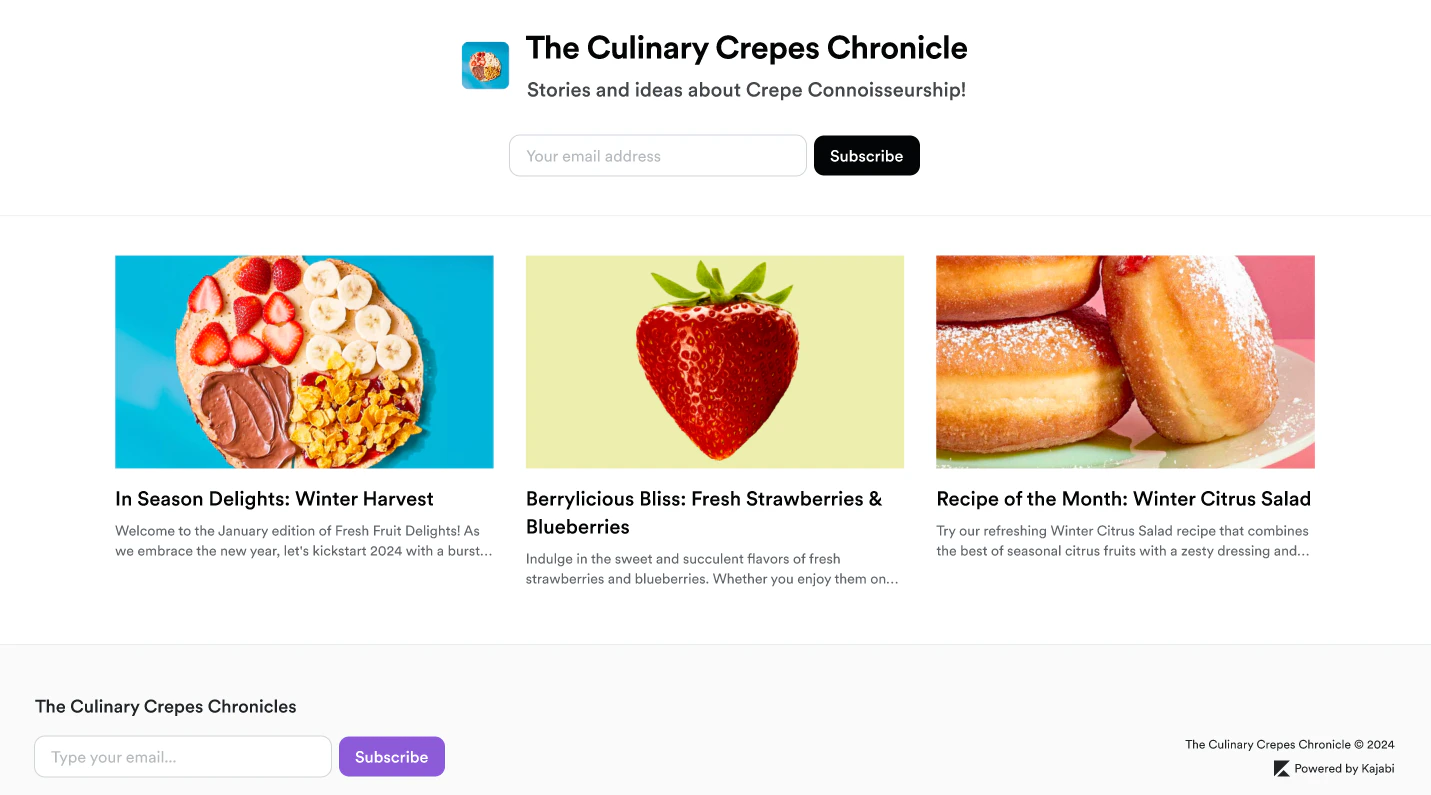
Tags
Help your Newsletter audience sort through topics with tags. By applying tags to your post, readers can filter their view of your web Newsletter Posts. Add a tag by typing the name and pressing the Enter or Tab key.Authors
Build brand visibility and credibility by publicizing your authors. Add an author by typing the name and pressing the Enter or Tab key.Post URL
Update your Newsletter Post URL ID and customize your URL language to improve SEO and sharing capabilities. Entering text into the Post URL field adds your copy to the end of your link. Preview your URL directly below the Post URL text field: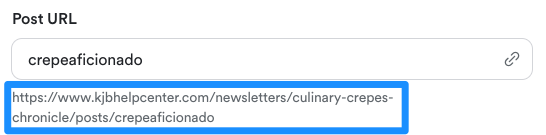
Email settings
- Email Subject — Capture your email recipient’s attention with a strong subject line. Learn email subject best practices.
- Preview Text — A snippet of copy commonly displayed beneath the sender name and subject line in your subscriber’s email inbox. Depending on the email client, the Preview Text may appear next to the subject line:

Note:
To delete a post, open your Newsletter Post Settings and navigate to Delete Post to permanently delete a post from your Newsletter.
Publish a Newsletter
Share your Newsletter and make it publicly visible by publishing your Newsletter and Newsletter Post(s).Publish a Newsletter Post
- Open the Products tab from your Dashboard
- Click Newsletters
- Open the Newsletter Post you wish to publish
- Navigate to the top corner of your Newsletter editor
- Click Publish
- Select when to publish (Right now or Schedule for Later)
- Click Continue and Review
- Review your selections and click Publish and send, right now or Schedule for (date) after confirming your publishing selections
View Newsletter analytics
Gain insight into how your Newsletter is performing by reviewing overview, audience, engagement, and health metrics.Access Newsletter analytics
- Open the Products tab from your Dashboard
- Click Newsletters
- Navigate to the top of your Newsletter Dashboard to view your Newsletter analytics
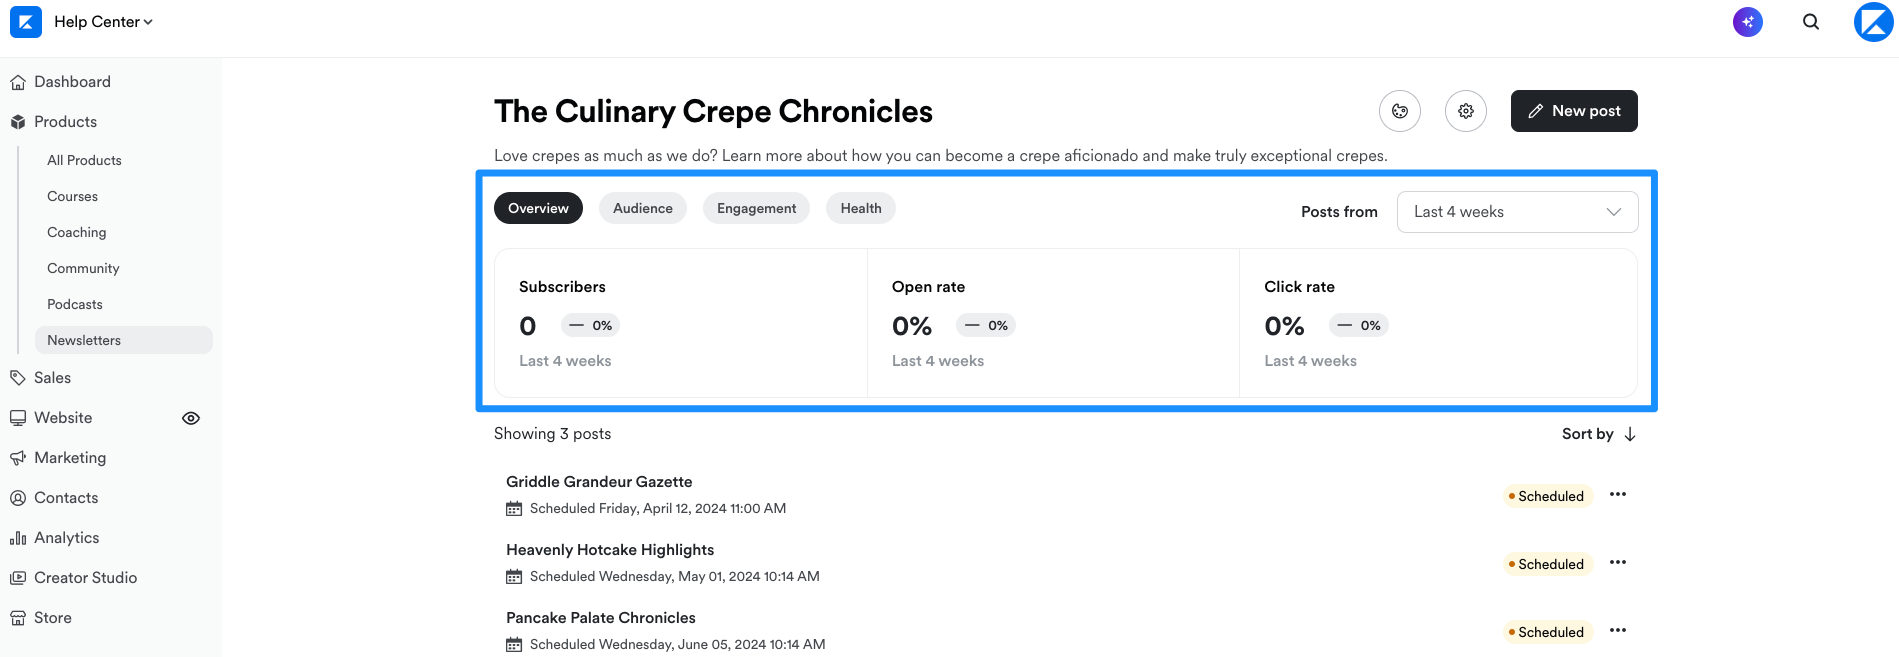
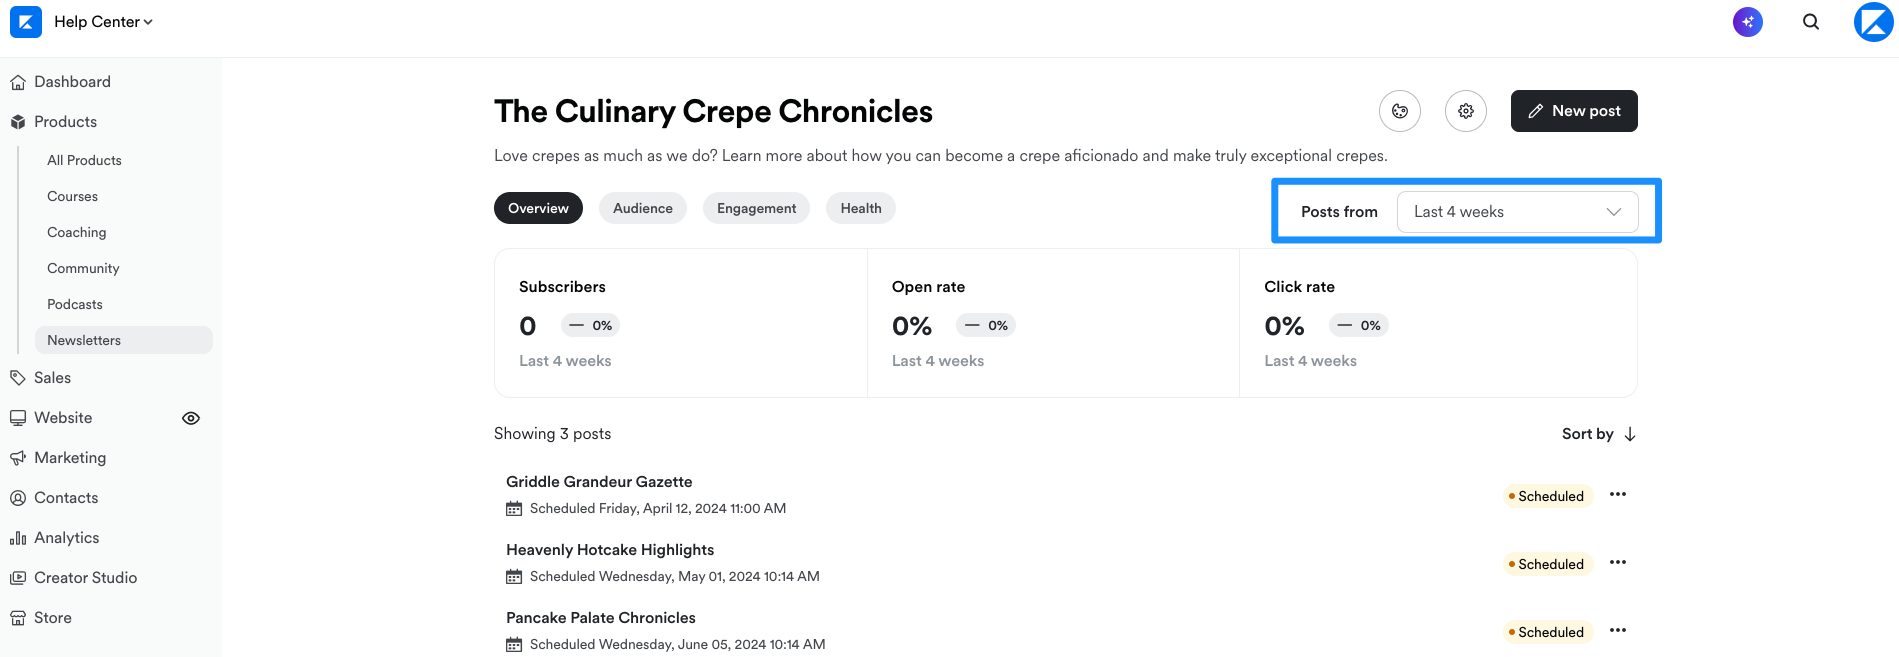
Overview
View the overview metrics for the Newsletter Posts published within your selected time frame.- Subscribers — The number of subscribers from posts published during your selected time frame
- Open rate — The percentage of Newsletter Posts opened during your selected time frame
- Click rate — The percentage of Newsletter Posts with a link that was clicked during your selected time frame
Audience
View your audience metrics for the Newsletter Posts published within your selected time frame.- New subscribers — The total number of subscribers that subscribed through your published Newsletter Posts during your selected time frame
- Unsubscribes — The percentage of unsubscribes that occurred during your selected time frame
- Net subscribers — The percentage of net subscribers (subscribers minus unsubscribes) that occurred during your selected time frame
Engagement
View your engagement metrics for the Newsletter Posts published within your selected time frame.- Open rate — The number of Newsletter emails opened during your selected time frame
- Click rate — The percentage of Newsletter Posts with a link that was clicked during your selected time frame
- Impressions — The number of views on the Newsletter Post from your email subscribers
Health
View your health metrics for the Newsletter Posts published within your selected time frame.- Bounce rate — The number of Newsletter Posts published that did not make it to the subscribers’ email inbox as a result of a hard bounce
- Complaints — The number of complaints that occurred from Newsletter Posts published during your selected time frame
- Unsubscribes — The number of unsubscribes that occurred during your selected time frame