

Overview
Disqus is a comment hosting service that makes it easy to moderate comments and gauge engagement on your blog posts. By integrating Disqus with your Kajabi blog, you can enable discussions and build community around your content.Add Disqus comments
Step 1. Create a Disqus account
- First, Create a Disqus account.
- In the prompt, click I want to install Disqus on my site.
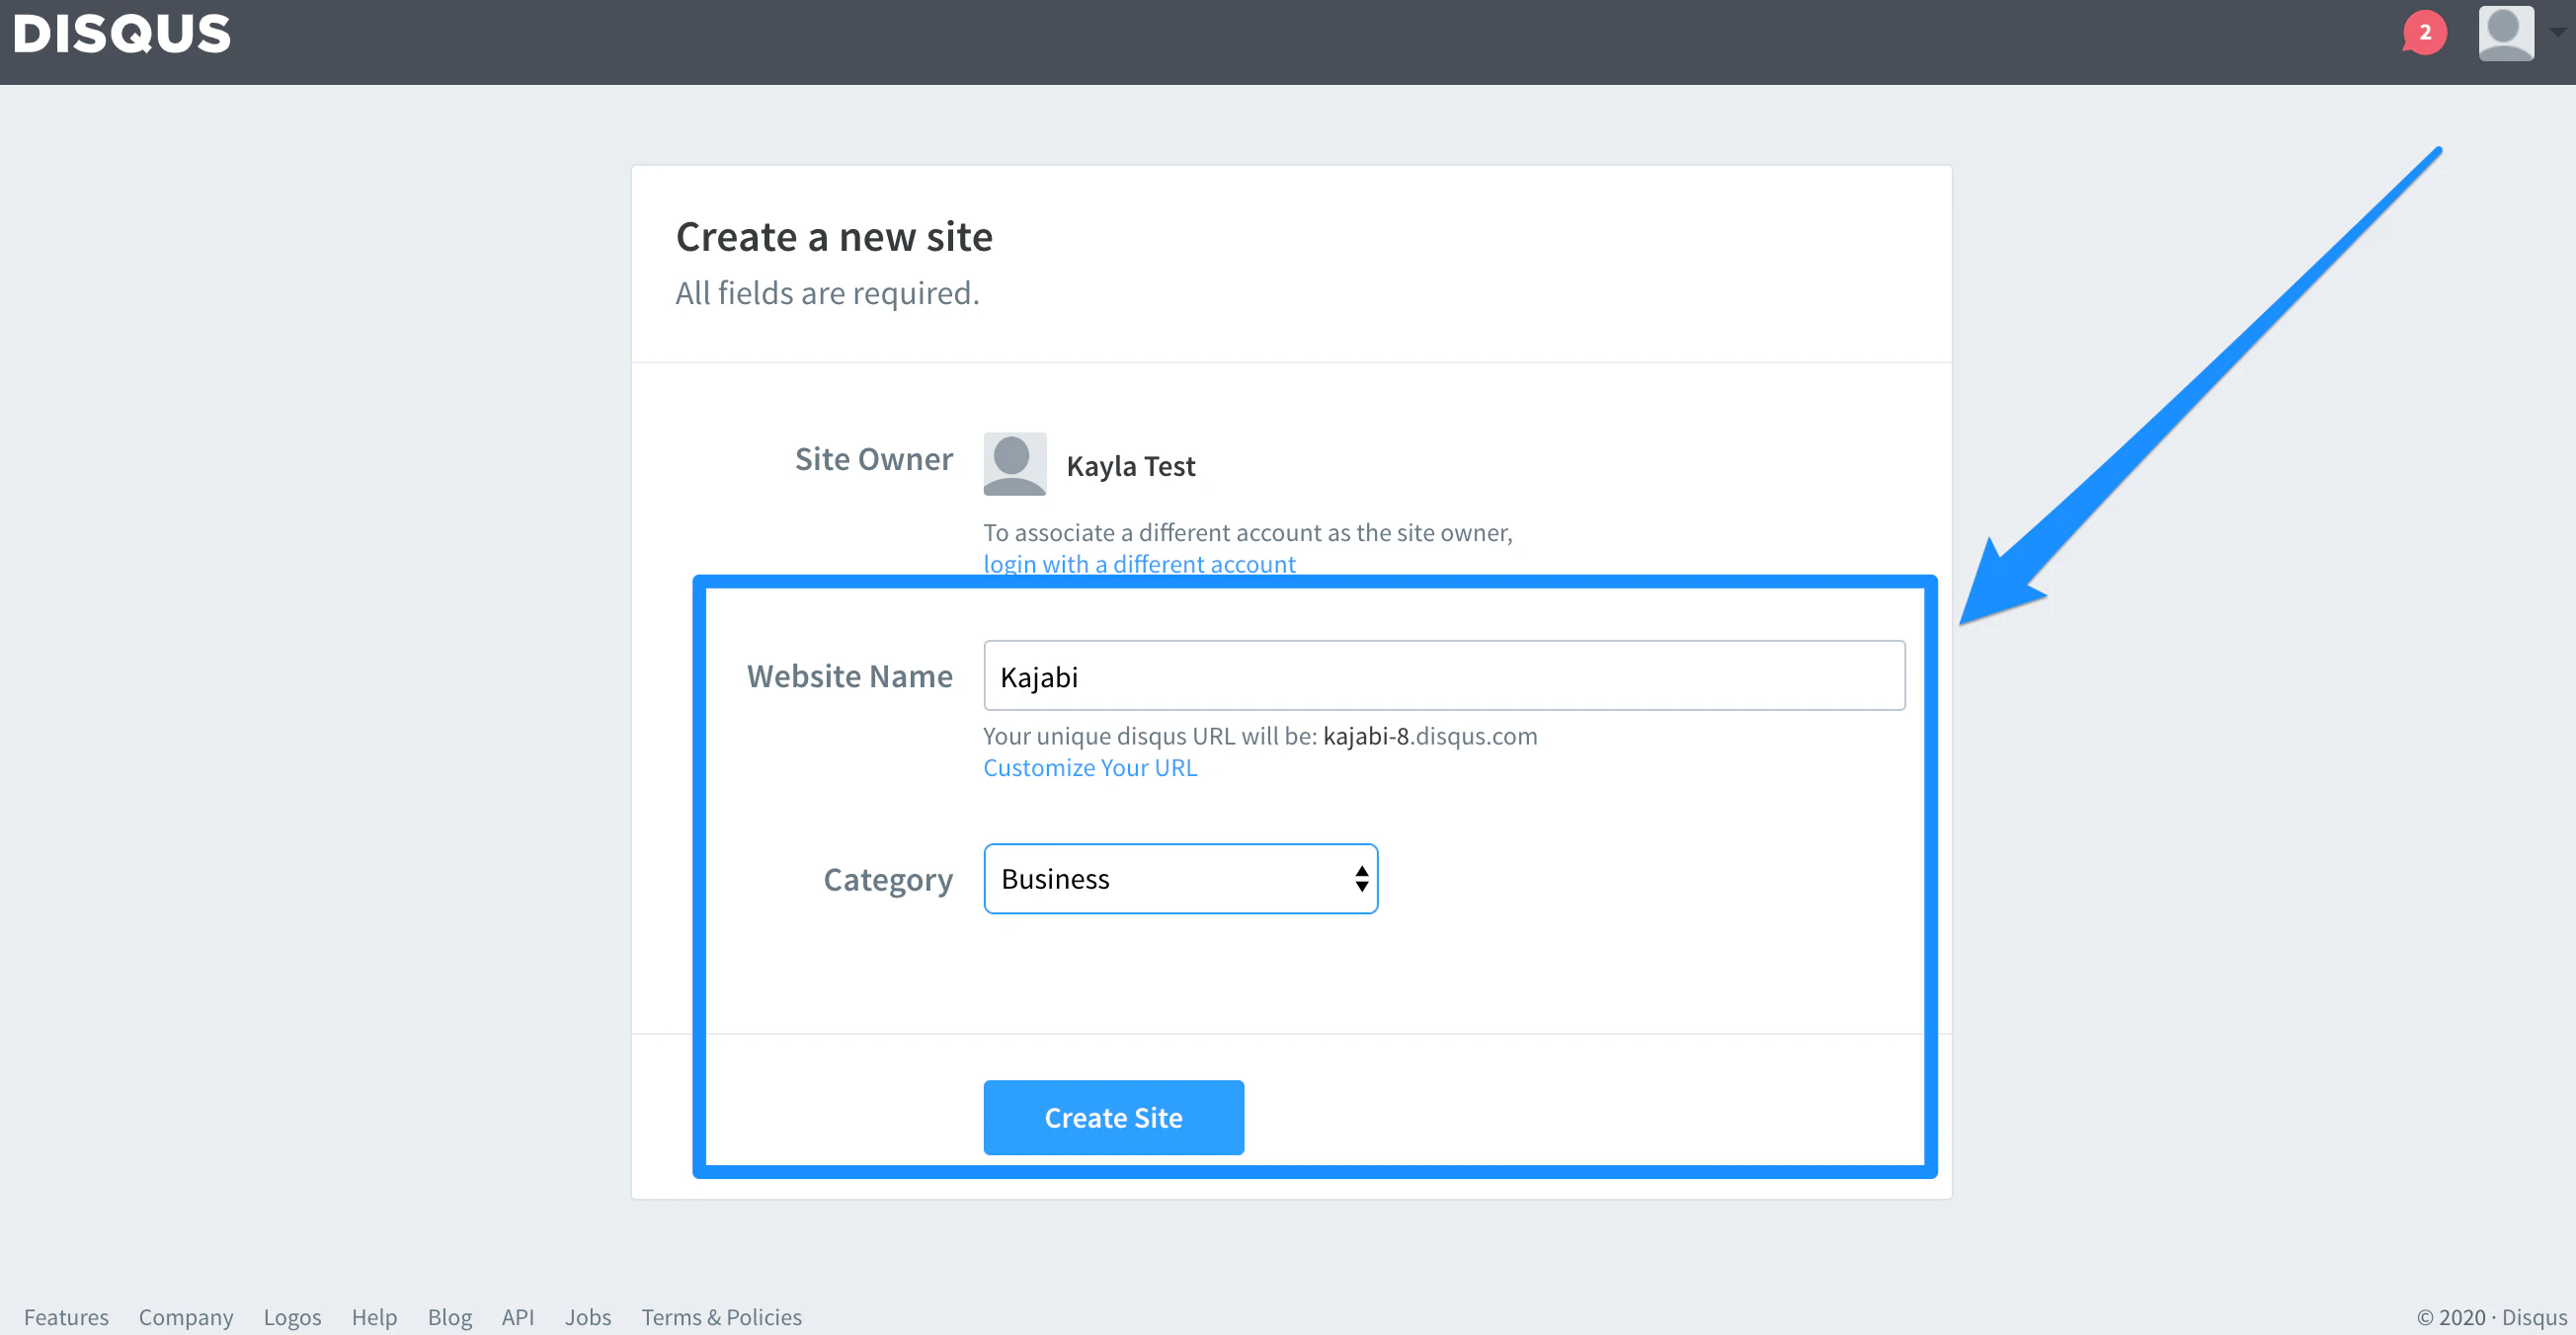
- Complete the Create a new site prompt and click Create Site:
Step 2. Copy Disqus shortname
- Click Settings in the top menu.
- Locate the Shortname header.
- Copy the website shortname:
Step 3. Paste Disqus shortname into Kajabi
- Log into your Kajabi Account.
- Open the Website tab from the Dashboard.
- Click Pages.
- Select Blog Post from the list of website pages.
- Click Settings in the top menu of the sidebar.
- Select Disqus Comments.
- Paste the Disqus shortname into the text box field.
- Check the Show Disqus Comments box.
- Click Save to apply and keep the changes: