

Note: It’s not possible to schedule or drip individual posts or quizzes within a module or submodule. As a workaround, you can create a module or submodule that contains only a single lesson or quiz.
Schedule content
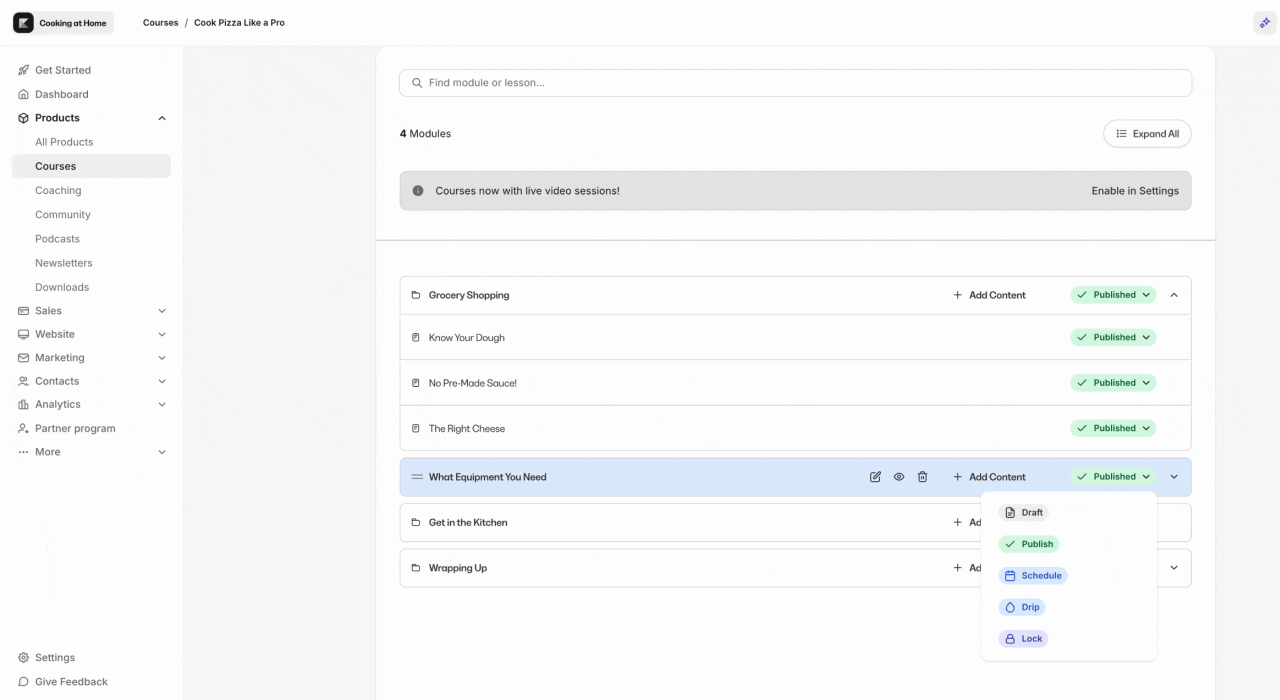
You can use the schedule status to unlock a module or submodule on a specific date.- Go to Products > Courses.
- Open your course.
- In the course outline, next to your module or submodule, click Schedule in the status dropdown.
- Enter the date you want this content to become available in the Publish date field.
- Click Schedule.
Note:
- If a customer gains access after the scheduled publish date has passed, then they will have access to the module or submodule.
- The date format is MM-DD-YYYY. For example, if you want to choose June 3rd, 2026, then it should say 06-03-2026.
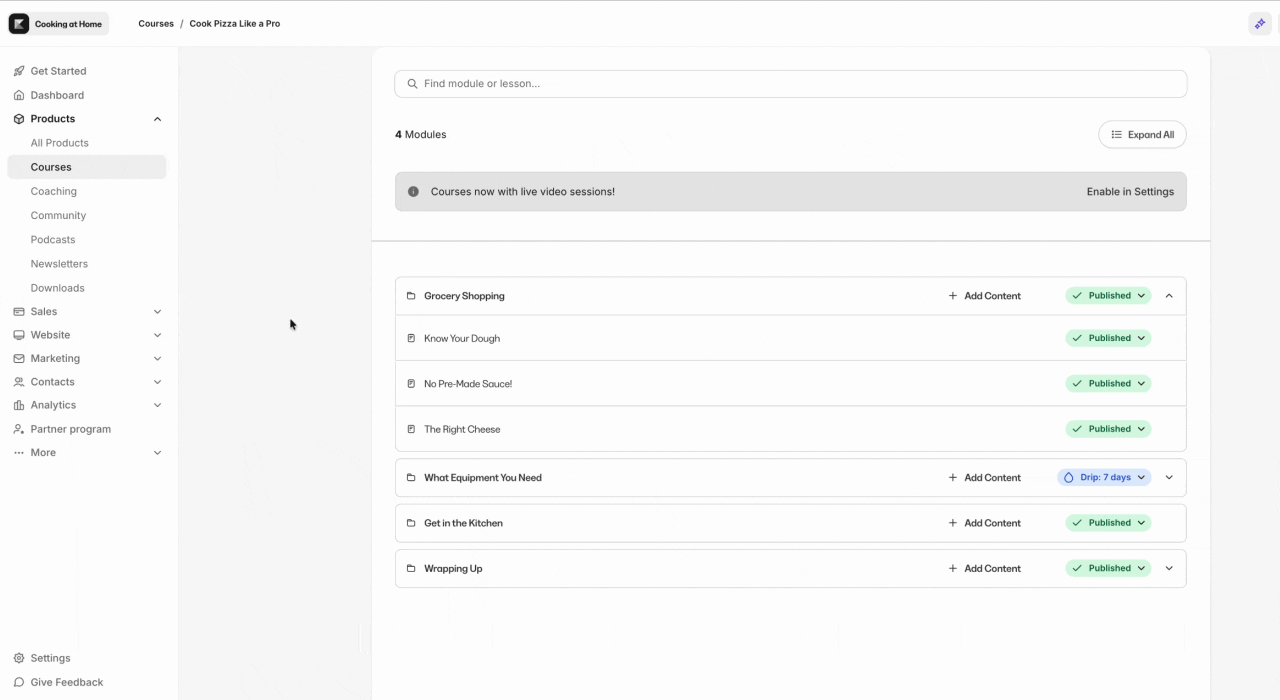
Drip content
You can use the drip status to unlock a module or submodule after a specific number of days. By default, the drip start date (access start date) for your course is when the customer purchased or was granted the offer containing your course. You can customize the drip start date on the offer or for a specific customer.Drip after a specific number of days
- Go to Products > Courses.
- Open your course.
- In the course outline, next to your module or submodule, click Drip in the status dropdown.
- Enter in the number of days you want this content to become available in the Set drip days after enrollment field.
- For example, if your customer purchases your offer on Sunday, June 1st and your drip days is set to 7, your module or submodule will be unlocked on Sunday, June 8th.
- Click Done.

Note: For drip days, you must choose between 1 and 731 days.
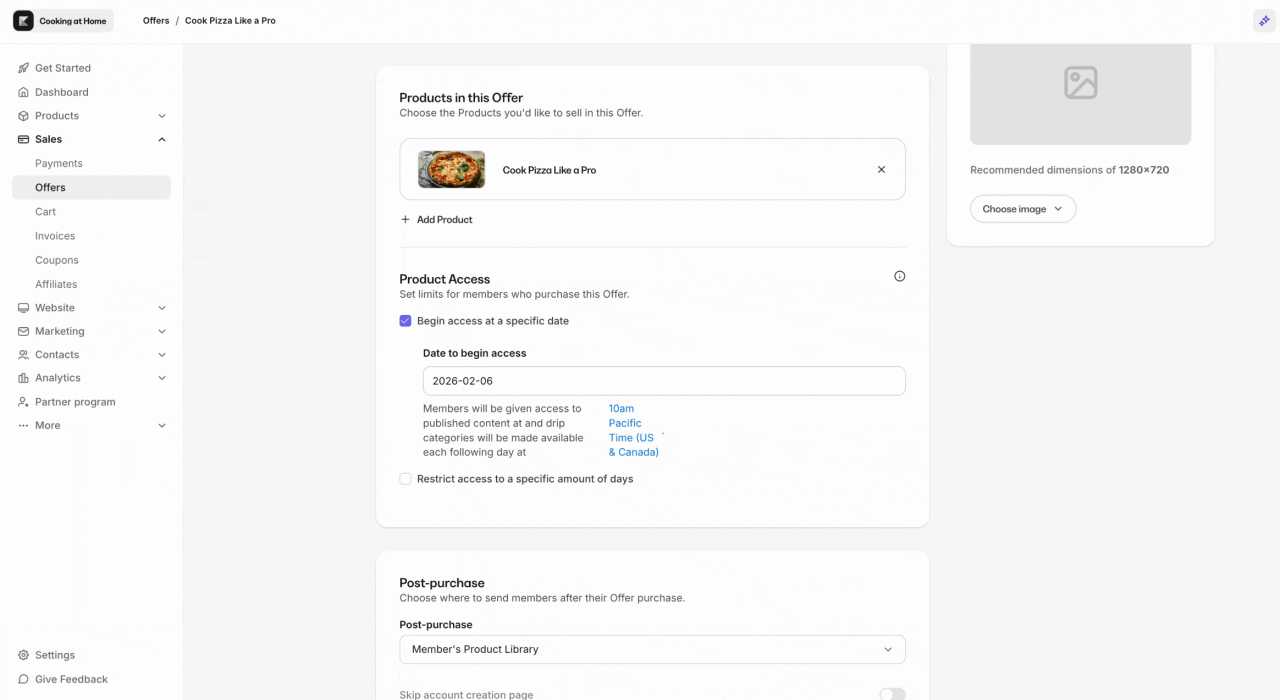
Set drip start date in an offer
- Go to Sales > Offers.
- Open the offer related to your course.
- In the Product Access section, click Begin access at a specific date.
- Set an access start date and click Apply.
- Click Save.
Note: Keep in mind that changing the access start date in an offer will impact future purchases only. Customers that have purchased the offer before your update will not be affected by this change.
Set drip start date for a customer
- Go to Contacts > All Contacts.
- Click on a contact and click Open full profile.
- Click Purchases.
- On the purchase related to your offer, click View Details.
- Click the 3 dots button > Edit access start date.
- Set an access start date.
- Click Save.
Send an email when drip content is unlocked
- Go to Settings > Drip settings.
- Click Send an email to customers when product modules are dripped.
- Click Save.
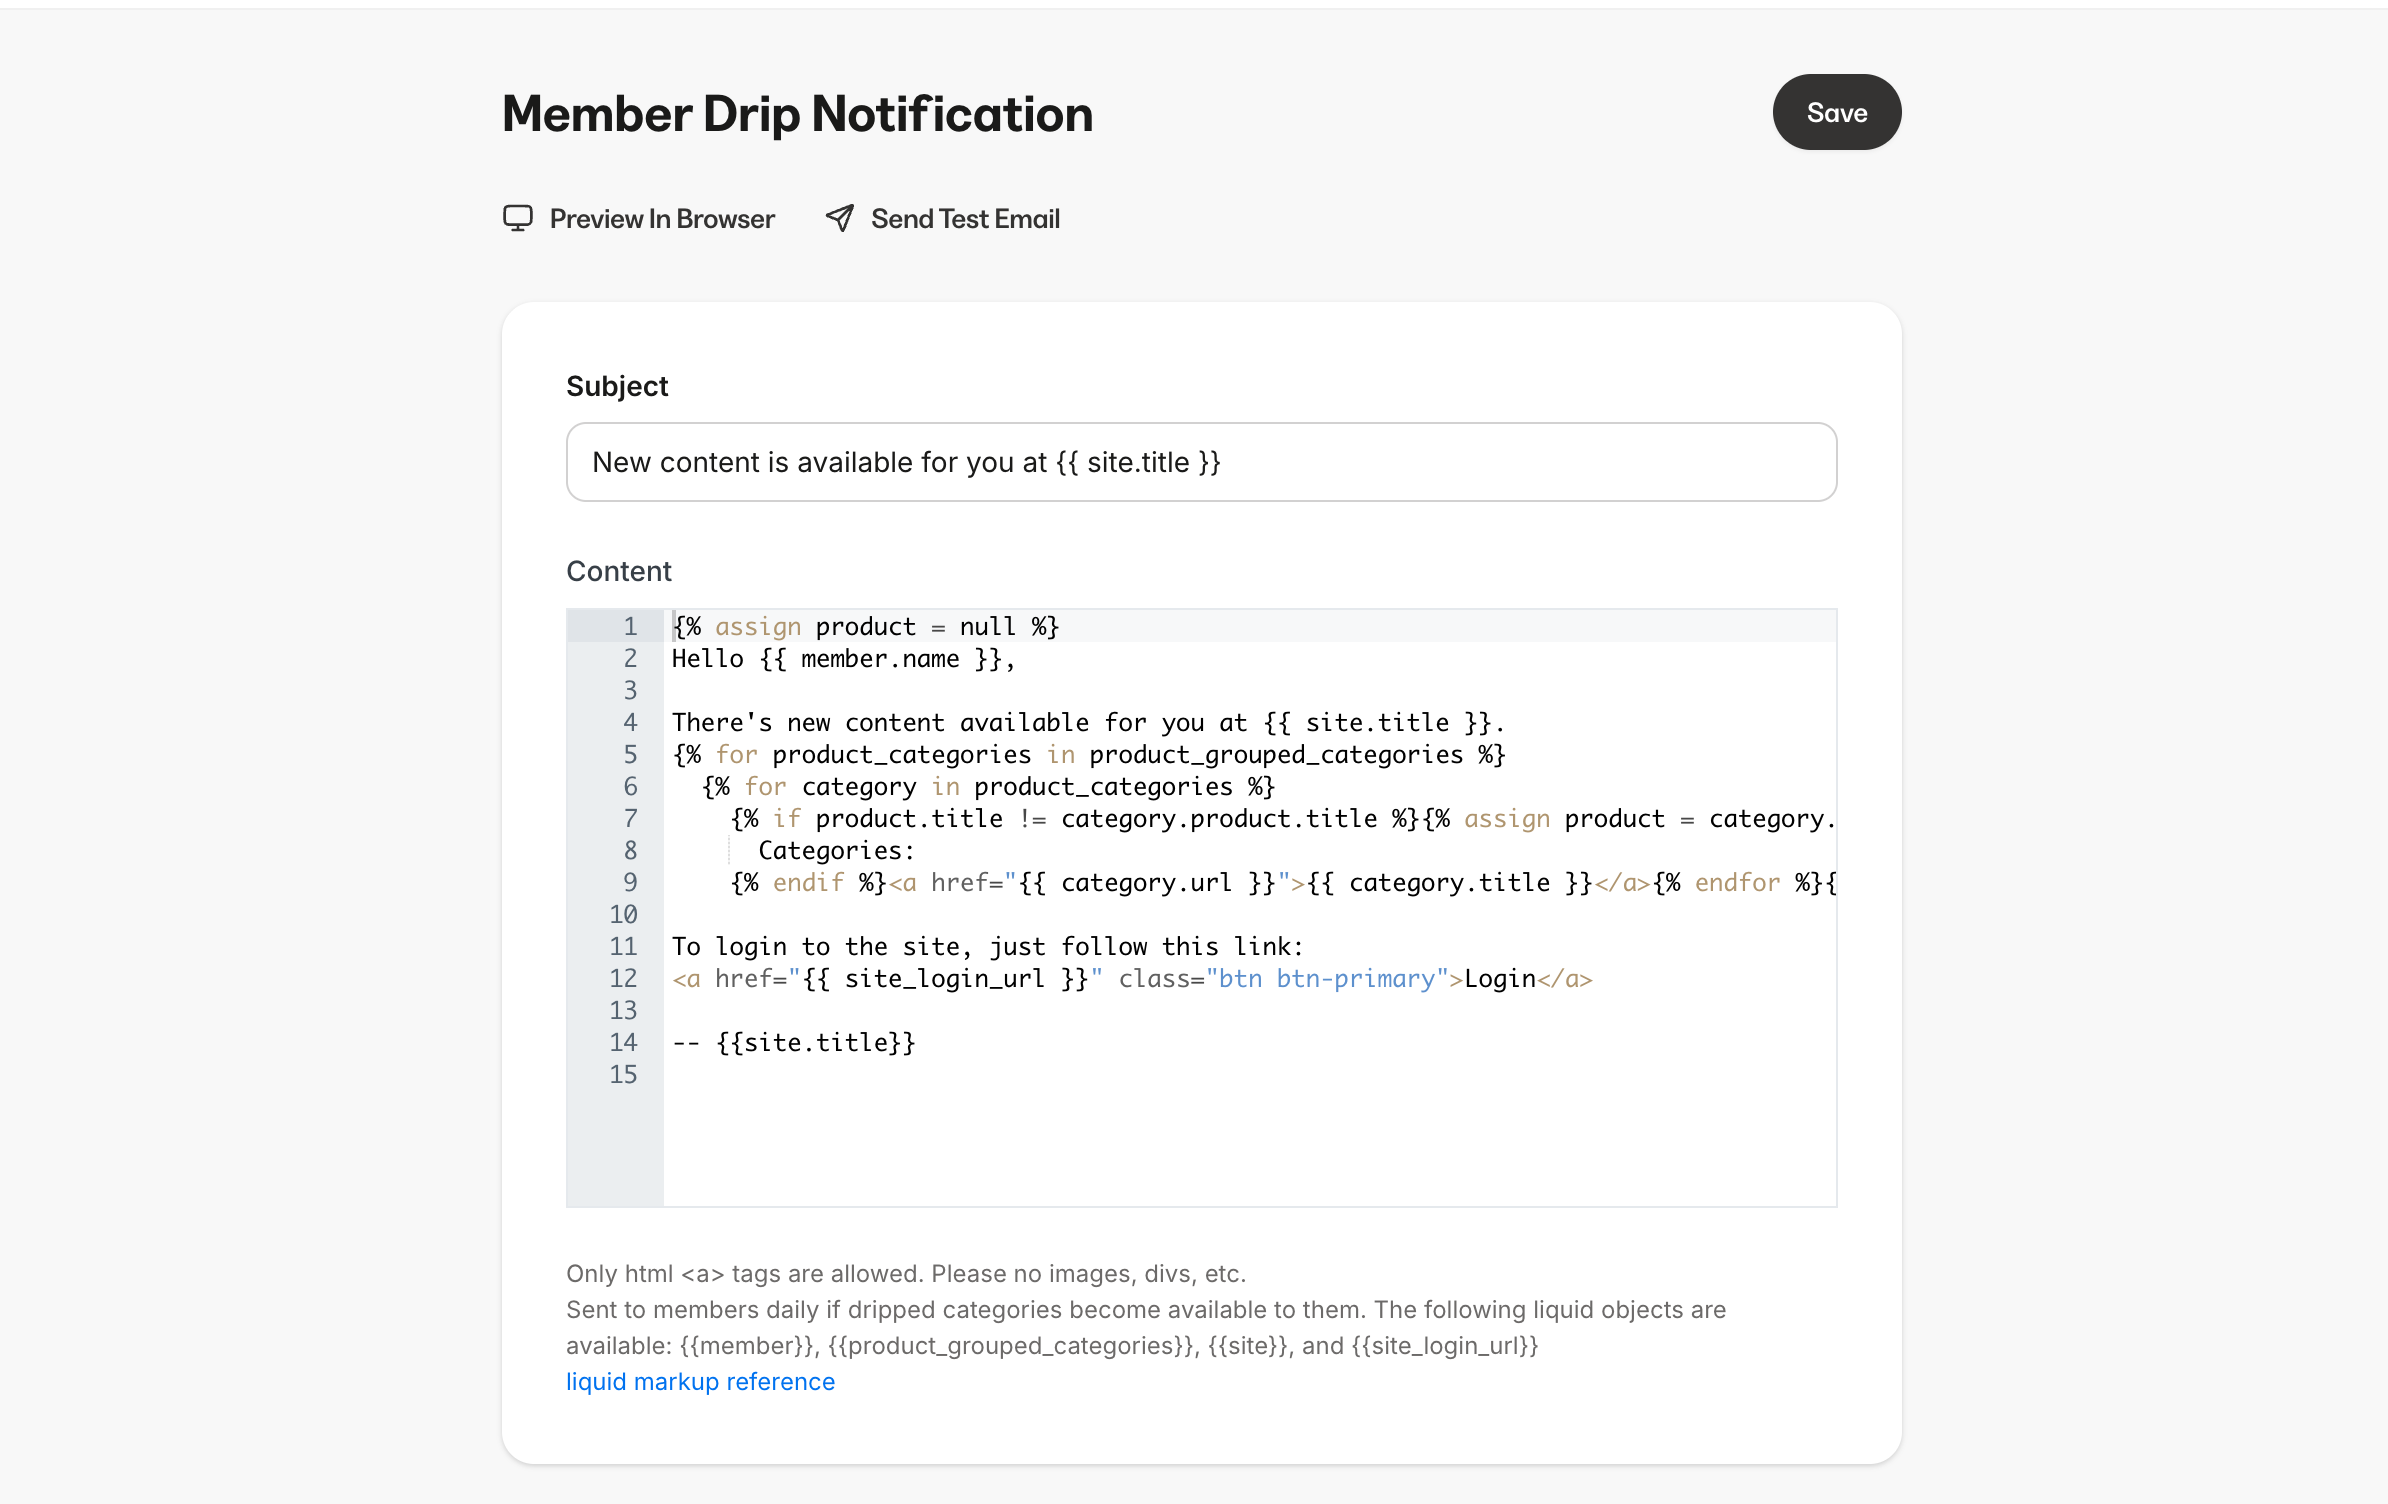
Customize drip content unlocked email
- Go to Settings > Email templates.
- Click Member Drip Notification.
- Edit the subject or content of the email.
- Click Save.
Set the time content is unlocked
- Go to Settings > Drip settings.
- You can edit the time and timezone.
- Click Save.
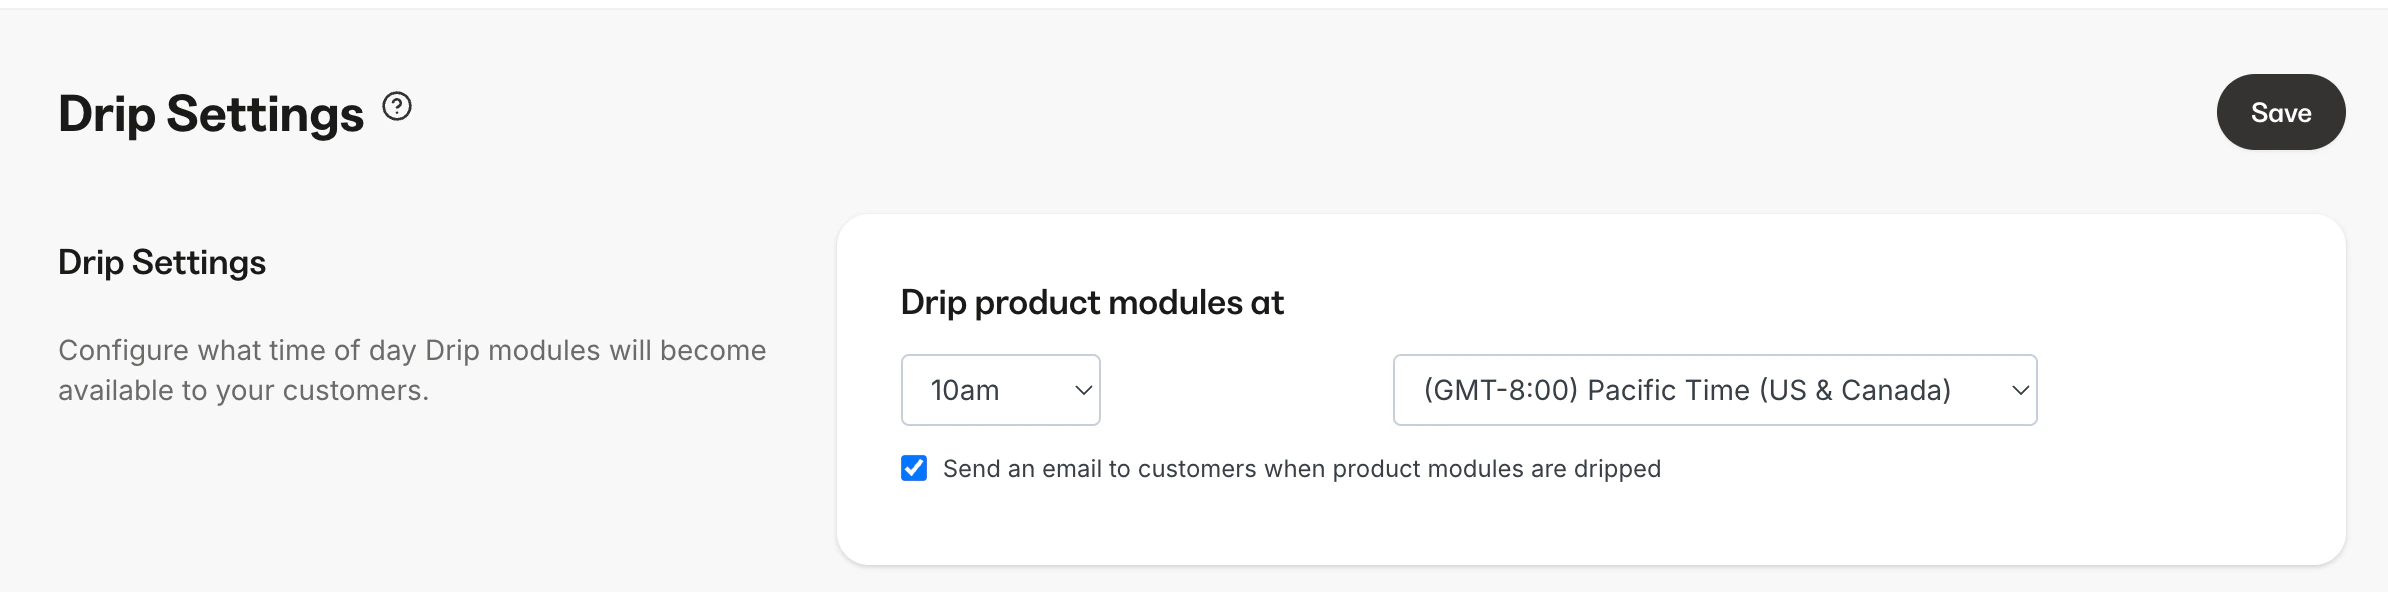
Note: The time set in the Drip settings applies to dripped and scheduled modules and submodules.